Typical Beach Shot Ex.: Nice to look at, but the water isn’t “adding” anything to the shot.
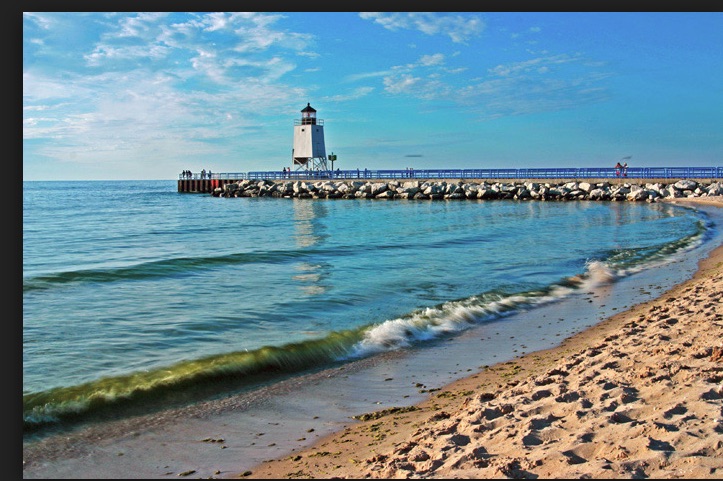
Nice beach shot…but the water isn’t doing anything to “add” to the photo
Let’s explore some tools to make water “work” for you!
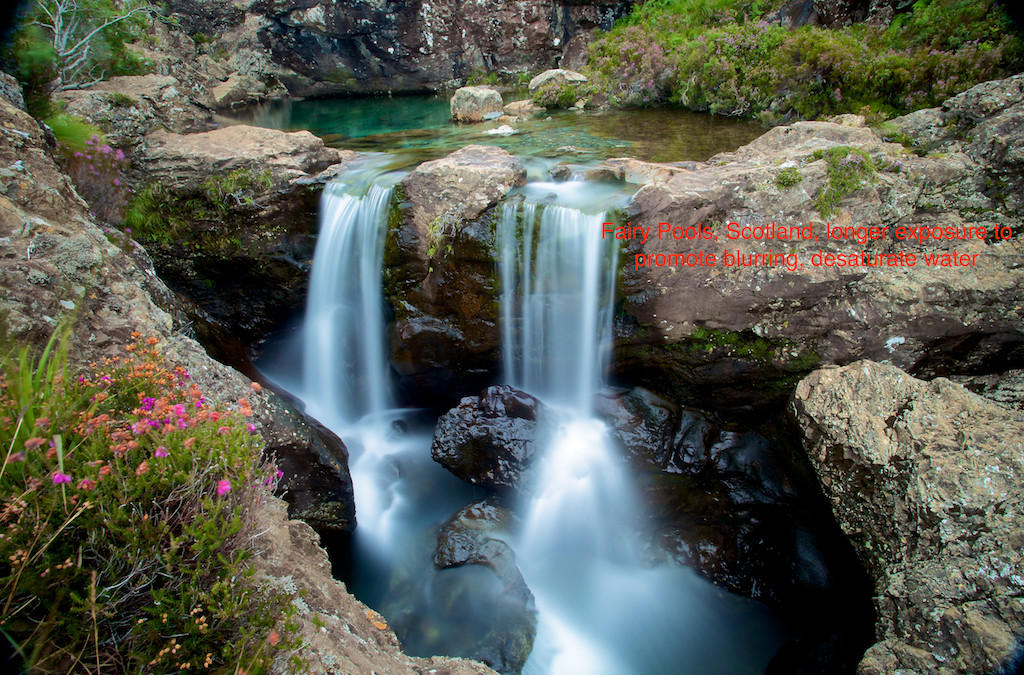
Blurring water the “Old School Way”. Many different types of water features can be presented better using long exposure photography. The three composition variables that impact the proper length of exposure: 1. speed of water flow 2. vertical decent (how far/fast is water dropping) 3. what features exist at the bottom of these drops, how do they shape water flow.

slow moving water, small vertical decent

slow moving water, moderate 12 ft drop

Slow moving water, multiple cascading drops
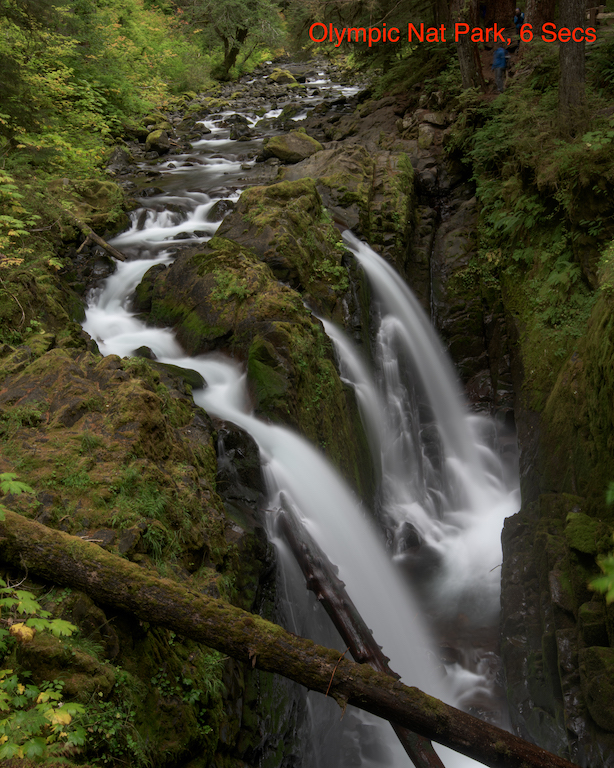
Fast moving water, large 30 ft drop
- Slow, medium & fast moving water (can require different shutter speeds to properly blur).
- Tripod provides stability for long exposure (w remote shutter release). Remember to turn image stabilization off (note some new lenses allow)!
- Your shooting in RAW…right! Always shoot in RAW!
- Water shoes can come in handy for certain strategic camera locations…puts you in the “thick of things”.
- Mirror lock up engaged for SLRs. Nikon has electronic shutter option (even better)!
- Polarizer benefits:
- 2 stop ND filter
- Allows removal of leafy reflections/glare
- Dial water reflection “on” or “off” to show bottom features or not.
- Typically shooting on cloudy day/dusk/dawn…crop out sky (which is often “blown out”).
- Goldilocks: Too much blur, too little…Just Right!
- Aperture Priority (start with test shot at lowest ISO, F18).
- ISO: Lowest setting helps slow shutter speed.
- Canon that’s 100 (option to cut to 50),
- Nikon 100 or some 64 (option to cut to 32).
- Review test shot to see if exposure compensation (+ or -) is required. Use LED image, histogram and “blinkies” as tools. Typically camera adjusted auto exposure is ok (in diffuse light…easy for camera light meter to get “right”).
- F18 is the smallest aperture that won’t create significant distortion.
- Try shooting at F16, F11, F8. Each successive larger aperture will shorten the shutter speed and reduce the “blur”. Pick your favorite. Don’t go less than F8 (you’ll loose depth of field). Simply raise ISO if you need shorter shutter speeds after F8.
- If you need to lengthen the exposure (F18 won’t do the trick) you have the option of trying a smaller F stop (f22 …) or adding an additional ND filter (sunglasses for your lens). Note that when stacking a ND & Polarizing filters on your lens…focal lengths under 24mm will vignette.
- Rules of thumb: river: 5-20 seconds, small waterfall 3-10 seconds, fast moving waterfall 1-6 seconds. Experiment…break rules…hard to generalize.
- If going over 20 seconds, cover the viewfinder opening!
- Post processing (getting water right v surroundings):
- May often incr color temp slightly to “warm”.
- De-saturate water, often boost green sat, hue.
- Dodge reflective water surfaces (don’t overdo).
Blurring water and showing sky

To blur water on brighter day I add ND filter
- On a moderately brighter day I may need to add an additional ND filter behind the polarizer to sufficiently slow down the shutter speed, blur the water. You can often bring out the sky in Lightroom/Photoshop by using selective brush (burning in).
- You can also try HDR. While the shutter speeds and blurring differ among shots, the merged image looks fine!
Stopping water in its tracks (strobe like photos)!
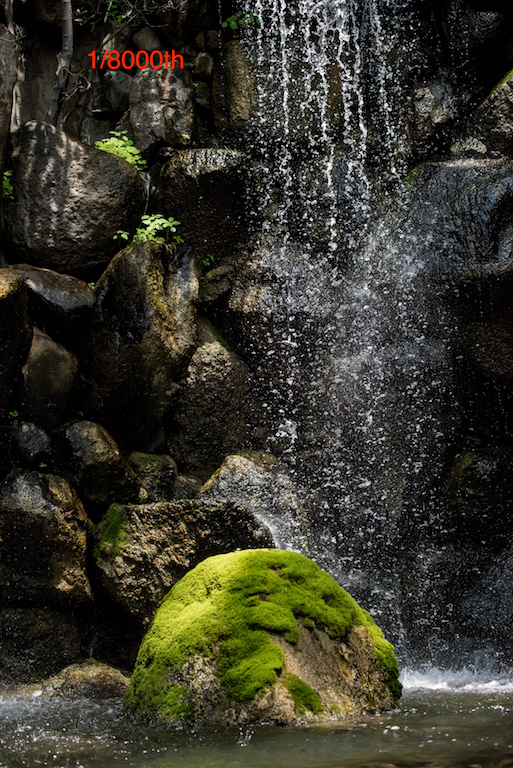
offers great way to isolate water illuminated in sunlight against dark background.

water looks entirely different when “stopped” in action
small flow offers op to isolate droplets
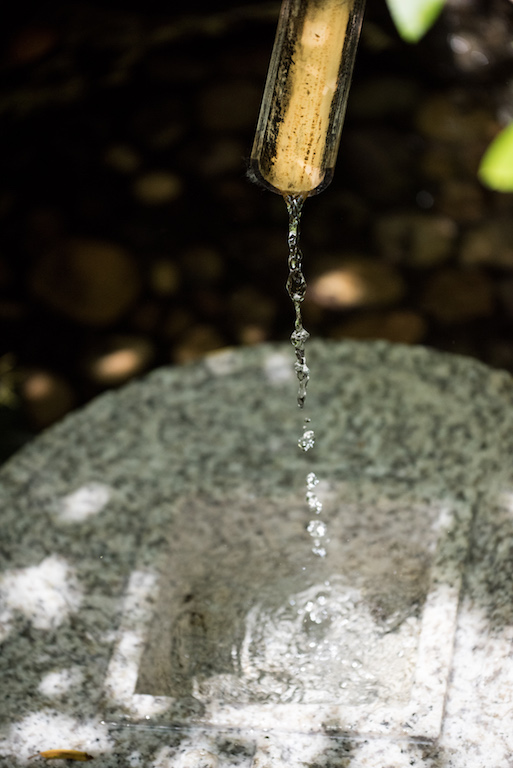
- Water is actually not solid. It’s made up of thousands of droplets.
- When using a shutter speed of 1/8000 the water appears to separate…magic results. Slower shutter speeds don’t work!
- Great for shooting water in direct sun.
- Typically requires ISO 800+ and large aperture (not great depth of field) to support 1/8000th shutter speed.
- Remove polarizer (you can’t afford to lose 2 stops).
Blurring water in direct sunlight (Multiple exposure). For more detail, see my dedicated blog post on Multiple Exposures.

Multiple exposure…3 photos, stacked atop of each other in one in camera digital image
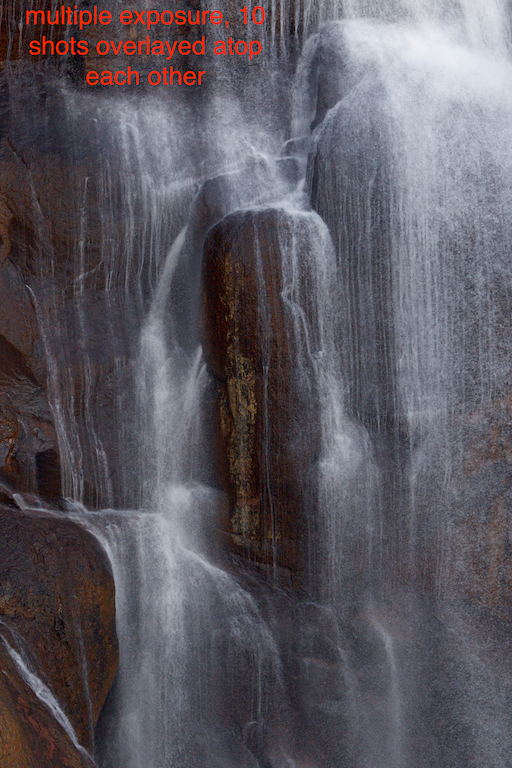
New: Blurring using multiple exposure.
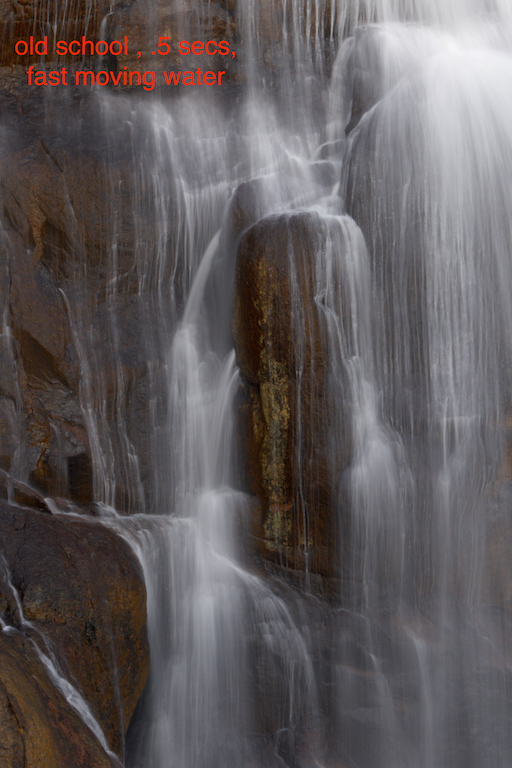
Old school blurring with long exposure (.5 sec)
- Overlaying multiple shots (on top of each other) creates the illusion of blurred water (plus shows individual water droplets)
- Mount camera on tripod with remote shutter release.
- Take test exposure @ 1/400th of a second (shoot in manual mode). Adjust aperture exposure + or – as needed to get right.
- Activate “multiple exposure” on your camera.
- Select a “series” of photos (turn off when you’re done)
- Select “10” as the number of shots. For Canon “9” is the max.
- Turn “auto gain” off. Ergo…each shot will overlay atop the previous one (making the image successively brighter).
- Set the drive to high speed continuous. Set the shutter speed to 1/4000th (10x faster than test shot).
- Depress shutter release. The camera will bang off 10 shots (9 for the canon) & automatically stop.
- Review your handiwork. Adjust exposure if required.
- Note: If your camera can shoot at 1/8000th, try dialing in your test picture at 1/800th (for maximum droplet effect).
- Hold on there. Did you check your camera’s color space? sRGB (256 colors only) can create trouble, you may want to choose AdobeRGB(especially if your using Lightroom?). Otherwise your multiple exposures may have a magenta tint!
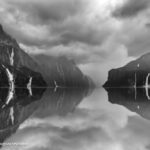
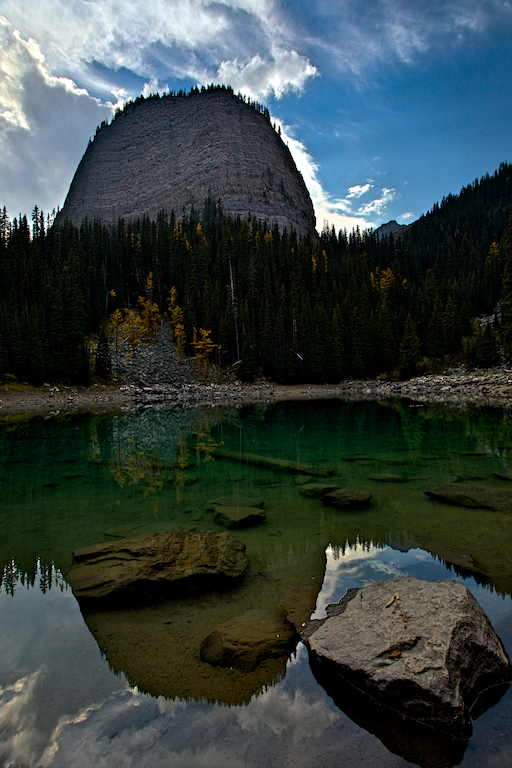
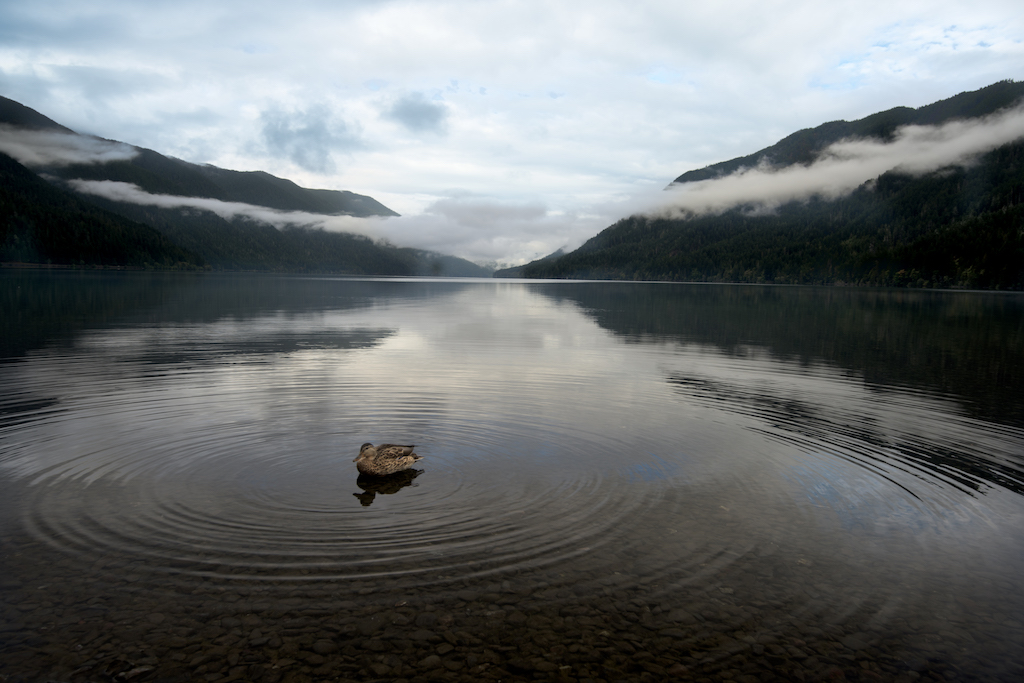
Using a polarizer to adjust reflection on lakes.
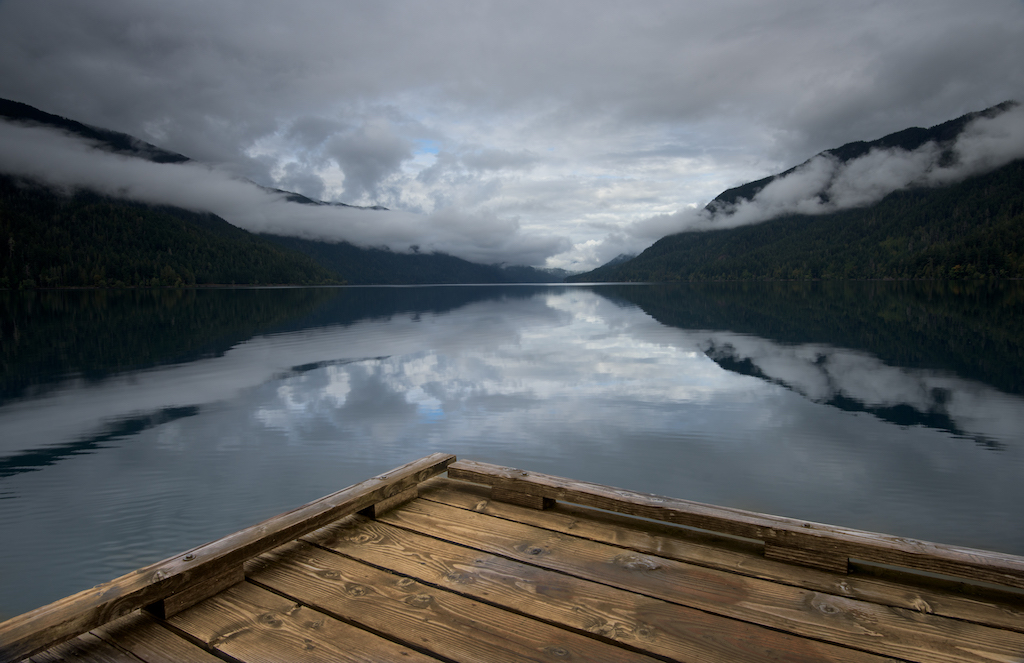
polarizer turned so lake is a giant mirror.
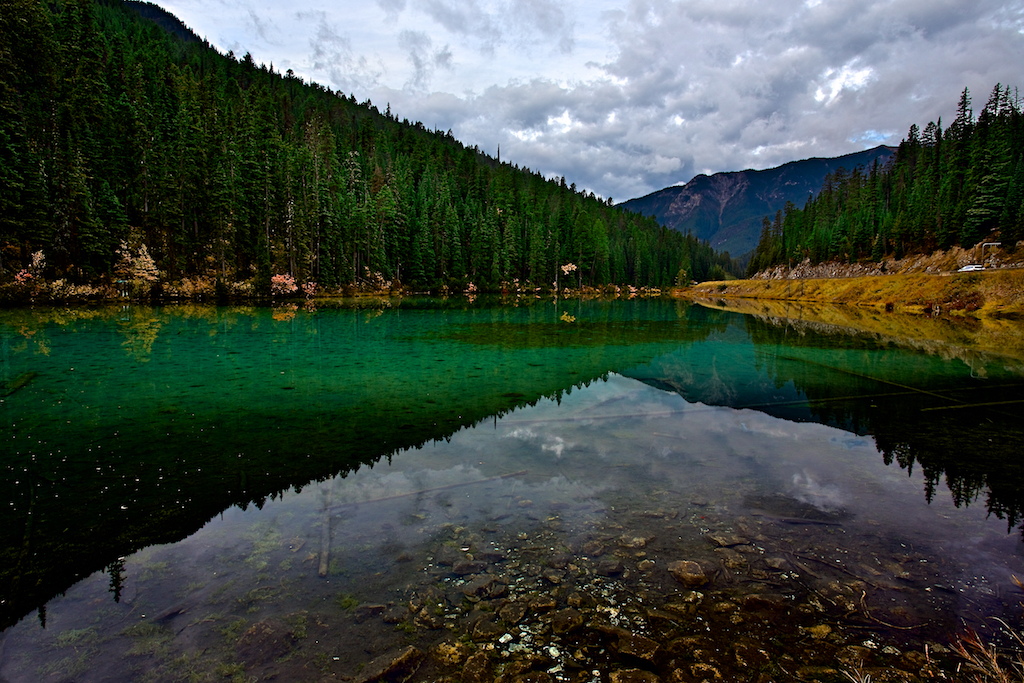
Rotating my polarizer to show bottom detail in Glacier Nat Park
Lake above Banff, Canada
Lake showing bottom features of shoreline
- Sometimes tweaking the ratio of reflected surface to bottom visible can enhance the photo.
- Early am (pre sunrise) is a great time for still water…means reflections.
- Don’t forget to consider a fun foreground element. Small F stop/big depth of field (tripod may be required in low light…if lens image stabilization can’t handle).
Clouds are your new best friend shooting coastal scenes.
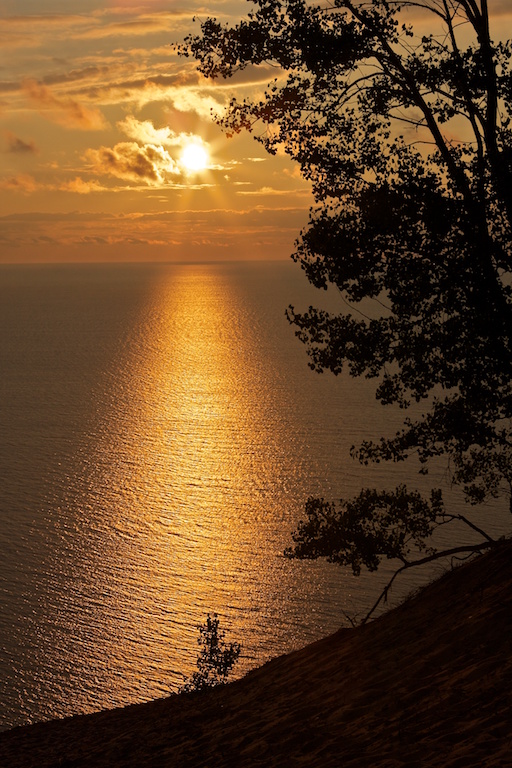
Clouds can help diffuse a bright sun to create wonderful sunset/sunrise ops…reflections of sun off water!
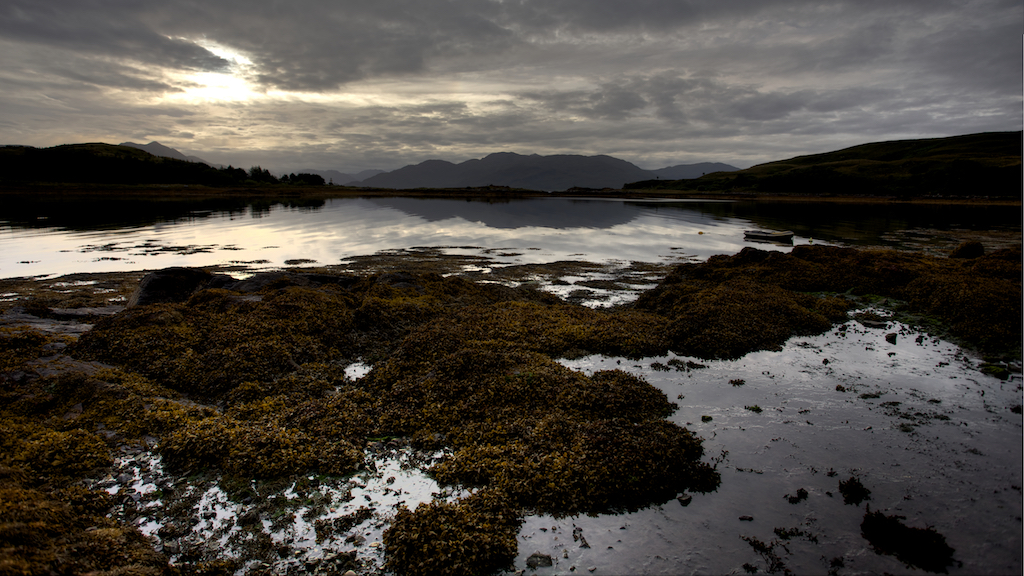
Earlier morning creates great light and still water for great mirror images. Interesting foreground elements make a good pic great!

Clouds create the op for spectacular color just before sunrise or after dawn. Window of op can be only 10-15 mins. Be ready!

Openings in clouds create great shot ops during midday sun
- Clouds create ops for spectacular color (sunrise/sunset) and diffuse direct sun (allowing better exposure).
- Shooting when sun is “in the sky”. Direct sun is hard to shoot. Starbursts are overrated? Clouds make a great diffuser.
- Polarizer? No need…shooting into the light…no impact.
- Shooting when sun is below horizon: Best ops for “color” are often just before sunrise, just after sunset (colors may only last 10 minutes at peak or less/be ready!).
- HDR vs ND Grad (Cokin or Lee).
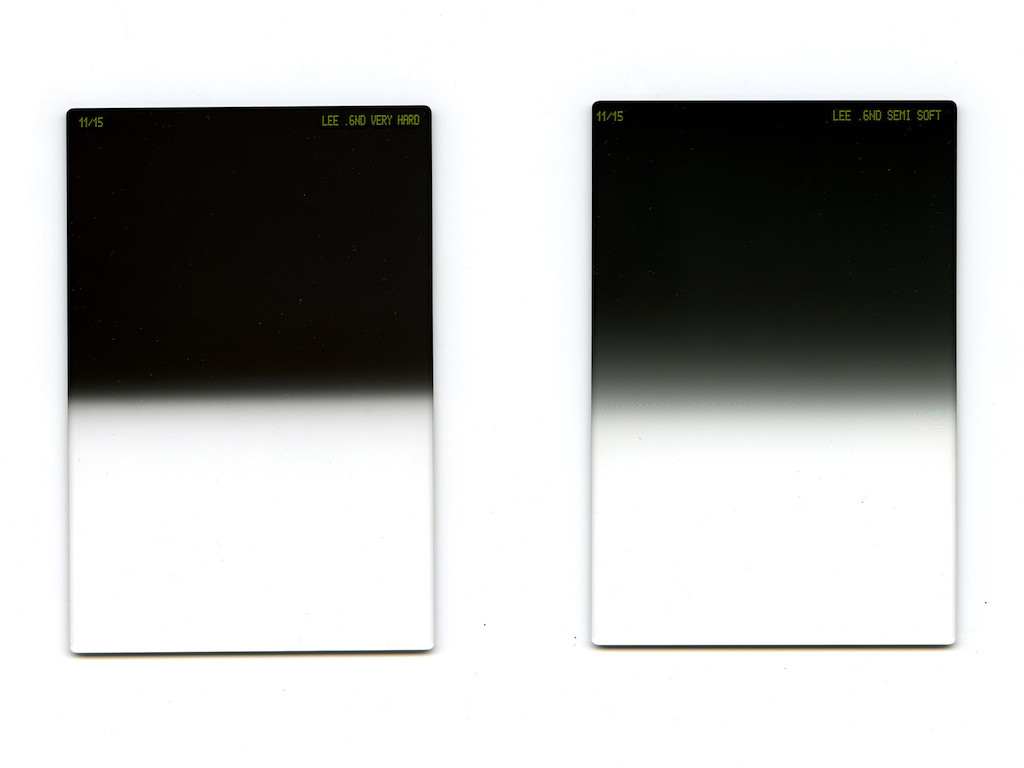
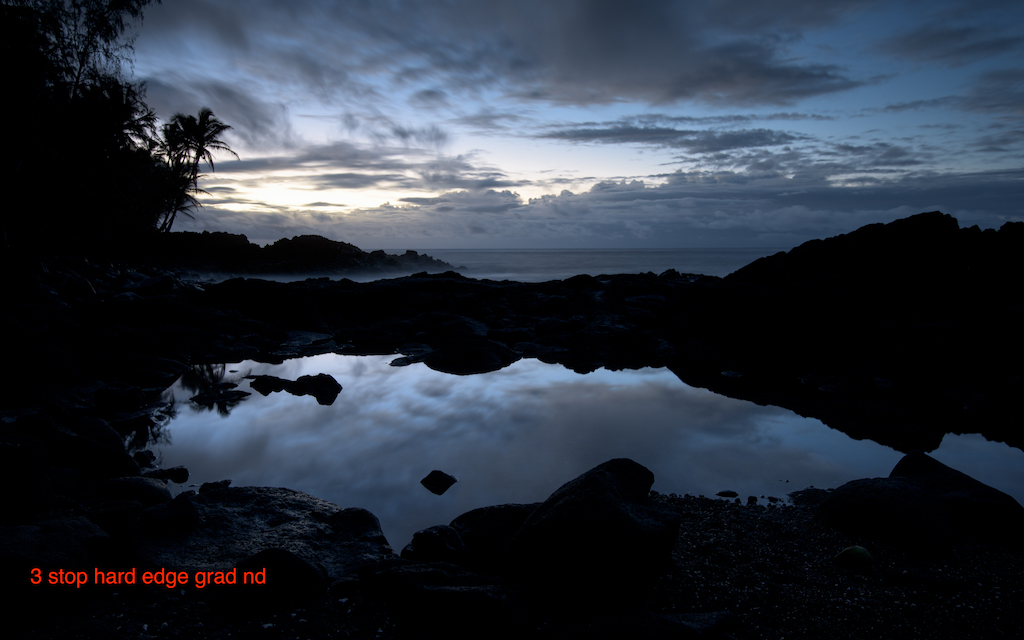
3 stop hard grad ND is my tool of choice
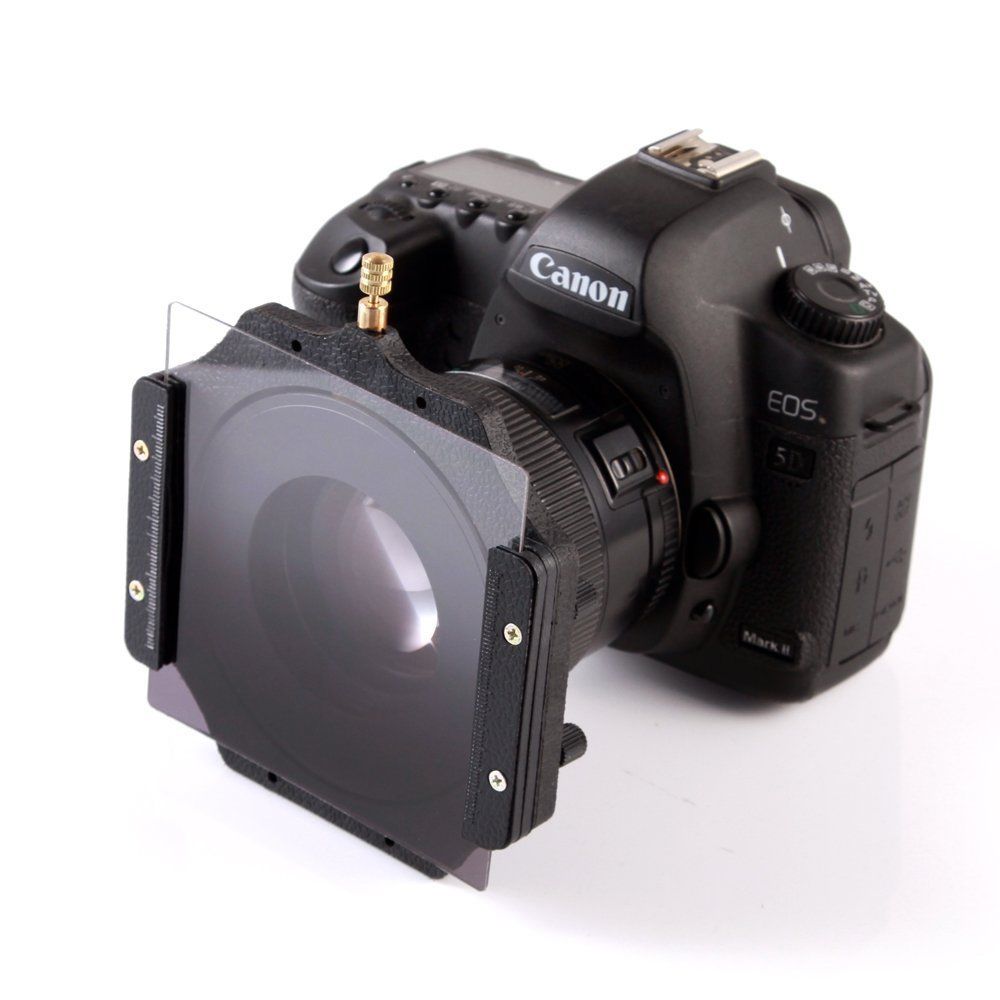
Here’s how filter and holder attached to your camera

Filter holder easily detaches.
- Three stop hard grad ND is my fav tool of choice.
-

I used the grad ND to darken the sky . Now you can see the foreground!
- Throw in a Little or Big Stopper for even longer exposures!
-
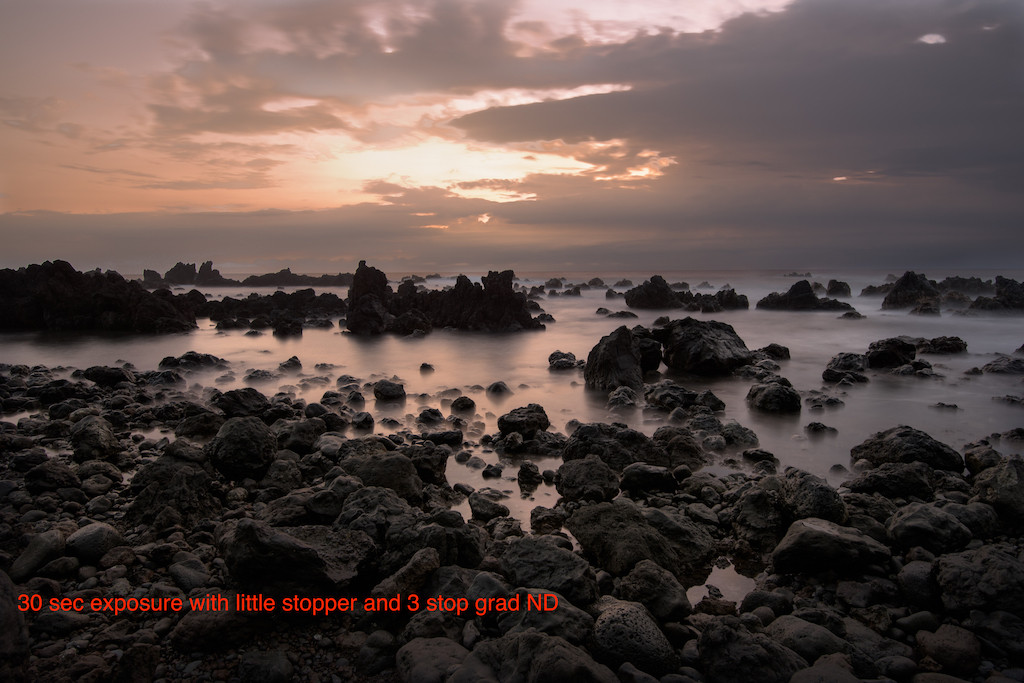
I combined a 3 stop grad ND and a 6 stop little stopper to get a 30 second exposure. That blurred the wave action to create the surreal imagery.

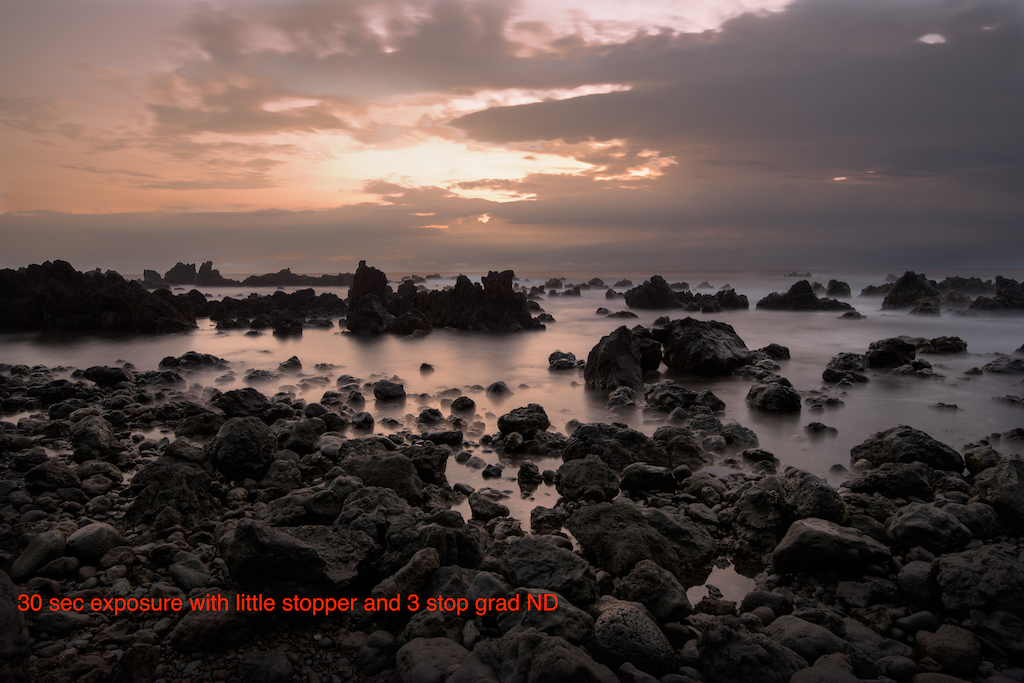
- Remember to cover up viewfinder opening!!!
- Blur clouds, surreal water scenes…great in rough seas!
- How to set exposure: Use the included table or a phone ap.
-
- Polarizer will vignette @ less than 24mm.
- Post processing: Often useful to dodge (lighten) reflective surfaces. Be careful not to overdo…can look overcooked.
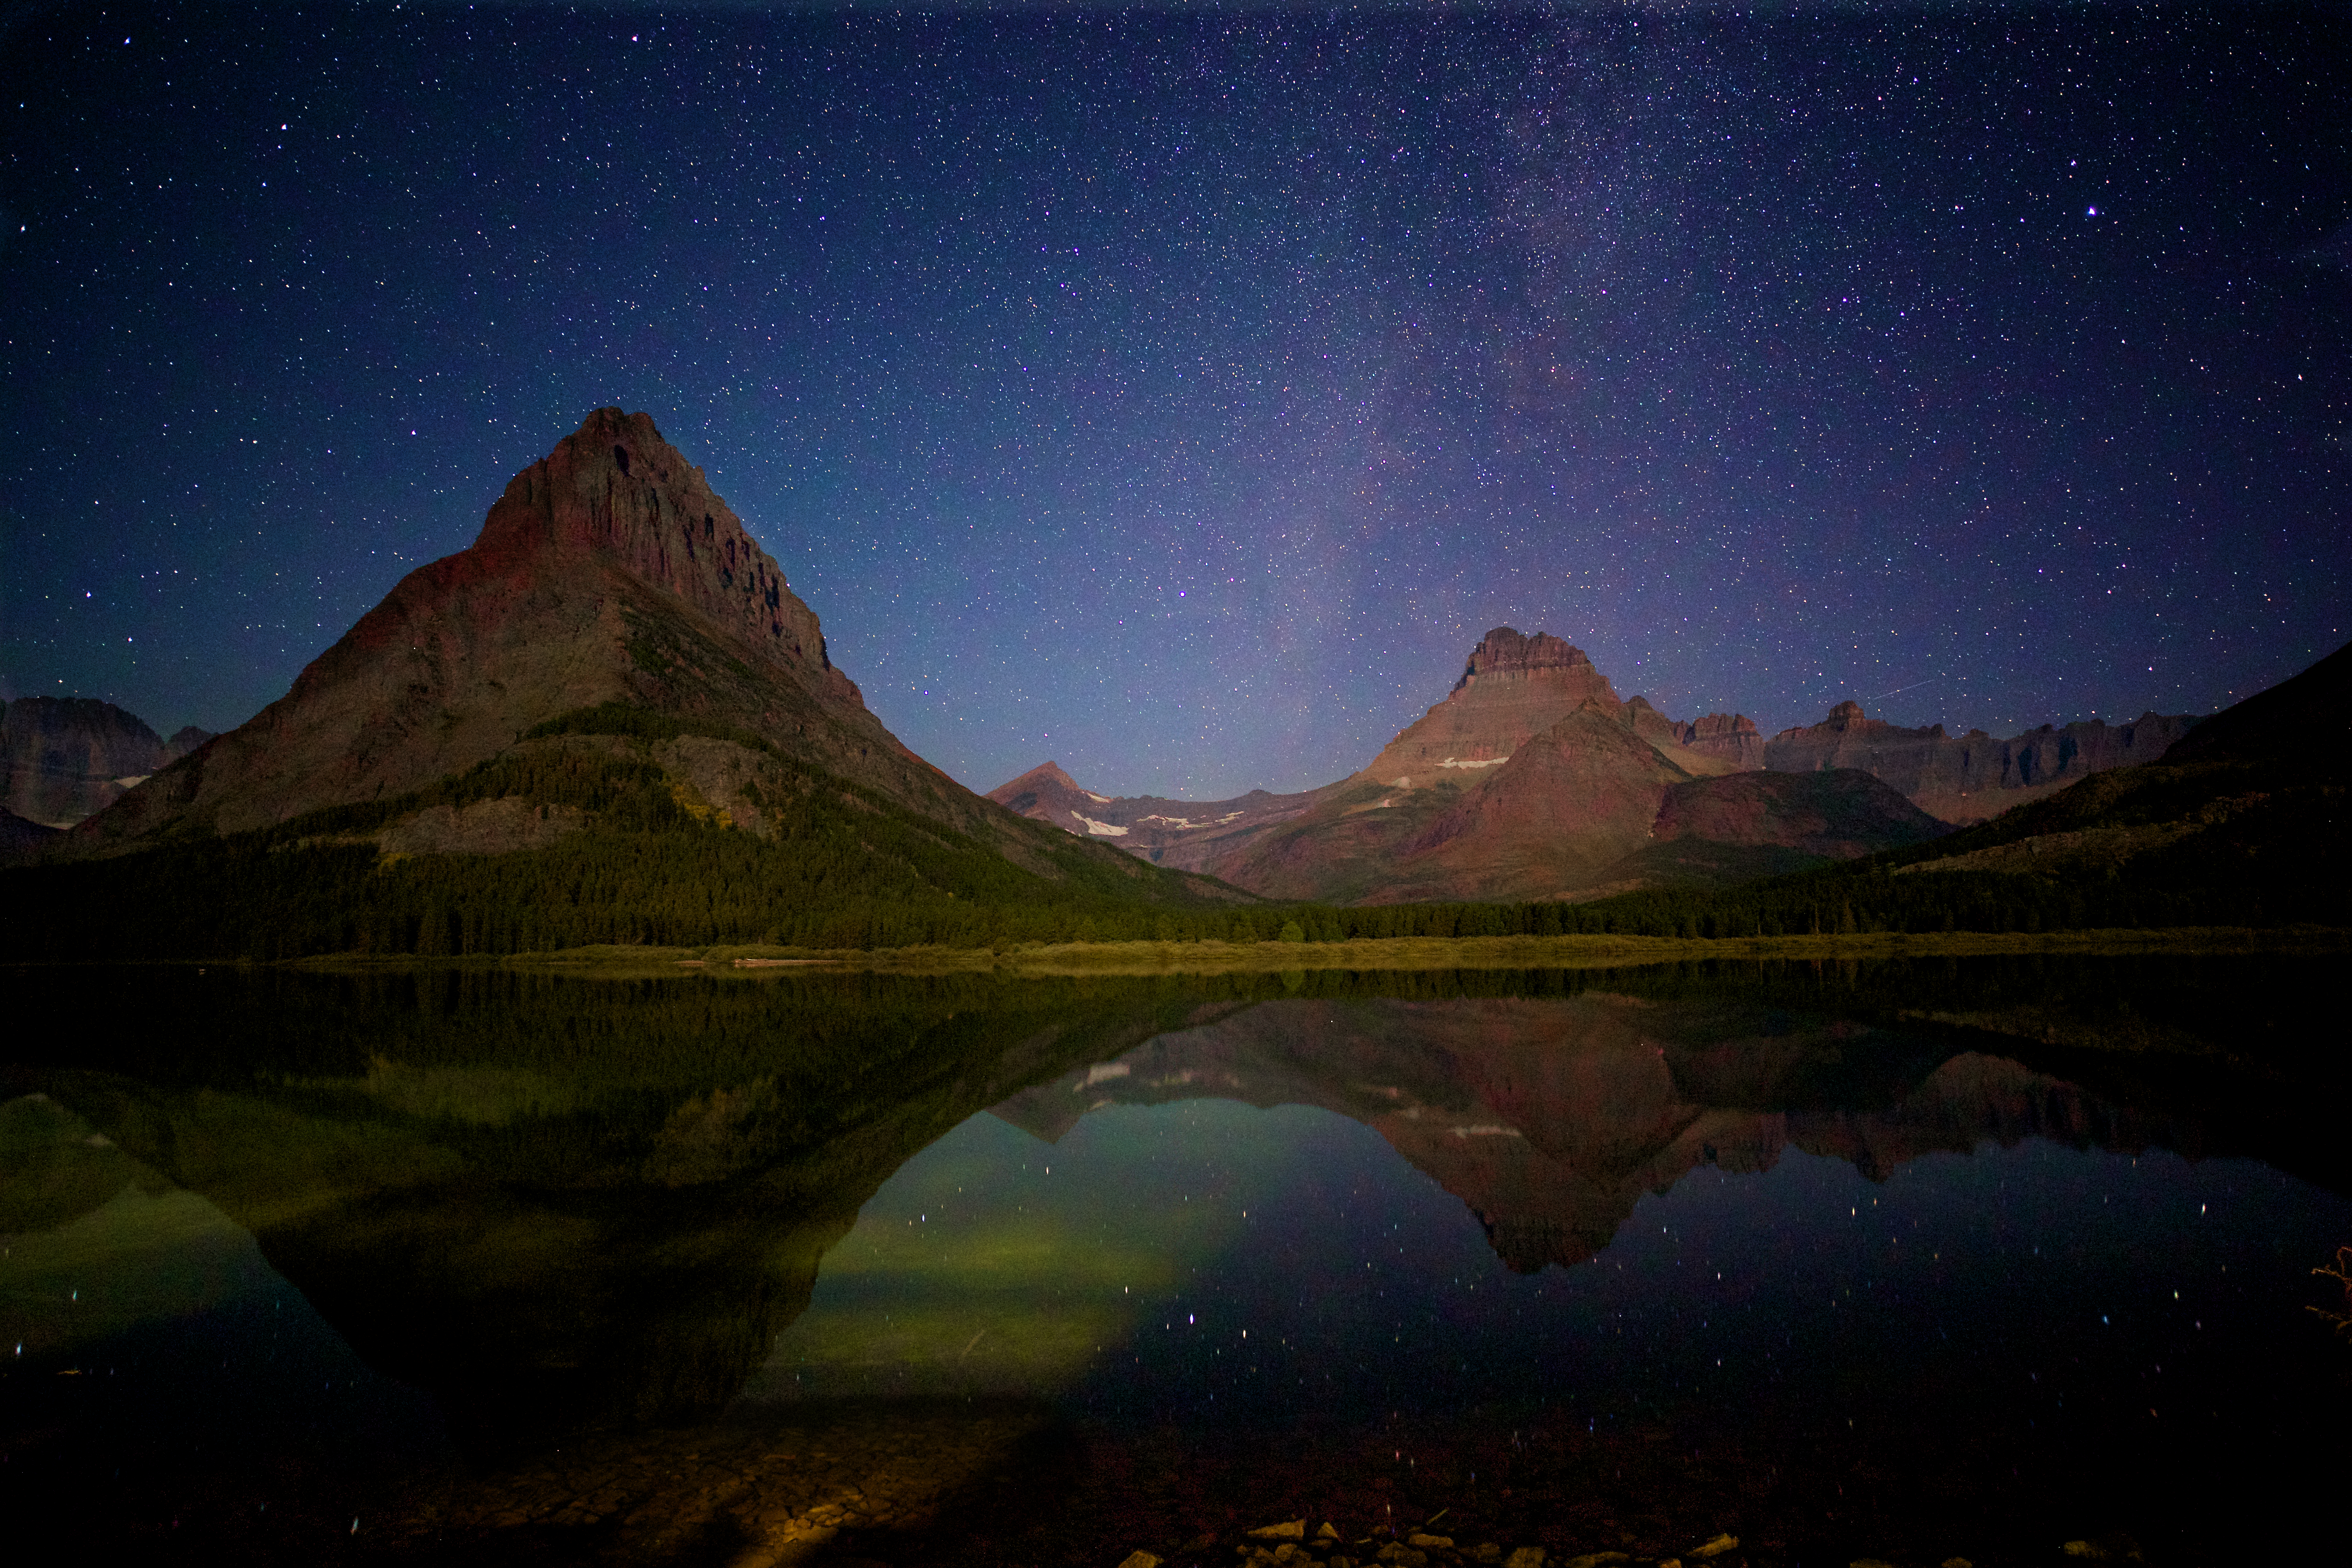
Don’t forget those night shots!
- Stars out? Crescent moon low in the sky light paints background with stars reflected off water. Woooo!!!

Reflecting stars off the water!
Snitzer Photography 5/30/16