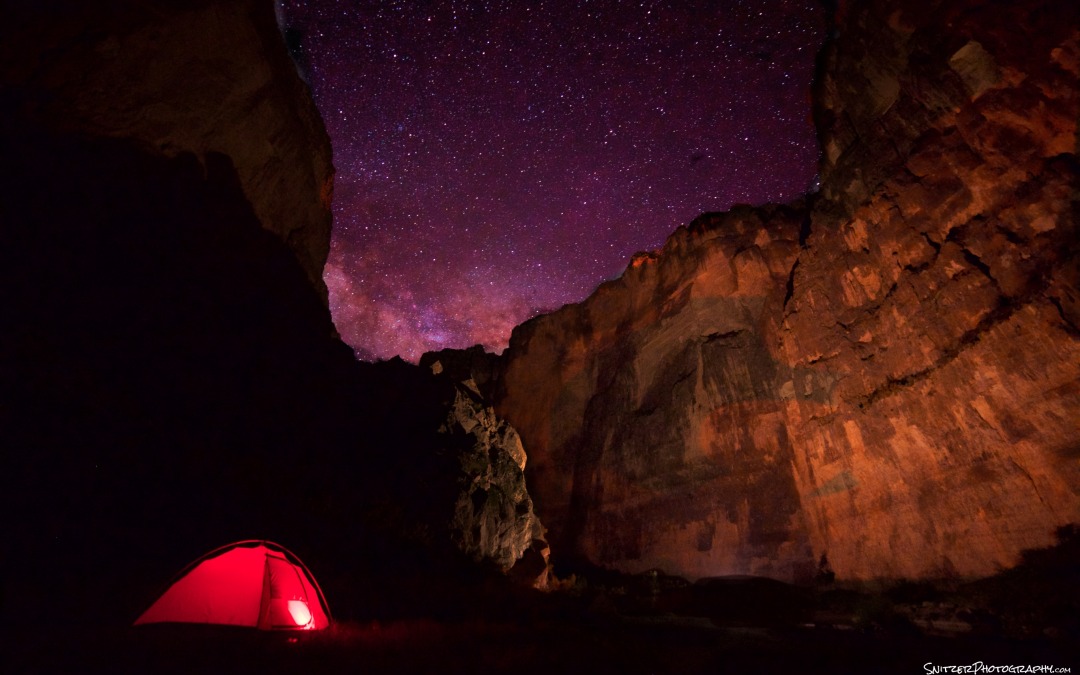
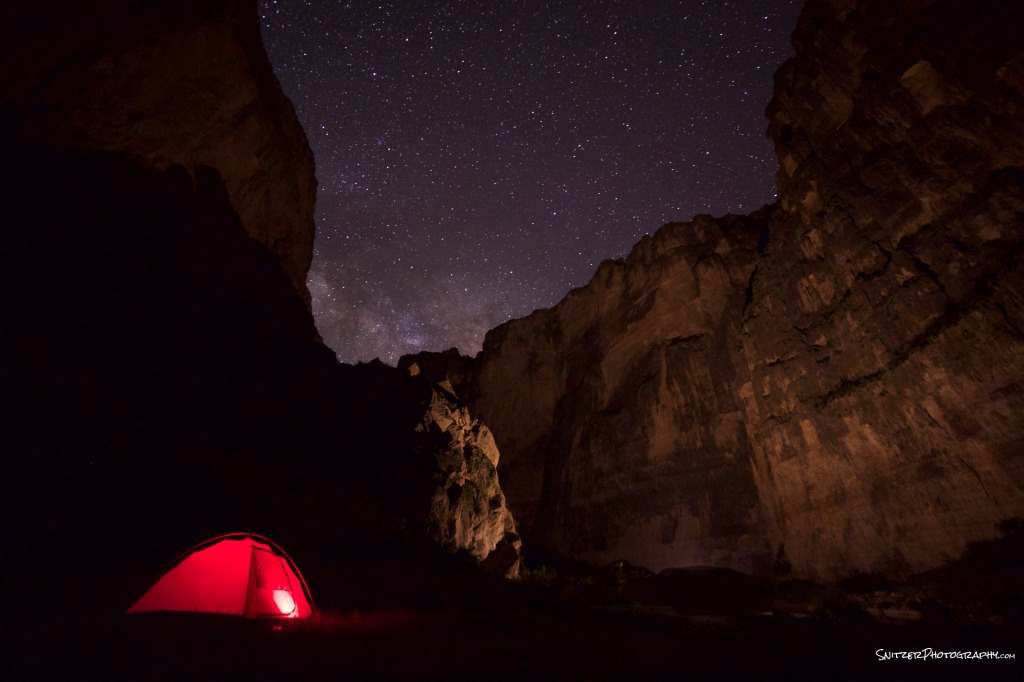
Photos, like the one shown above, combine two disciplines executed during a single exposure:
- Photographing stars as fixed objects
- Lighting an interesting foreground element using the moon or light painting techniques.
Step #1: Where/When to go
- Stars are obscured by the surface illumination of urban and suburban areas. Places like Southern Utah (Arches National Park, Bryce Canyon), South Texas (Big Bend National Park), Nevada (great op to shoot ghost towns…) or portions of Northern Michigan all offer clean, dark night skies.
- The locations also offer interesting foreground subject matter to make your photos more memorable.
- Is the moon your friend? Generally not. You’re typically trying to shoot into a jet black sky. Even a modest crescent moon overhead can ruin an otherwise great night sky.
- The Photographers Ephemeris is a great tool to find the days each month, at a specific location, which will provide either a new moon, or a time when the moon isn’t visible during the evening hours.
- Most people can actually see the Milky Way Galaxy (a great source target for your photo) once their eyes acclimate to the night sky. If you can’t, PhotoPills is another application that help locate the Milky Way for you.
- http://photoephemeris.com/
- http://www.photopills.com/
- Moon occasionally your friend? A 5-15% crescent moon, low in the horizon is a good source to illuminate foreground objects providing your shooting away from it (moon). Great for very large objects (mountains….). Will usually lower the required ISO by 500-1000.
- Time of year? Many different opinions. My take: You’ll be out for 3-4 hours (it’s fun/addictive). Go late winter/early Spring or late fall. It gets dark earlier. You might actually get some sleep. It’s cold but not freeeeeezzzing. Factor in location. Arches is great in February, Bryce another great spot will be ice cold.
Step #2: Getting the stars “right”
- The night sky is constantly in motion, rotating around the North Star. In order to get a sharp rendition of the Milky Way, & avoid star trails, your exposure time is generally limited to between 20 & 35 seconds.
- The Exposure Rule: Divide the lens focal length into 500. Ex. 14mm lens divided into 500 yields a maximum exposure time of 35 seconds. Longer lenses require shorter exposures.
- Dialing in other exposure dets. Auto exposure won’t work on a dark evening. You’ll need to rely on your histogram (see below for target exposure…bulk of your histogram about 25-33% across the lower axis). Generally speaking, you’ll need to be 1 – 1.5 stops below a neutral exposure to keep the ISO reasonable and the shutter open for less than 35 seconds. You’ll fine tune/boost exposure in post processing.
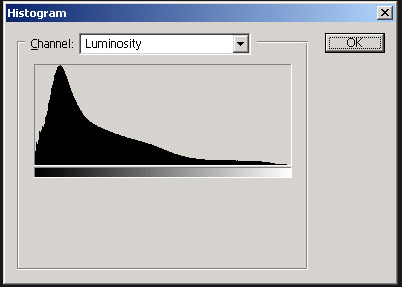
Given the dark sky, your histogram may show significant clipping on the left.
- A good starting point: 35 second exposure, aperture of F2.8 and an ISO between 2,500 and 4,000. You’ll need to generate several test shots to dial your exposure in.
- I generally set my color temp to 4000K.
- Given it’s dark, you may find it hard to frame your photo in the viewfinder or using “live view”. Each test shot, allows you to check your histogram and your framing to micro adjust the camera angle.
- Long exposure noise reduction is IMP. To save time, turn it off (while taking test shots) until your ready to take the final shot (saves time).
- Don’t forget to use your mirror lock up option to reduce vibration.
- How long after sunset? It generally takes about 2 hours after sunset for the sky to darken sufficiently to get optimal images.
- Forget about autofocusing or even manual focusing. Too dark! Set your lens to manual focus, turn the ring to “infinity” and your done. Remember that most lenses have an infinity focus mark next to the infinity logo…make sure you get that right! PS. When you move the camera between shots, it’s easy to inadvertently change your focus…check it every time you move the camera to a new location!
Step #3: Selecting Camera/Lens
- You’ll obviously be shooting at very high ISO settings were “noise” is a big issue. Full frame cameras offer a real advantage.
- If you don’t own a full frame camera, the Canon 6D (now avail for $1,399) may be an option worth considering (for this & other aps). Offers practically identical image quality as the 5DMkIII ($2,500), lower weight for hiking, albeit inferior focus ability. For nature photography and portraiture, where fast focus isn’t critical, it can be a good fit. The 6D offers better tonal range and ability to utilize wide lenses as compliment your crop sensor camera.
- Nikon full frame cameras are also great, although more costly (v the 6D) and ironically provide worse low light performance. See comparison of noise between Nikon 810 and Canon 6d.
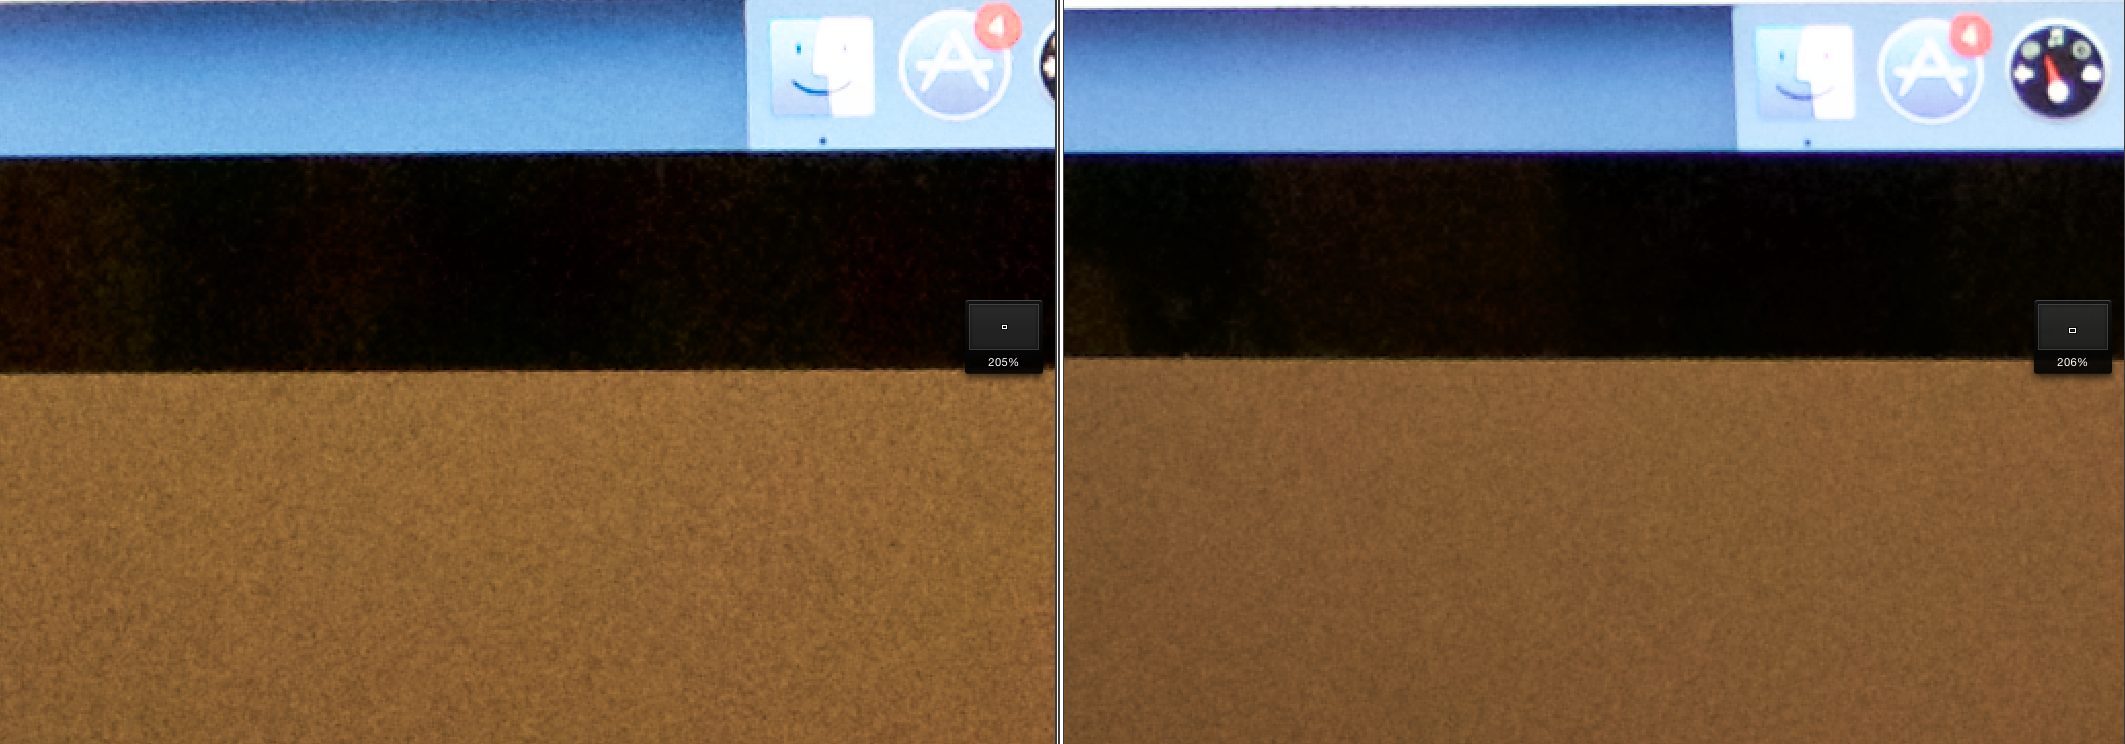
Nikon 810 (left) vs Canon 6D (right) both at ISO 6,500. The Canon has less noise.Fast wide lenses are the ticket to capture the celestial heavens and the Milky Way.
- Fast wide lenses are the ticket to capturing the celestial heavens and the Milky Way.
- 14mm is my lens of choice offering a great view of the Milky Way (wider is typically better when capturing the night sky). The small focal length also has a short hyperfocal distance. At F2.8 everything from 20ft to infinity will be in focus. Ergo, your foreground object will be tack sharp…as will be the stars. I also shoot occasionally with a 24mm F1.4 (about 10% of my nighttime shots).
- Lens choices: Canon 14mm F 2.8 $2,250, Nikon 14mm F2.8 $1,600, Rokinon 14mm F2.8 $349

Rokinon 14mm F2.8, avail in Nikon or Canon mounts
- Which lens? The fully manual Rokinon matches the others for edge to edge sharpness and has the lowest coma (the tendency of a lens to turn stars from round pin point objects into egg shaped blobs). Save the money. Set the Rokinon to F2.8, Infinity focus and fire away.
- Remote trigger
- You’ll need a remote wireless shutter release (to light paint your subject away from the camera).
- Velo FreeWave Wireless Remote Shutter Release $35.
- Tripod
- Use whatever is in your photo gear bag.
- If considering something new: Slik Sprint Pro II. $90 Lightweight 2 Lbs. workhorse, plenty tough for your lightweight celestial set up…”go to” tripod for long hikes.
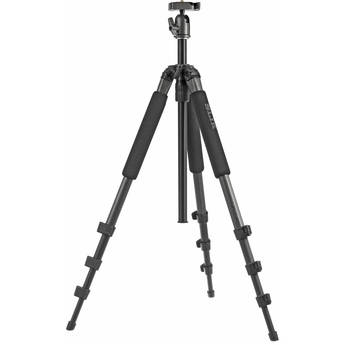
Slik Pro II Tripod: Lightweight, affordable workhorse
Step #4: Tools to Light Paint your foreground (MacGyver to the rescue)
- See at night. Get the “hat”. Digital After Dark’s hat has both white and red (to preserve night vision) LED lights in the visor. $35 Great way to see what your doing, while keeping your hands free.
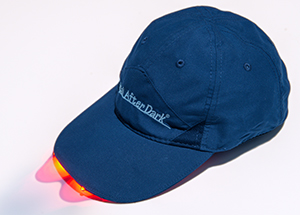
- http://www.kadamsphoto.com/catalog/digital-after-dark-night-vision-with-white-leds-p-82.html
- Light painting flash lights (right tool for the job)
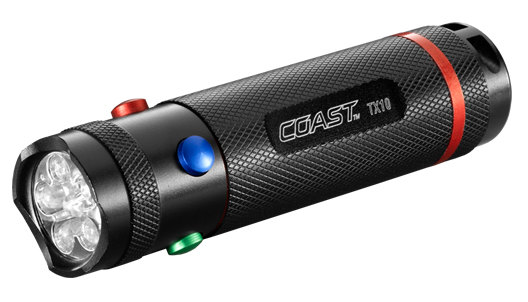
- Color made easy for smaller nearby objects. Coast TX10 Quad Color LED light $23. Select buttons offer red, blue and green light…no gels required!
- Workhorse for near to medium size objects. Olight M10 Maverick. $40. Small, 3 options for brightness, one 350 lumens!

Olight-M10
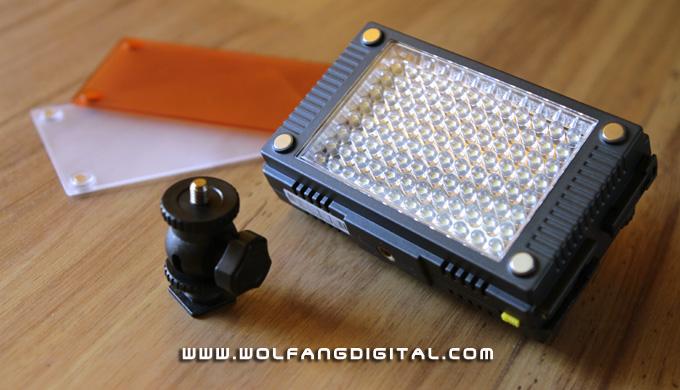
- Max power for the big jobs! Z96 LED Panel, provides an area of 96 LED lights which can be dialed in to any brightness. Comes with tungsten diffuser…perfect for painting rocks/mountains (1,000 lumens+)…etal. $86
- Color gels to modify Olight. $3. You’ll use black gaffing tap to build a small gel holder to filter your LED light. See photos below.
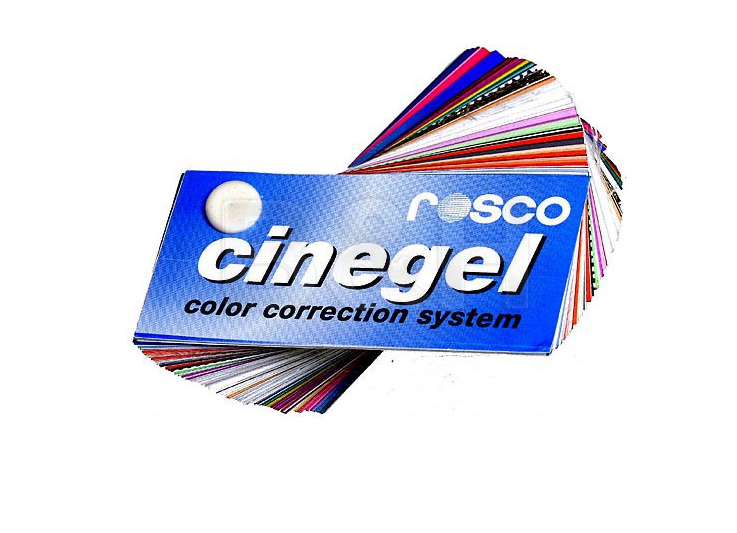
- Creating a gel filter/cap for your Olight flashlight: Having some different colored gels that you can quickly deploy to modify your flashlight is a huge winner. Let’s face it…white light for most light painting scenes looks pretty hard..ruins an otherwise great opportunity.
- Get a roll of black gaffing tape (B&H Photo carries).
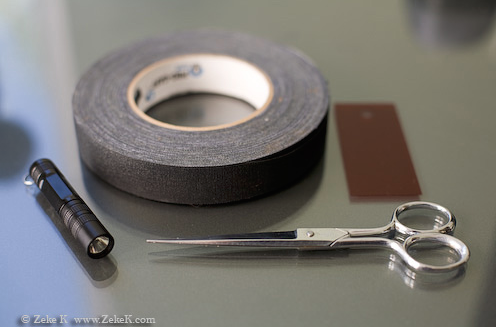
- Cut a piece and wrap around the front of your Olight, with the stick side facing OUT.
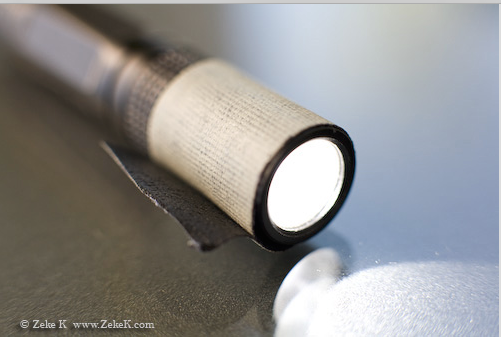
- Your then going to cut a small gel piece the approx diameter of the Olight with some small “fins” sticking out to the side.

- You now attached the gel by sticking these fins to the sticky part of the gaffing tape.
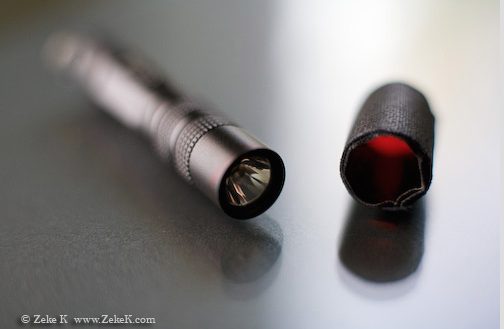
- Final step is to put another layer of gaffing tape (this time sticky side facing IN) to hold your gel in place. These homemade gel filters allow you to quickly change the color of your light painting wand.
- Get a roll of black gaffing tape (B&H Photo carries).
- Color made easy for smaller nearby objects. Coast TX10 Quad Color LED light $23. Select buttons offer red, blue and green light…no gels required!
Step #5 Time to Light Paint
- The key: Light objects from the side (like portrait photography), not straight on. More interesting shadows.
- Keep your light moving in circular painting brush like strokes. I usually avoid painting the ground area between the camera and the foreground object. If you get some light spillover, you can always darken this area in post production.
- Less is more! You don’t need much light to properly illuminate your subject, unless your doing far off mountains and such. Selecting the right light source and luminosity setting so you can paint for the full exposure time will help provide more even results.
- Remember to turn on your long exposure noise reduction for the final shot (once your settings are fully dialed in).
Step #6 Post Processing
- If using Lightroom or Photoshop, you’ll be taking your initial image and increasing the contrast, along with exposure of the night sky (use layers or magic paintbrush to make these mods selectively to the sky area only).
- Also try experimenting with your color controls, to boost the saturation levels, luminosity & range of the red, orange, yellow &/or blue channels. These colors will often present themselves at the lower part of the nighttime sky. Again apply these changes to the sky area only.
- Don’t be afraid to experiment with tweaks to the color temp.
- Splitting hairs: I’ve found that Apple’s Aperture program provides less celestial chromatic aberration than Llightroom (no idea why). Lightroom often yields stars that are occasionally bright red. If you have this problem, consider trying Aperture (assuming you have an Apple Computer).
Case Studies
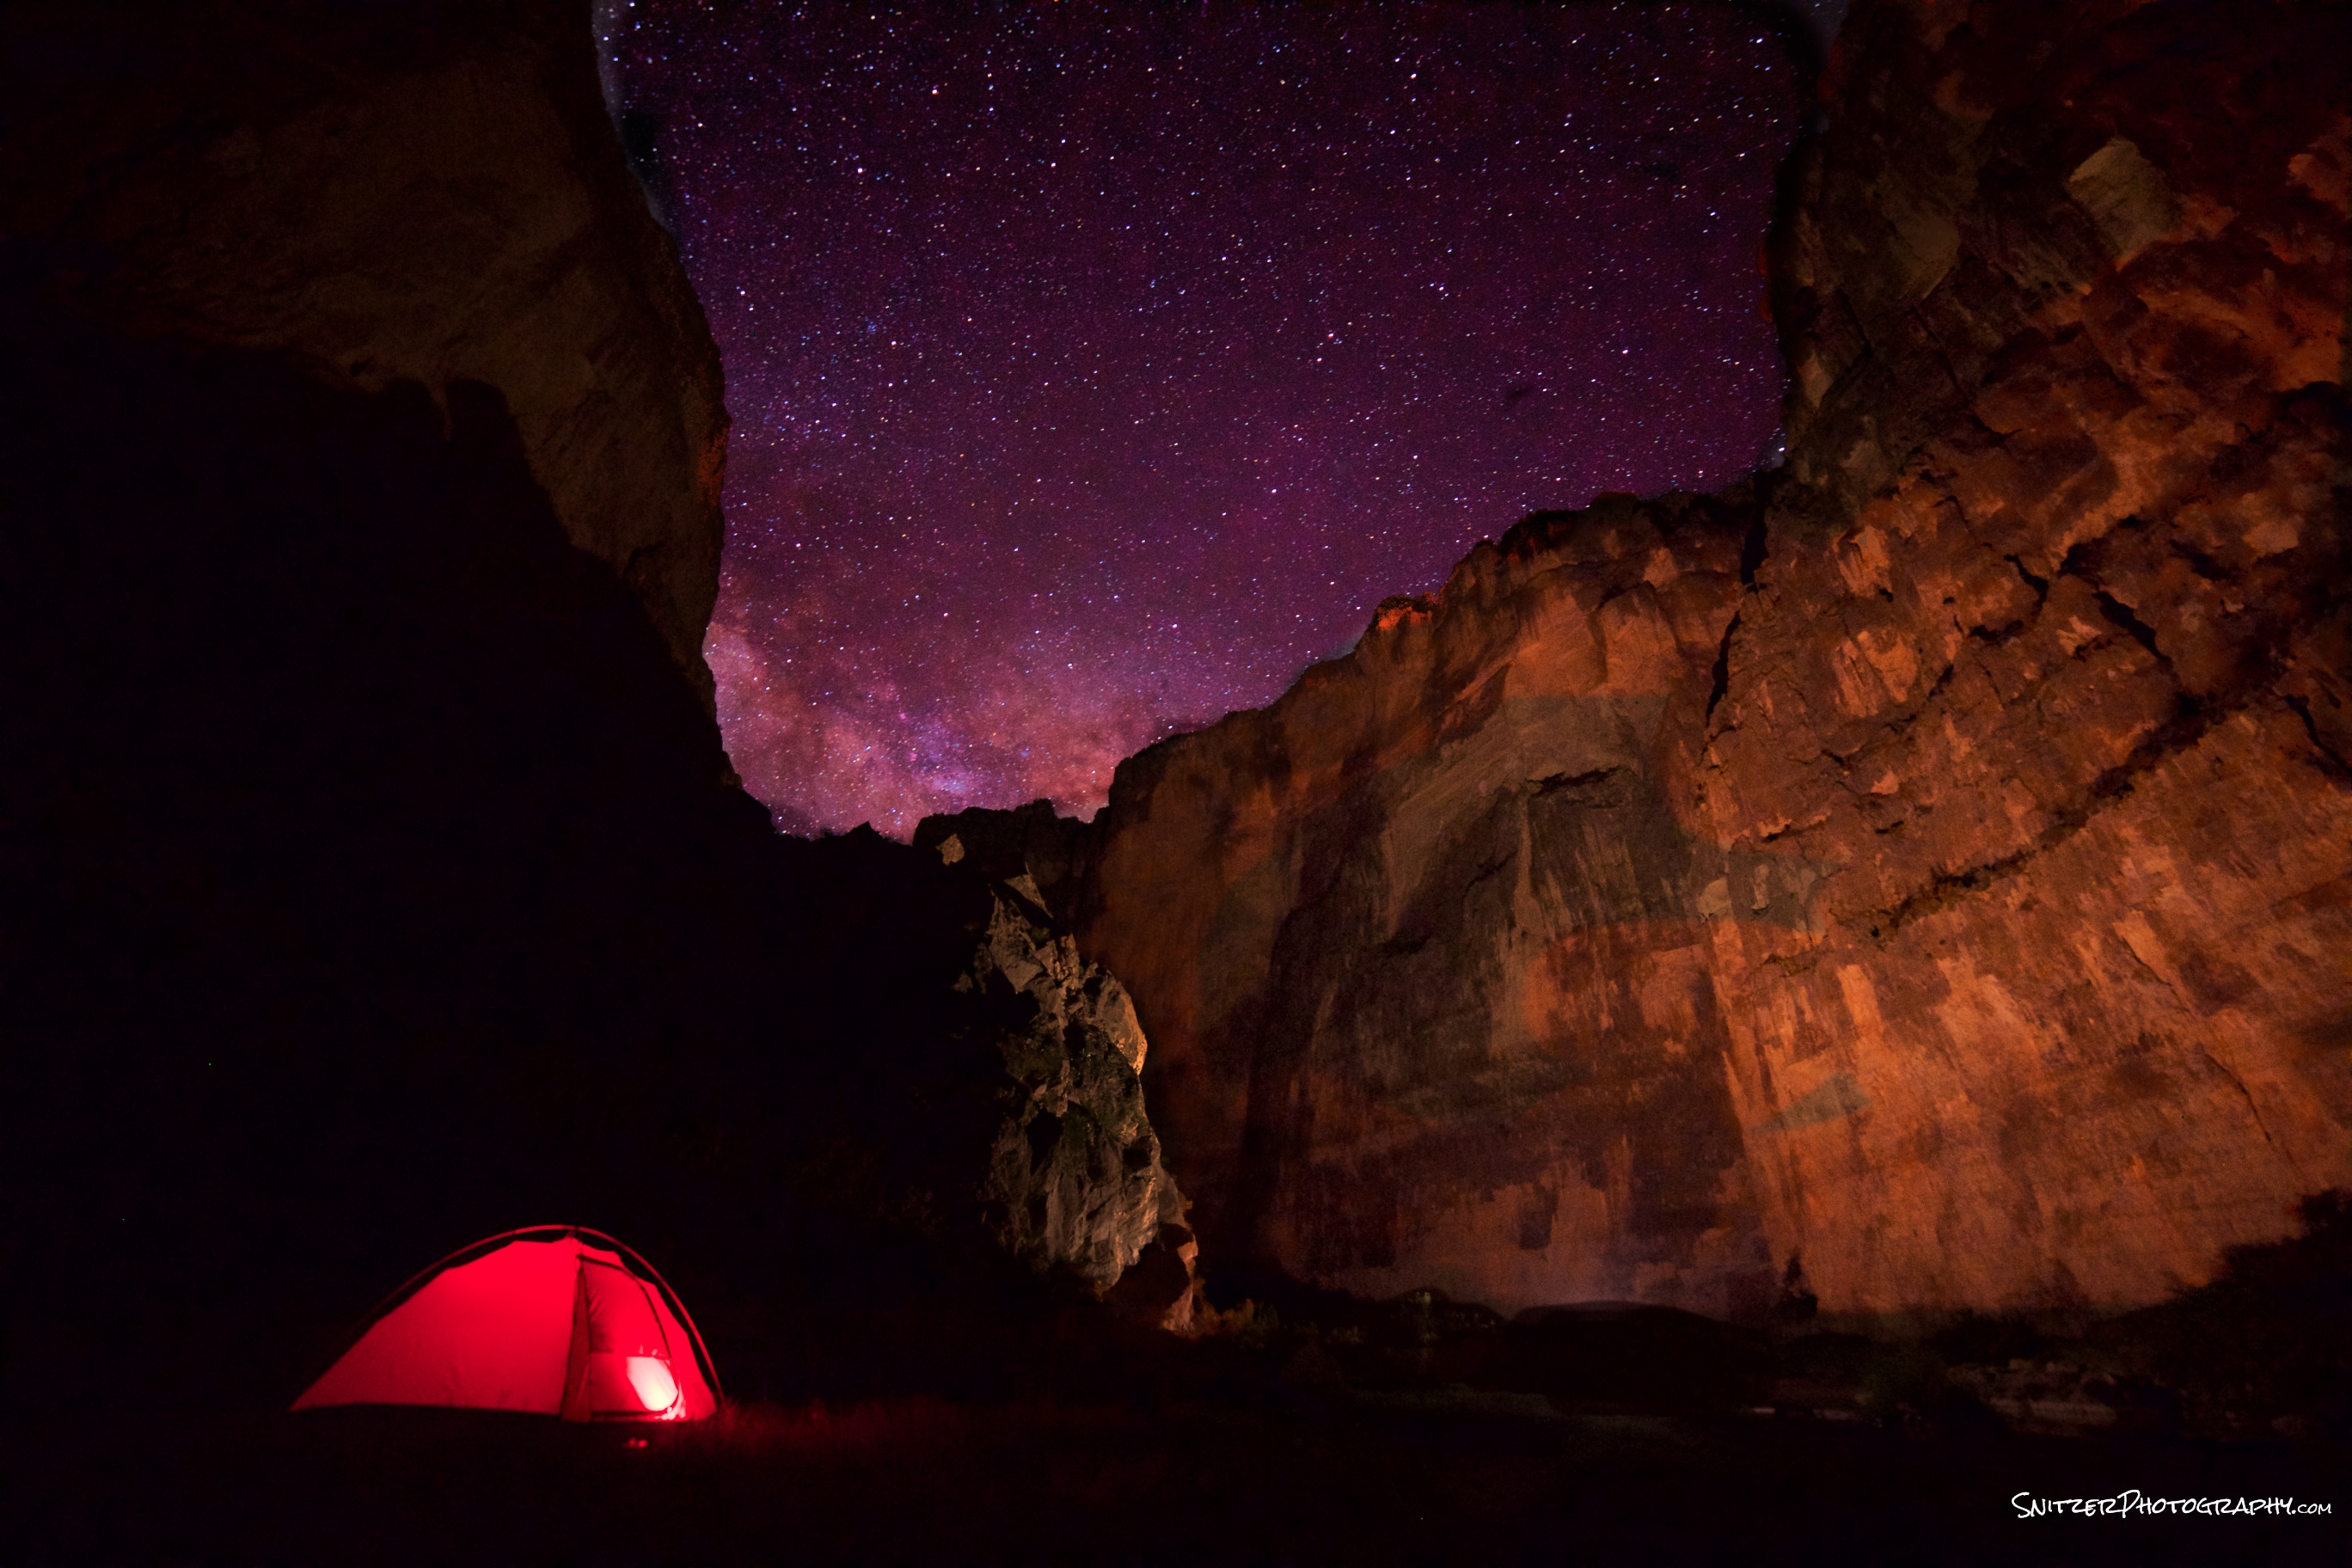
Saint Elena Canyon, Big Bend National Park
- Canon 6D, 14mm Rokinon @ F2.8, 30 sec, ISO 4000, color temp 4,000k.
- Coast Tx10 flashlight placed inside test (red). Light painted with Z96 Panel & tungsten diffuser.
- Post Processing: Increased sky contrast, boosted red channel (saturation, Luminosity & range). Dodged cliff areas to the right. Burned in foreground area between camera and lighted painted area (blacked out).

St Elena Canyon, Big Bend National park
Canyon shot before post processing

Arches National Park, Utah
- Canon 6d, 14mm Rokinon @ F2.8, 25 sec, ISO 1600, color temp 5,300
- Mountains lit by 15% crescent moon 15% above horizon (opposite direction of camera facing).
- Post processing: Dodged mountainous subject areas. Sky: contrast, black point, red and purple channels increased.
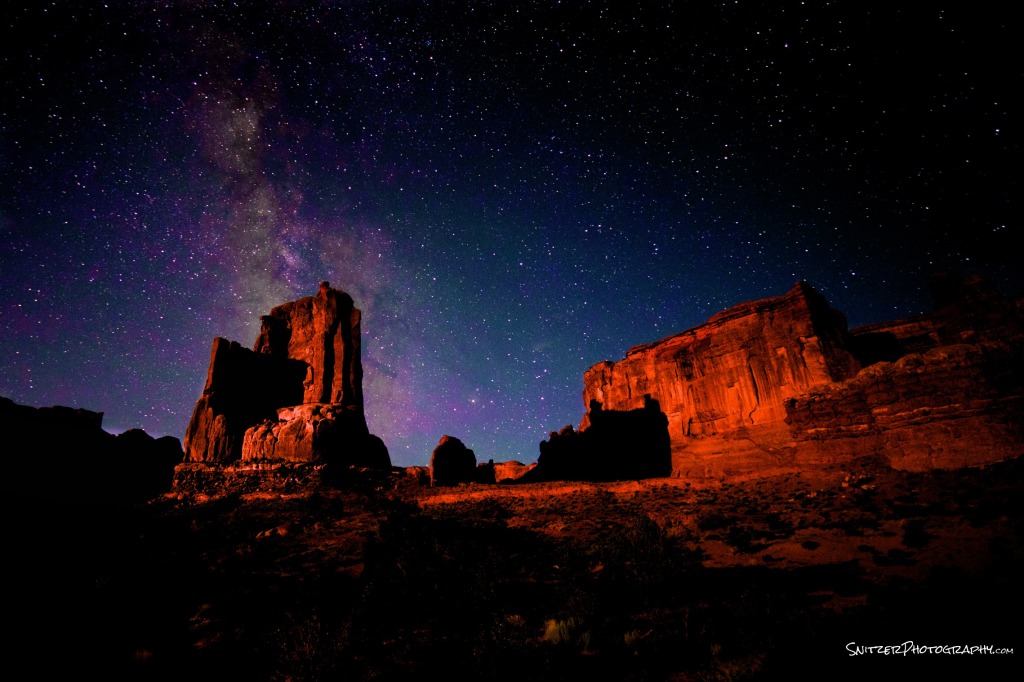
Arches National Park
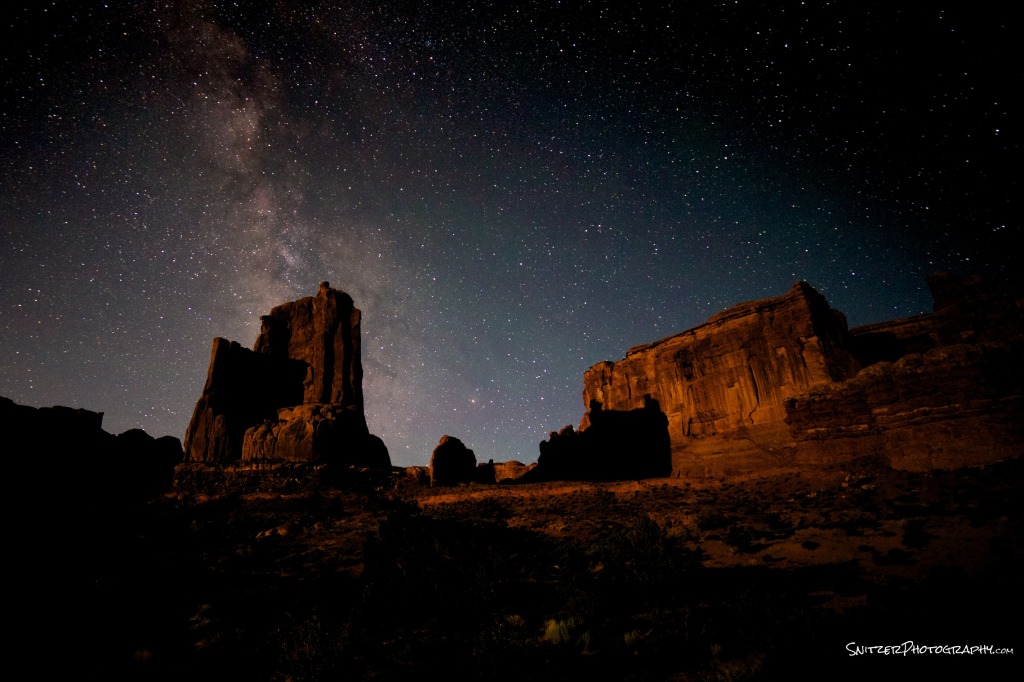
Arches before post processing


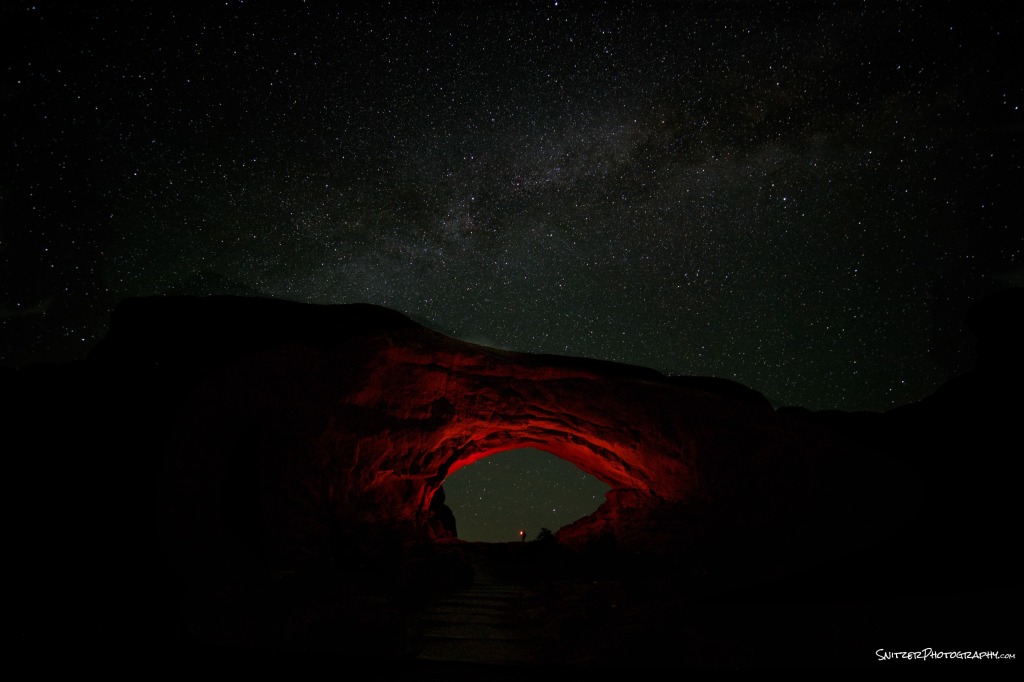
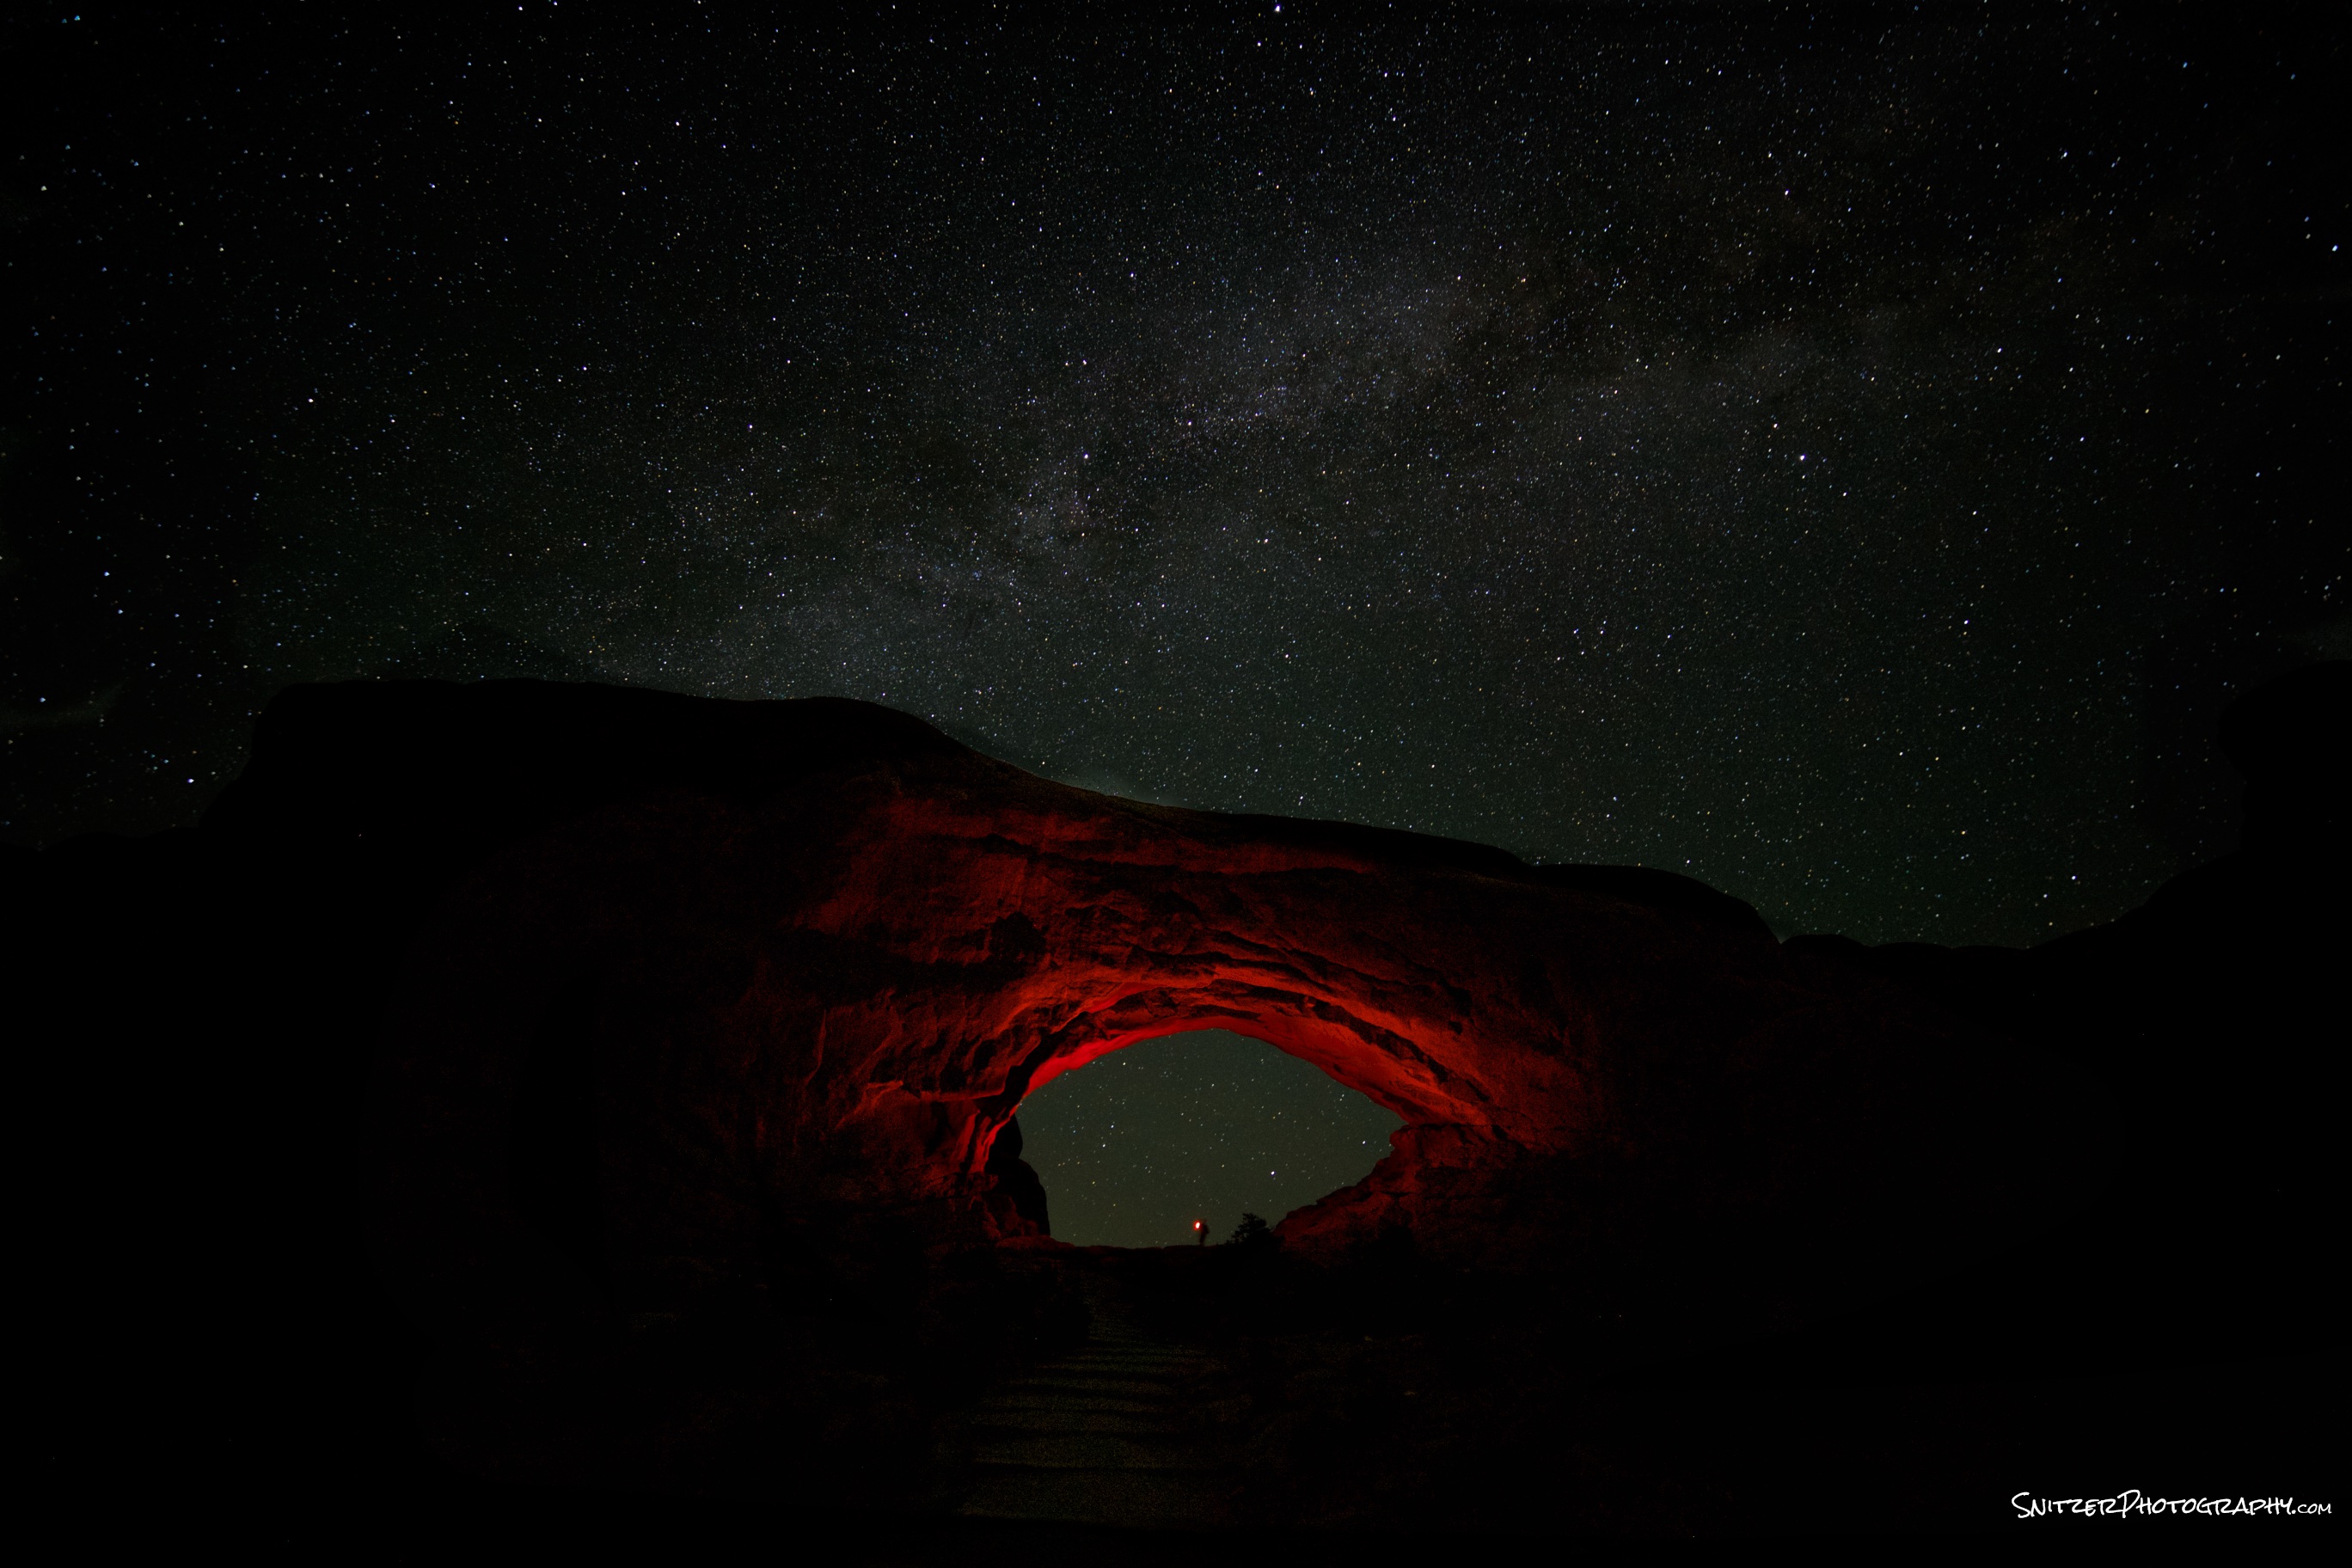
North Window, Arches National Park, Utah
- Canon 6d, 14mm Rokinon @ F2.8, 25 sec, ISO 2500, color temp 4,800
- Arch lit by a red gelled Olight, held under the arch (facing up).
- Post processing: Dodged the arch, Increased contrast, exposure and red channel for the sky.
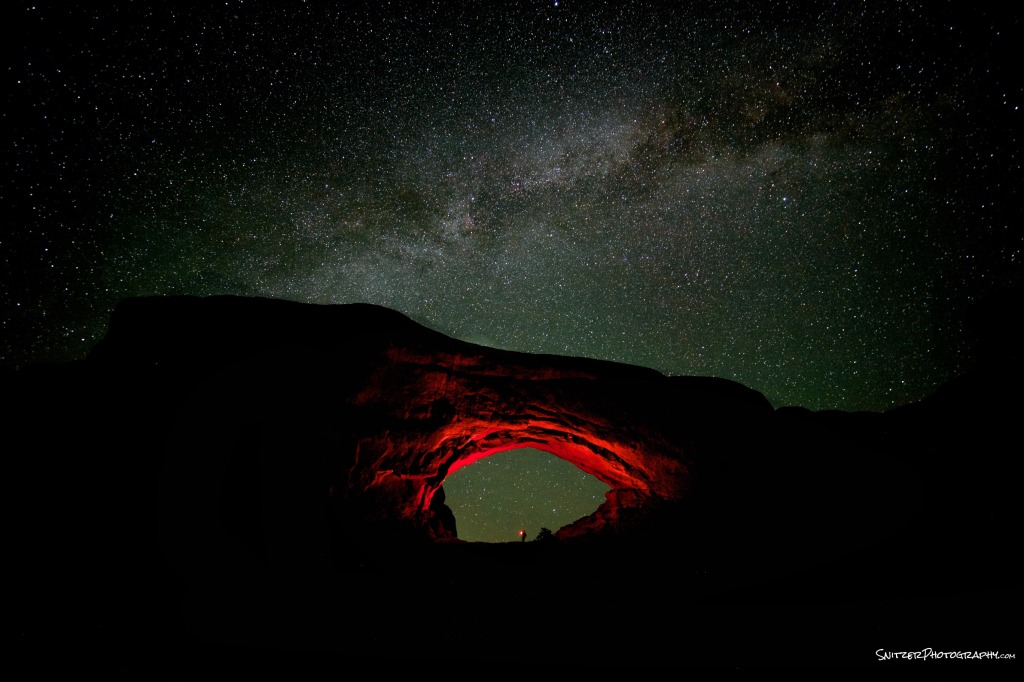
Arches North Window
Arches before post procesing

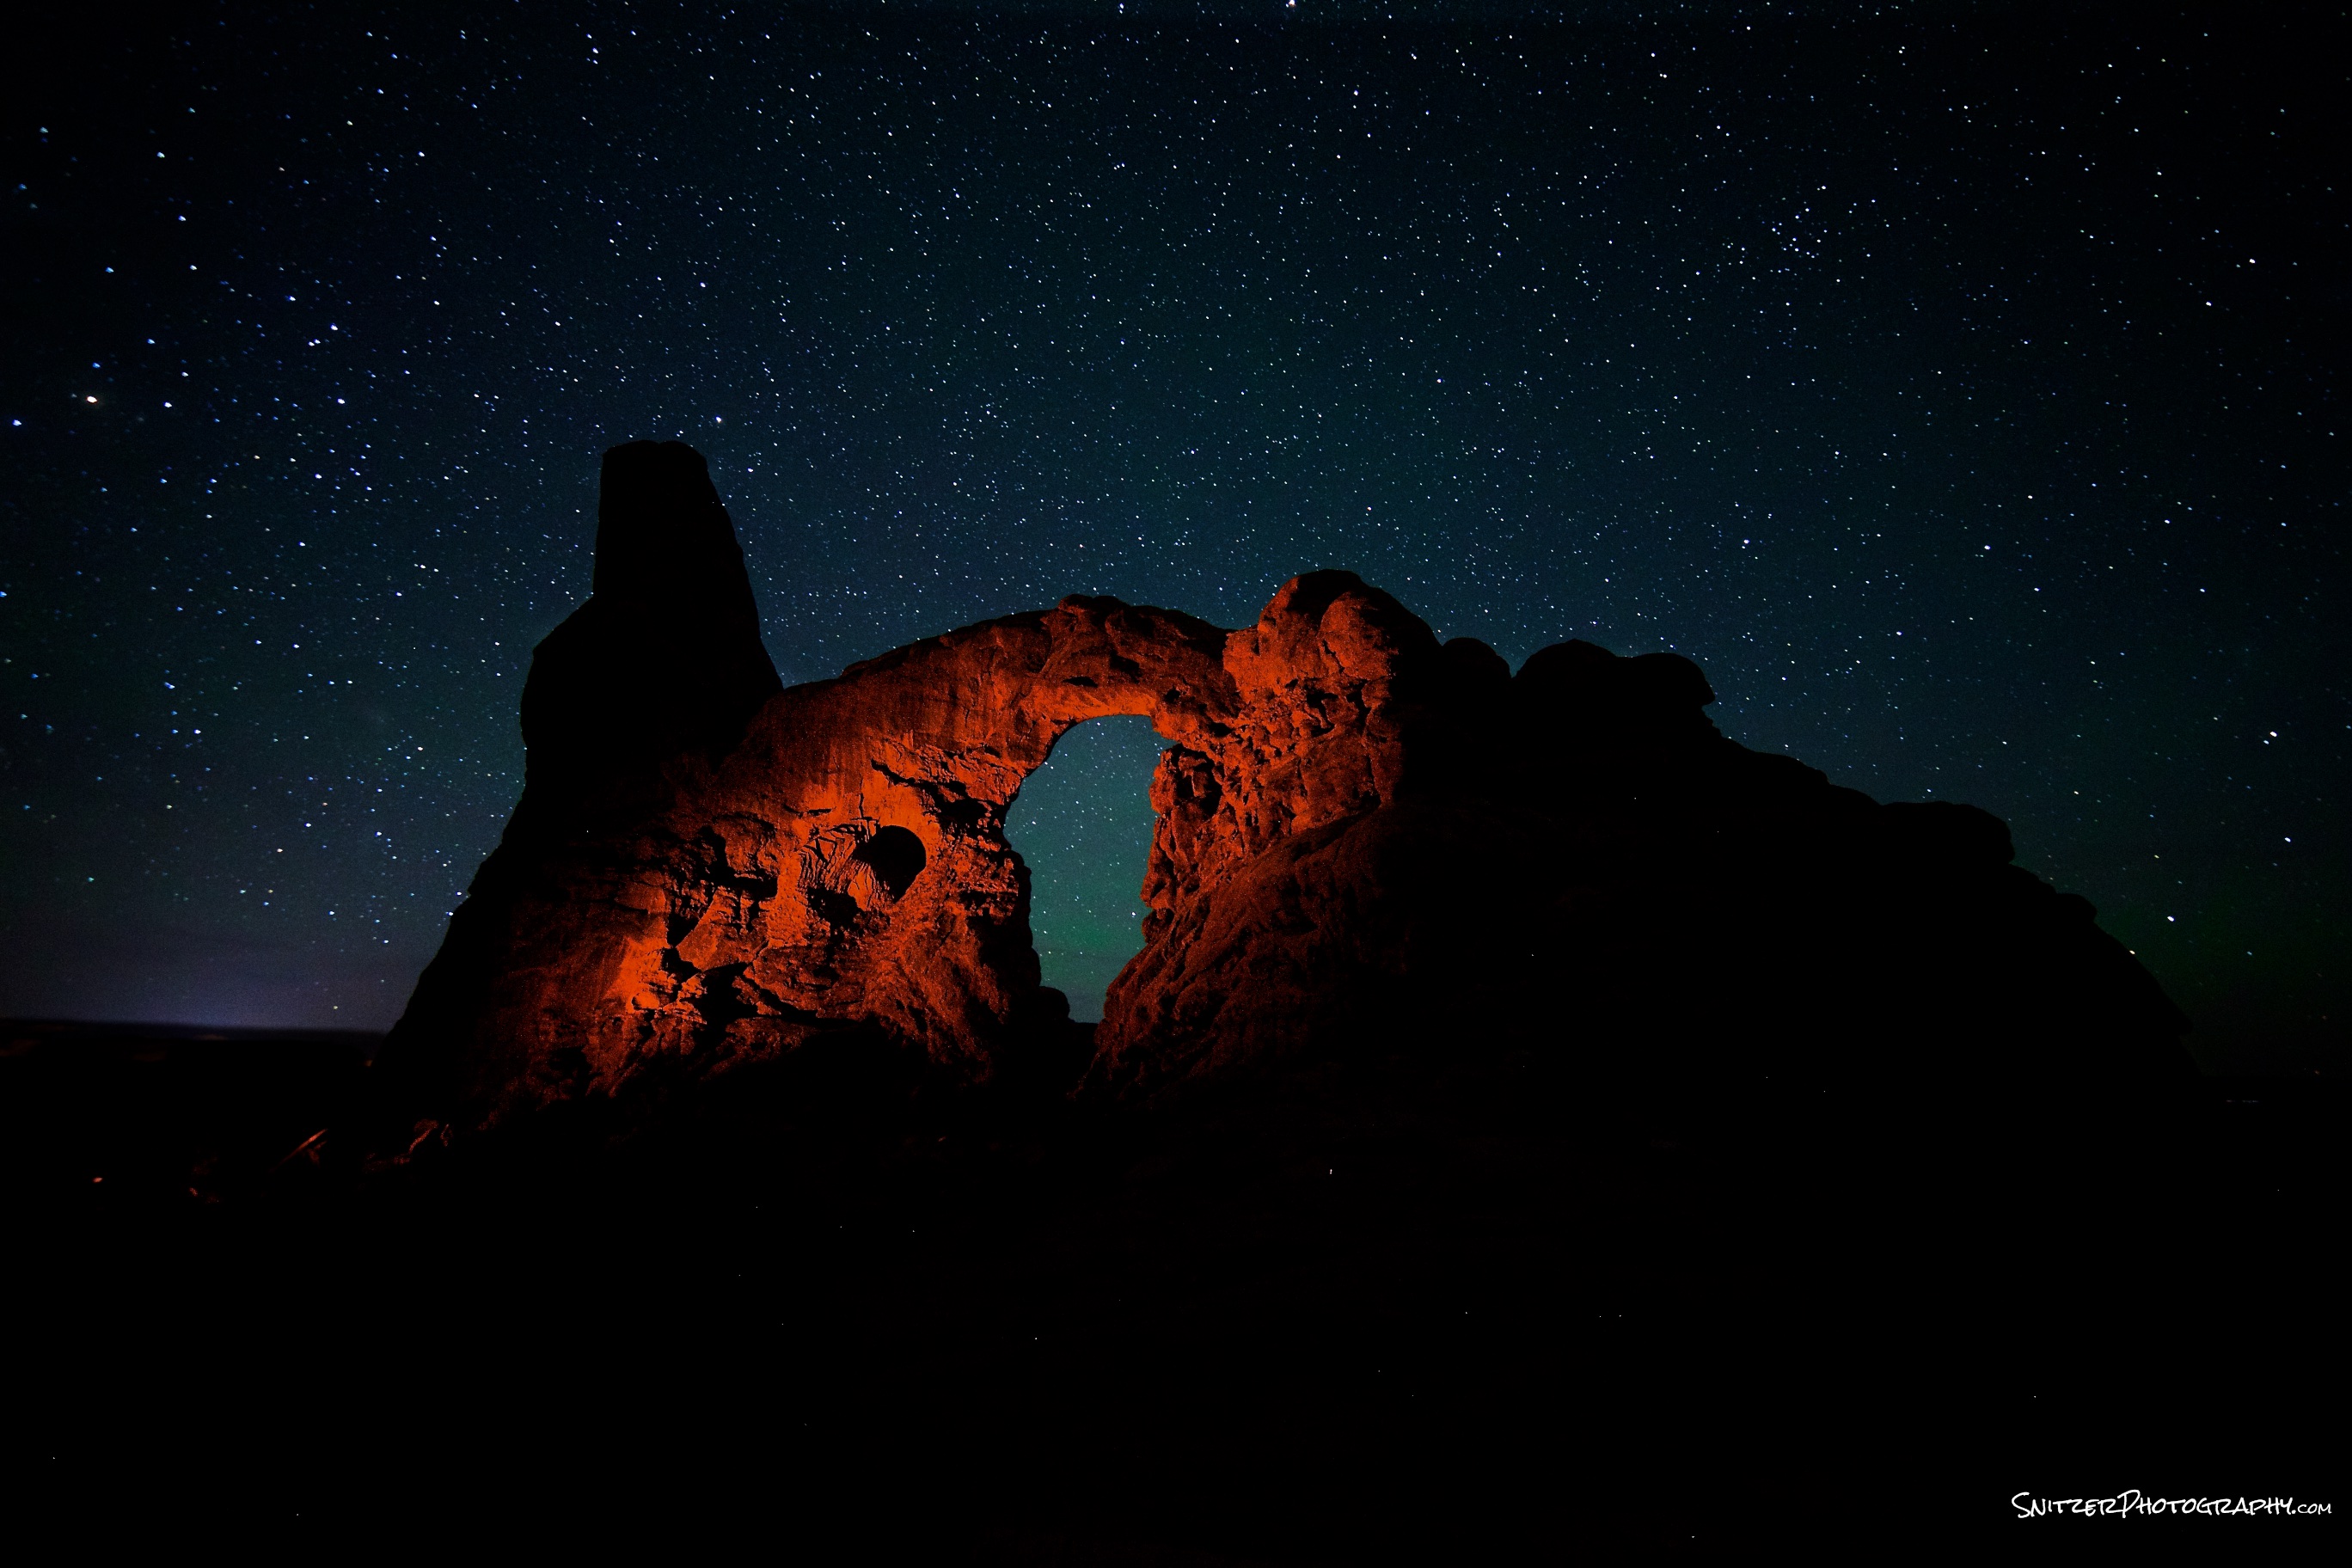
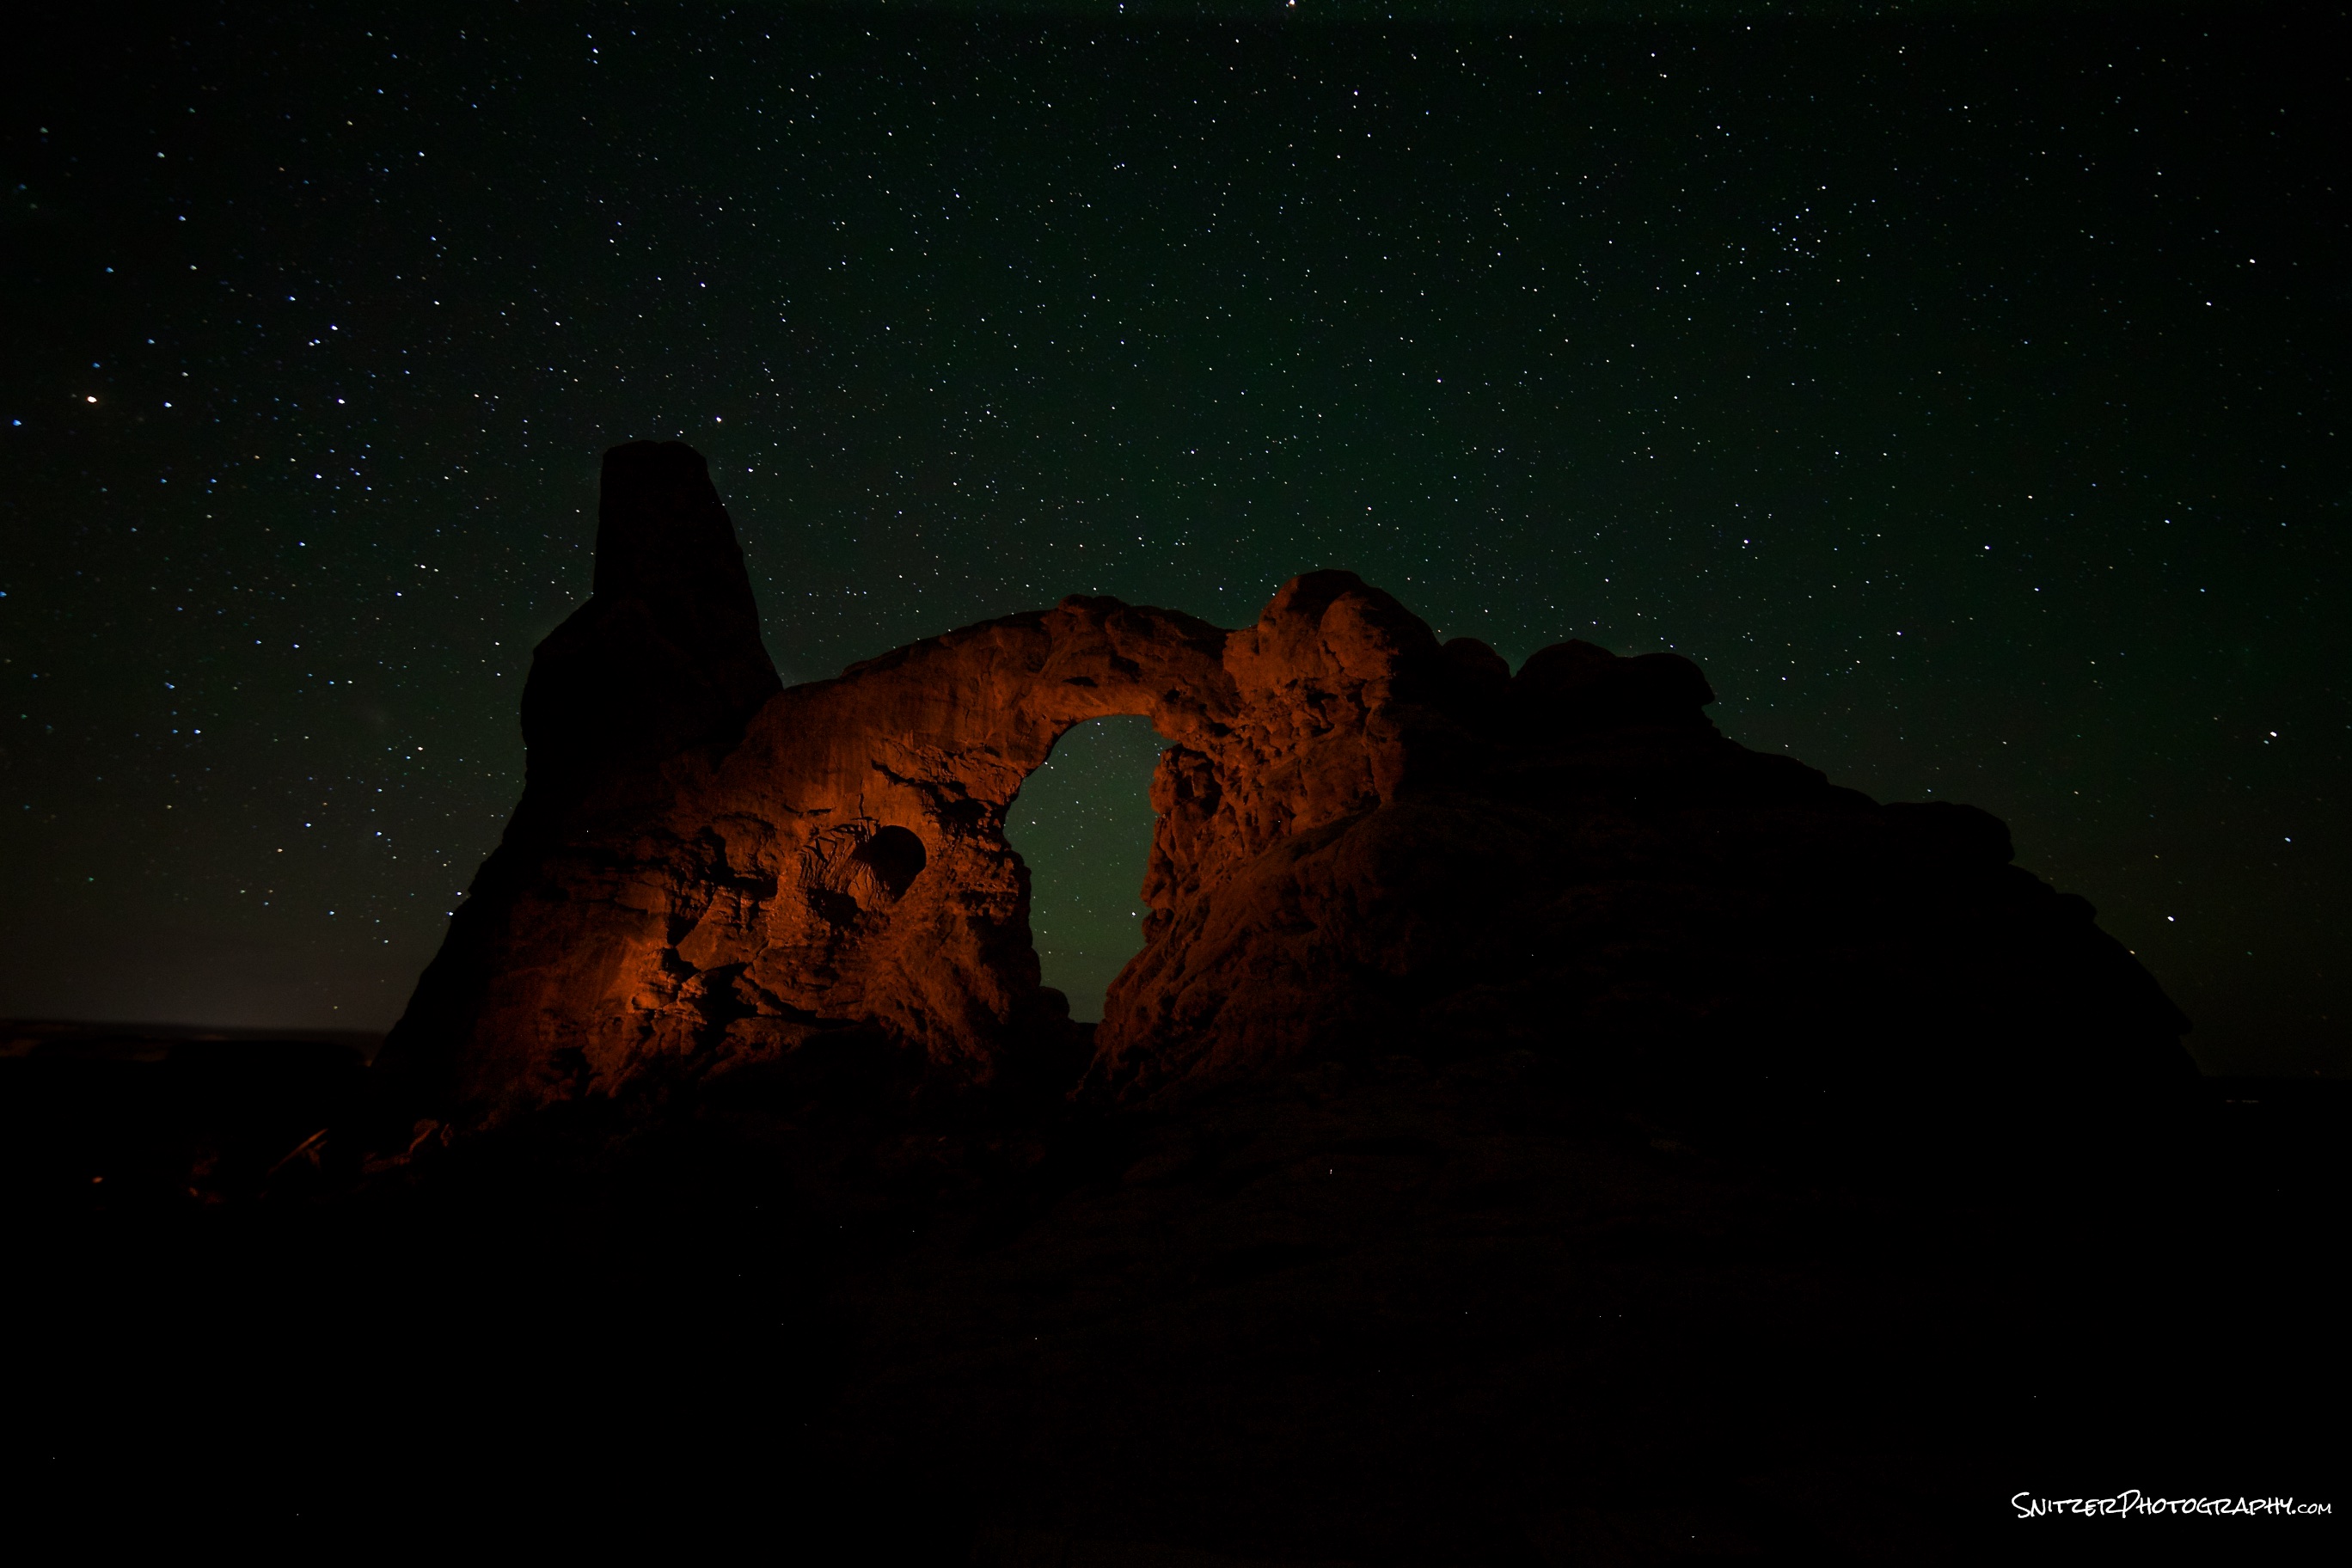
Turret Arch, Arches National Park, Utah
- Canon 6d, 14mm Rokinon @ F2.8, 25 sec, ISO 2,500, color temp 3,700
- Lighting by red gelled Olight.
- Post processing: Increased exposure, increased red channel for subject.

Turret Arch

Turret Arch before post processing


Excellent Tom. Really enjoyed reading about all of your little tricks with night photography. I like to take night pictures as well and play around with light painting both indoors and out. looking forward to more of your work.