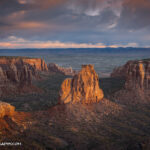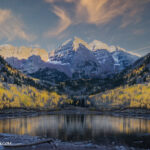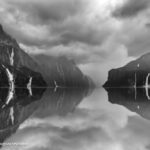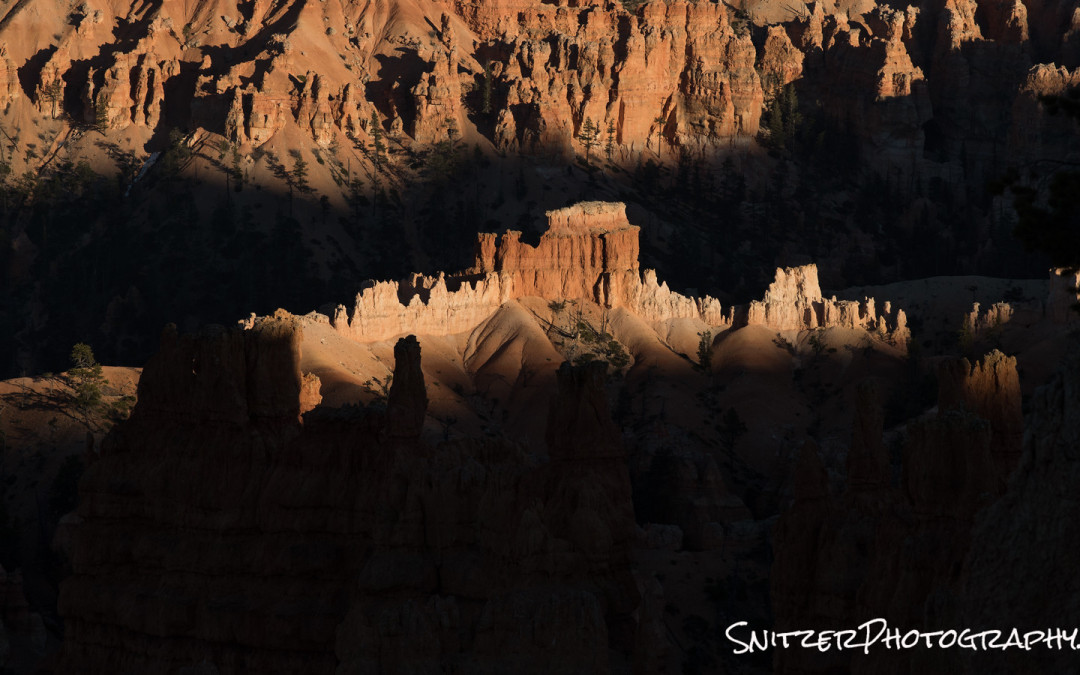
The photos below all share one common trait: They couldn’t be taken shooting in Aperture Priority mode.

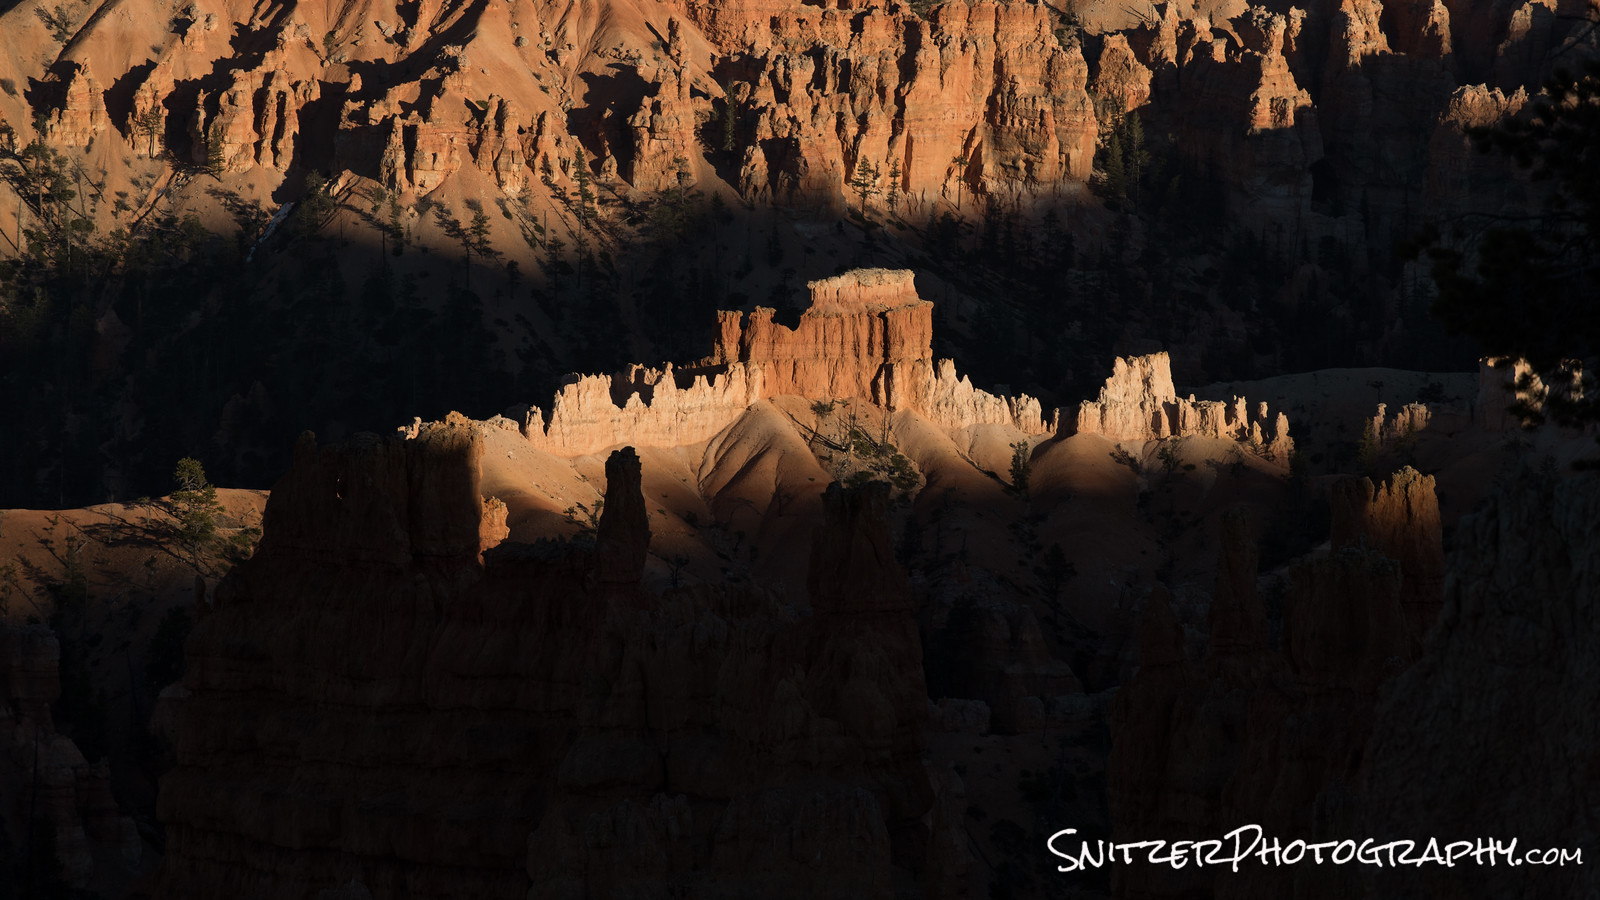
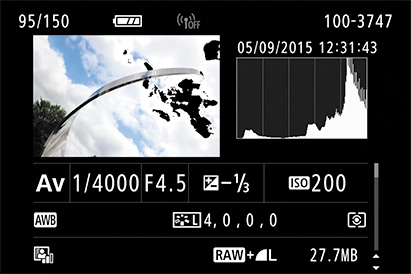
Why is that? Both photos were taken 2.5 stops under what the camera’s light meter indicated was “proper” exposure. That’s because while the photo’s subject is well lit, the majority of the frame is dark. Getting the subject to come out “right” requires the user to tweak the exposure properly. In this case, that means setting the exposure to get the rocks/yellow trees (shown above) perfect.
Using the camera’s Aperture Priority mode, even if bracketing (1 stop over/under), you’d have over exposed the photo & blown the opportunity. The dark areas in the photo would have been gray and the rock highlights/yellow trees would be white and unrecoverable.
So how do you get the exposure right every time? How to stop losing great photos? Simple, shoot in manual mode! Here’s how.
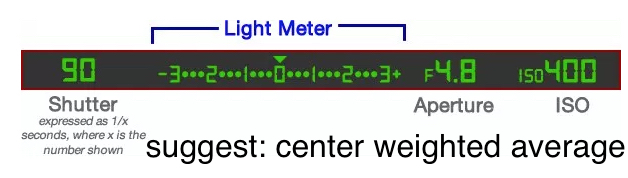
Step 1: Set your DSLR to “manual exposure” mode and the metering to “center weighted average”. Prepare to take a “test photo”.
Step 2: Look through the viewfinder. If it’s an overcast day or you don’t have a bright sky in your photo, just frame the picture normally. If you have a bright sky, however, you’re going to point the camera up to the sky for purposes of adjusting the exposure manually.
Step 3: Now that you’re pointing the camera in the right direction it’s time to adjust the exposure. You’ll see a scale inside the viewfinder indicating if you’re over or under exposed and the aperture/shutter speed settings. Adjust aperture or shutter speed till the meter indicator is centered
Step 4: Frame your image in the viewfinder, depress the shutter.
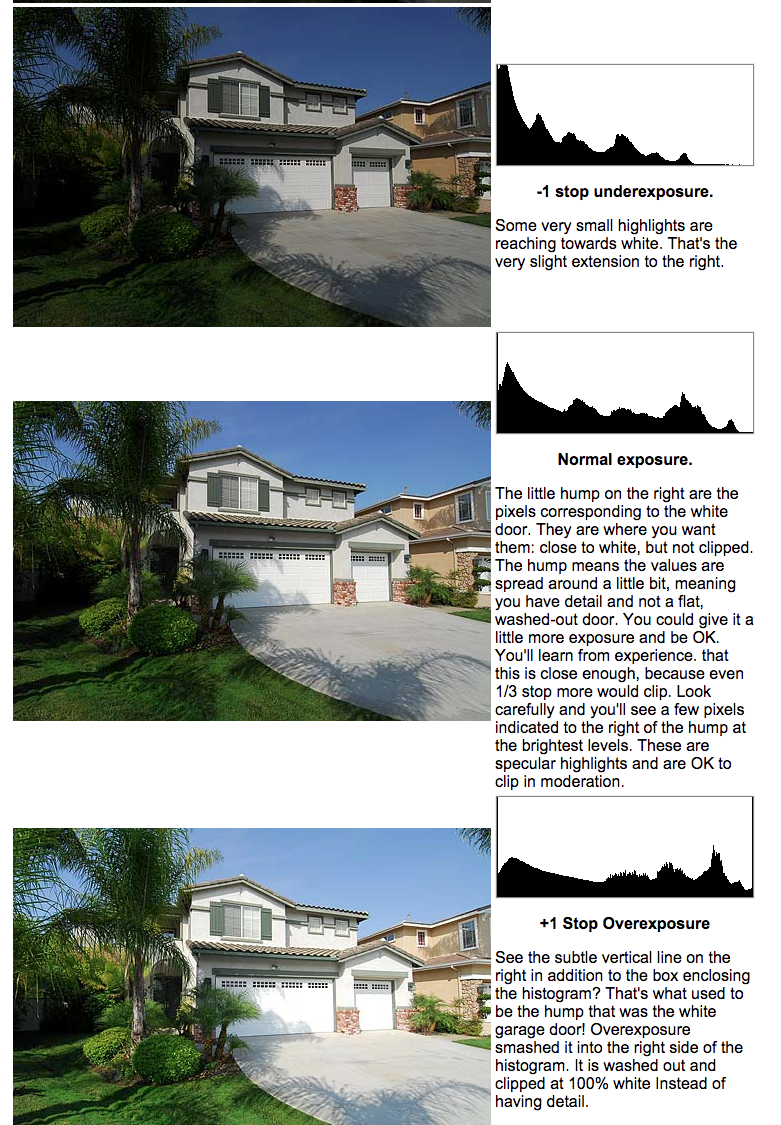
Step 5: Review the photo in the camera’s LCD viewer & check your histogram to see how you did. The key is to “keep it between the uprights”. You want to avoid overexposing your photo! As I explain below, it’s far better to under-expose a photo (easier to recover dark portions of the image). If your histogram is slammed up the right-hand side of your photo you’re overexposed.
Some good news: your camera is using a JPEG image to produce the histogram. Back home when processing in PhotoShop or Lightroom, you’ll be using the RAW file and will have 1.5 stops of additional dynamic range to the right. Rule of thumb…once your in-camera histogram starts to bump up on the right, you can still turn up the exposure 1.5 stops without harm. If your histogram is showing an area bumped up on the area to the left (portions too dark) you can increase the exposure accordingly.
Step 5: Also check your over exposure warning indicator. If it’s not yet turned on…turn it on!!! Any overexposed areas of your photo will flash white or black. This is a great way to make sure no smaller important areas of your photo are overcooked. Works great for shots of the moon!
Once you’ve managed to get your photo properly exposed you can then tweak in Lightroom/Photoshop. See example below. I’ve used Lightroom’s selective adjustment brushes to make local adjustments to the image.
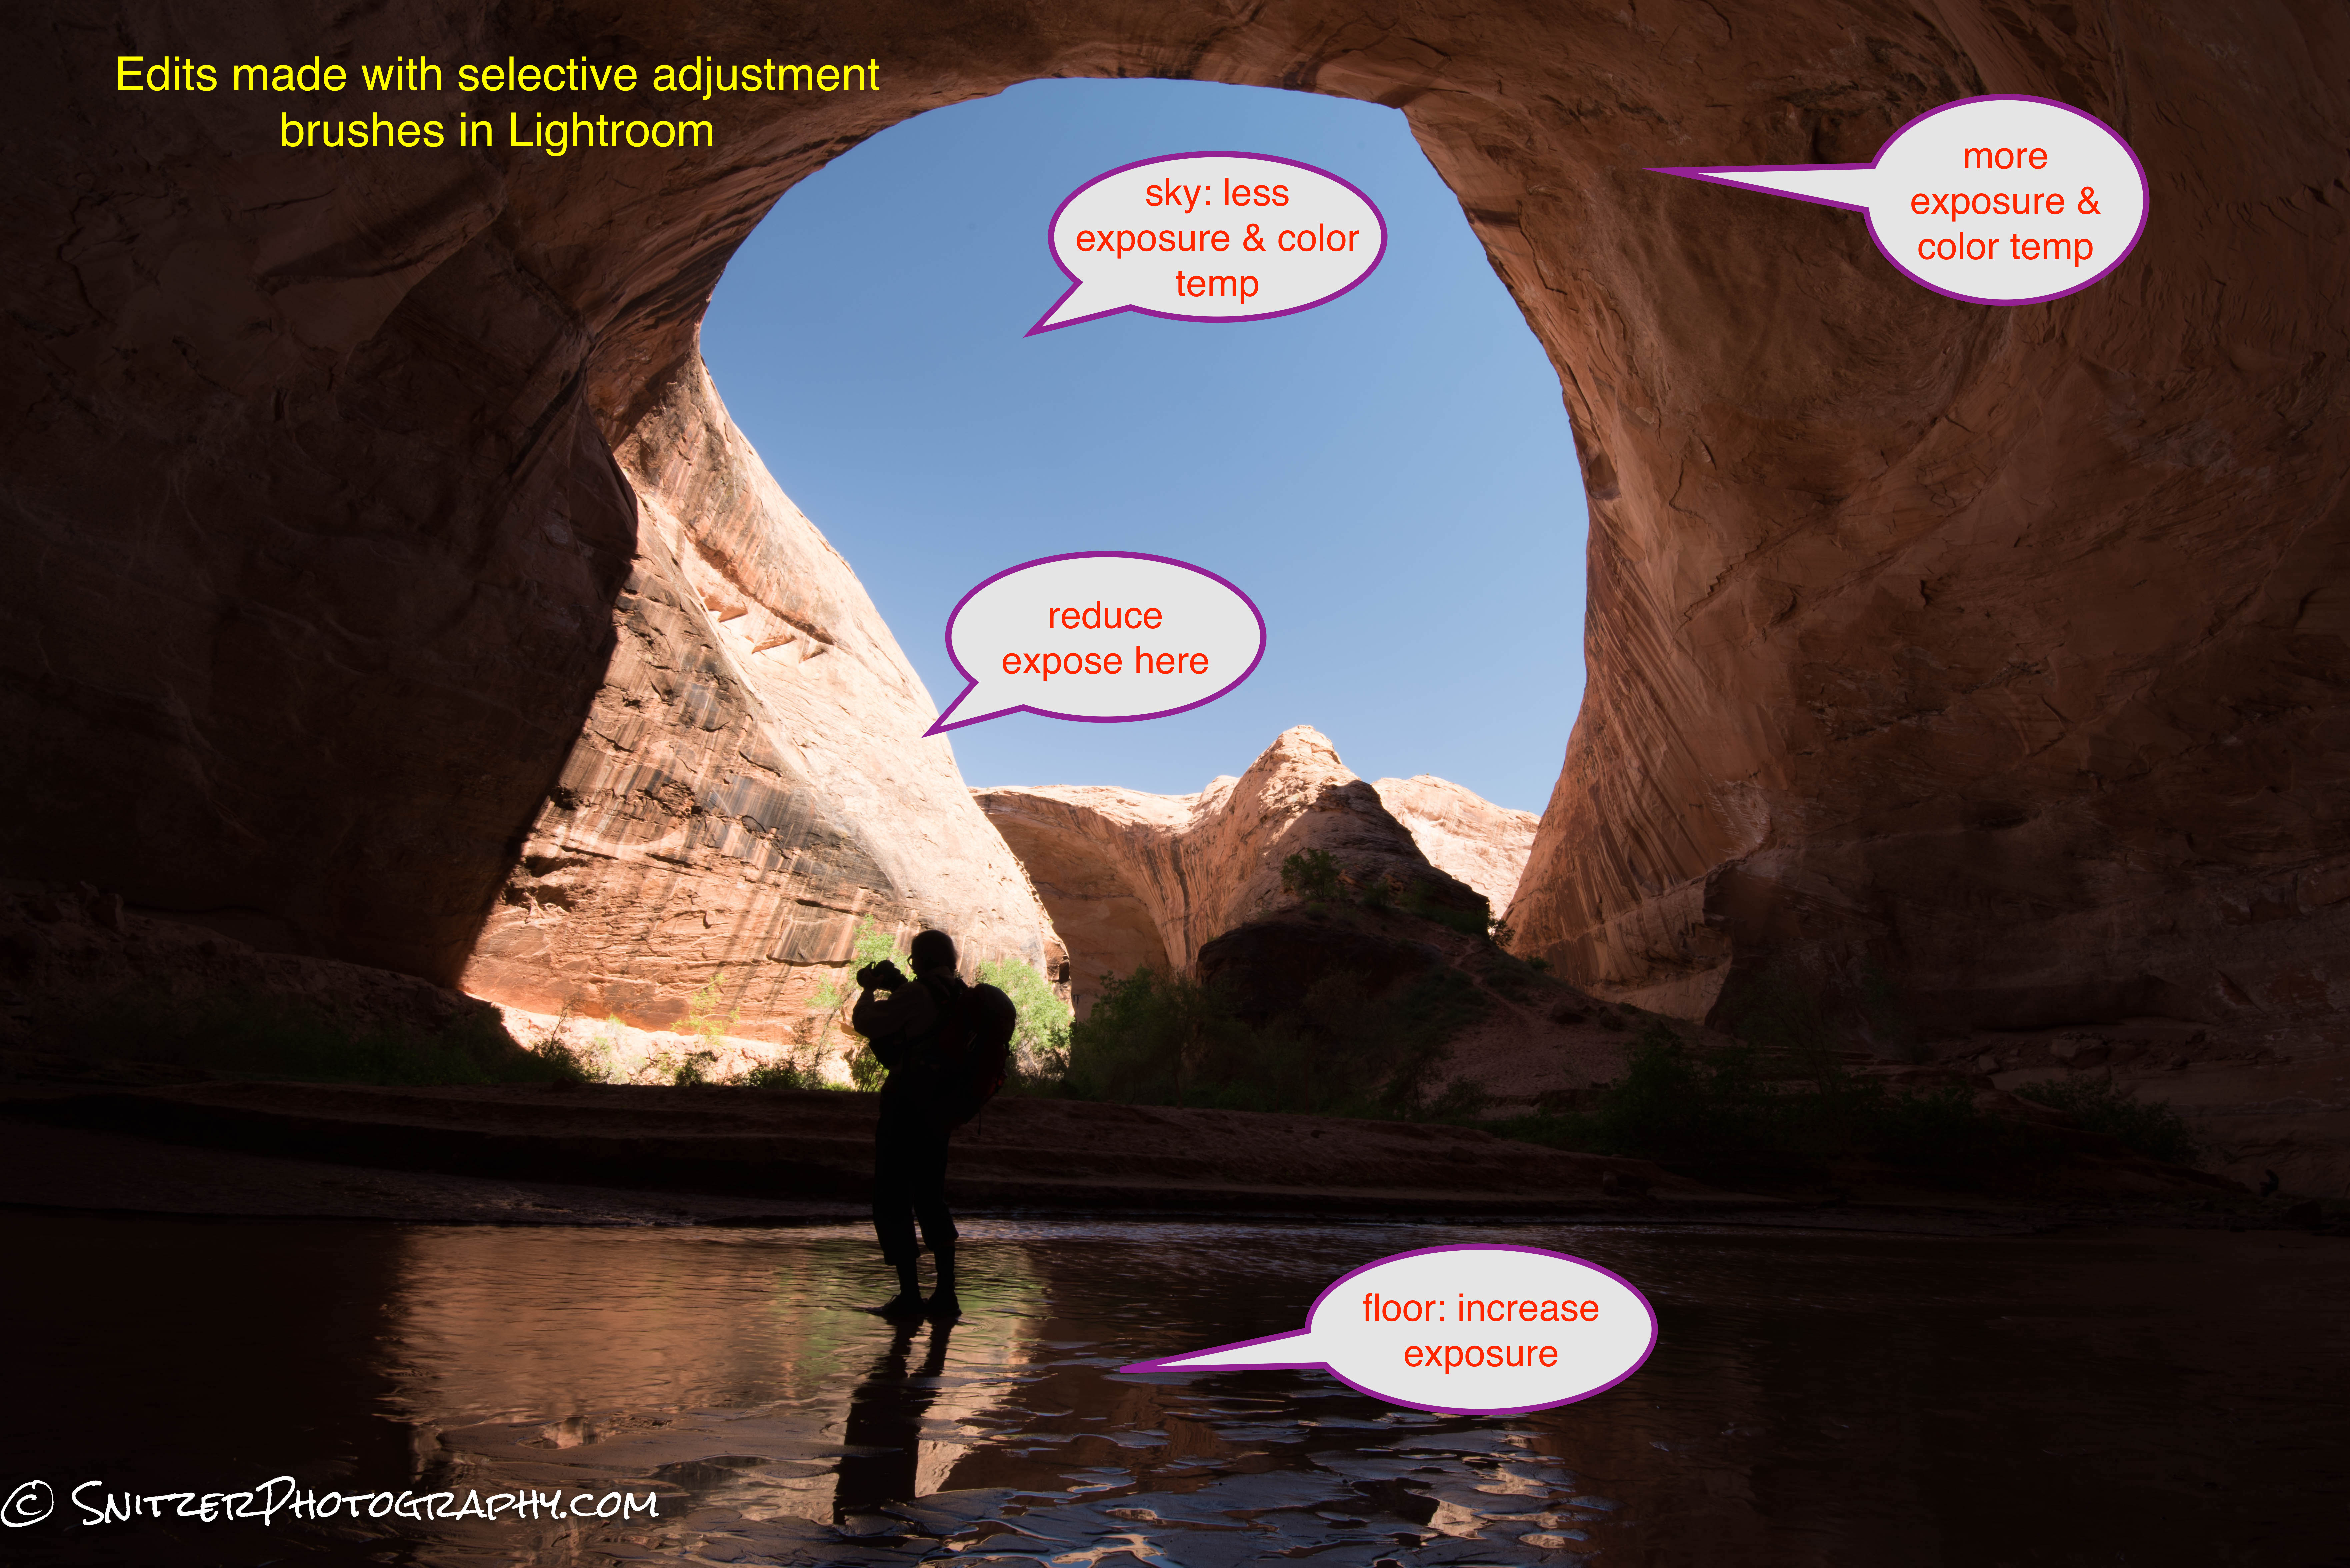
Orig image. Properly exposed but needs adjustment.
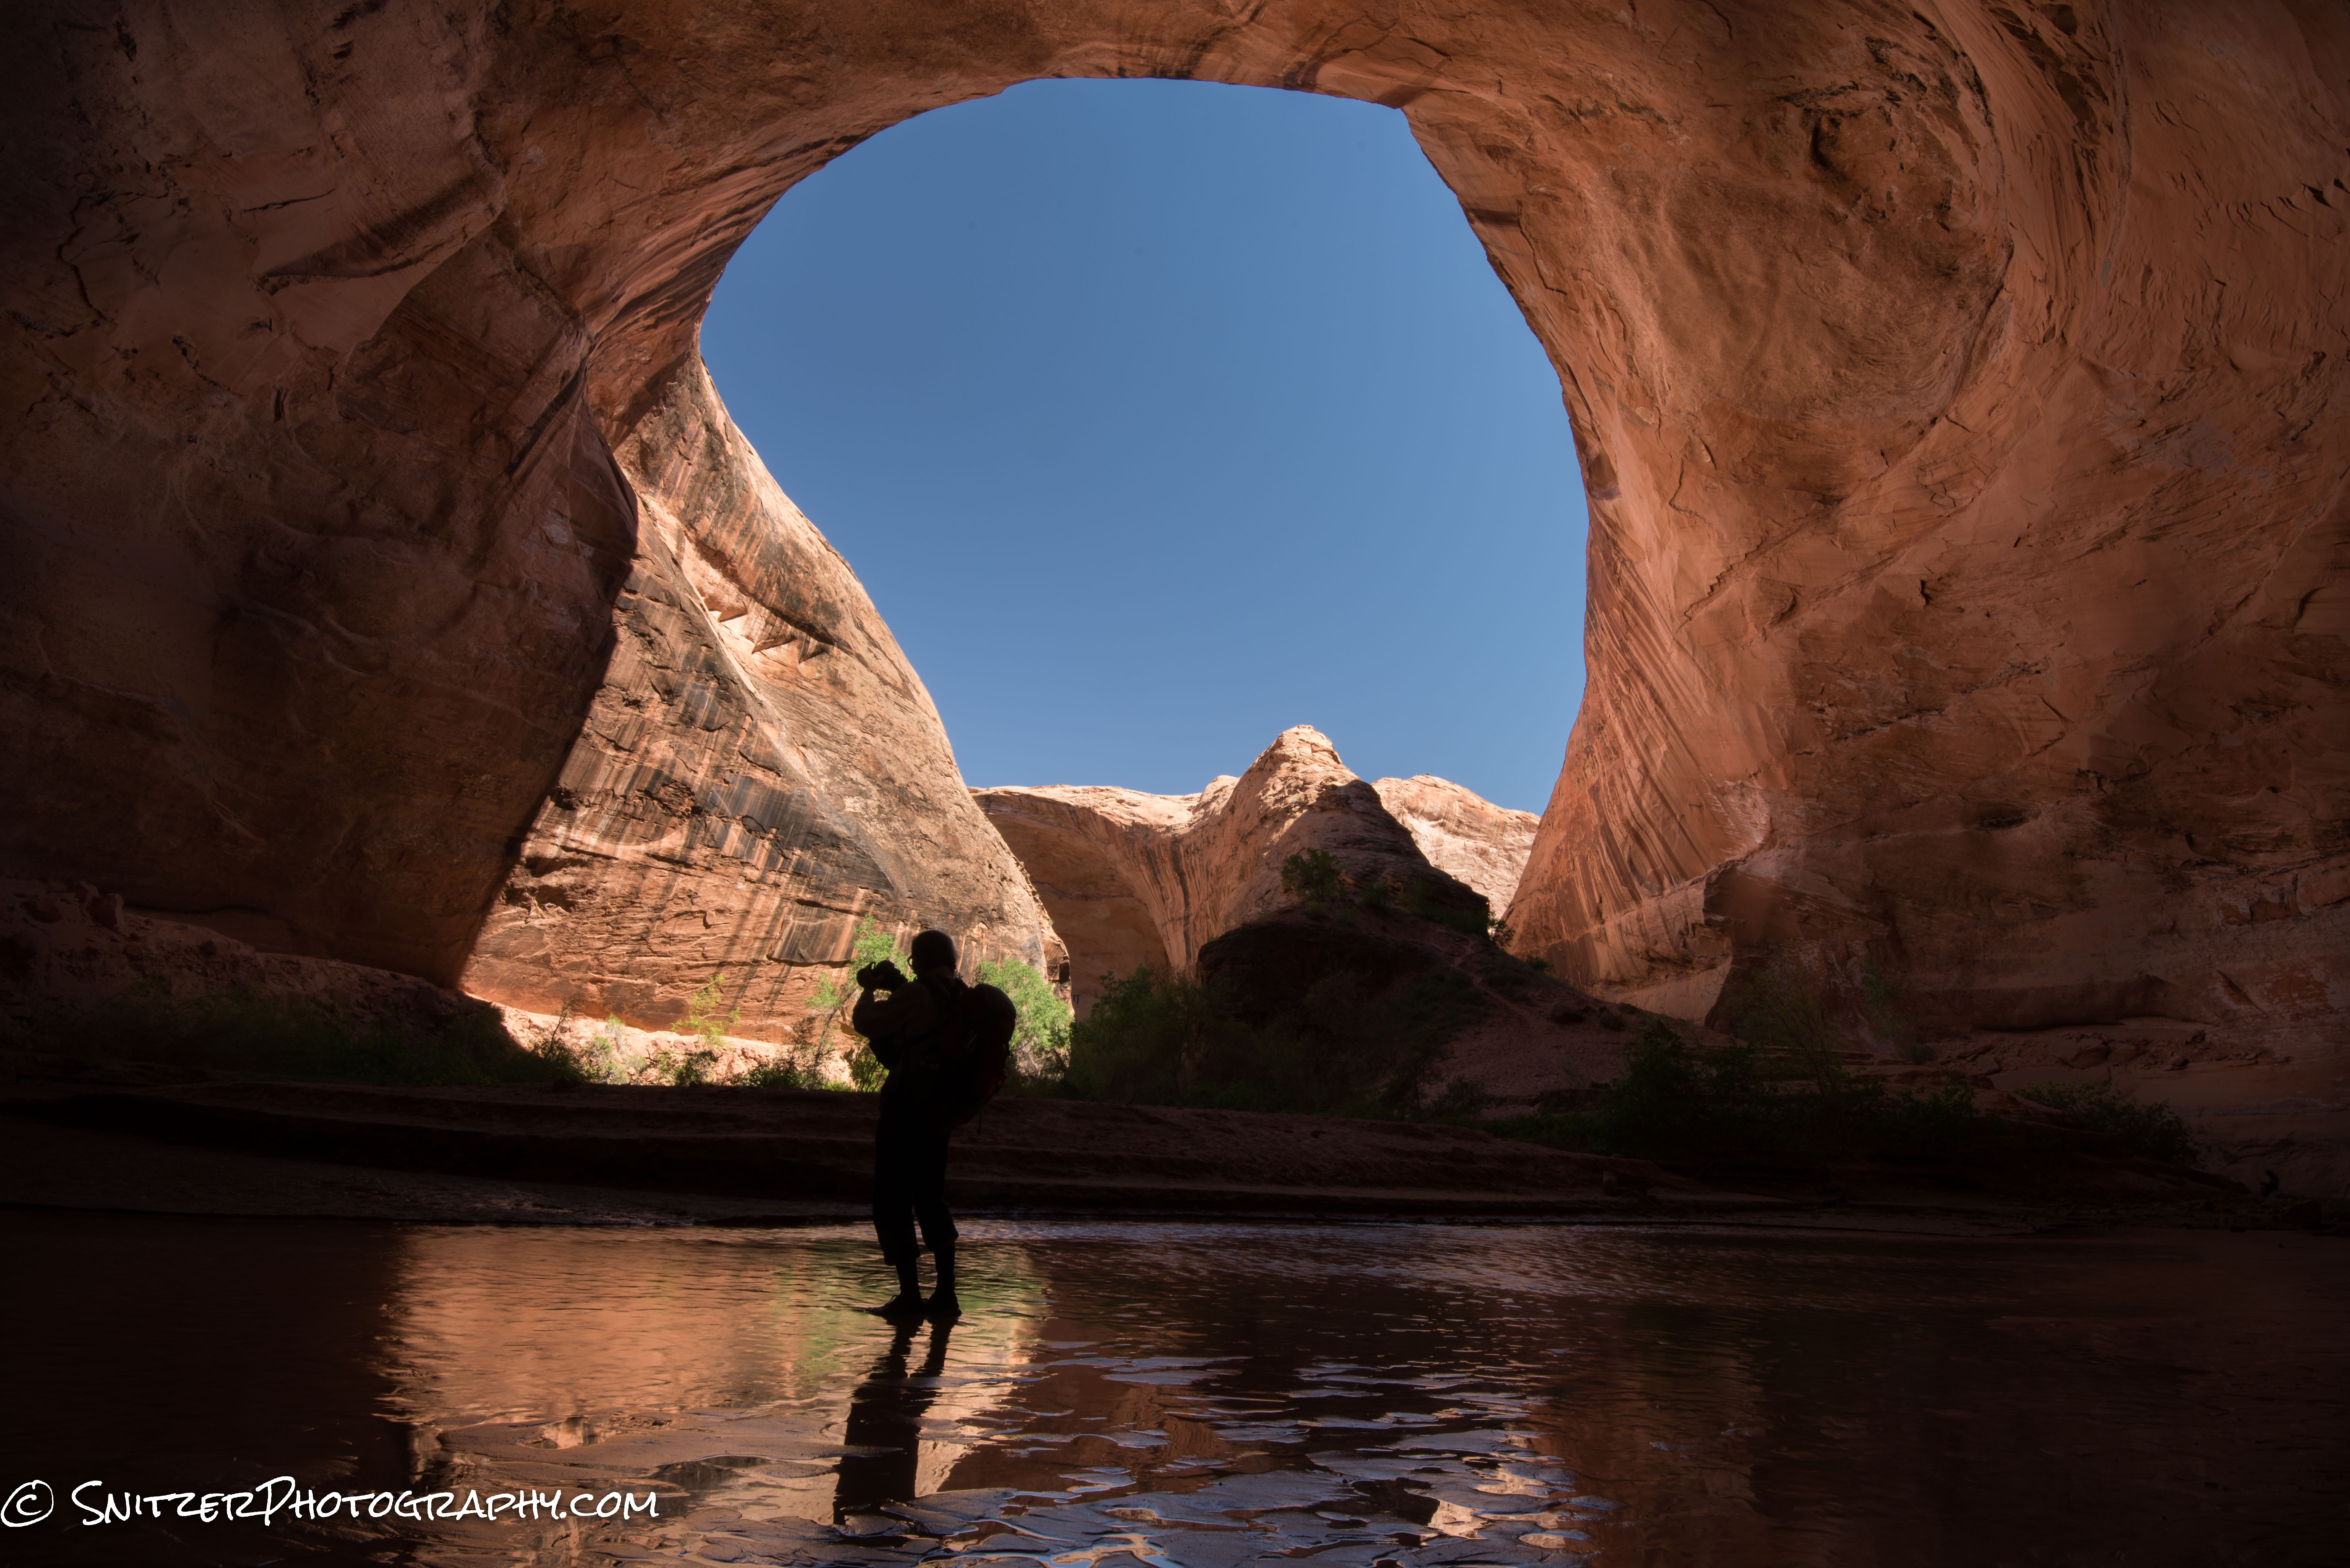
Tweaked image
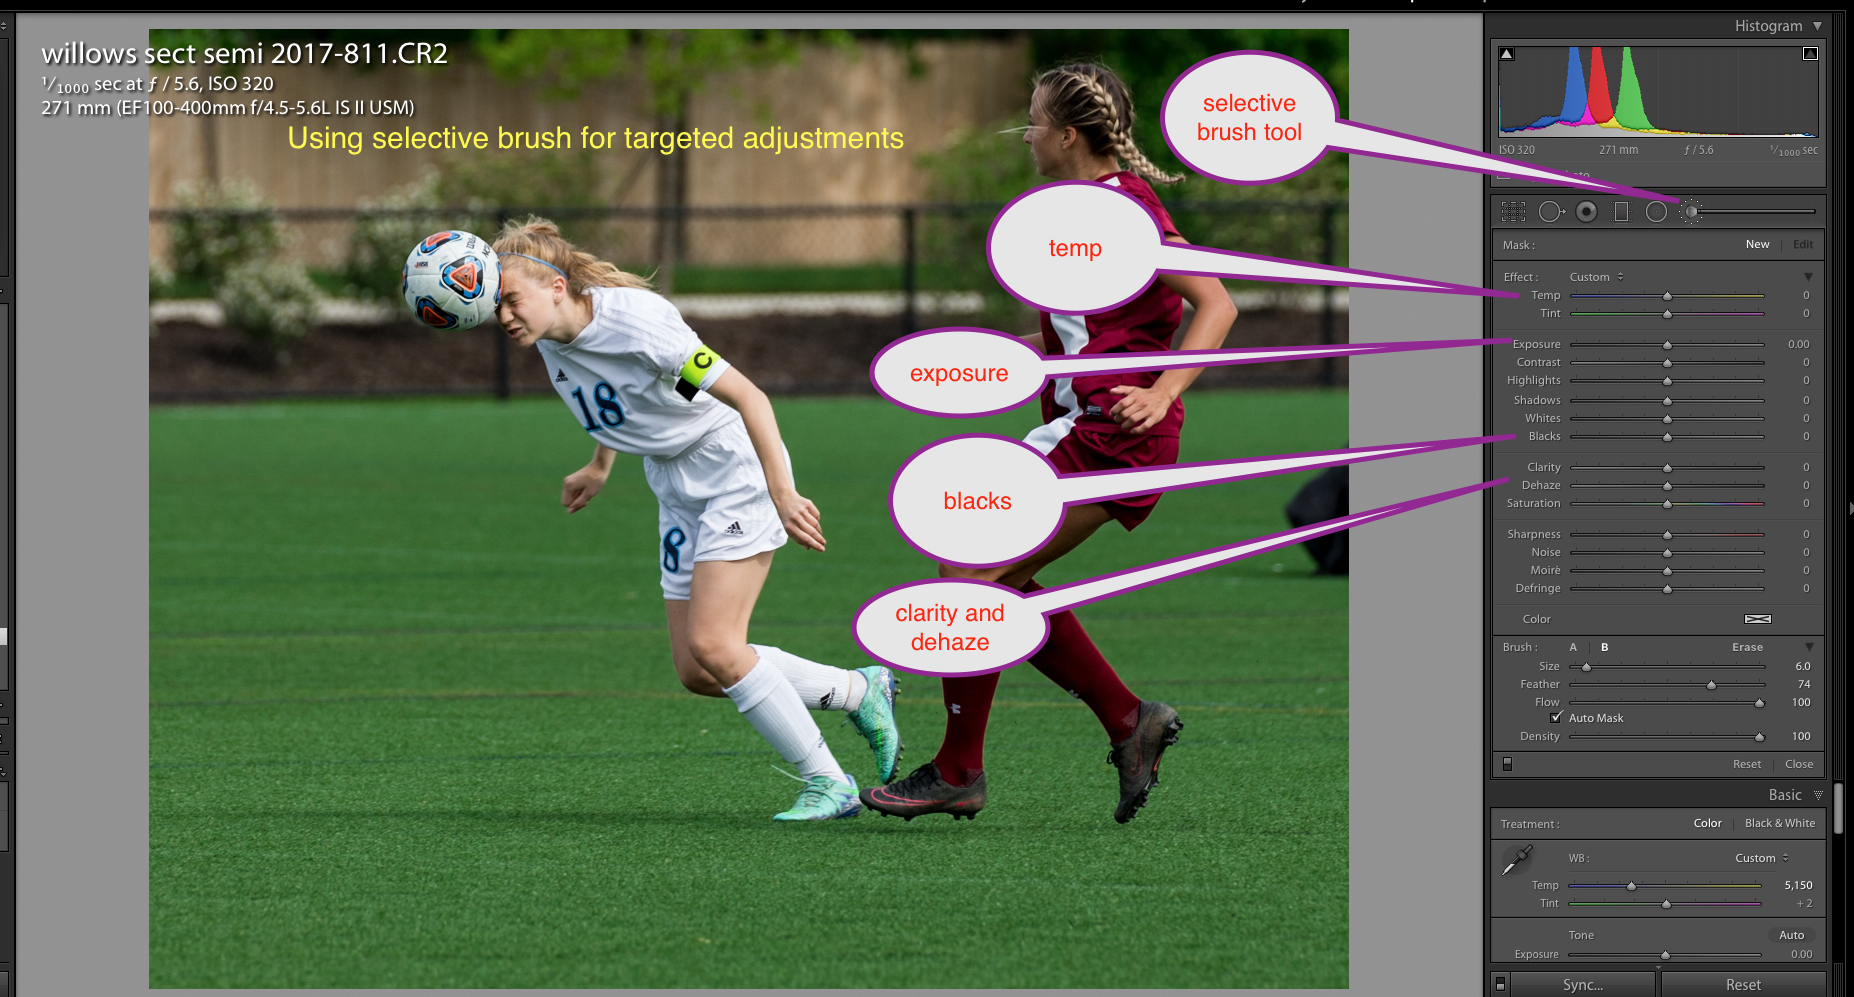
Below is shown the location on the Lightroom Adjustment Brush panel of the attributes I changed:
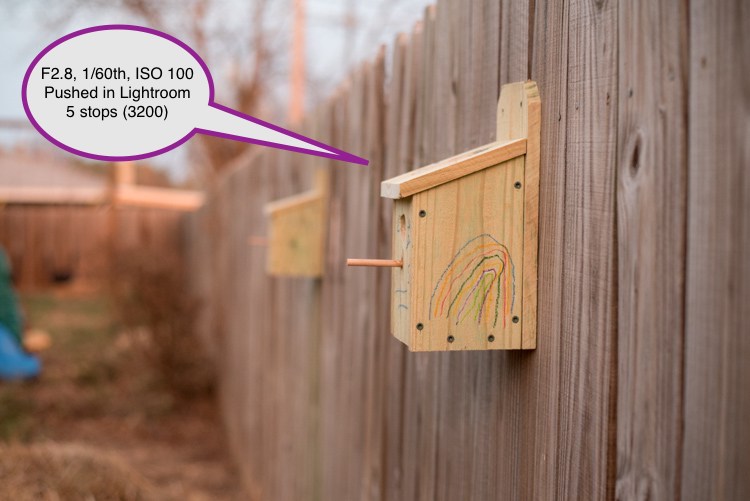
As I mentioned, anything over exposed by more than one stop is basically unrecoverable white mush. The same isn’t true for under exposing as the example below illustrates.
The first photo is properly exposed using an ISO of 3200.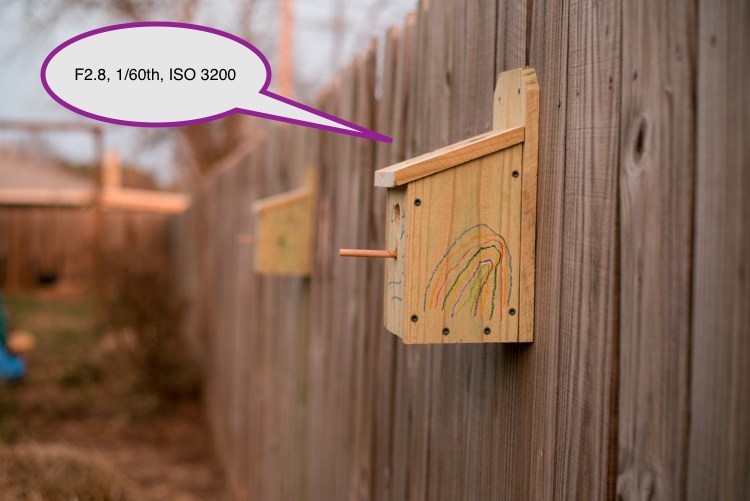
Let’s take the same photo, 5 stops under what the meter recommends (ISO 100).
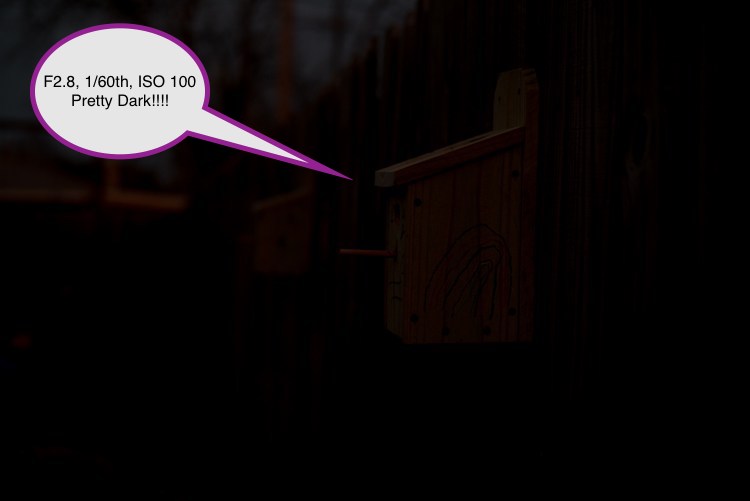
Amazing. After turning up the exposure slider in Photoshop…the photo looks great. With newer camera’s we can recover 5 or more stops! Even older DSLRs can recover 2-3 stops. Always better to under expose than overdo it.