There’s a revolution underway allowing cameras to record the world as we see it with expanded dynamic range.
So what is dynamic range (DR) anyway? DR refers to the variation of light and dark values in a photograph. The wider the range, the bigger the objective difference between darkest and brightest areas of your image.
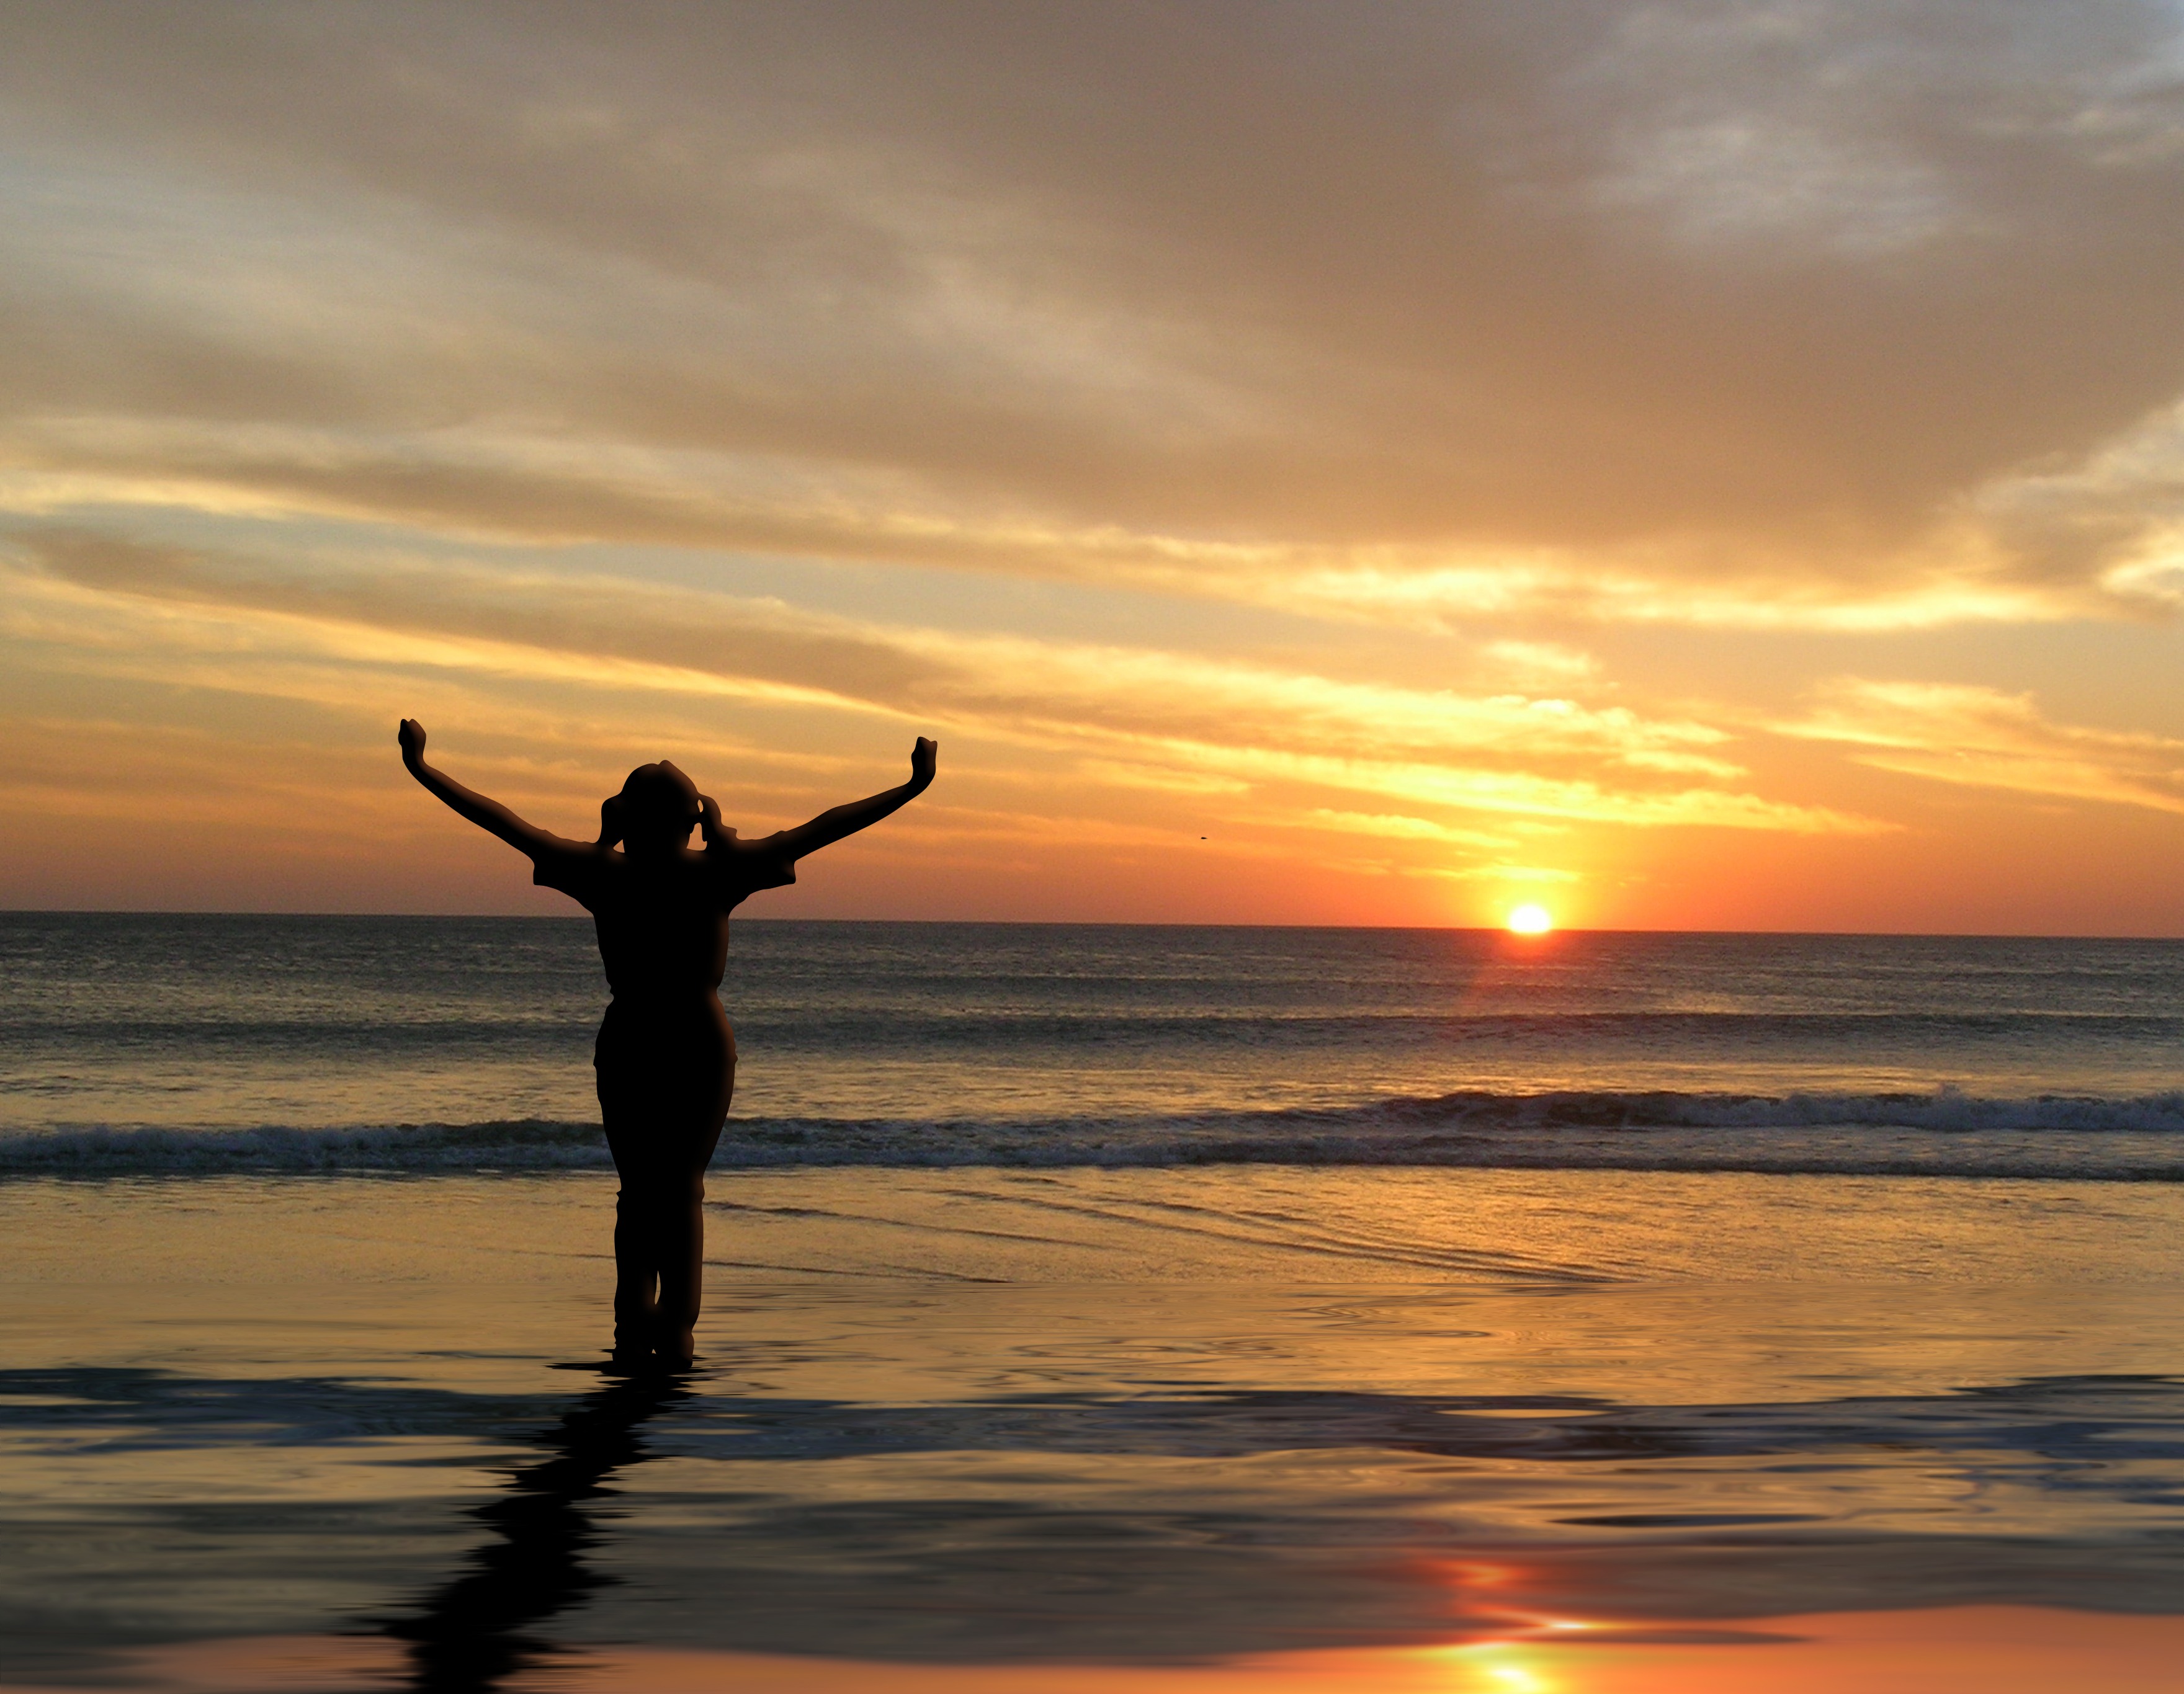
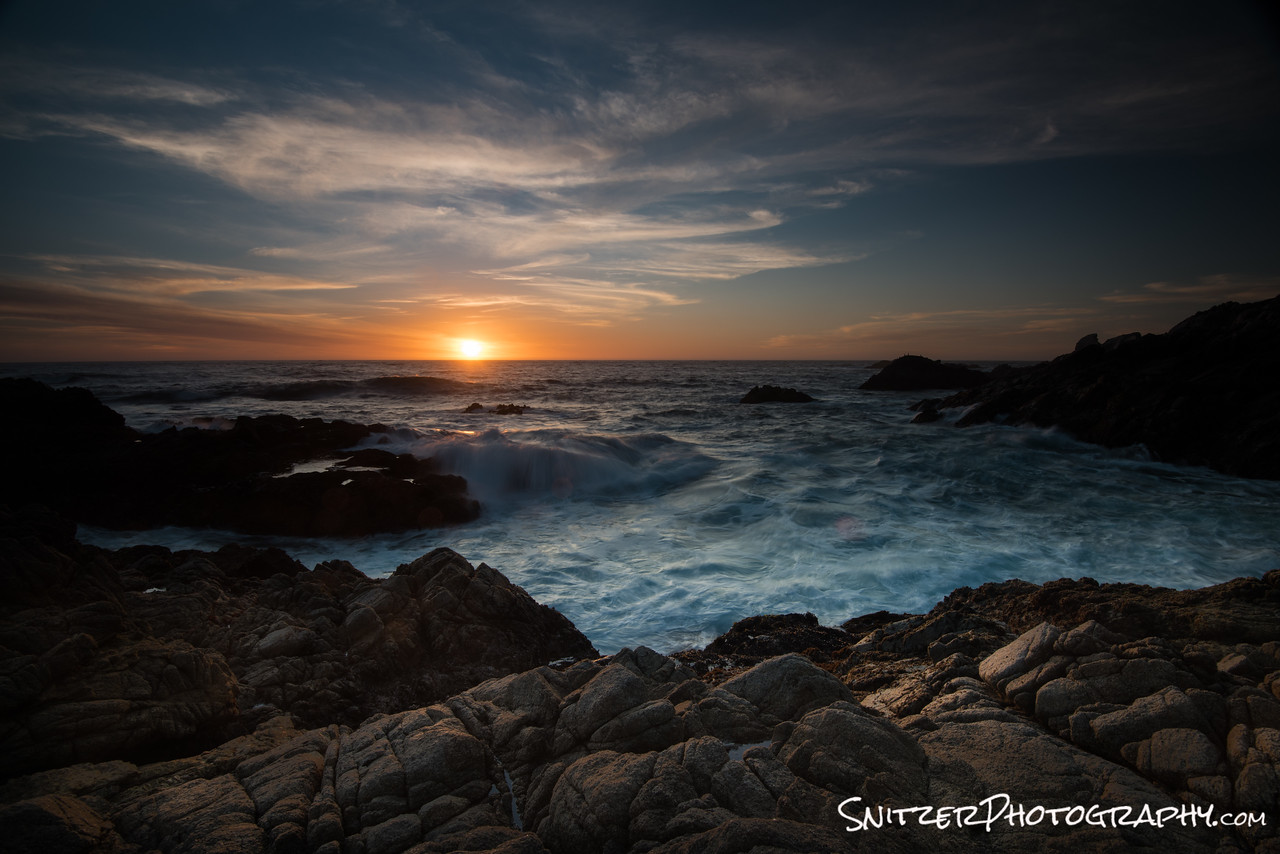
- While you can easily see people’s features at a beach sunset, until recently, most cameras couldn’t. Shots like the one below have been the norm, rendering the subjects features in silhouette.

You can see your friends on the beach; your camera can’t.
You have great eye sight!!! Most people can resolve between 18-20 stops of light. A huge “Dynamic Range”.
- We can typically see two objects; where one is up to 500,000 times brighter (each F-Stop a doubling of light).
- This remarkable range involves three components: 1. your optic nerve, 2. The ability of your eye to rapidly change aperture/field of view and 3. the brain’s internal HDR processing. Even if your optic nerve can’t resolve an image, the brain will often render it perfectly based on previous experience with similar objects.
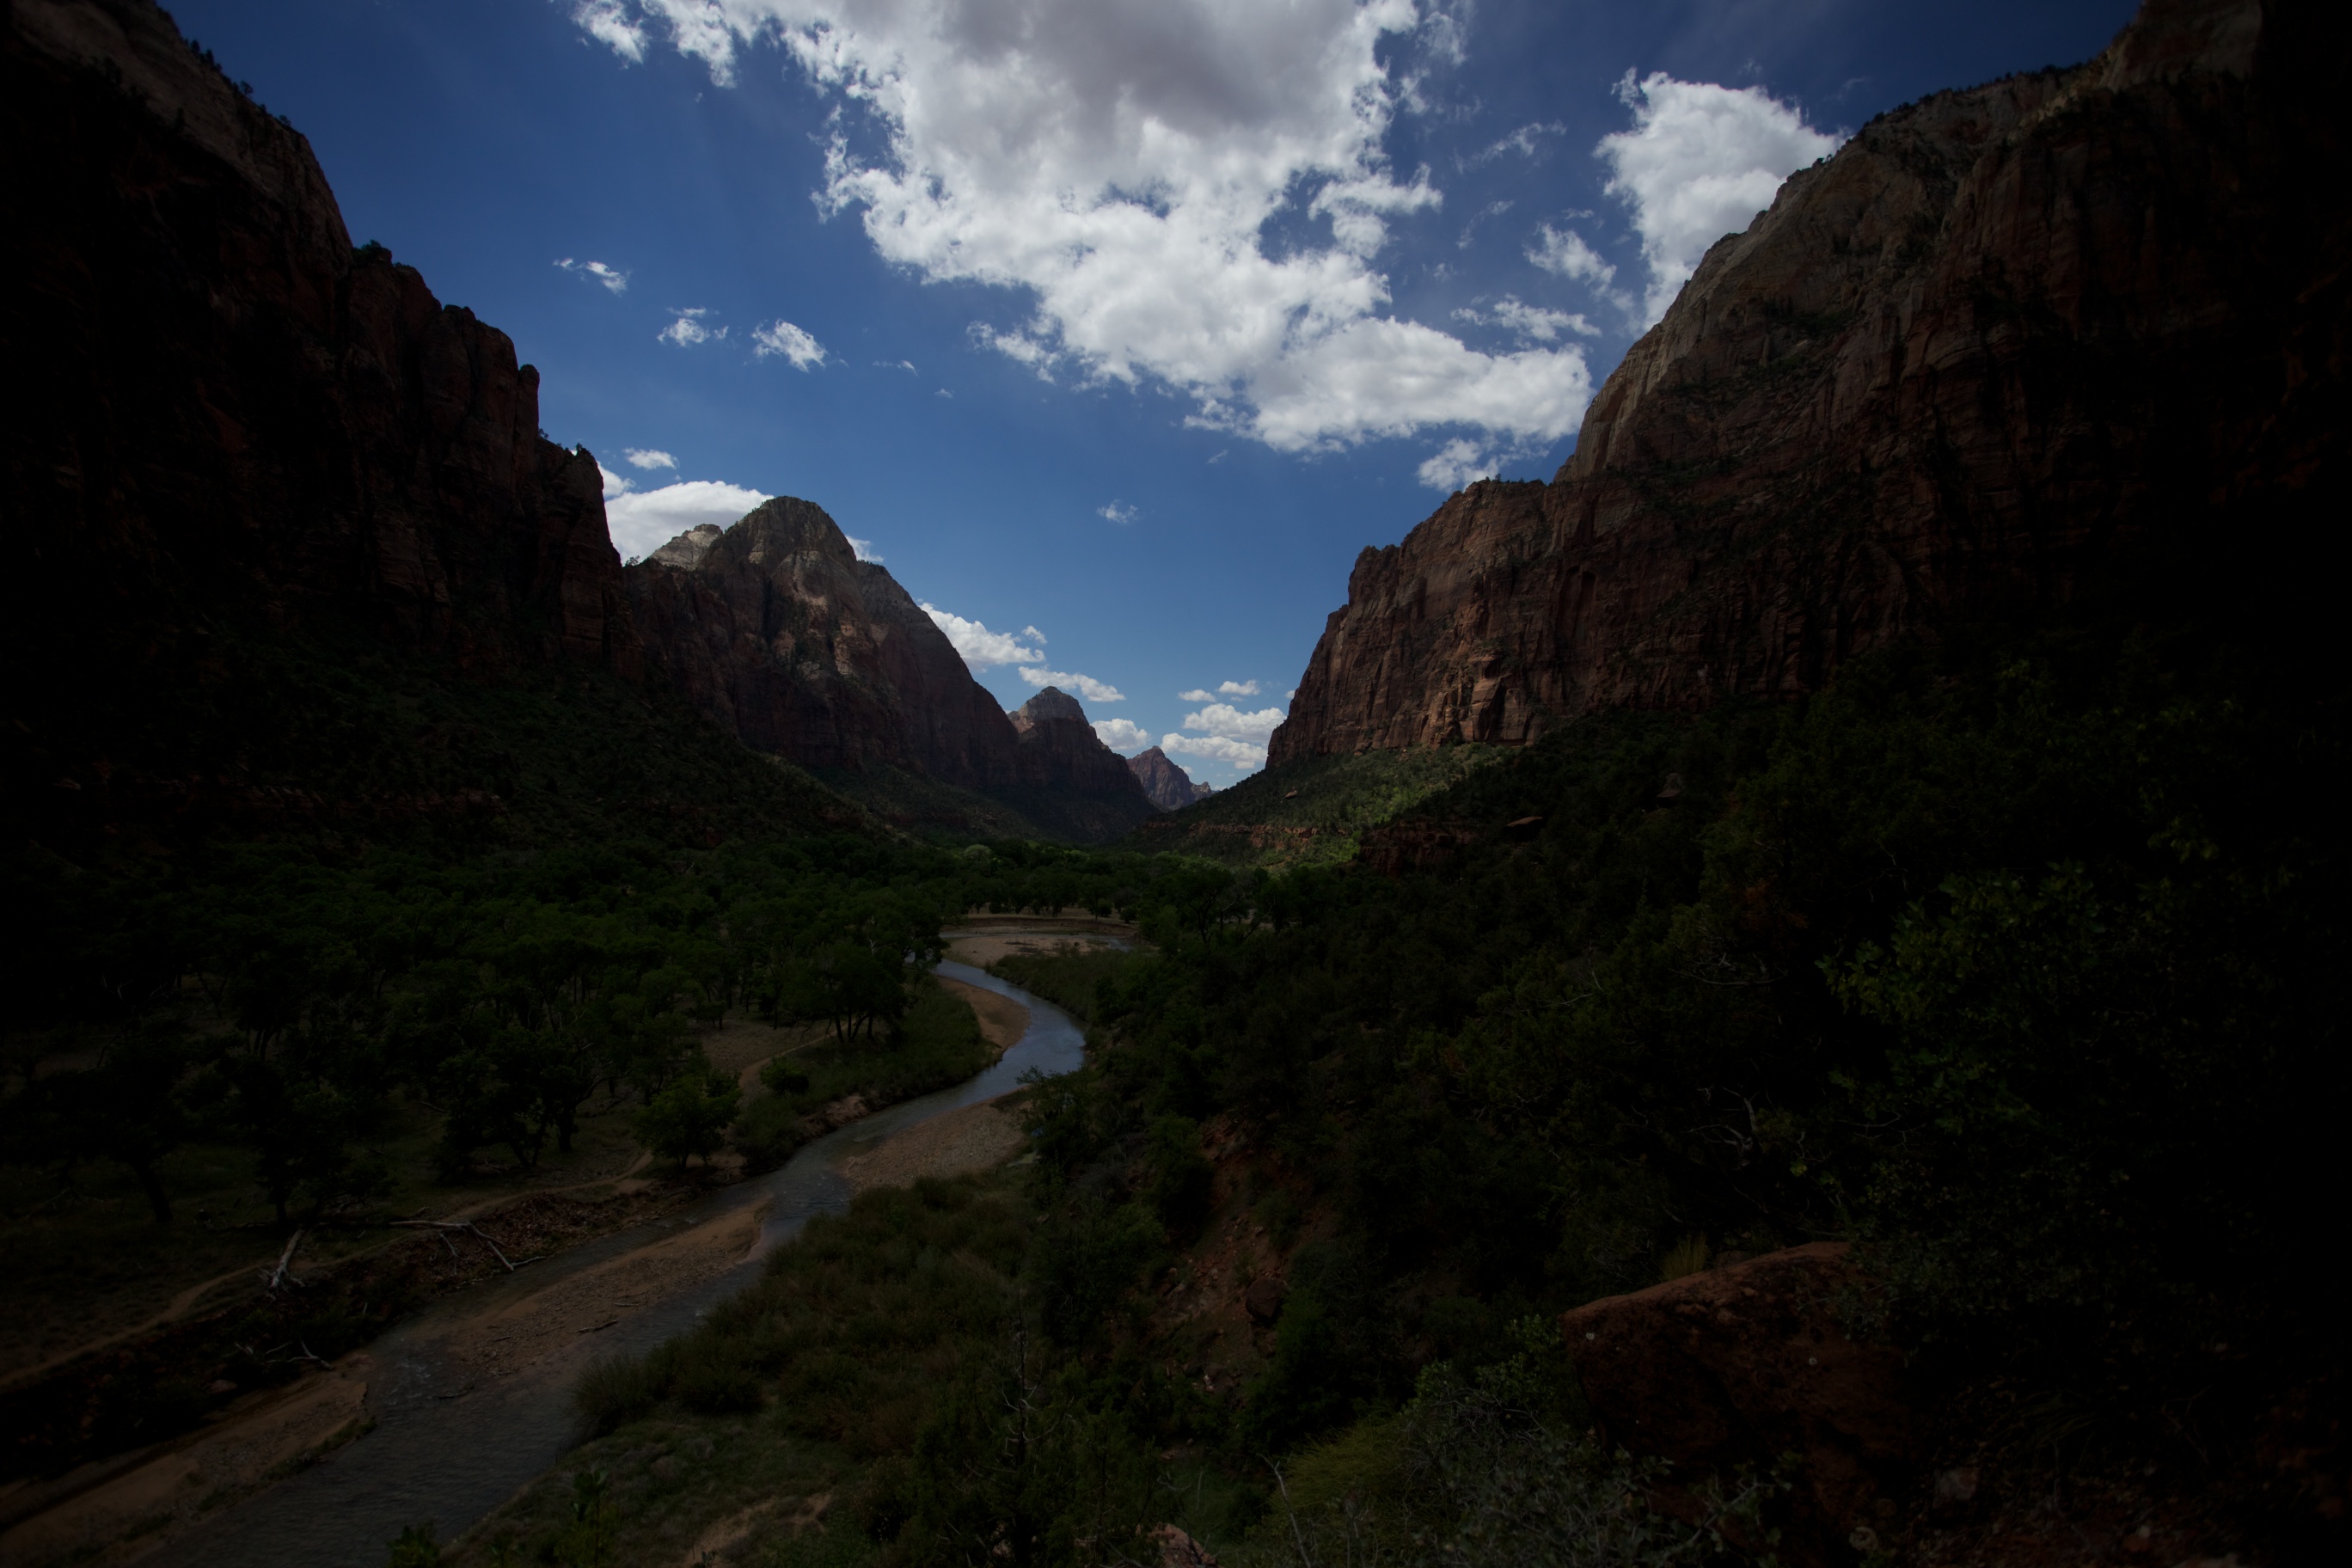
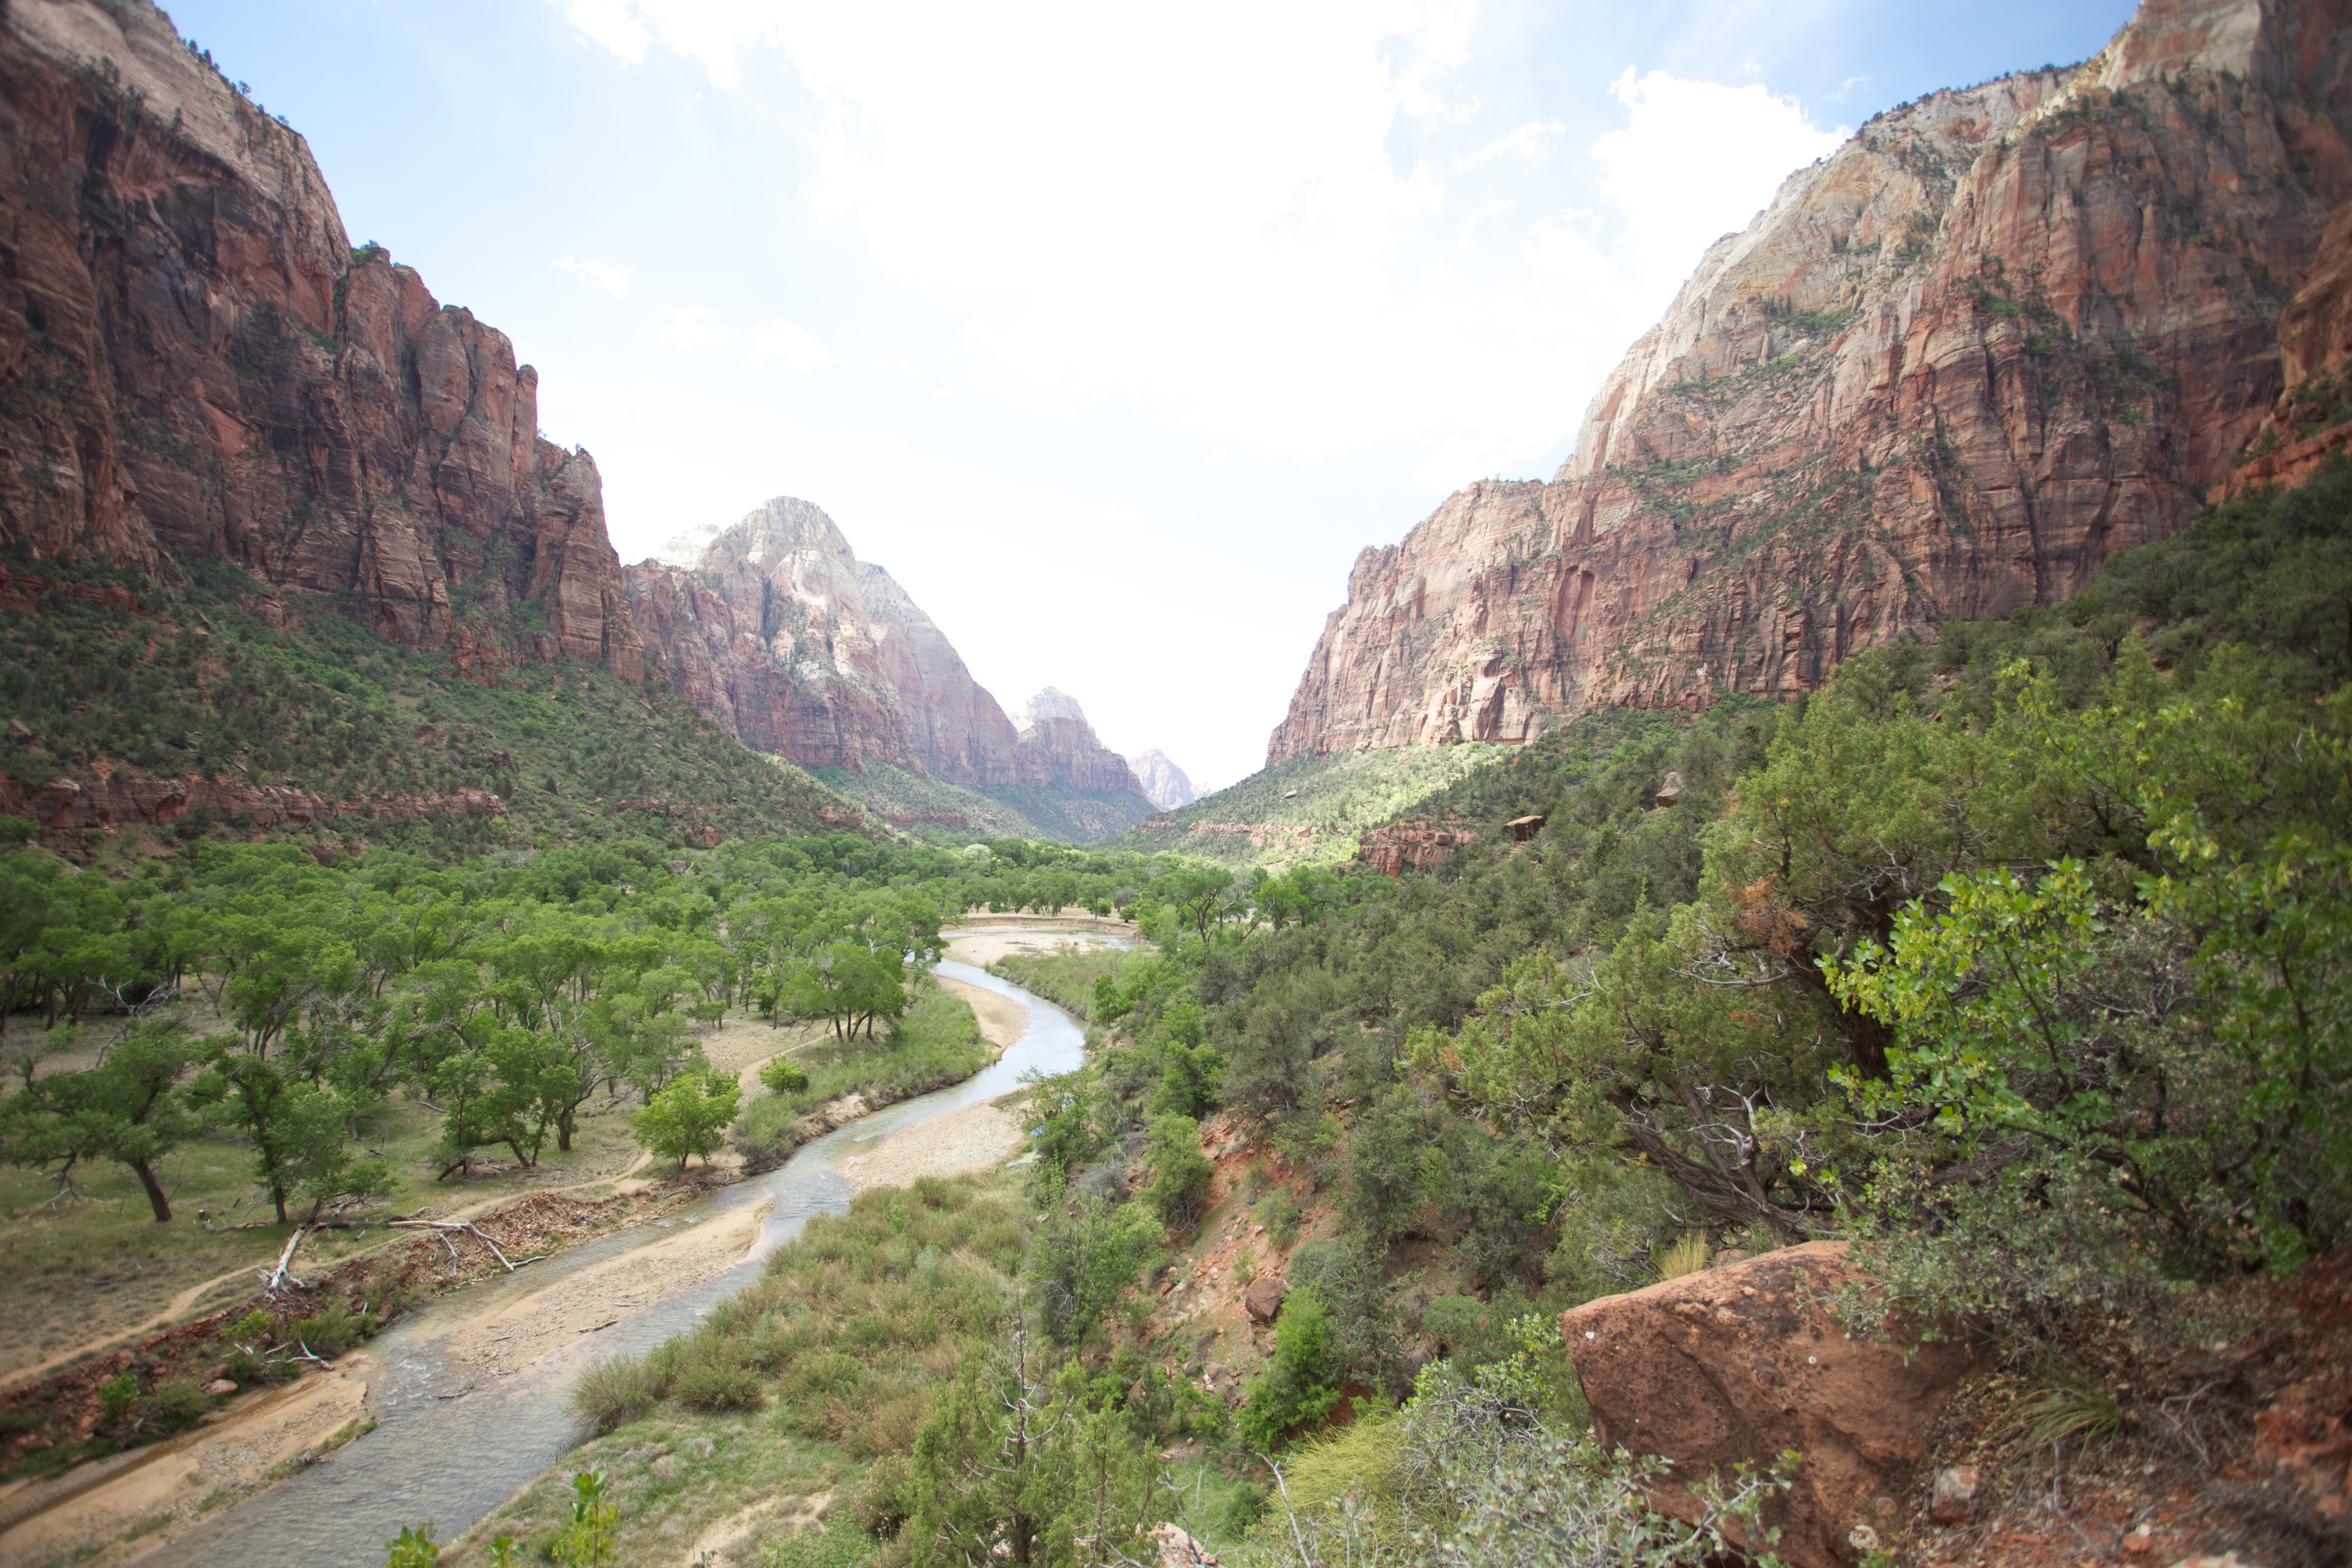
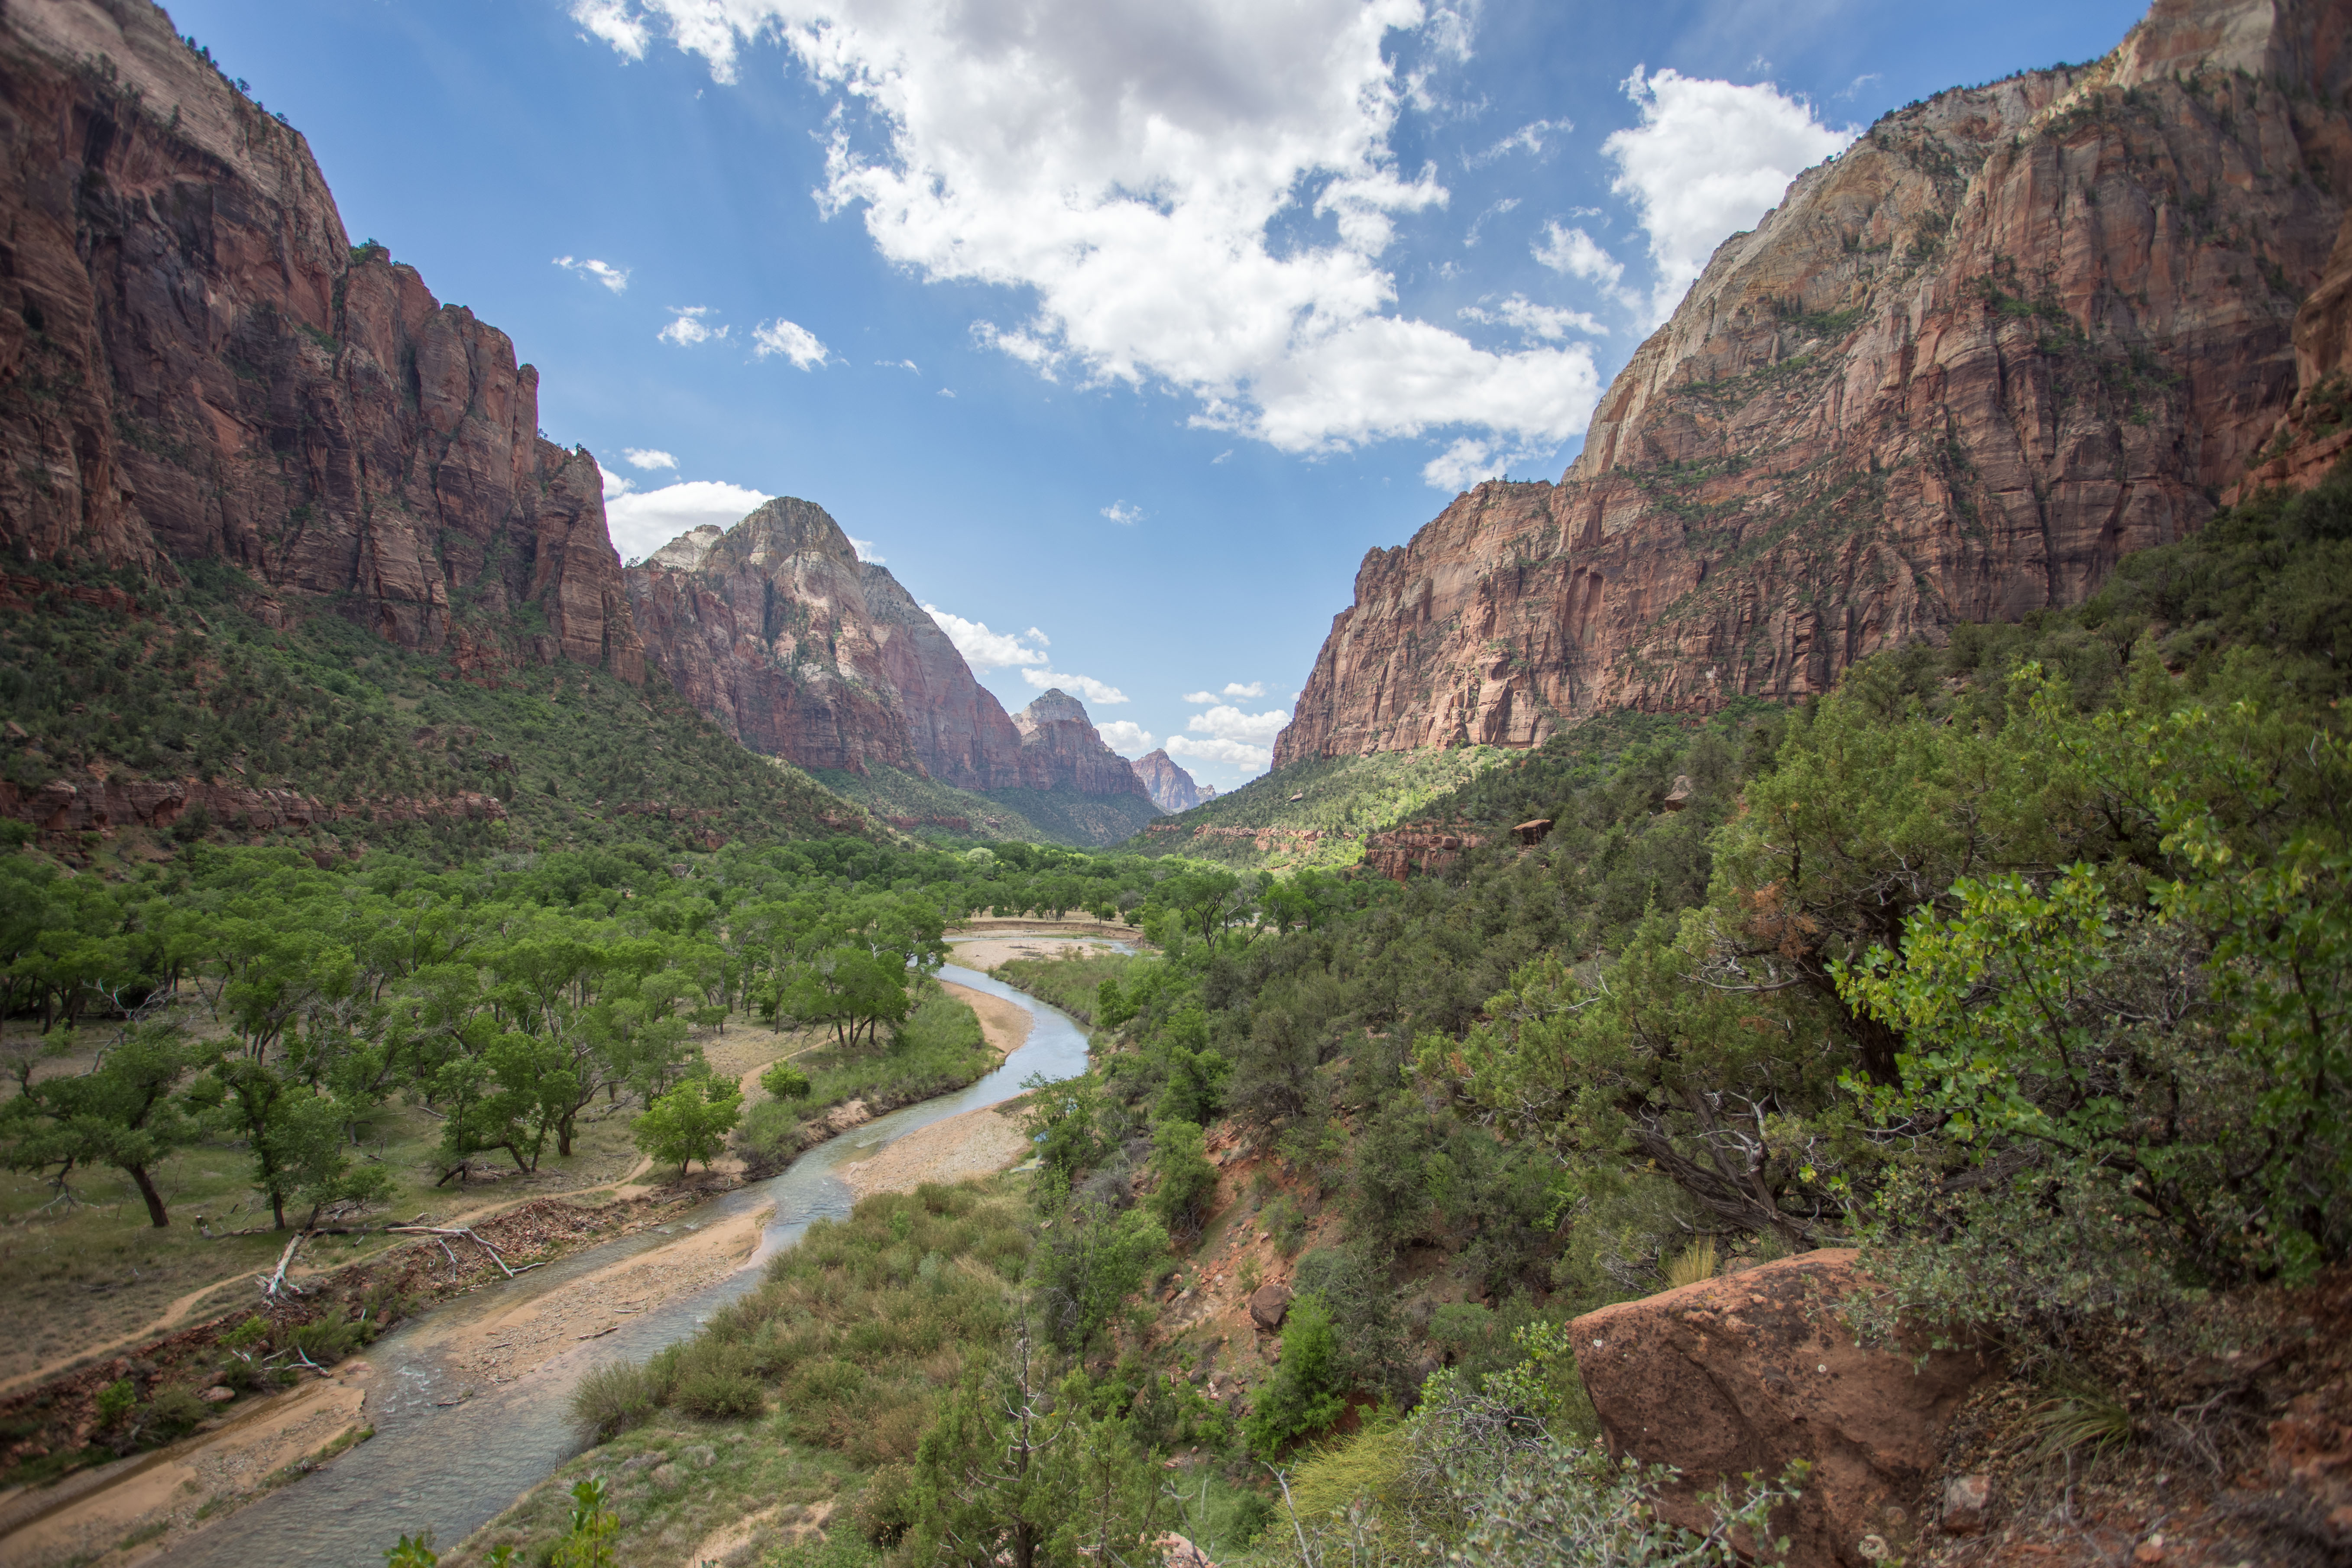
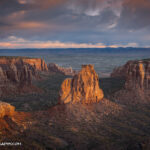
- The three photos below, taken at Zion National Park, illustrate how cameras often struggle to provide enough dynamic range to render an entire scene properly. The underexposed photo renders a perfect sky, but little else. Overexposing, in subsequently photos, provide the needed foreground detail, but sadly leaves the sky “blown out”. Our 2009 circa Canon 7D is unable to render all of the 14-15 stops of light required to resolve the image properly.

This photo is 2 stops underexposed rendering a perfect ski

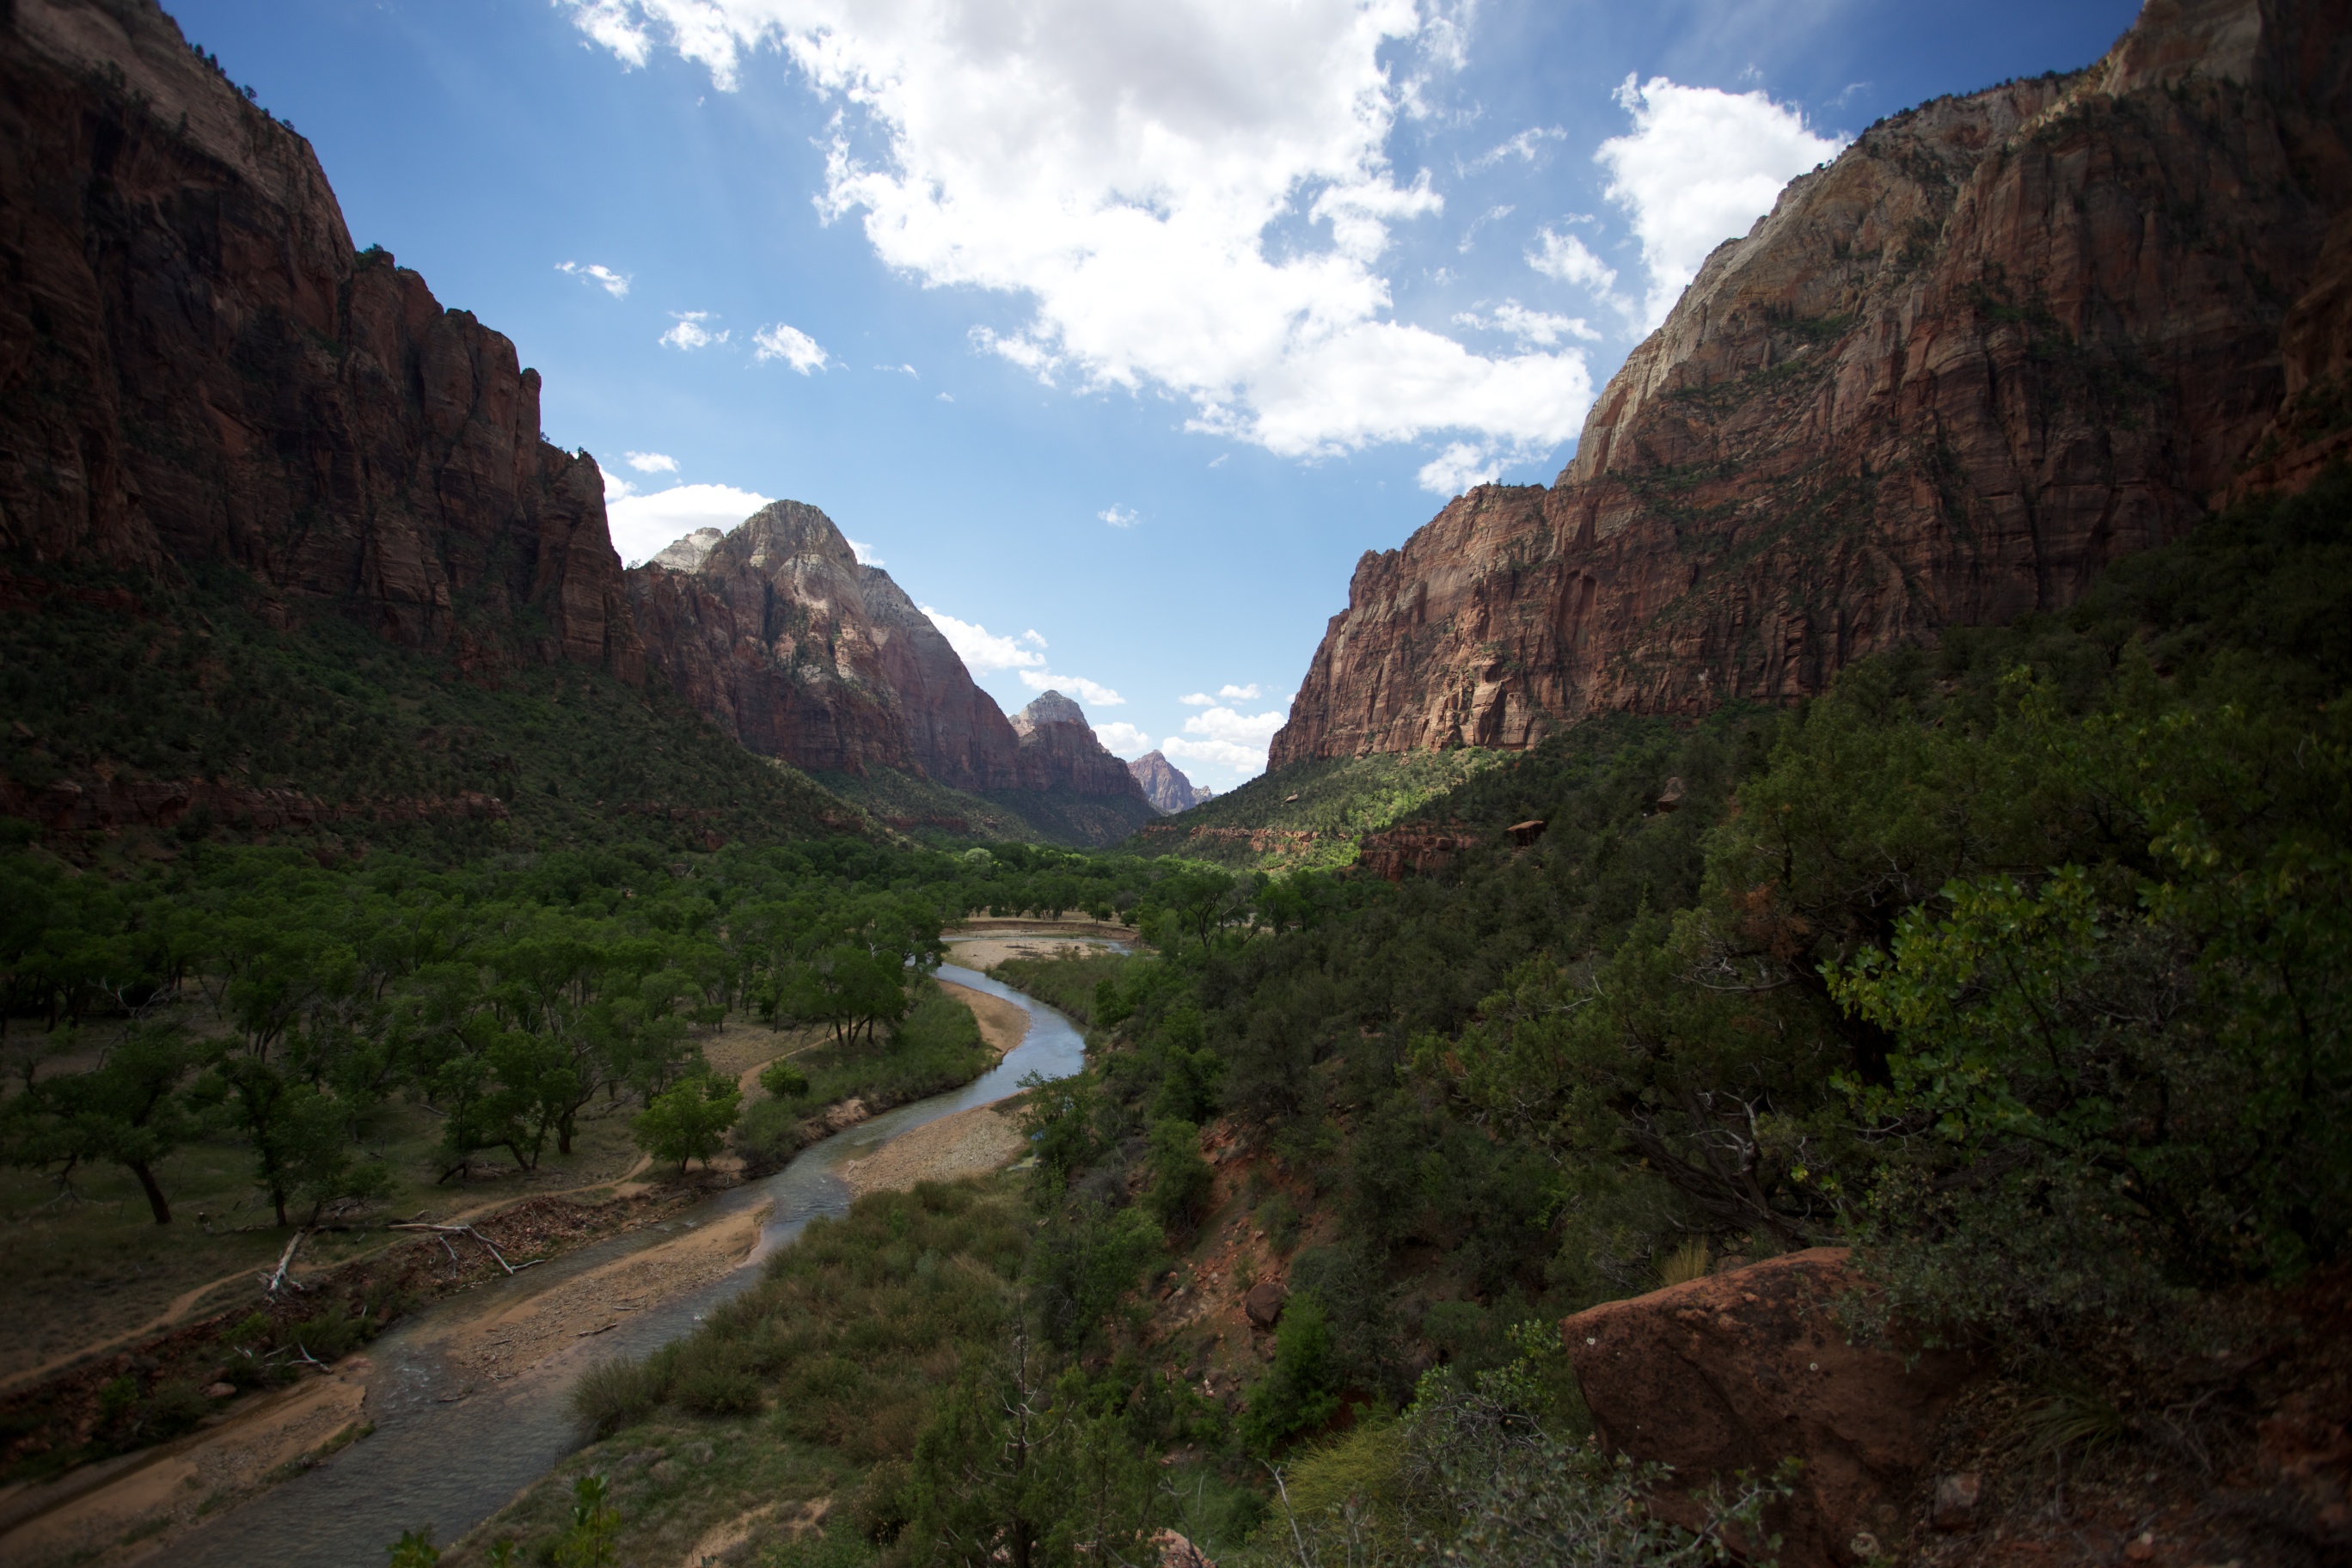
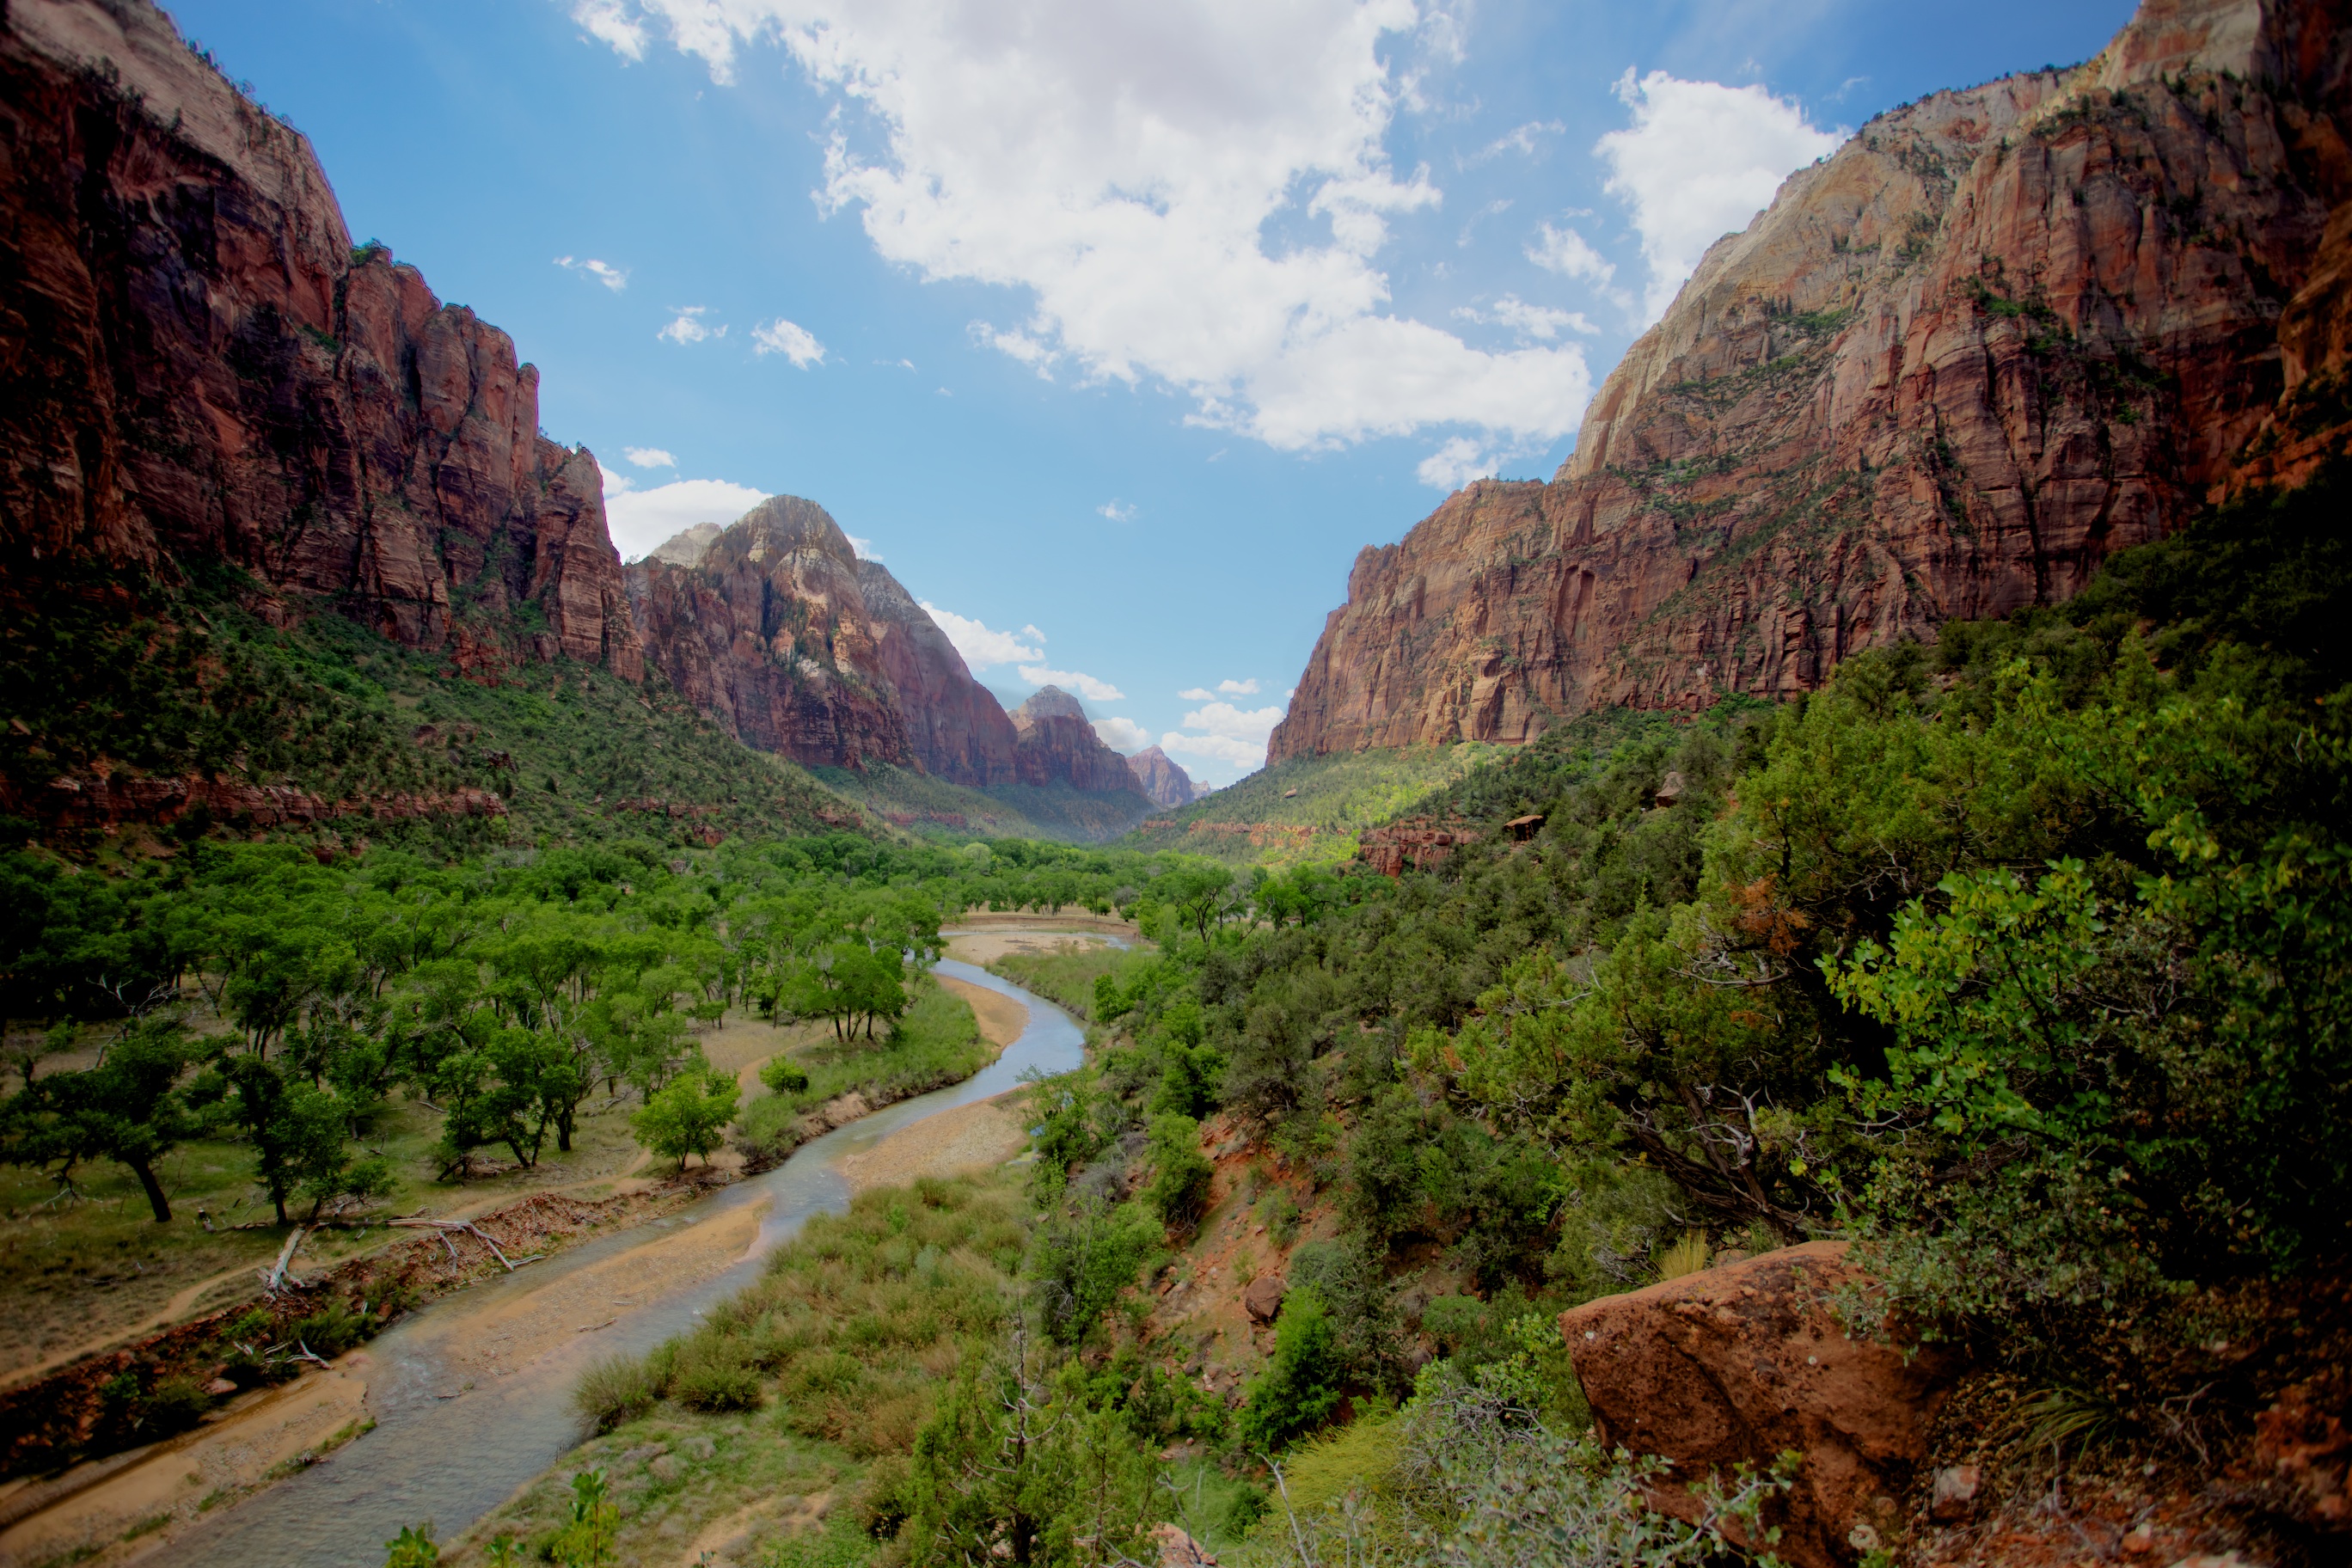
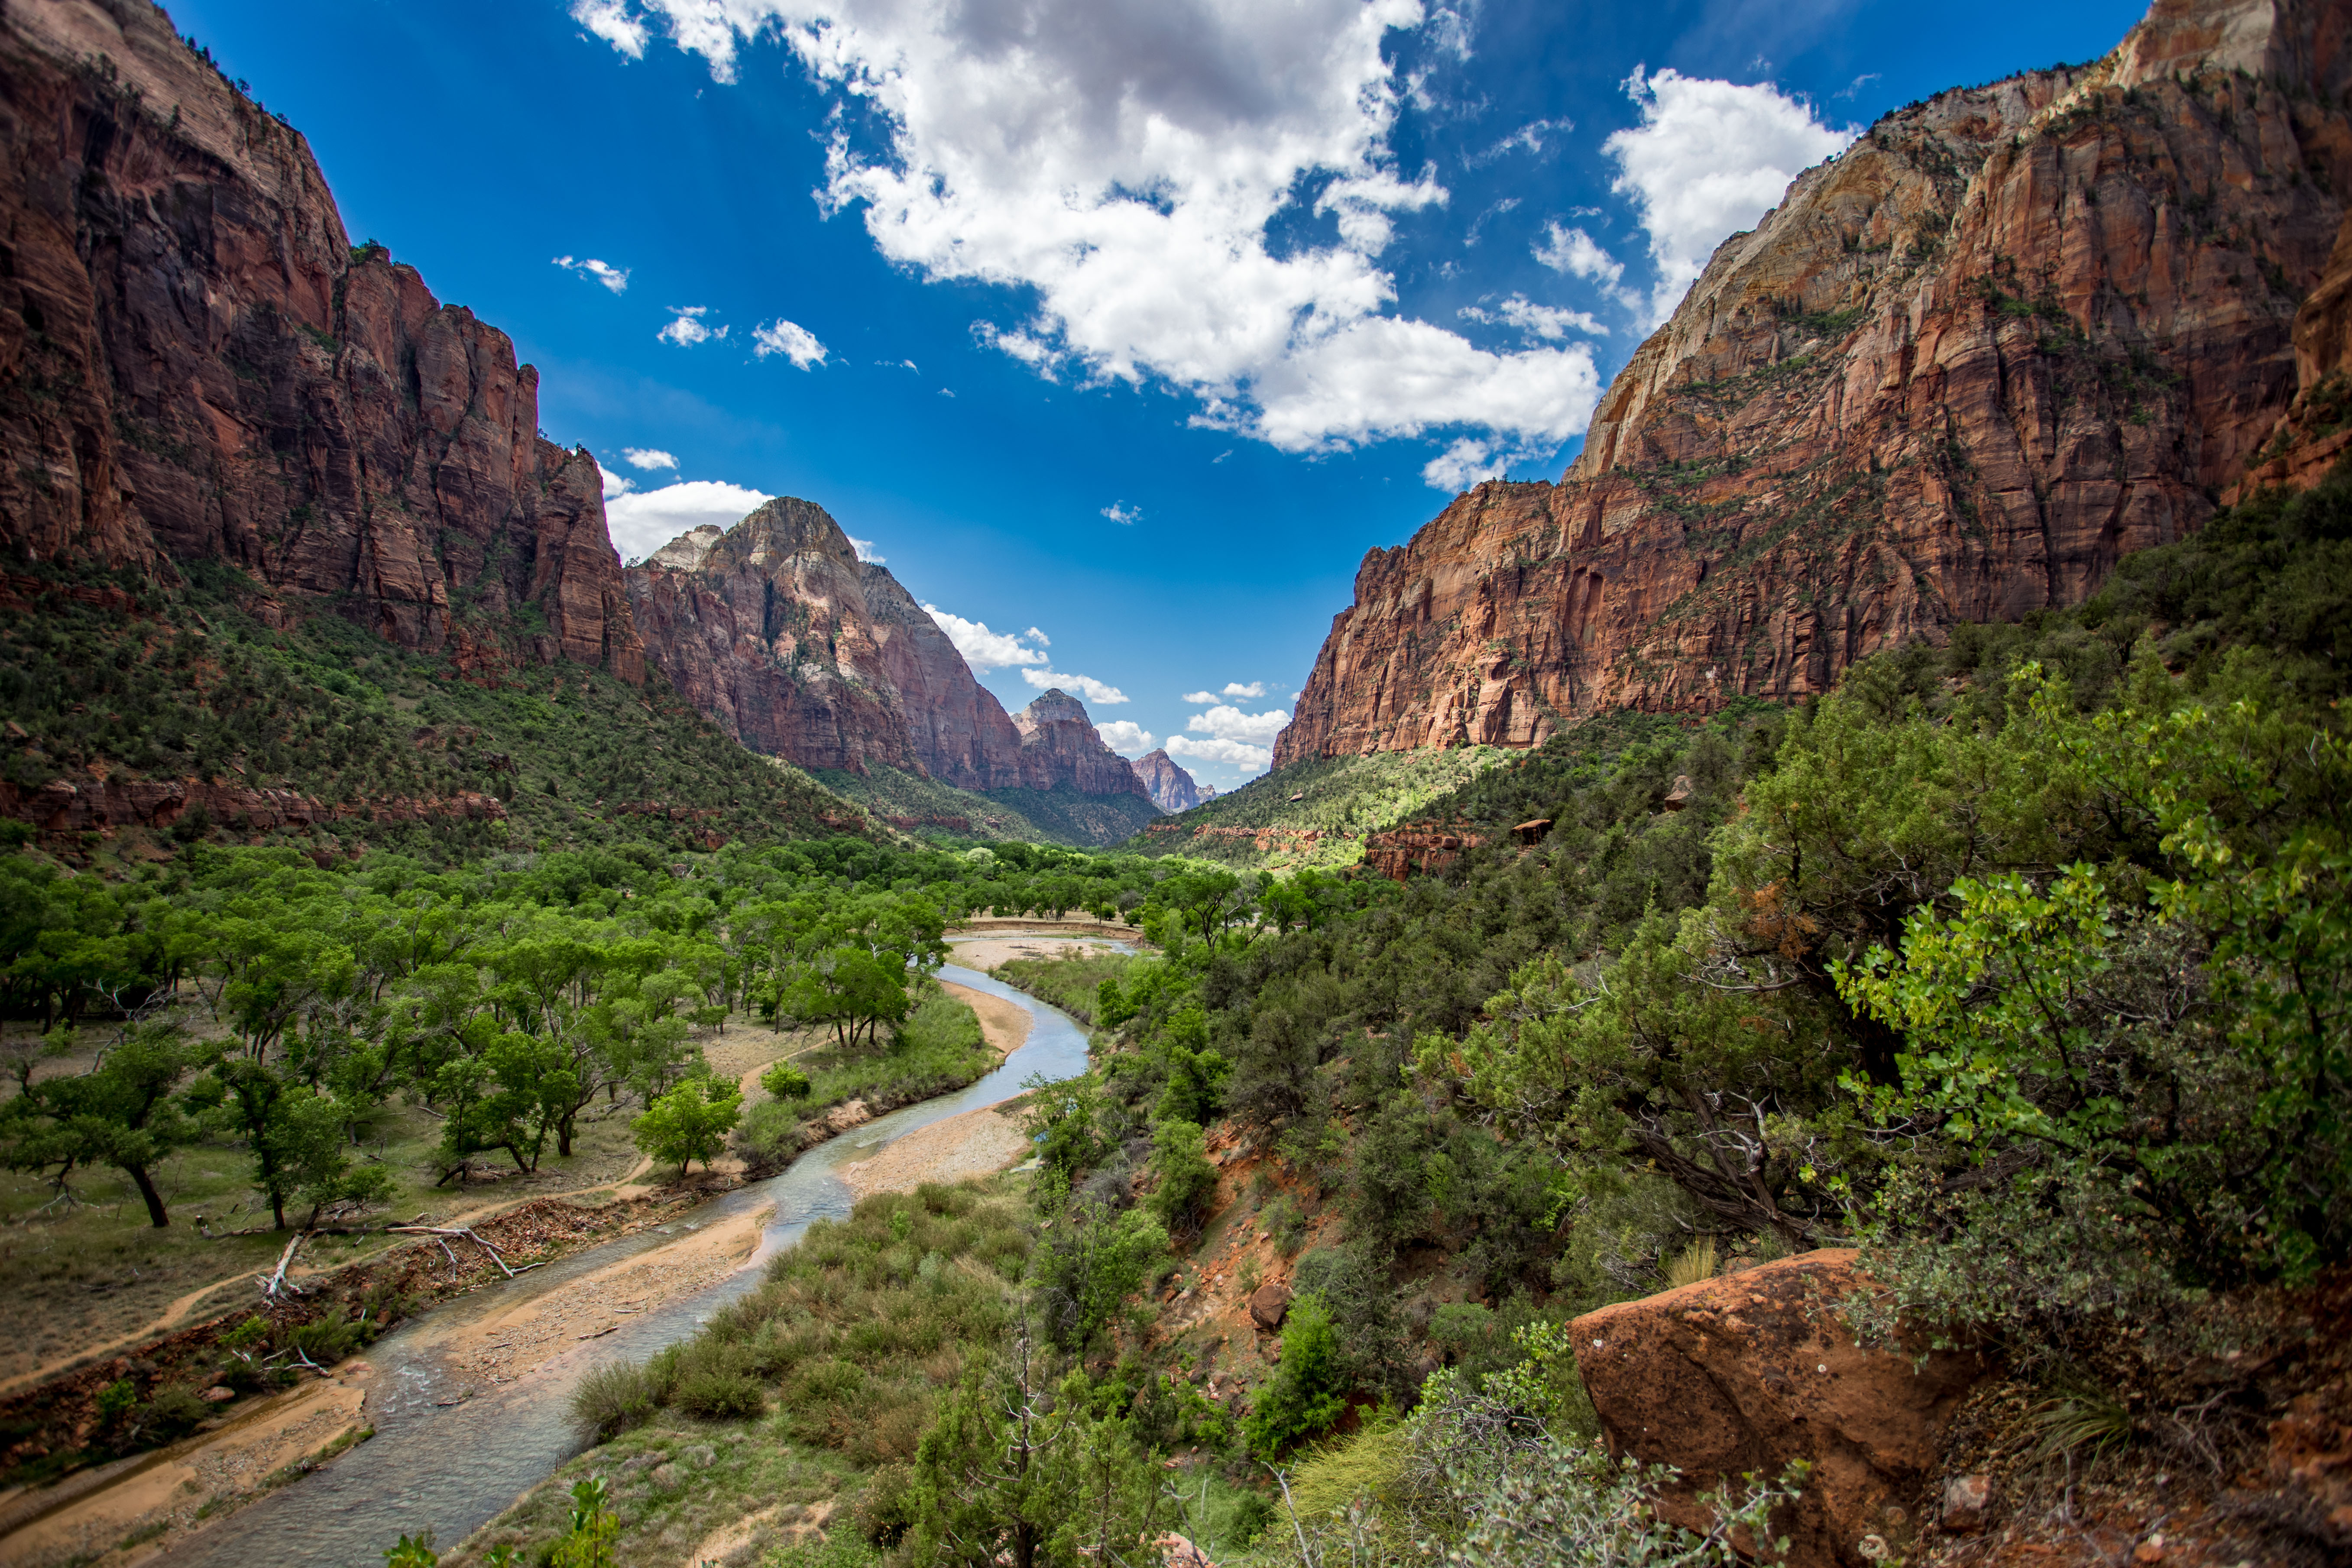
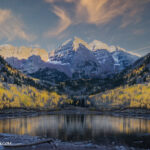
The properly exposed shot, is rapidly losing sky details and is still too dark in the foreground.

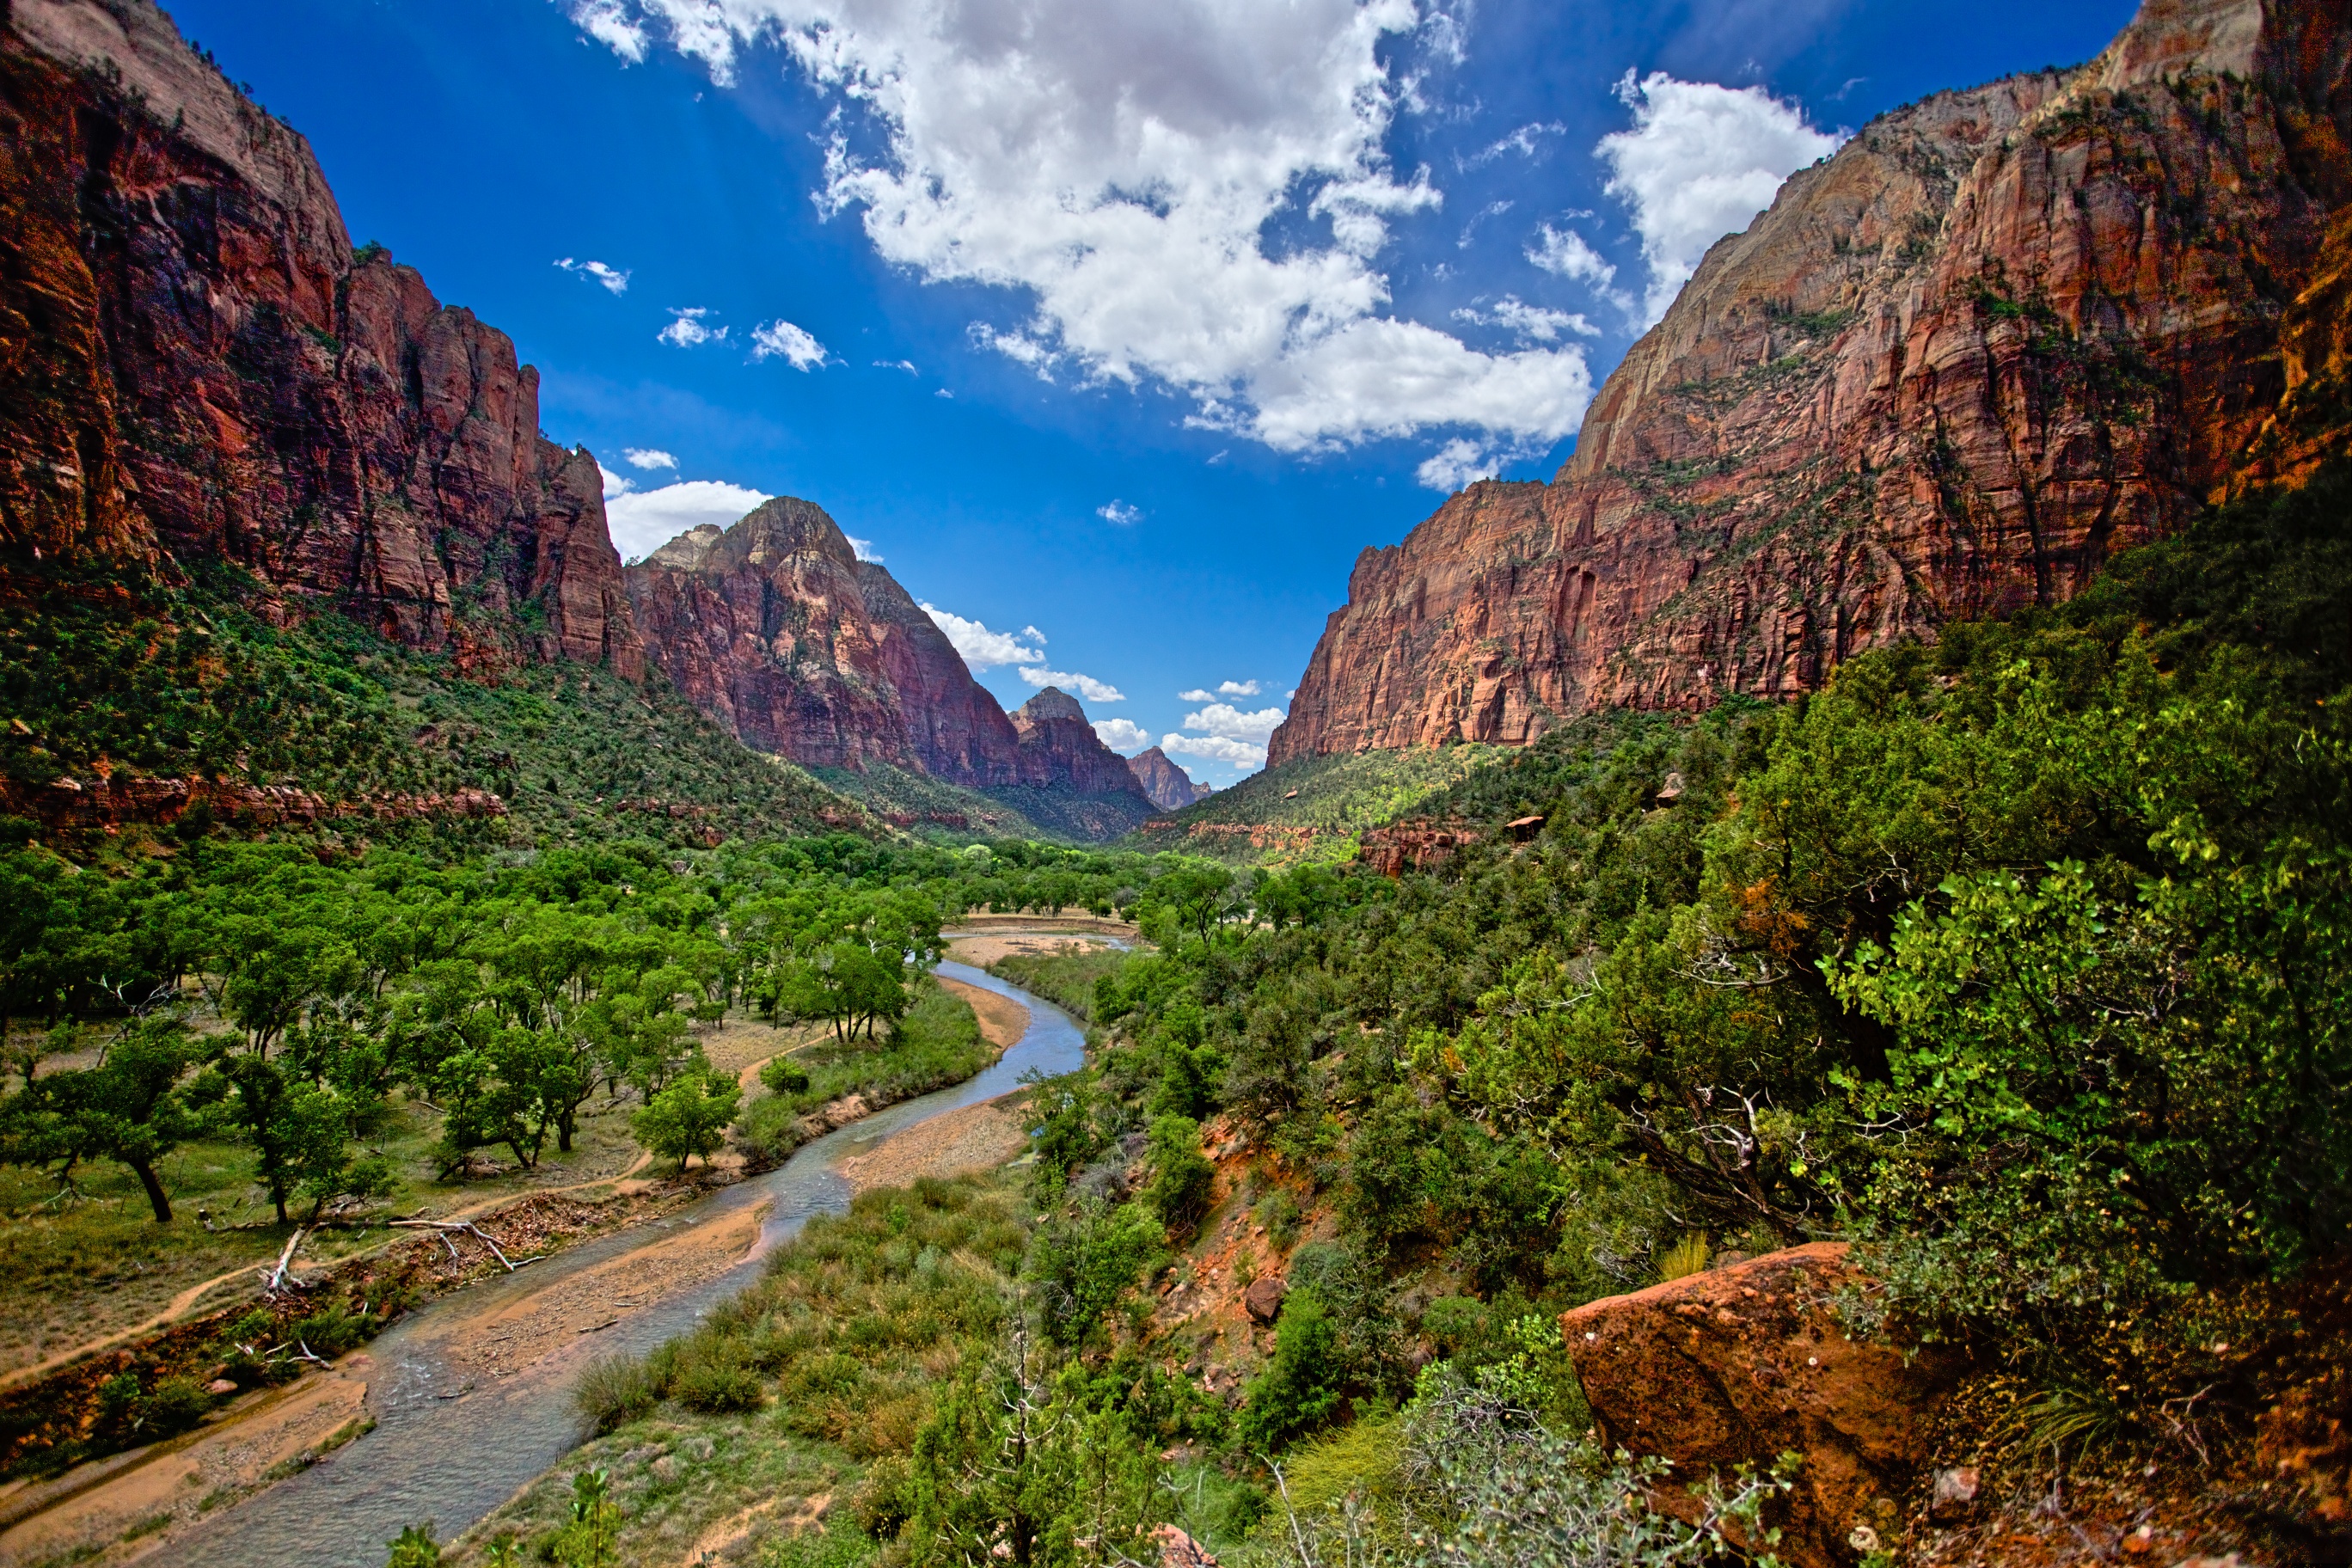
This overexposed photo has plenty of foreground detail, but the sky is now stark white.
As you can see above, Cameras have more limited dynamic range then the human eye. The good news: camera technology is improving rapidly allowing you to capture more range.
- Film: Original low ASA color films had between 5 & 7 stops of dynamic range.
- DSLR:
- Compact cameras have about 5-7 stops of range.
- Most modern DSLRs (like the Canon 7D which took the images above) have between 10-11.5 stops.
- Canon full frame cameras (1Dx, 5DMkIII, 6D) have between 11.5 & 12 stops. Their new 5D Mk IV has 13.5 stops.
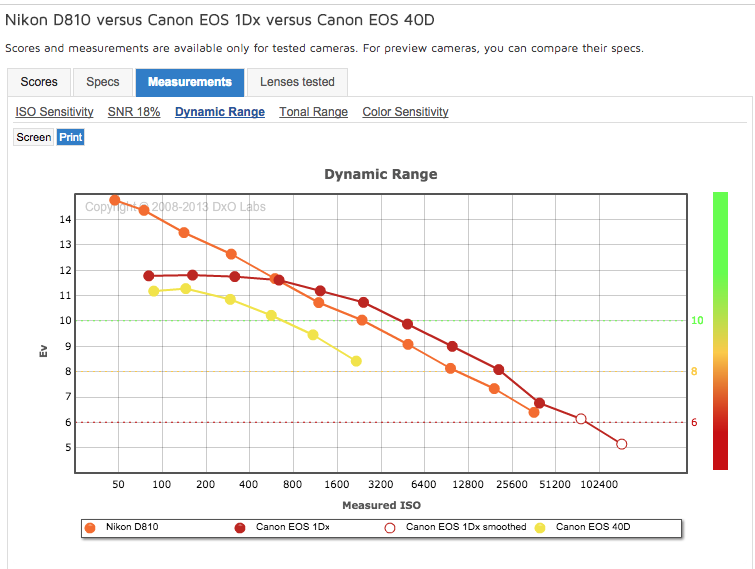
- Most Nikon camera have signficantly more dynamic range. The D7200 (crop) and D750(full frame) offer 14.6 stops and the D810/new D850 has 15 stops! That’s approx 8 times more light than Canon DSLRs (except the 5D MkIII @ 3 times).
- Sony’s new A7r III now shares top honors (also 15 stops)!
-
- Increasing ISO reduces dynamic range. To take advantage of your camera’s full dynamic range use the lowest ISO possible for HDR situations!
- DSLRs dynamic range deteriorates differently over the ISO range (depending on brand/model).
- The charts below illustrate how dynamic range drops with increased ISO. High ISO photos appear contrasty as a result.
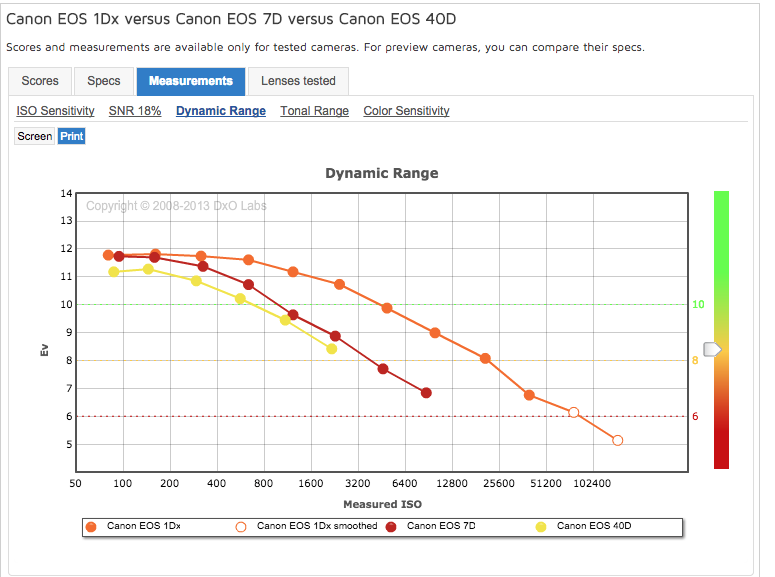
How earlier Canon DSLRs compare to the new 1Dx.
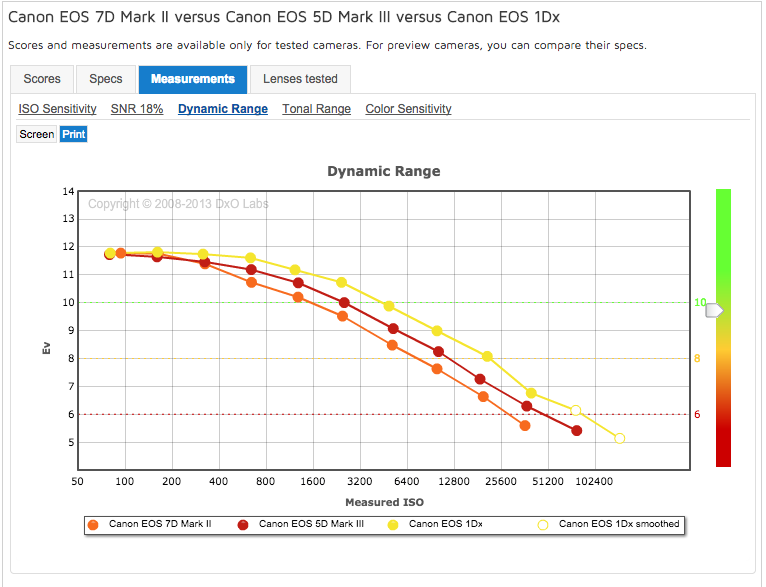
Some newer Canon DSLRs
- Shooting in RAW mode also preserves the greatest dynamic range. JPEGs, in contrast, reduce range by approx. 3.5-4 stops.
Before moving on…did you remember your polarizing filter?
- Cuts glare, improves skies, improves color saturation. Great for controlling amount of reflection for water features.
- Watch out: focal lengths under 24mm (sky distortion)/effect best at 90 degrees from the sun.
- No good into or directly away from the sun (direct sunrise or sunset). Doesn’t help, diminishes colors.
Is it better to over or underexpose?
- Overexposing is bad….very very bad. Bad bad bad! Anything overexposed by more than one stop will be useless white mush in post-processing.
- Underexposing, on the other hand, is far far easier to fix. Lets start with a properly exposed photo (ISO 3200).
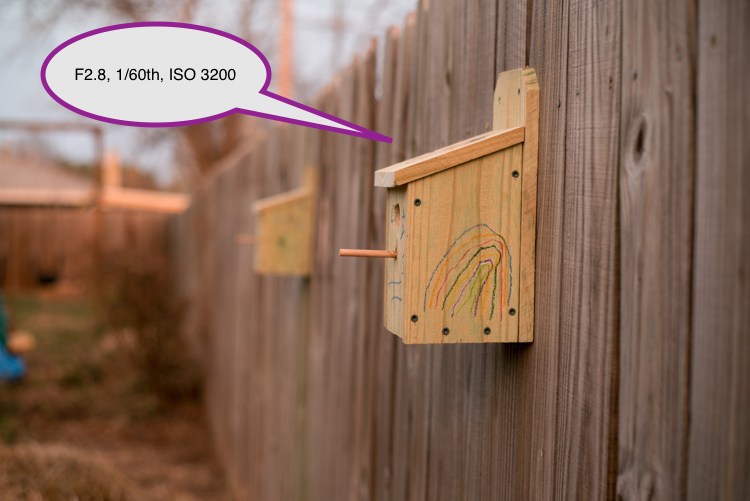
Properly exposed
- Here’s the same picture underexposed by a full 5 stops! We’ve reduced the ISO to 100.Looks pretty dark…beyond recovery…Right? Let’s try bringing this into PhotoShop and turning up the exposure slider by a full 5 stops.
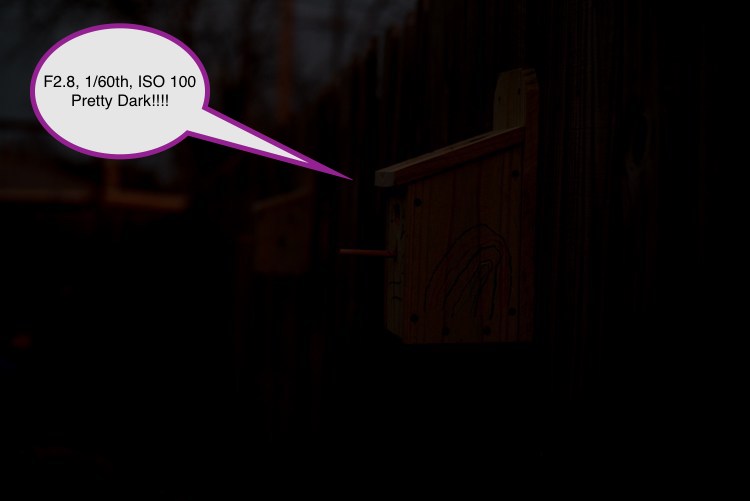
5 stops underexposed. Looks practically Jet Black.
- Holy Cow! Incredible. Looks just like the original. Woooo!!! New light sensors exhibit ISO Invariance. Ergo they have a remarkable ability to recover underexposed images. The newest crop of cameras can recover 5 or more stops, older models 2-3 stops.
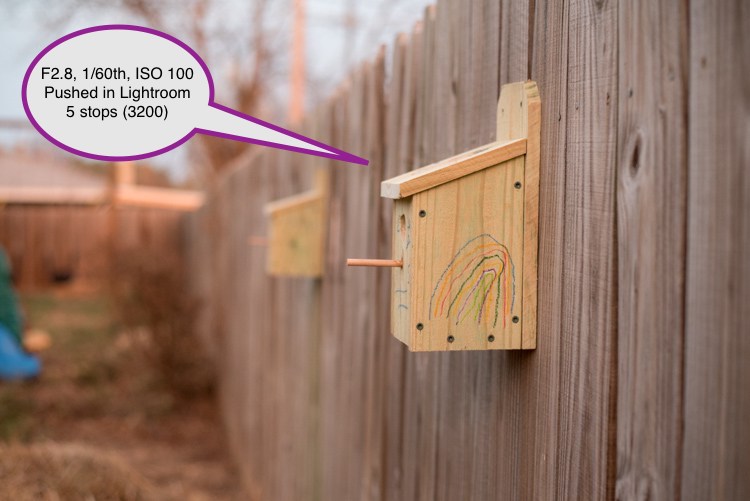
Underexposed photo recovered in post-processing
Remember…always better to underexpose…NEVER OVER EXPOSE.
Therefore, getting the exposure right essential to using your camera’s full range (& to avoid overexposing). Shoot in manual mode & rely on your histogram & overexposure indicator (blinkies).
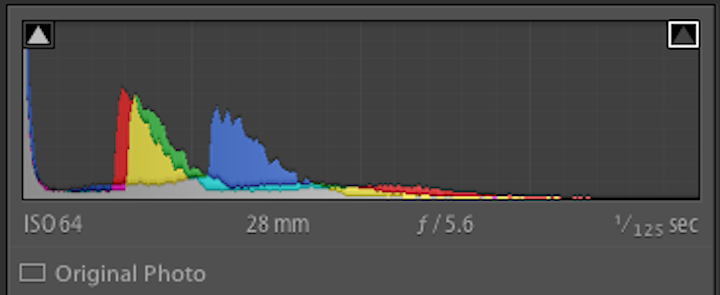
- Your camera’s histogram is showing the range of a JPEG image(shows smaller dynamic range). The RAW image utilized when post-processing in Lightroom/Photoshop provides 3-4 stops of additional dynamic range (1.5 stops minimum on the right and left side of the histogram).
- IMP to use all the available range. If your in-camera histogram/blinkies are starting to show clipping (on the right) you can still increase exposure safely by 1.5 stops.
- Some photos involve special situations (clipping isn’t always a bad thing). This photo from Big Bend National Park works because certain parts are completed “blacked out”. I wasn’t concerned about clipping on the left side of the histogram. I wanted to make sure I was able to render the lighter tones properly. Mission accomplished!
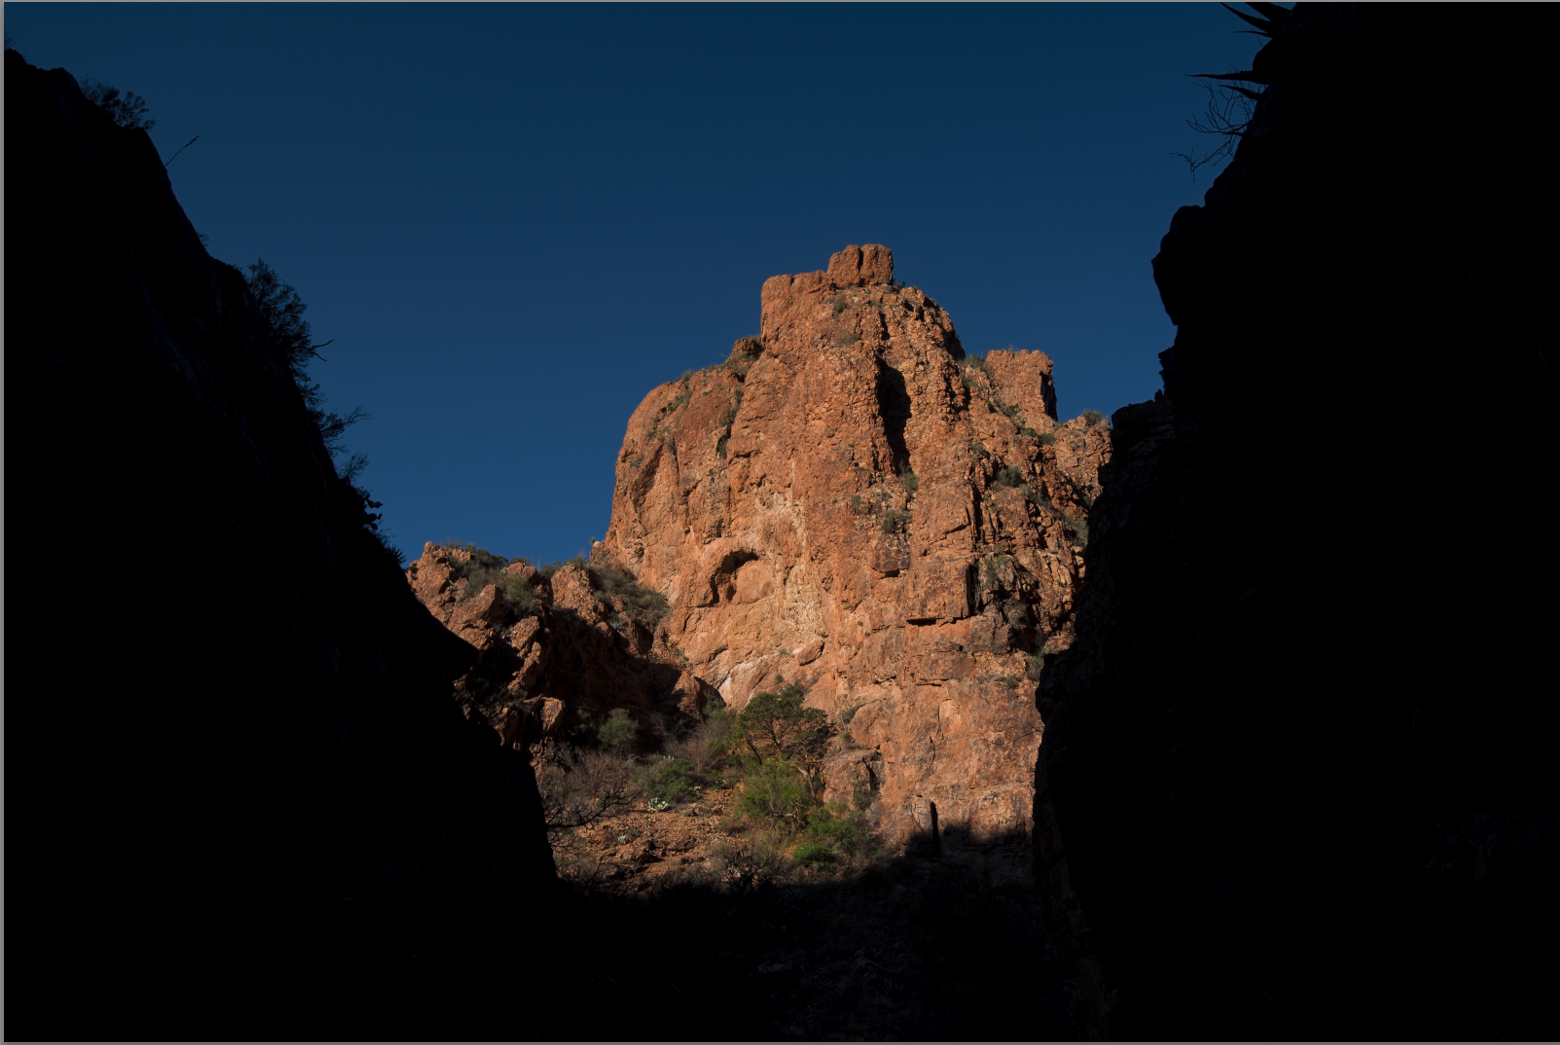
Having some areas underexposed and clipped works in special situations
While there’s clipping on the left side of the histogram, the lighter tones are all perfectly rendered.
Different approaches to capture a photo with high dynamic range:
Solution #1. Always best to capture the entire range in one shot, then adjust brightness/exposure levels, etal in Lightroom/Photoshop. If you’re lucky enough to shoot with one of the high DR Nikons (D7200, D540 or D810) or the Sony A7r III, your need for HDR software drops significantly.
Work flow suggestion: If you have a bright sky as an important compositional element in your photo, trying metering on that(expose for the sky). Take a test shot. If your histogram looks ok, you’re done! You can bring up the foreground elements in Lightroom or PhotoShop.
If you are underexposed and are showing clipping (underexposed areas) to the left in your histogram…you can always turn up your exposure slider (in post p). You have 1.5 stops of additional exposure available once you start seeing the blinkies or clipping on the right portion of the histogram. Again, that’s because your in-camera histogram is using a Jpeg image…at home, you’ll be processing the RAW image with much greater dynamic range.
Example: Here is a photo properly exposed (metered on sky). Many of the image’s elements need adjustment. Since none of the darker image values lie outside the histogram’s range (not underexposed) they can be recovered/tweaked in post-processing.
Orig image. Properly exposed but needs adjustment.
Here’s our image after tweaking. Looks pretty darn good!
Tweaked image
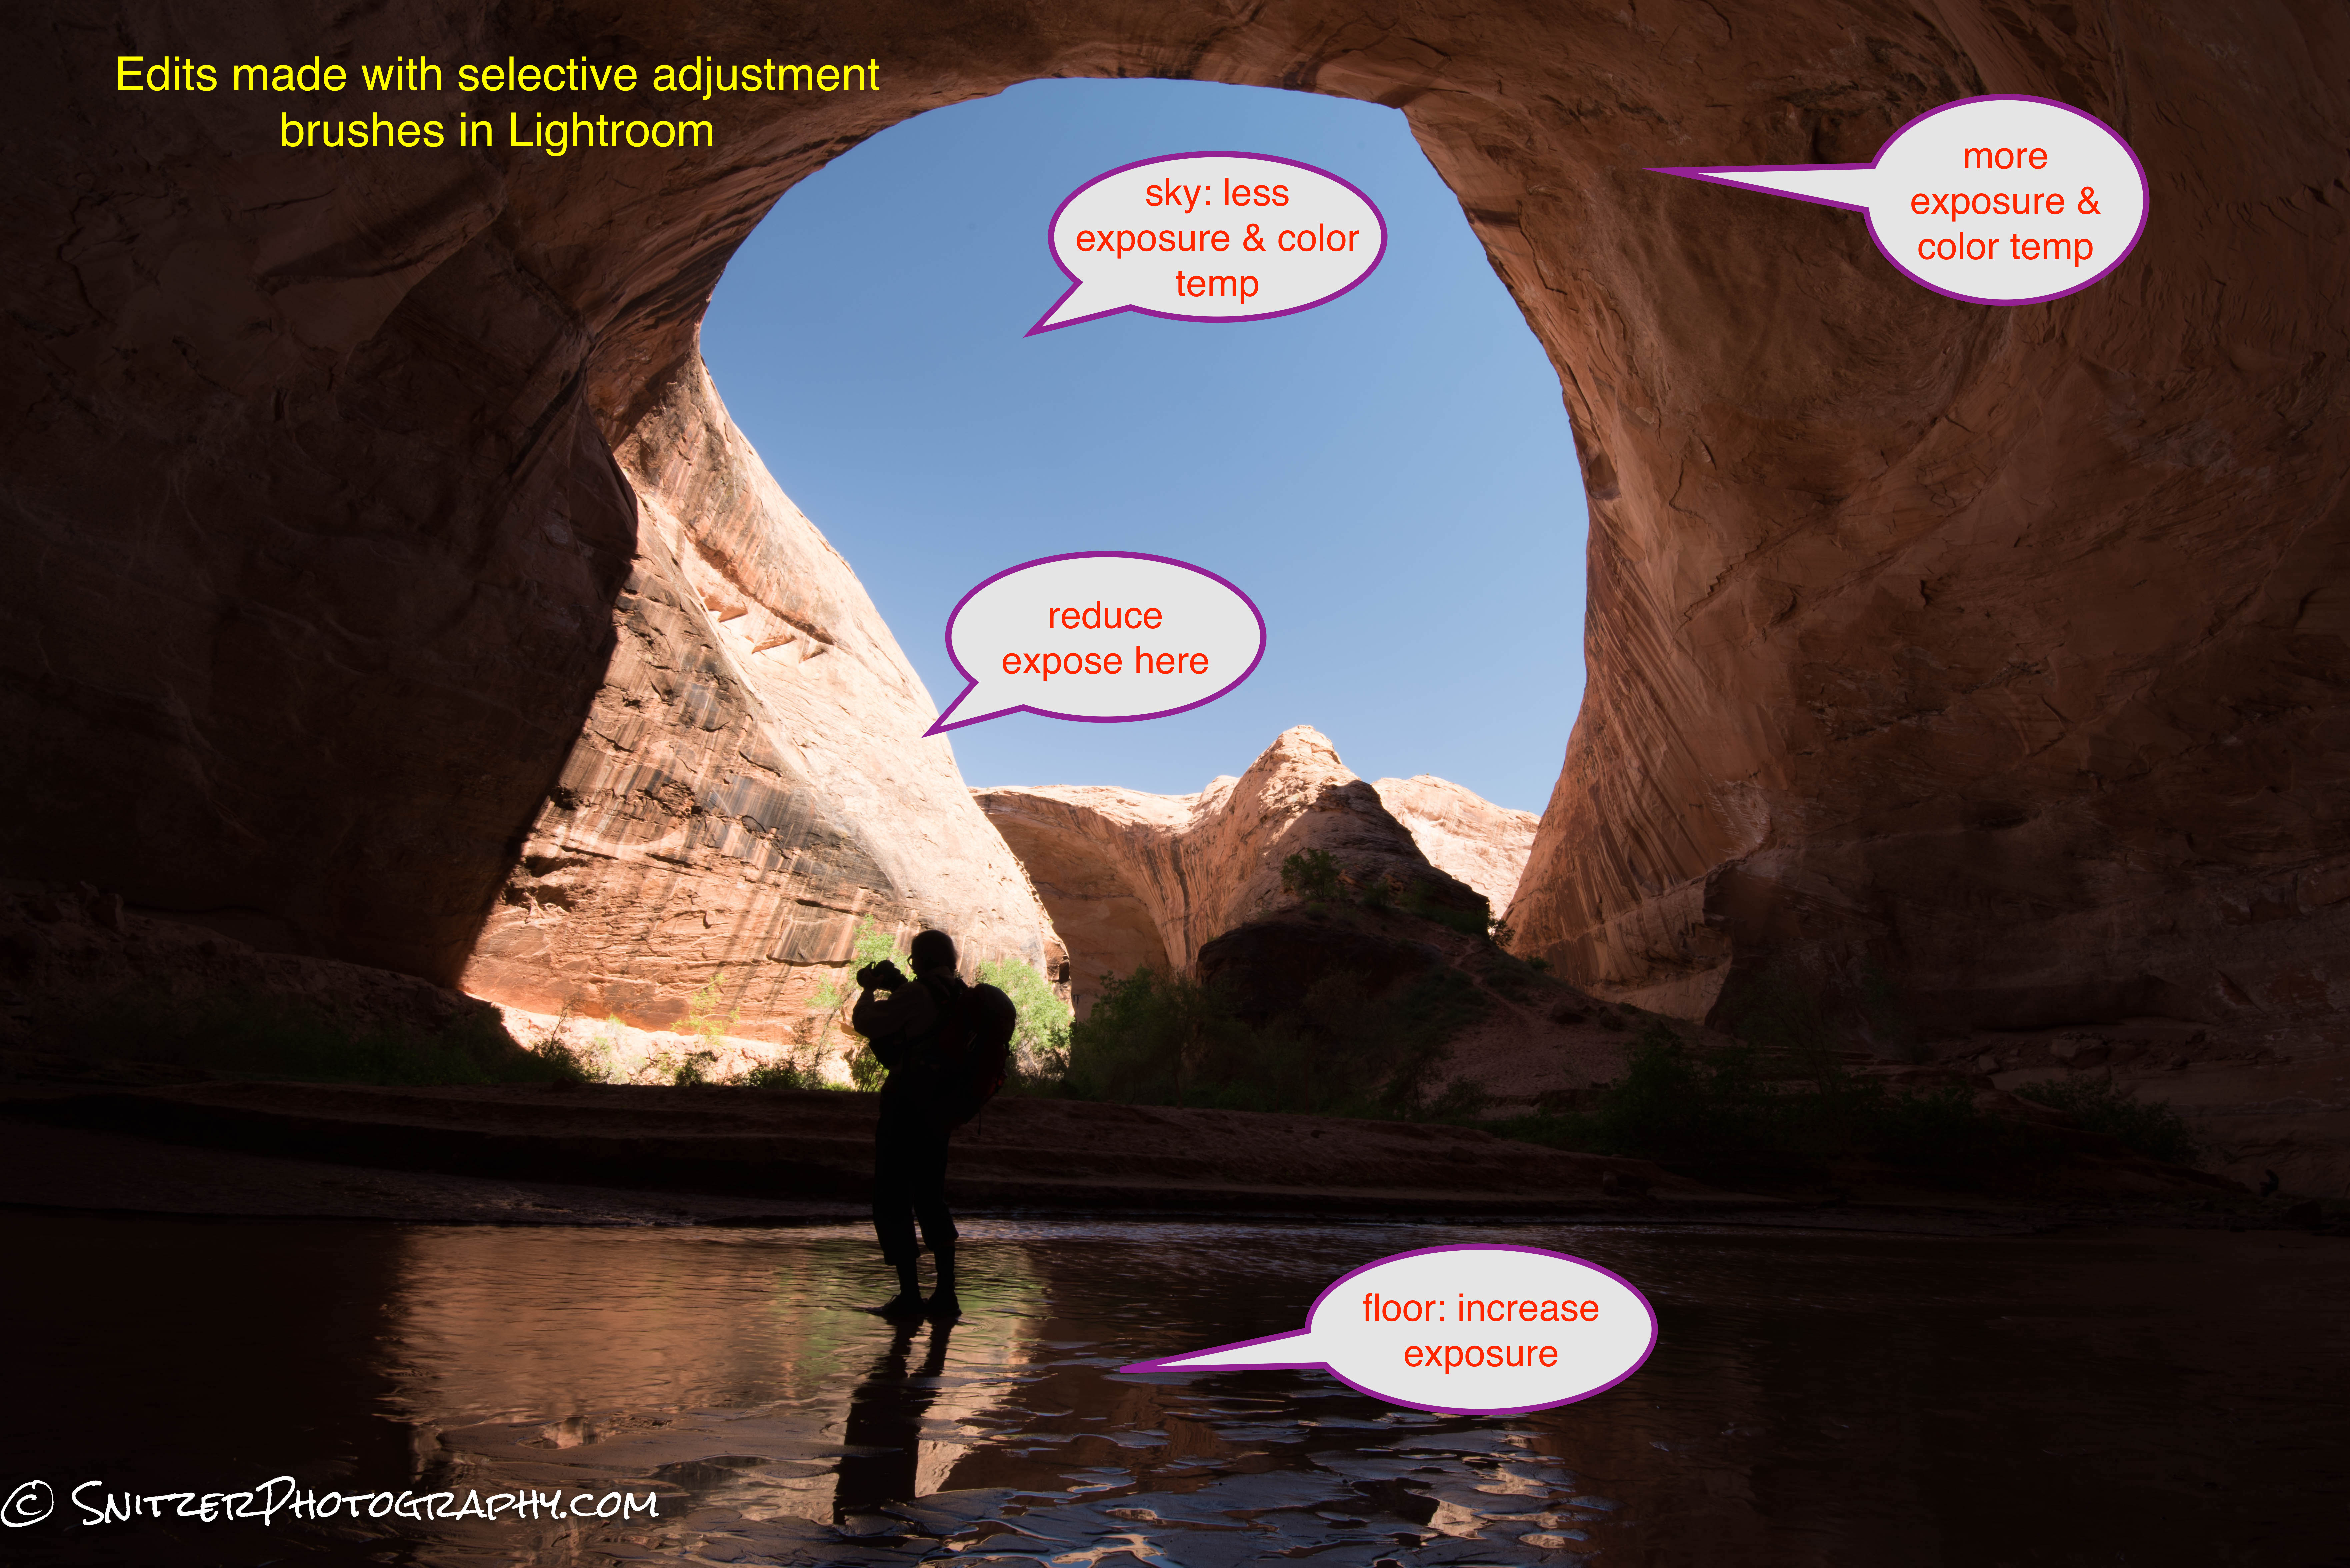
Remember that you have great latitude to recover even underexposed/dull photos in post-processing. In this base we’re going to boost the exposure, clarity and dehaze settings globally in Lightroom. Then we’ll use selective brushes to enhance further. The top section gets more whites, the bottom portion more saturation and exposure.
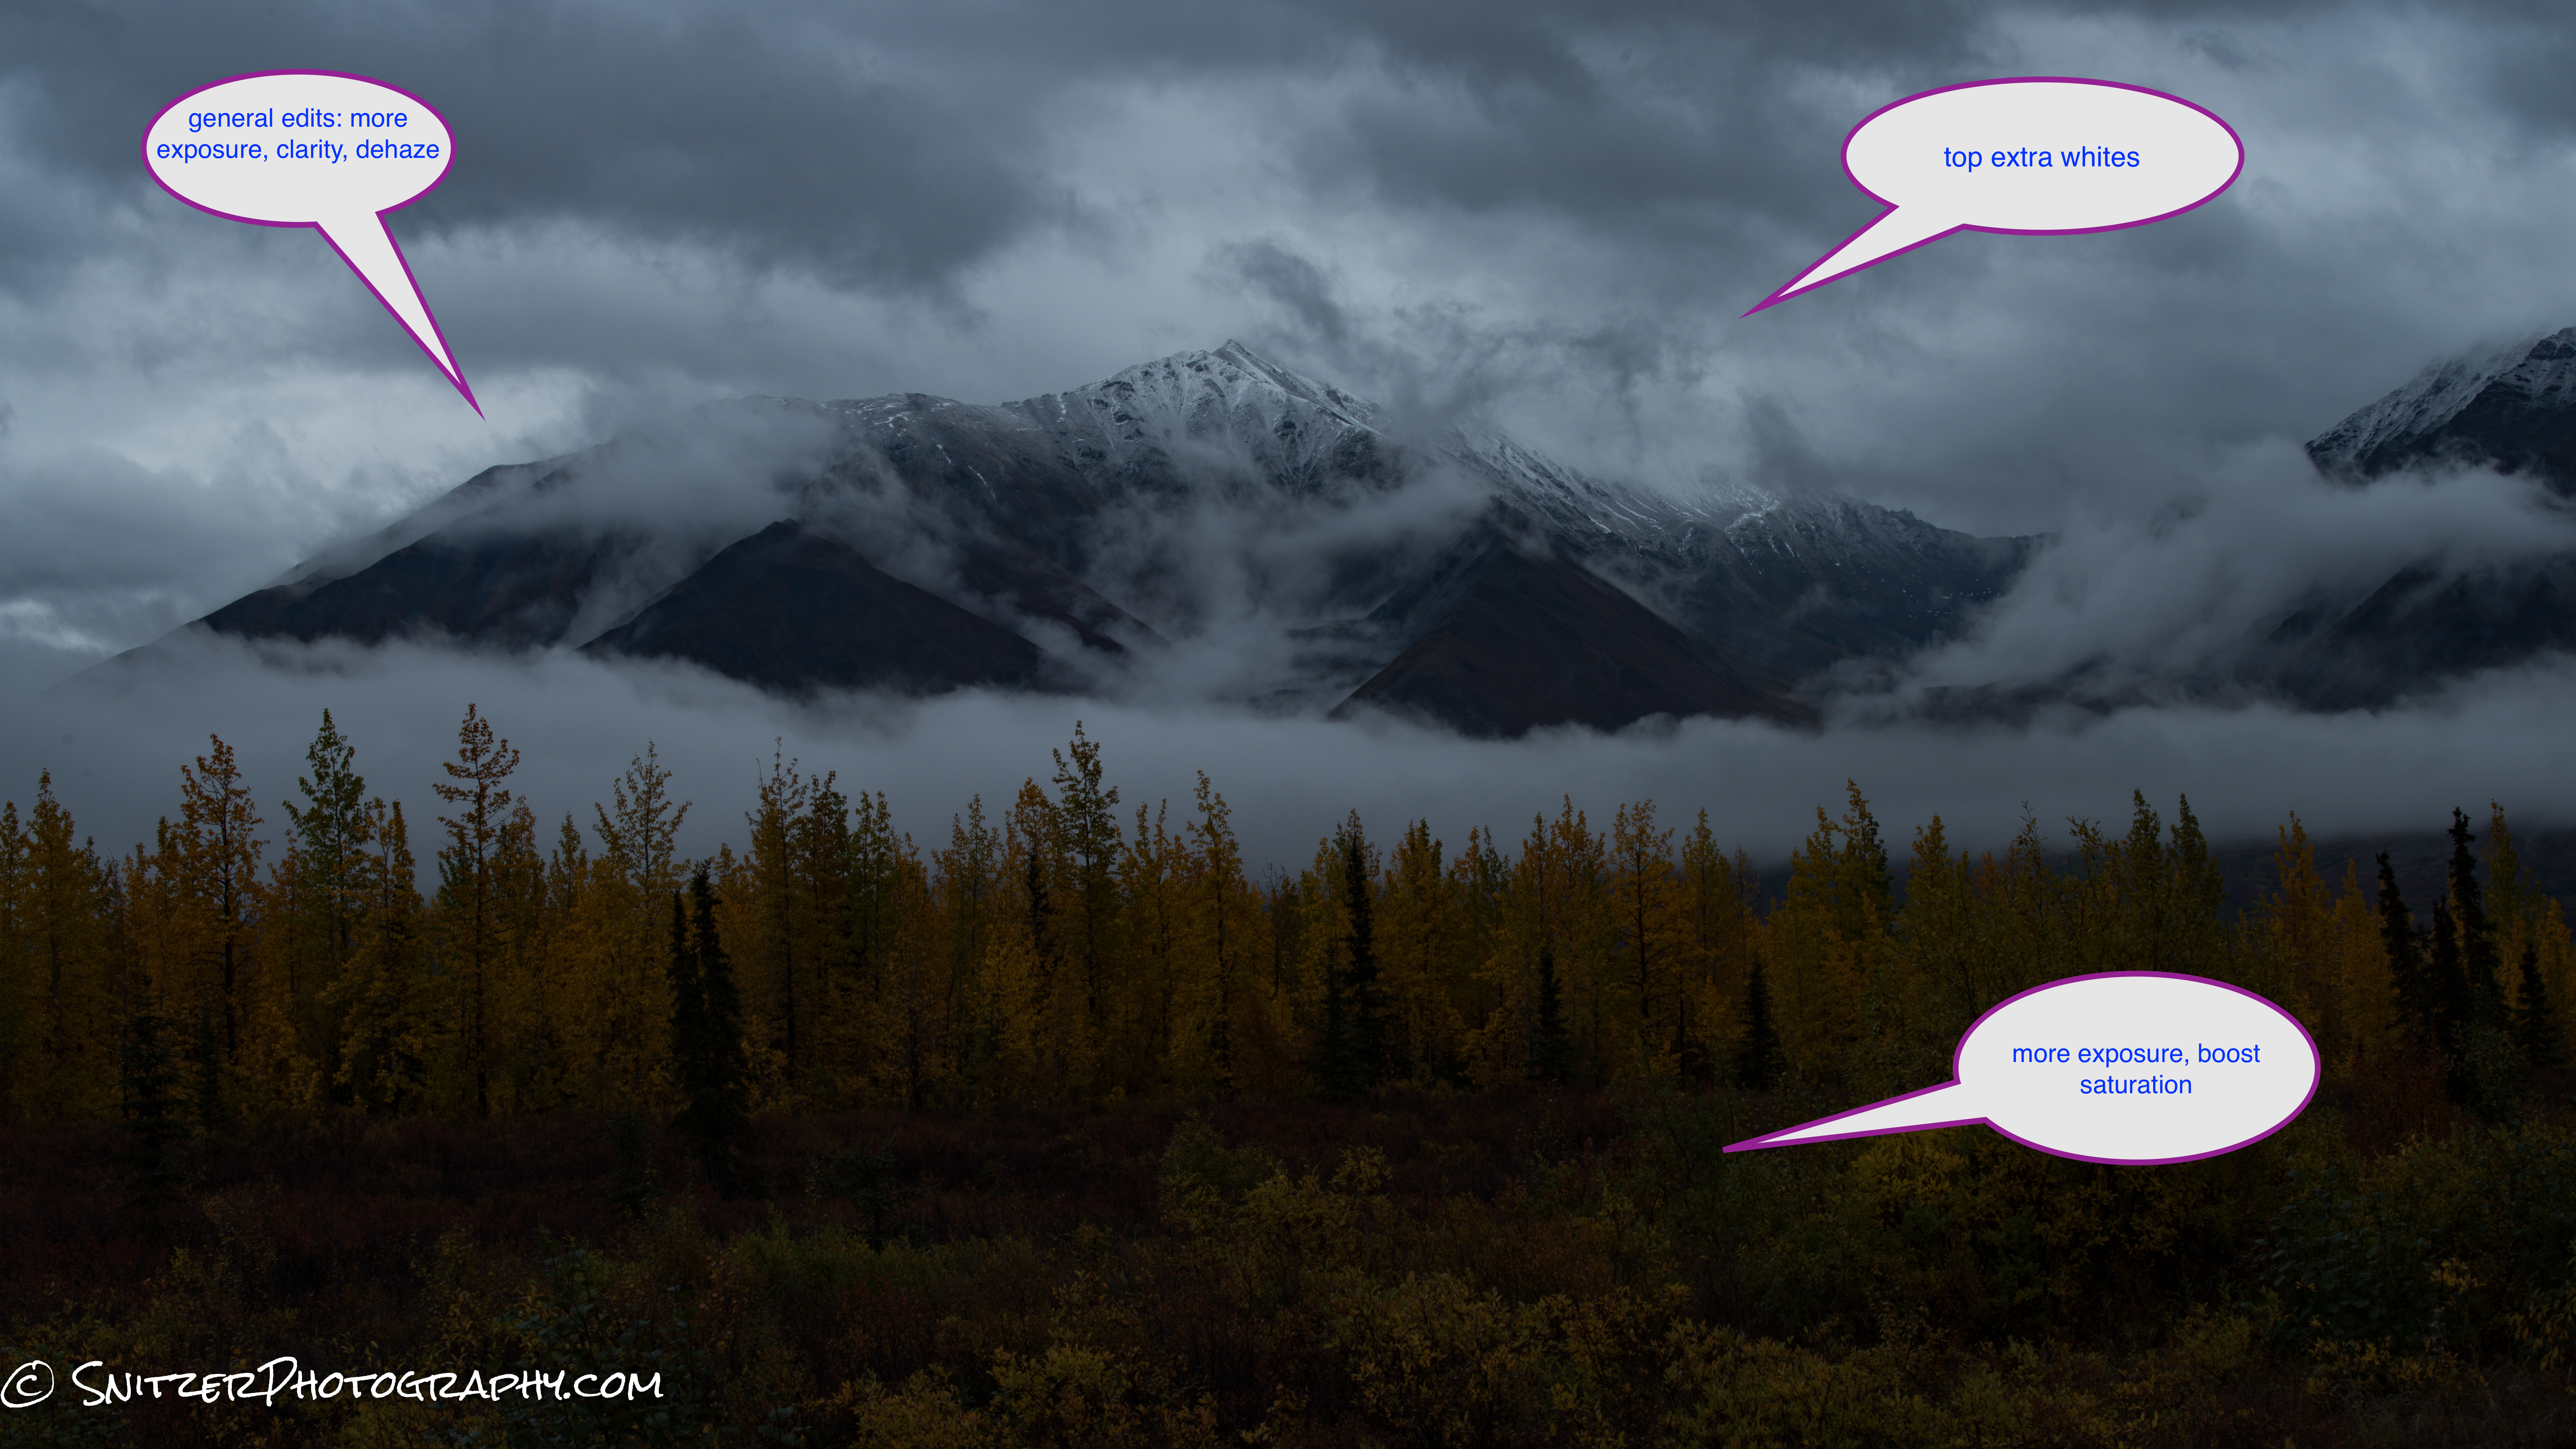
Pretty grim photo until we tweak
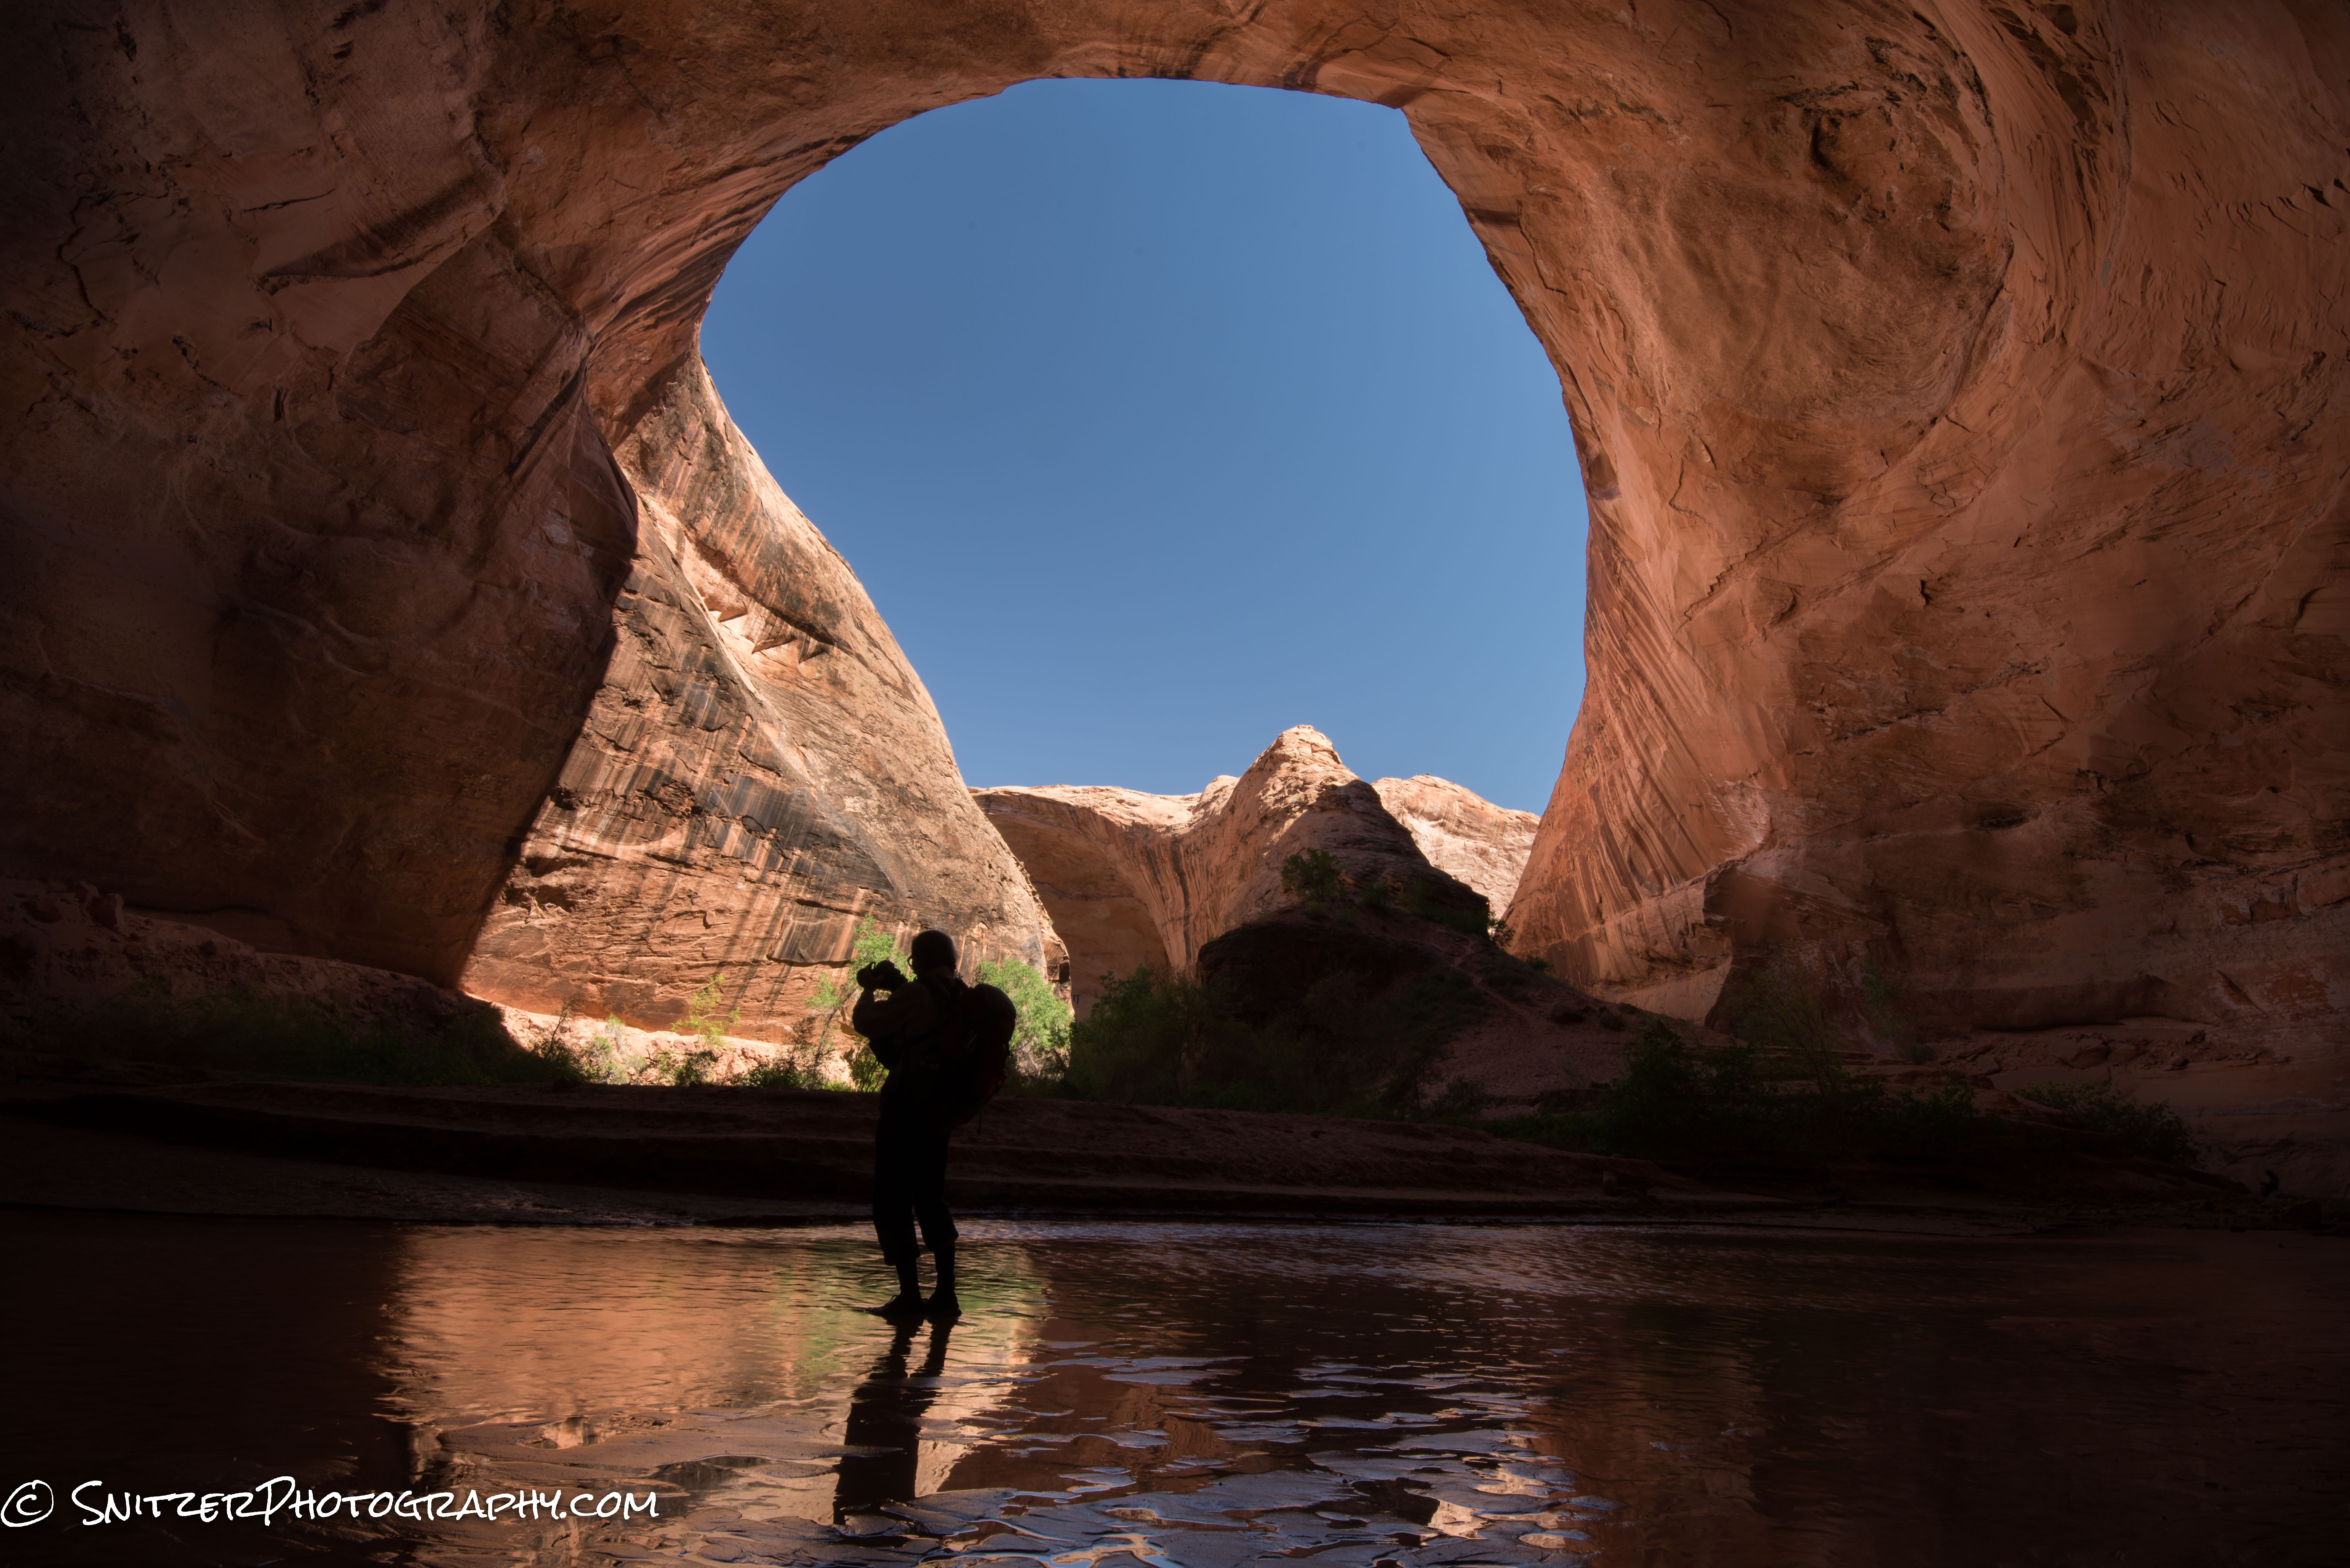
Holy Cow…this the same photo?
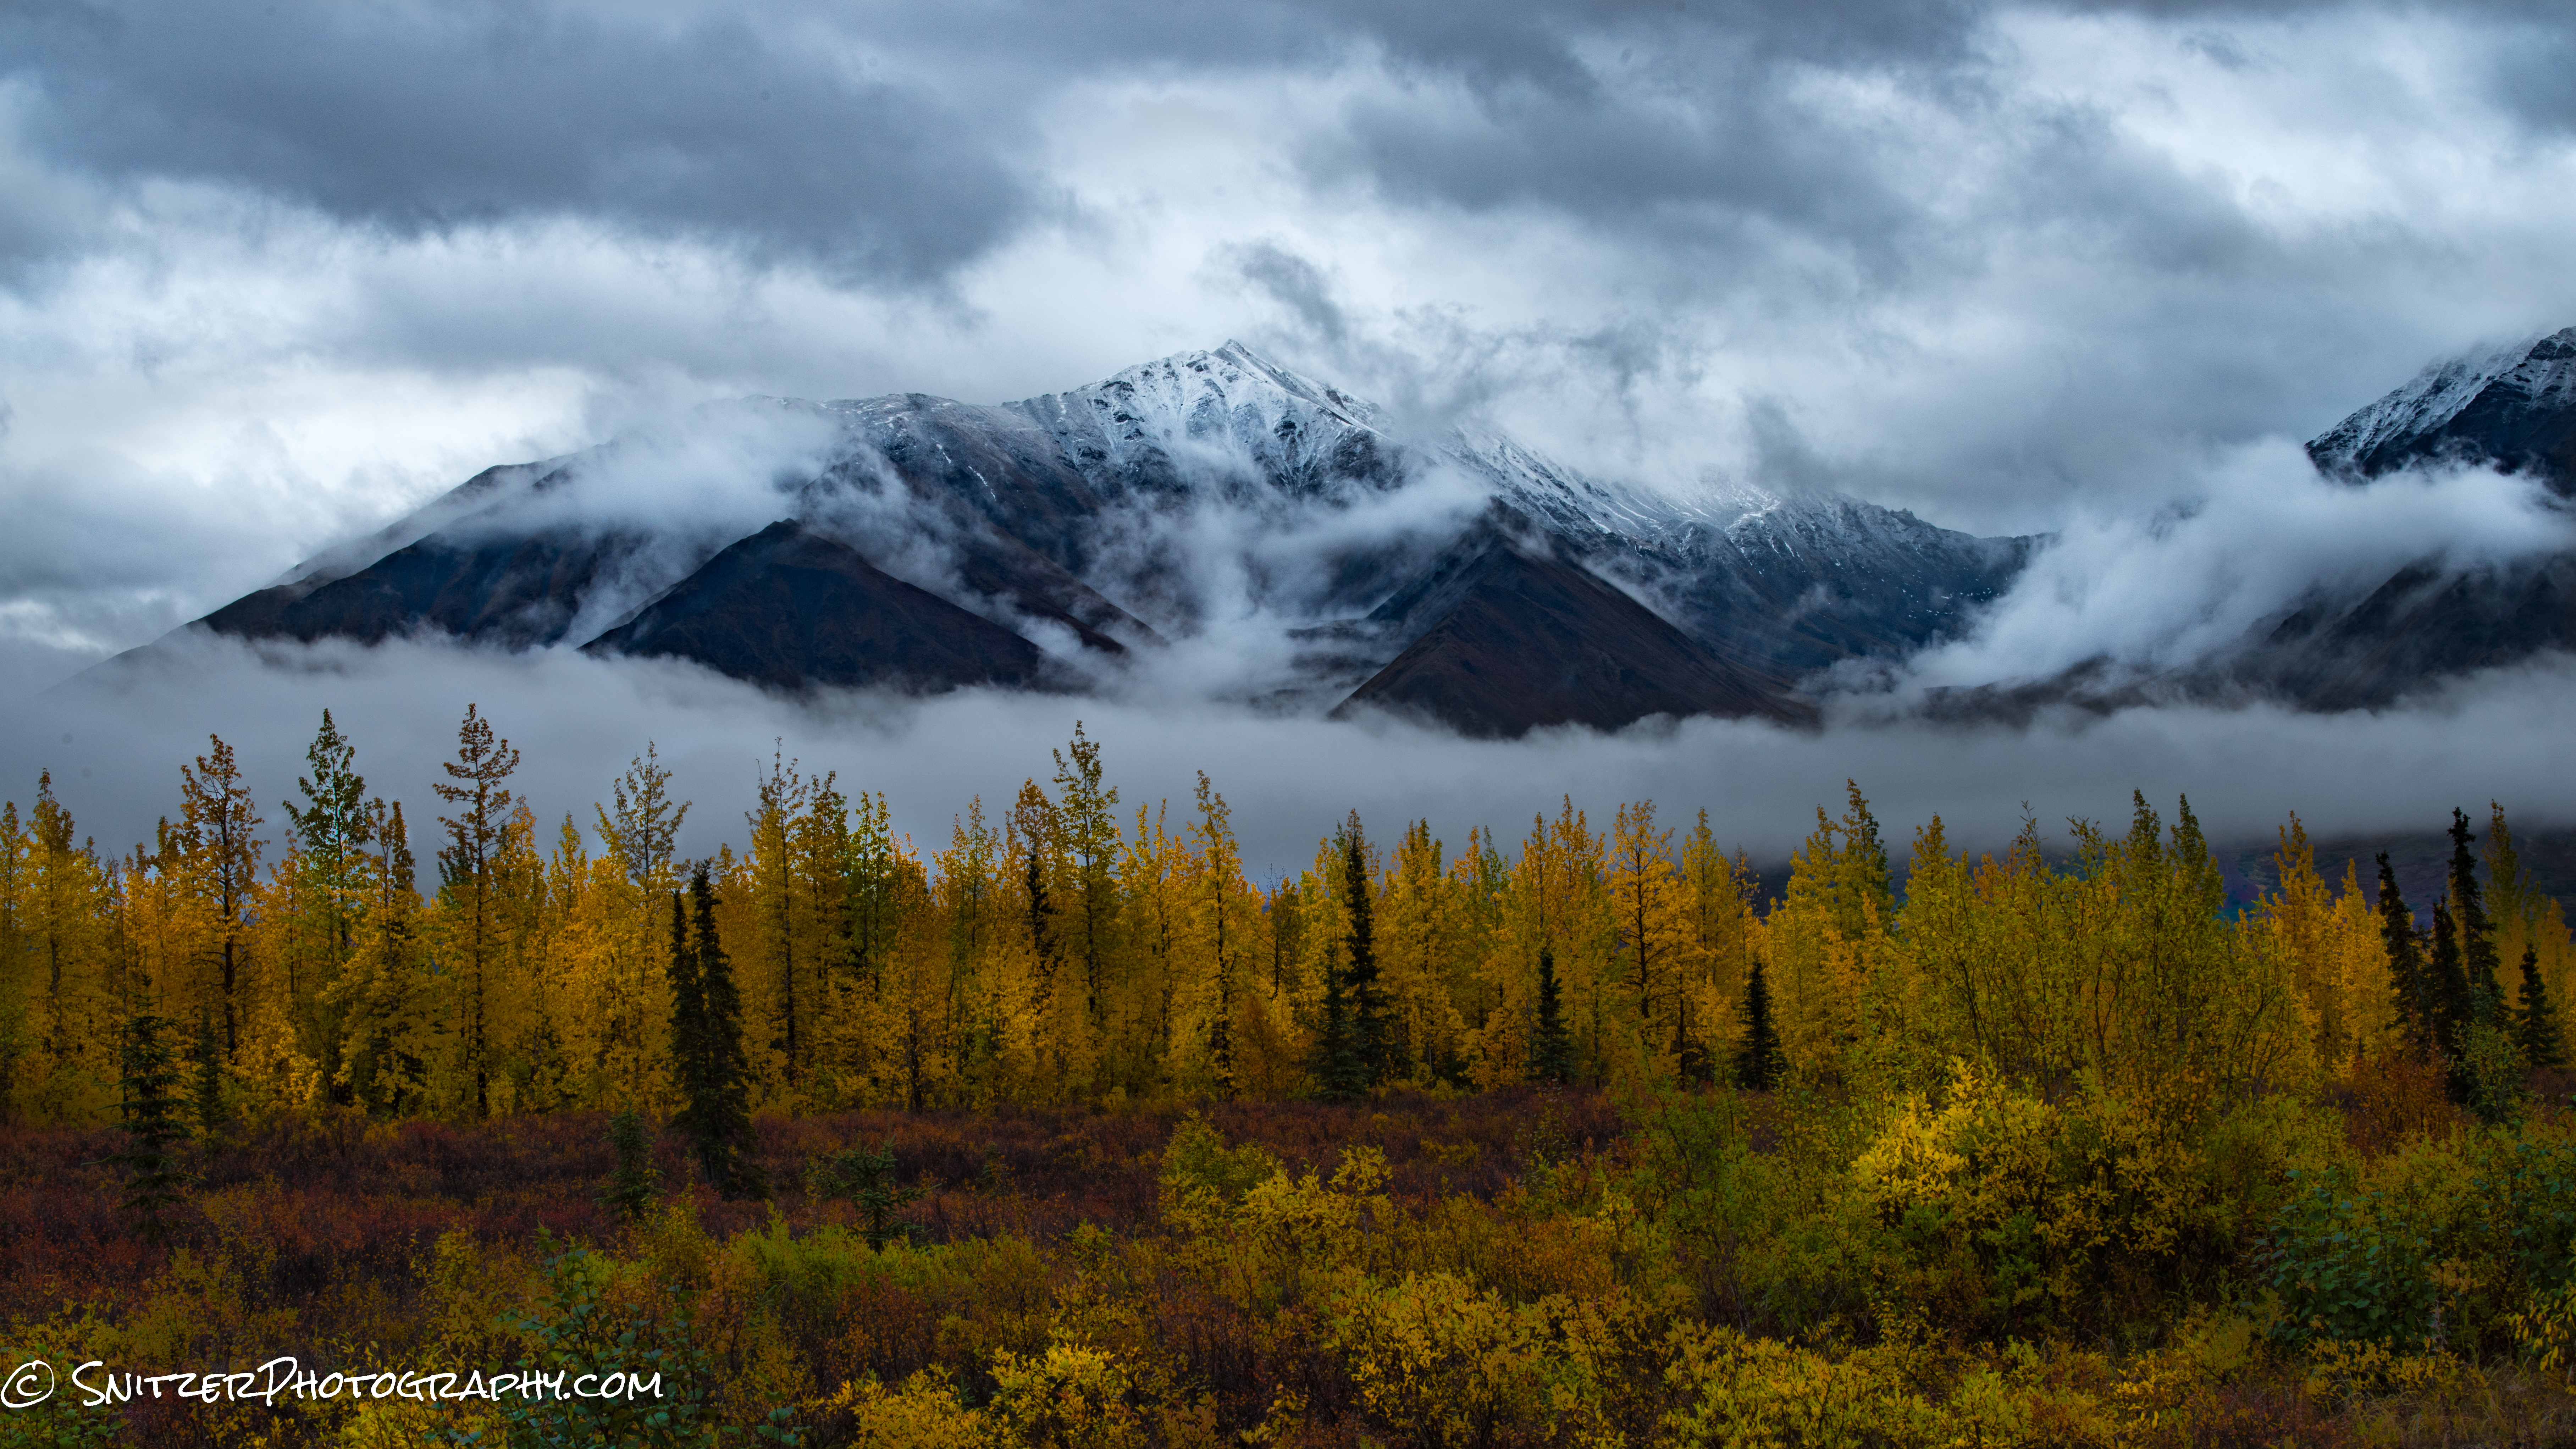
Wow…Looking good!
Solution #2
- Sunglasses for your lens, avail in 1,2 or 3 stop varieties. While straight line shading isn’t great for many situations (ex. mountains, complex photos with bright areas toward the interior), for shots involving a flattish horizon or water, they can’t be beaten.
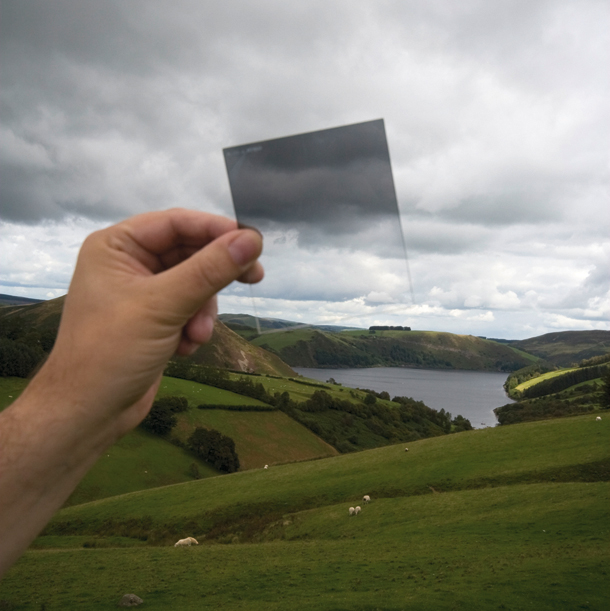
Grad ND filters are sunglasses for your camera that allow you to selectively shade areas of your photo
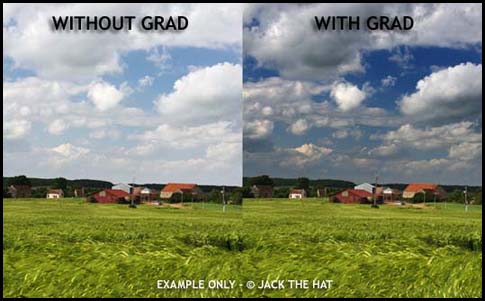
The affect is to provide properly rendered skies. Unfortunately the correction comes only in a straight line.Solution #2: Higher dynamic range camera Nikon 810.
The filters I use most frequently: 3 stop hard grad (below left), 3 stop soft grad (bleow right) which can be used in conjunction with a 6 stop Little Stopper (solid ND filter for blurring water…etc). Hard filters are great for photos where the line between bright/darker areas is pretty linear. Soft grad filters work great with mountains, less linear objects.

3 stop hard grad ND is my tool of choice
Shown below is the Lee Filter system which consists of an attachment ring that screws onto your lens, a filter holder and the filter itself. There are several other Grad systems available. I recommend Lee Filters! Best bang for the buck. Cokin while cheaper are pretty low quality…not good results. Hi-Tech has suffered quality control issues and Singhray are 2x the price.
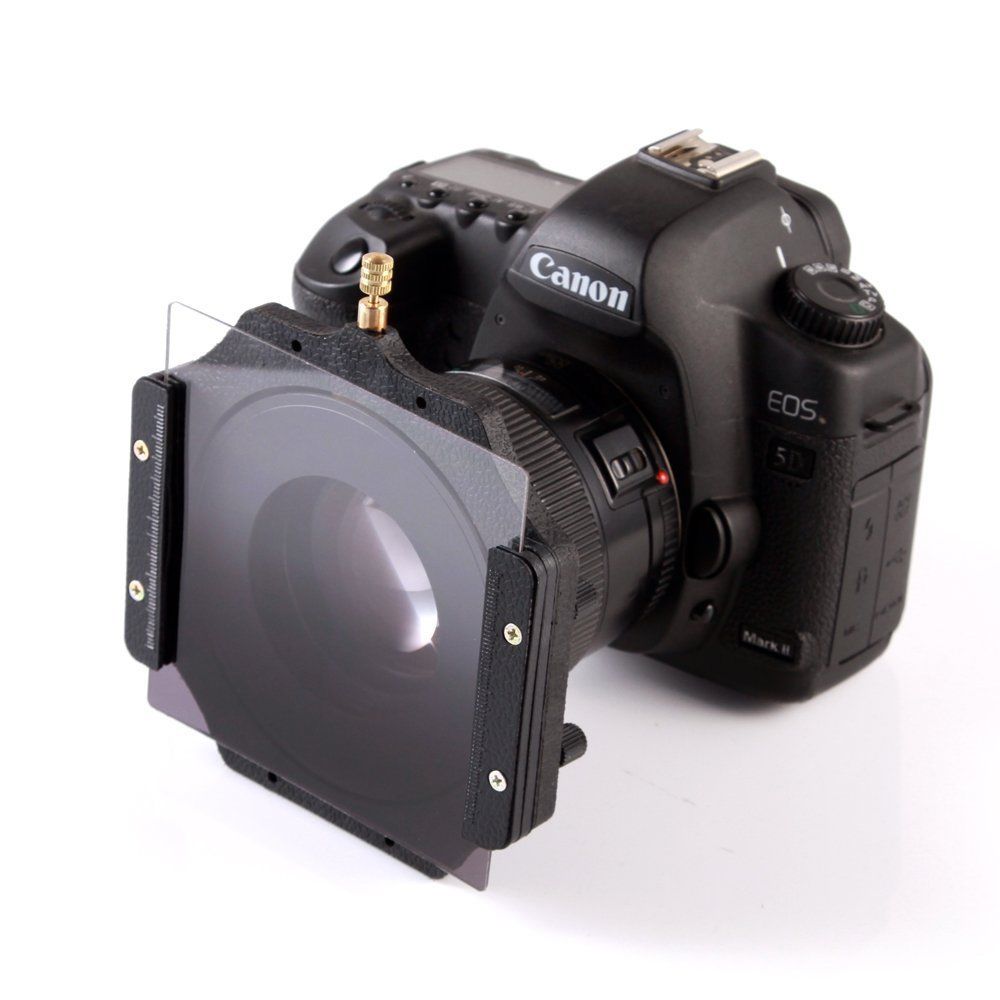
filter holder attached to lens w filter in place
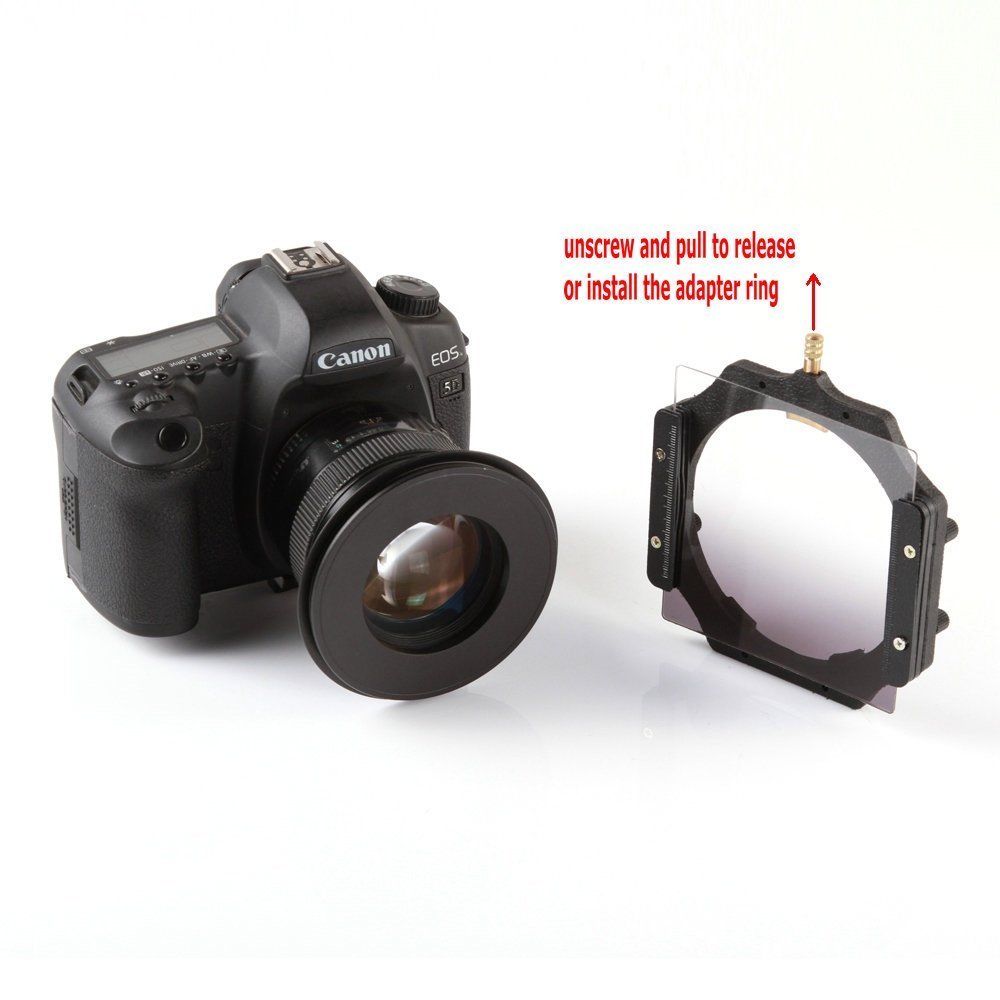
Lee filter ring screws on lens, filter holder attaches to such
The photos below were all taken with 3 stop hard grads to balance the sky and foreground elements. Works like a charm.

3 stop hard grad
3 stop hard grad
3 stop hard grad
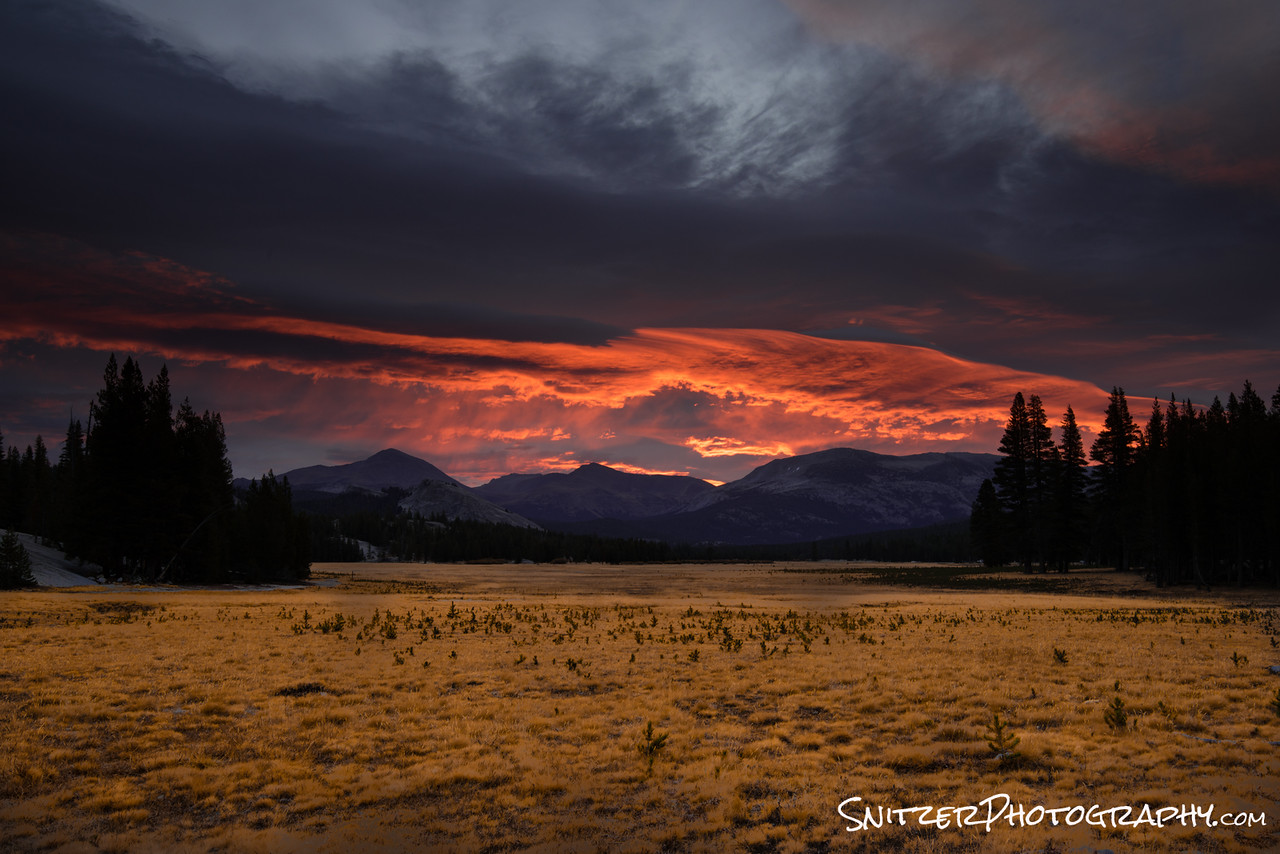
3 stop hard grad
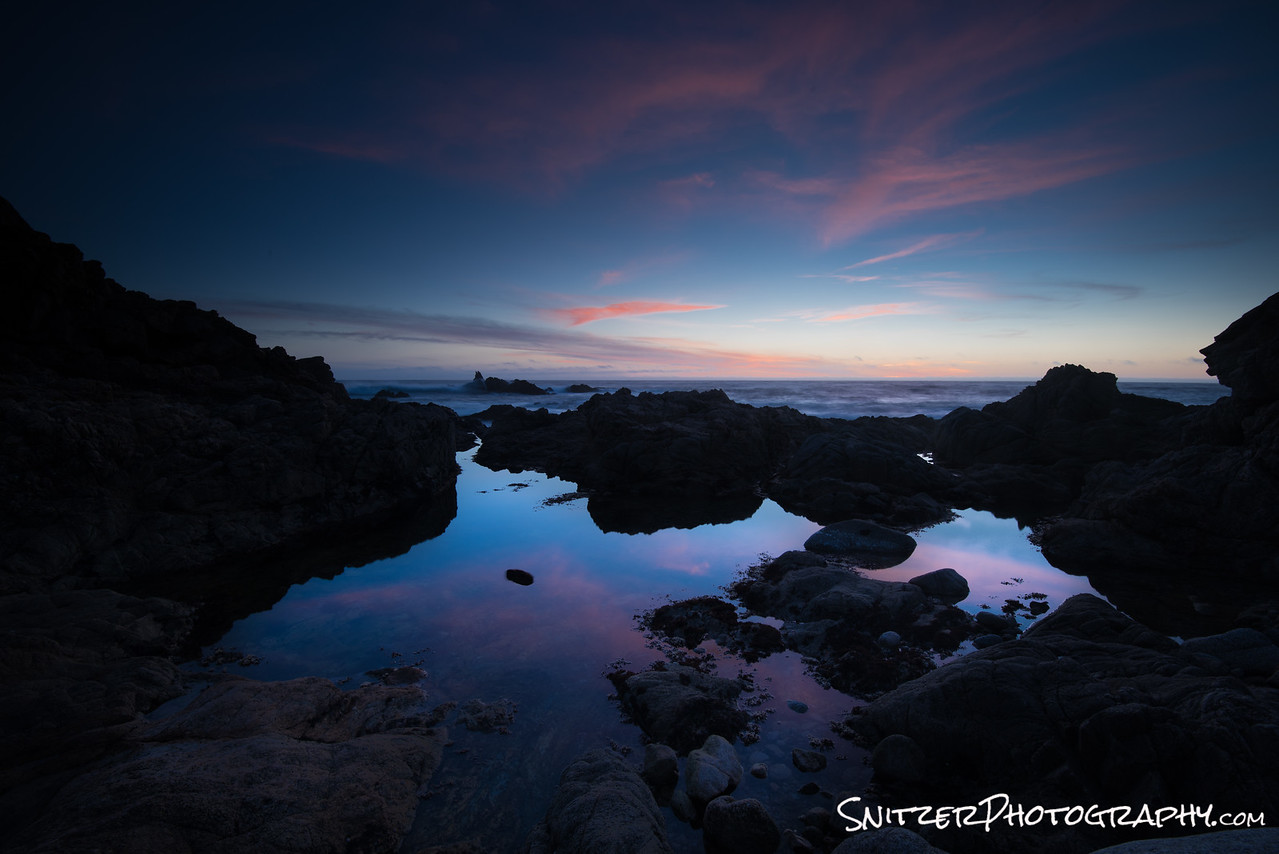
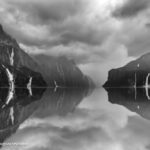
Grads also work great for mirrored reflections. Typically the mirrored reflection is 2.5 stops darker than the sky. I usually use the 3 stop hard grad…and darken the water slightly (1/2 stop) using a selective brush in post processing to make sure it looks realistic.
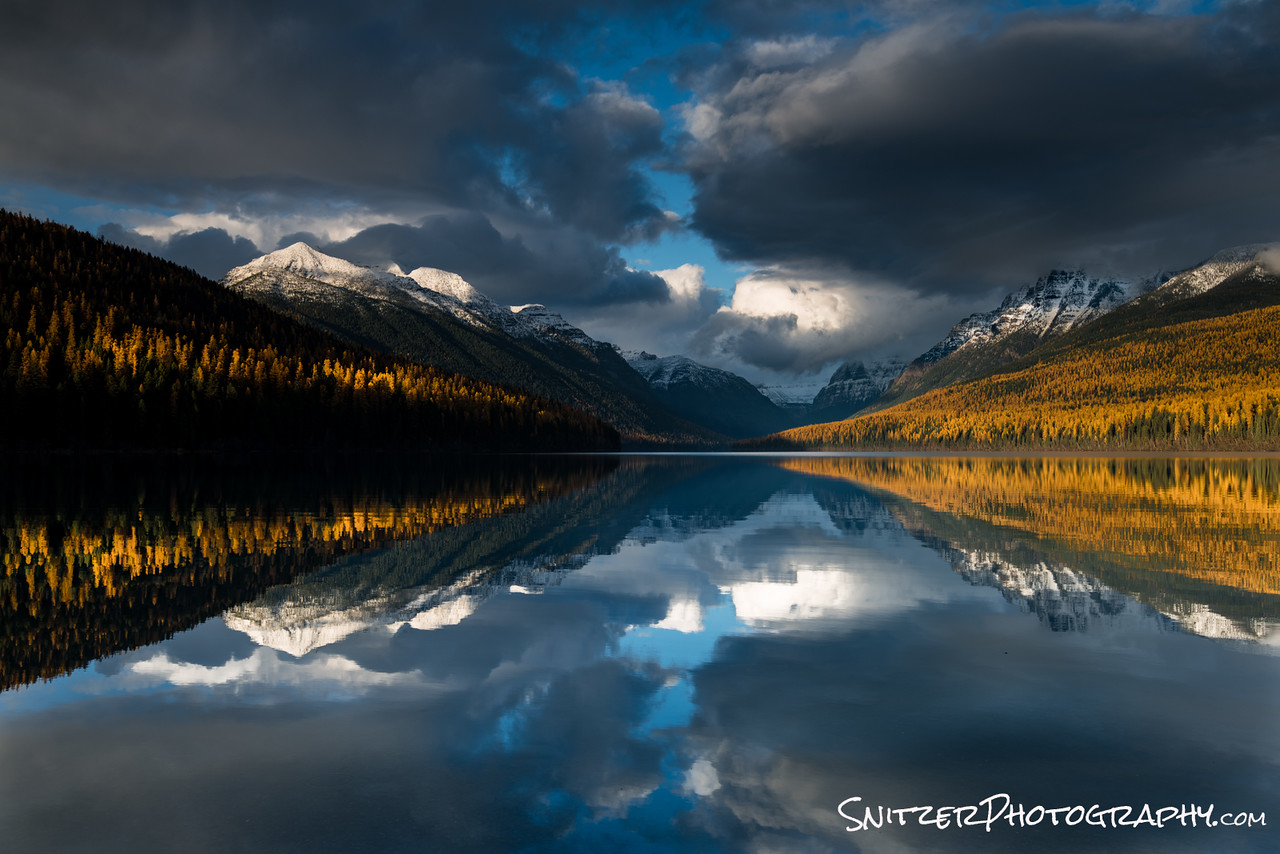
3 stop hard grad
Solution #3 Exposure Blending. You can also accomplish the above results by taking two images exposed three stops apart (one for the sky, one for the foreground) and combine in PhotoShop. Ergo use the “good” sky with the “good” foreground…masking as required. This works great when you have a tricky foreground subject that’s uneven…mountain range with peaks for example. I usually prefer the HD Grad route when possible since it saves time in post processing and makes it easier to spot that special “winning” photo when you’re shooting several images of a scene.
Solution #4: HDR Software approach (when you can’t fit the range into one shot). As you recall from above, our scene from Zion taken with a Canon 7D demanded more range than our camera could handle. We needed a little help from HDR software to merge the best parts of our over and under exposed images together. Shown below is a scene shot two stops under exposed, normal and two stops over.
This overexposed photo has plenty of foreground detail, but the sky is now stark white.
Industry standard: Photomatix $100 has been used to merge our three shots (-2, proper and +2 over exposed photos). Quite an improvement!
The merged photo is a big improvement over any of the three earlier images
- http://www.hdrsoft.com/
Unfortunately, Photomatrix can often look a little “fake”, with surreal looking colors, halos and a rather gamma like feel. Many pro nature photographers have been reluctant to use HDR software for this reason. An example of an “overcooked” Photomatrix image prominently featured on the ever popular “Stuck in Customs” Website below.
What planet was this taken on?
What’s supplanting it: HDR Expose $100. The image below merges our earlier Zion photos with better results.
Better looking HDR rendition of our Zion scene.
- http://www.unifiedcolor.com/products/hdr-expose-3
HDR Expose provides more natural looking images, no ghosts or strange lighting effects. This photo taken in the Zerkel National Forest doesn’t look HDR.
Aurora HDR has just released it’s latest 2018 version with results that are on par with HDR Expose. Both products have a free trial to test drive. You can’t go wrong with either…hard to recommend one over the other…both great.

Aurora HDR 2018 does a great job equal to HDR Expose!
But wait a minute. How about Lightroom’s in house HDR processing! Let’s try the same three photos and see how LR does! Errr….it’s looking pretty flat. Certainly not as attractive to look as HDR Expose/Aurora’s results. But hold the phone, let not give up yet.
Let’s try some Lightroom processing. Increase the contrast, saturation, add in a little dehaze and clarity.
Now that’s more like it. In fact the results now match the quality produced by those expensive third-party software options. Conclusion: Lightroom HDR when processed correctly holds it own with the competition, provides more control and saves you $100!
By the way, HDR done well is impossible to detect. The photo below looks 100% natural (but it’s HDR).

- HDR processed images are notoriously noisy in the dark areas (especially when processed with Photomatrix). HDR Expose, Aurora HDR & Lightroom each have the ability to avoid this noise. HDR Expose does it by offering a processing option for static photos (ergo. those taken on a tripod).
HDR check list when shooting
- Test shot: Get exposure right. Clipping appearing in the histogram?
- Set camera to auto bracket. Bracketing must be done by changing shutter speed not F-Stop.
- Depth of field issues typically appear with F-Stop bracketing.
- Select number of bracketed shots (typical 3, 2 stops apart). Extreme situations 5 shots (more advanced cameras offer this autobracketing option).
- If hand held, set the camera to highest frames/second. Depress shutter until bracketing complete. Shooting 5 bracketed shots typically can produce slower shutter speeds (hard to hand hold)
- If tripod, remember to activate mirror lockup option to reduce shutter induced camera vibration (Imp for exposures between 1/20 and 10 seconds). Turn off vibration reduction on your lens!
- Allows very low noise production during post-processing.
- Great for small F-Stop shots for max depth of field (slower shutter speeds).
- Lightweight tripod great when hiking. Slik Sprint Pro II $89, 2 lbs., $89.
- Don’t forget cable release.
An example of a super high dynamic range shot requiring 5 shots.
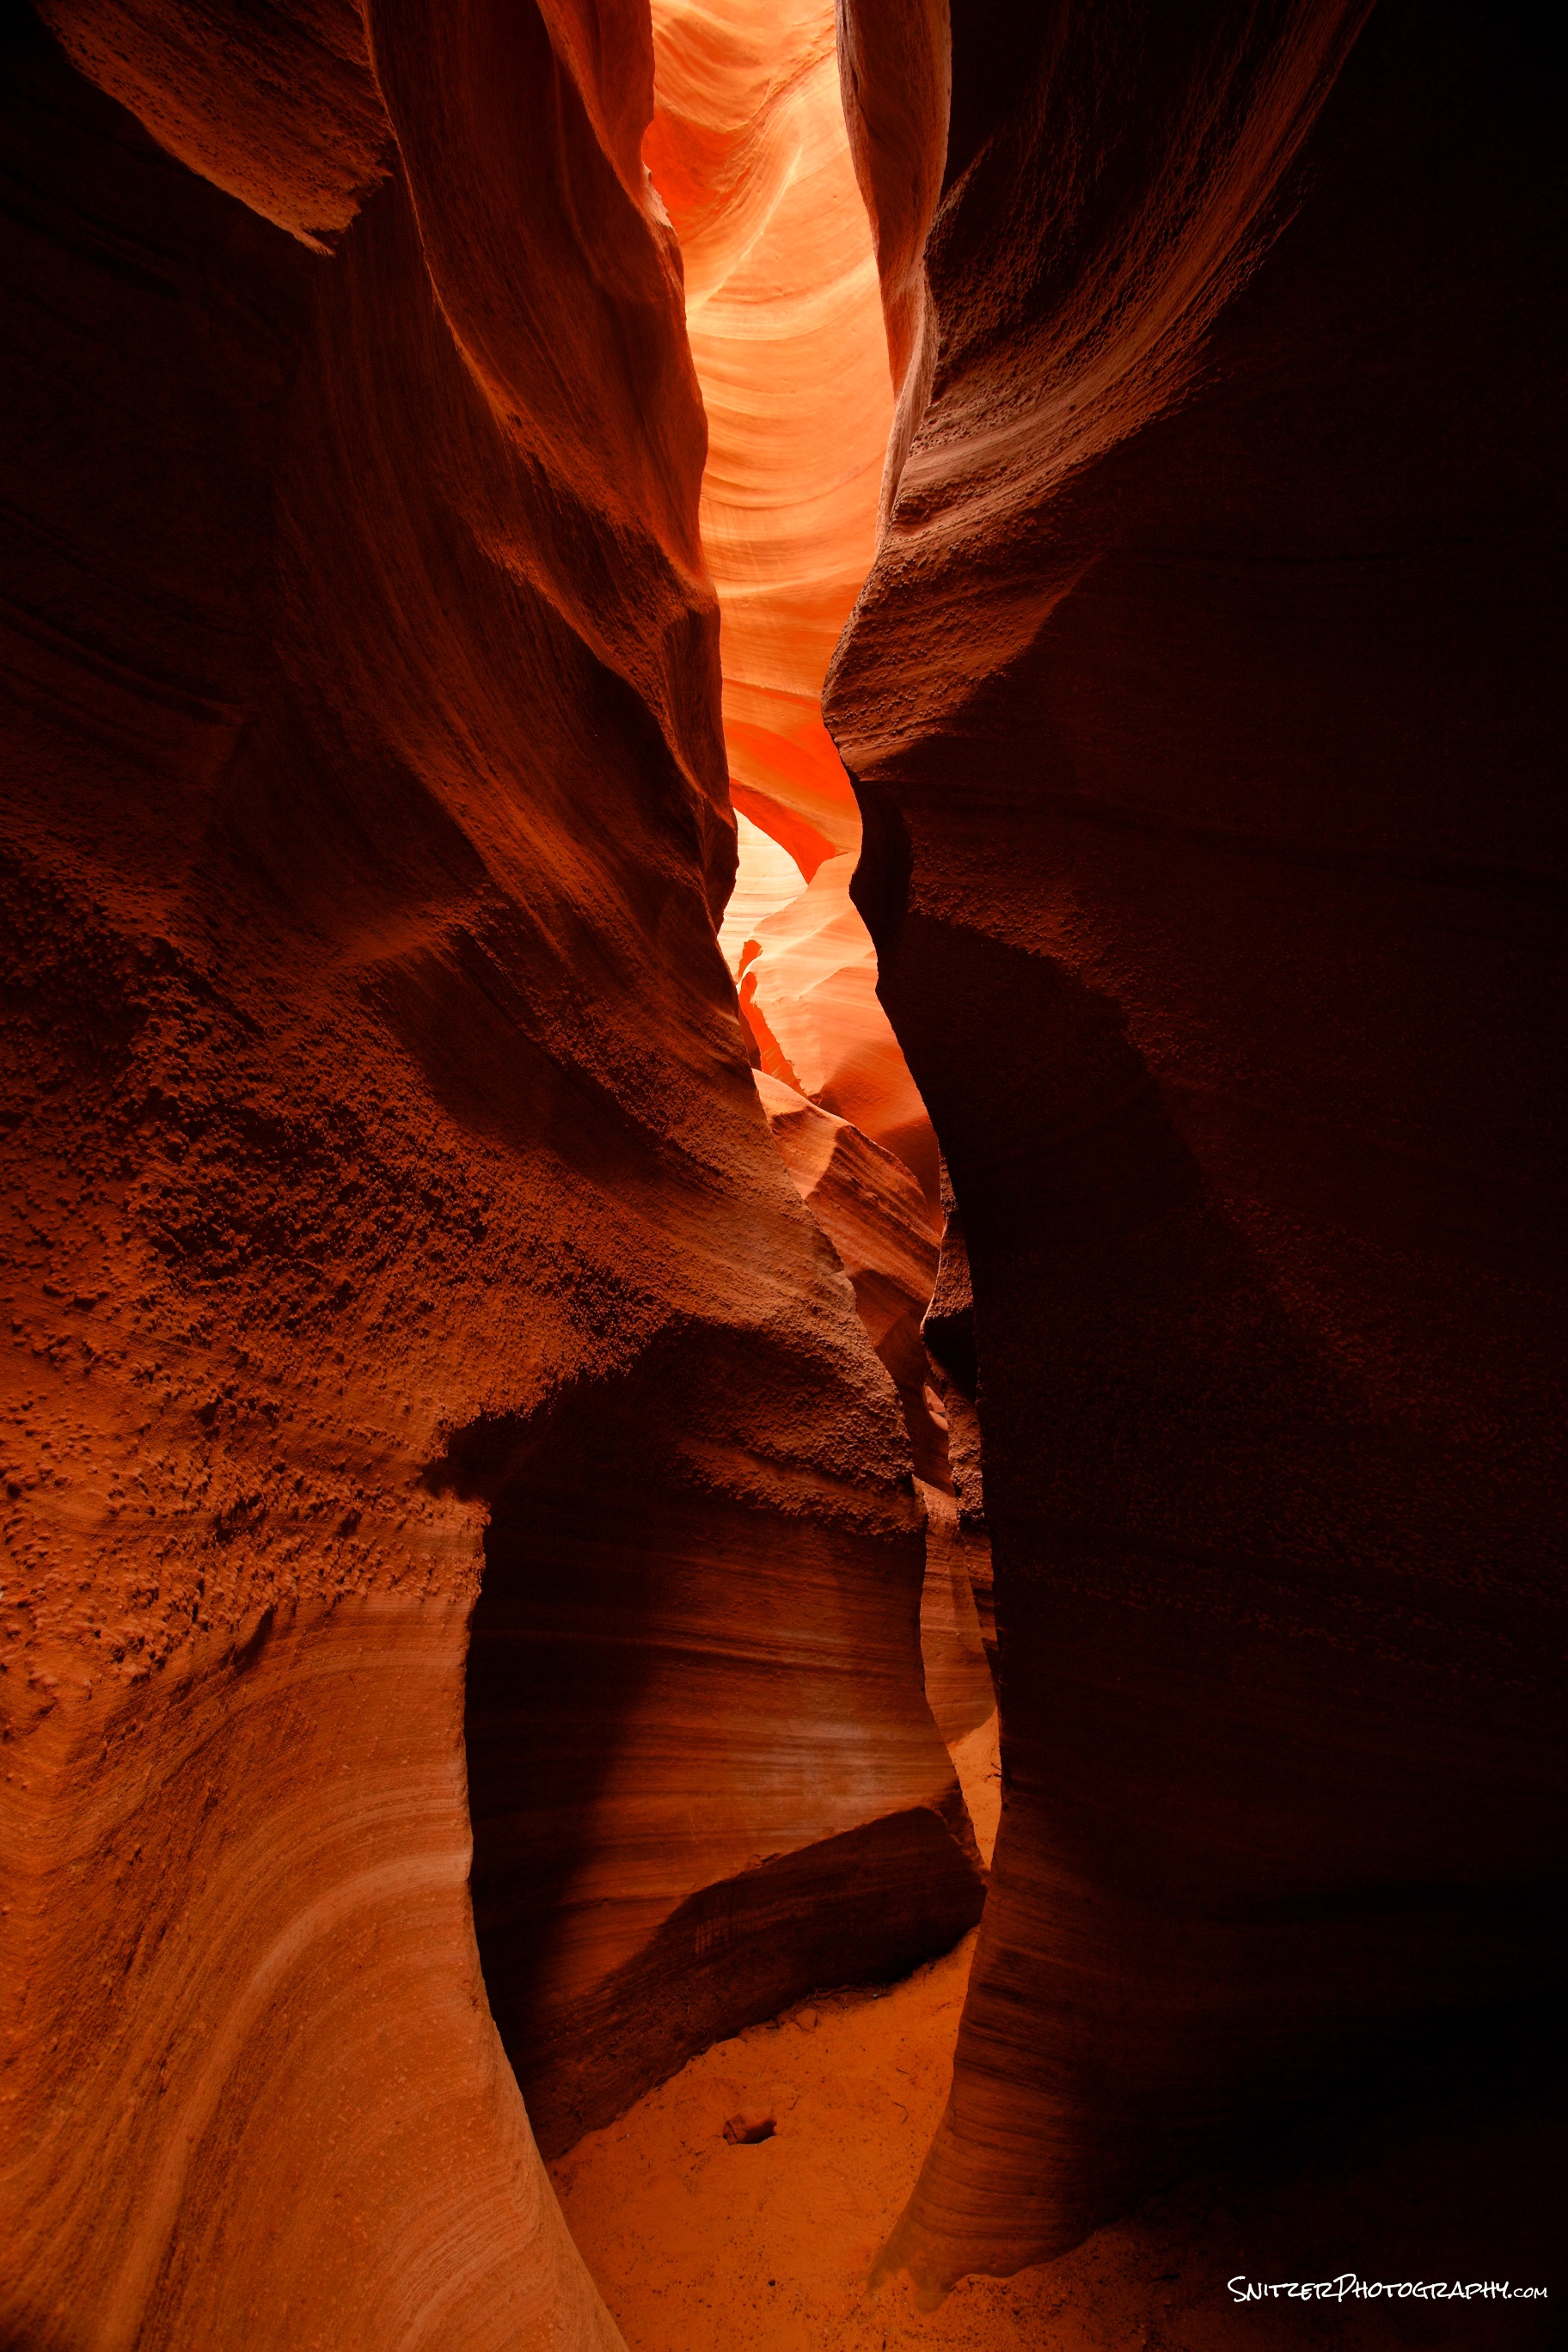
- Visited the Iconic Antelope Canyon is Arizona. Most of my photos captured the typical imagery that’s been portrayed for decades in this local.
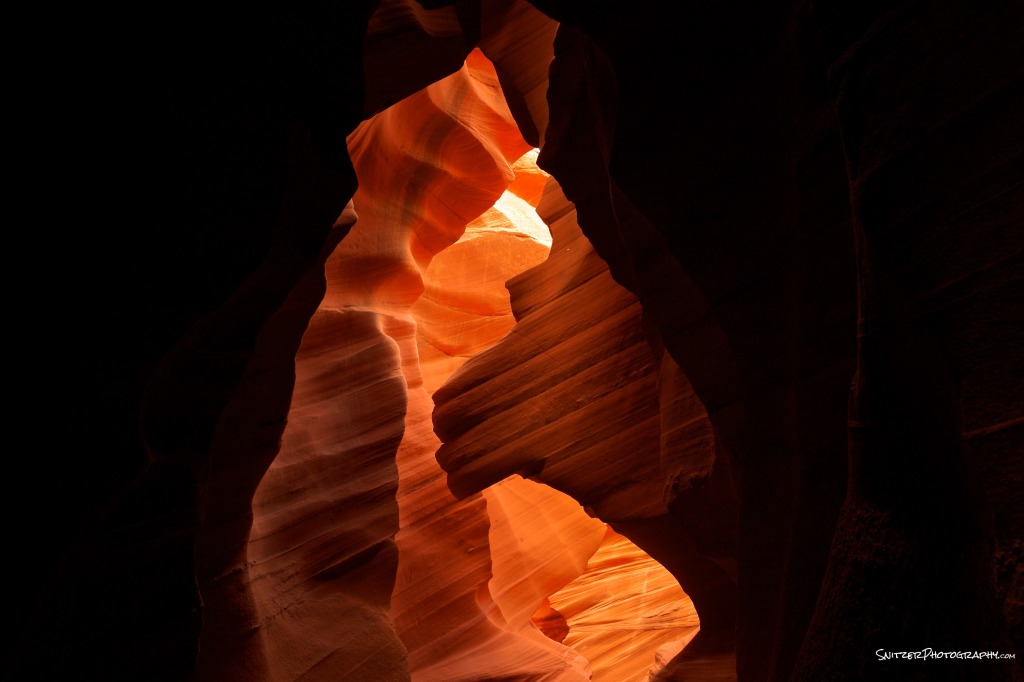
Great shot…just like everyone elses?

Nothing wrong with this pic?
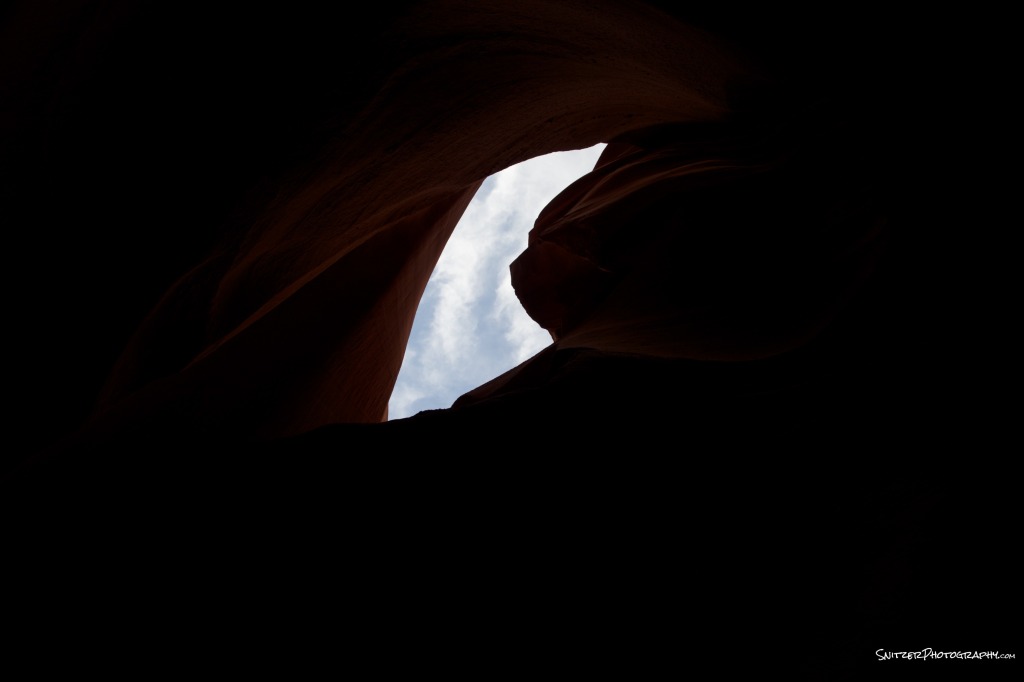
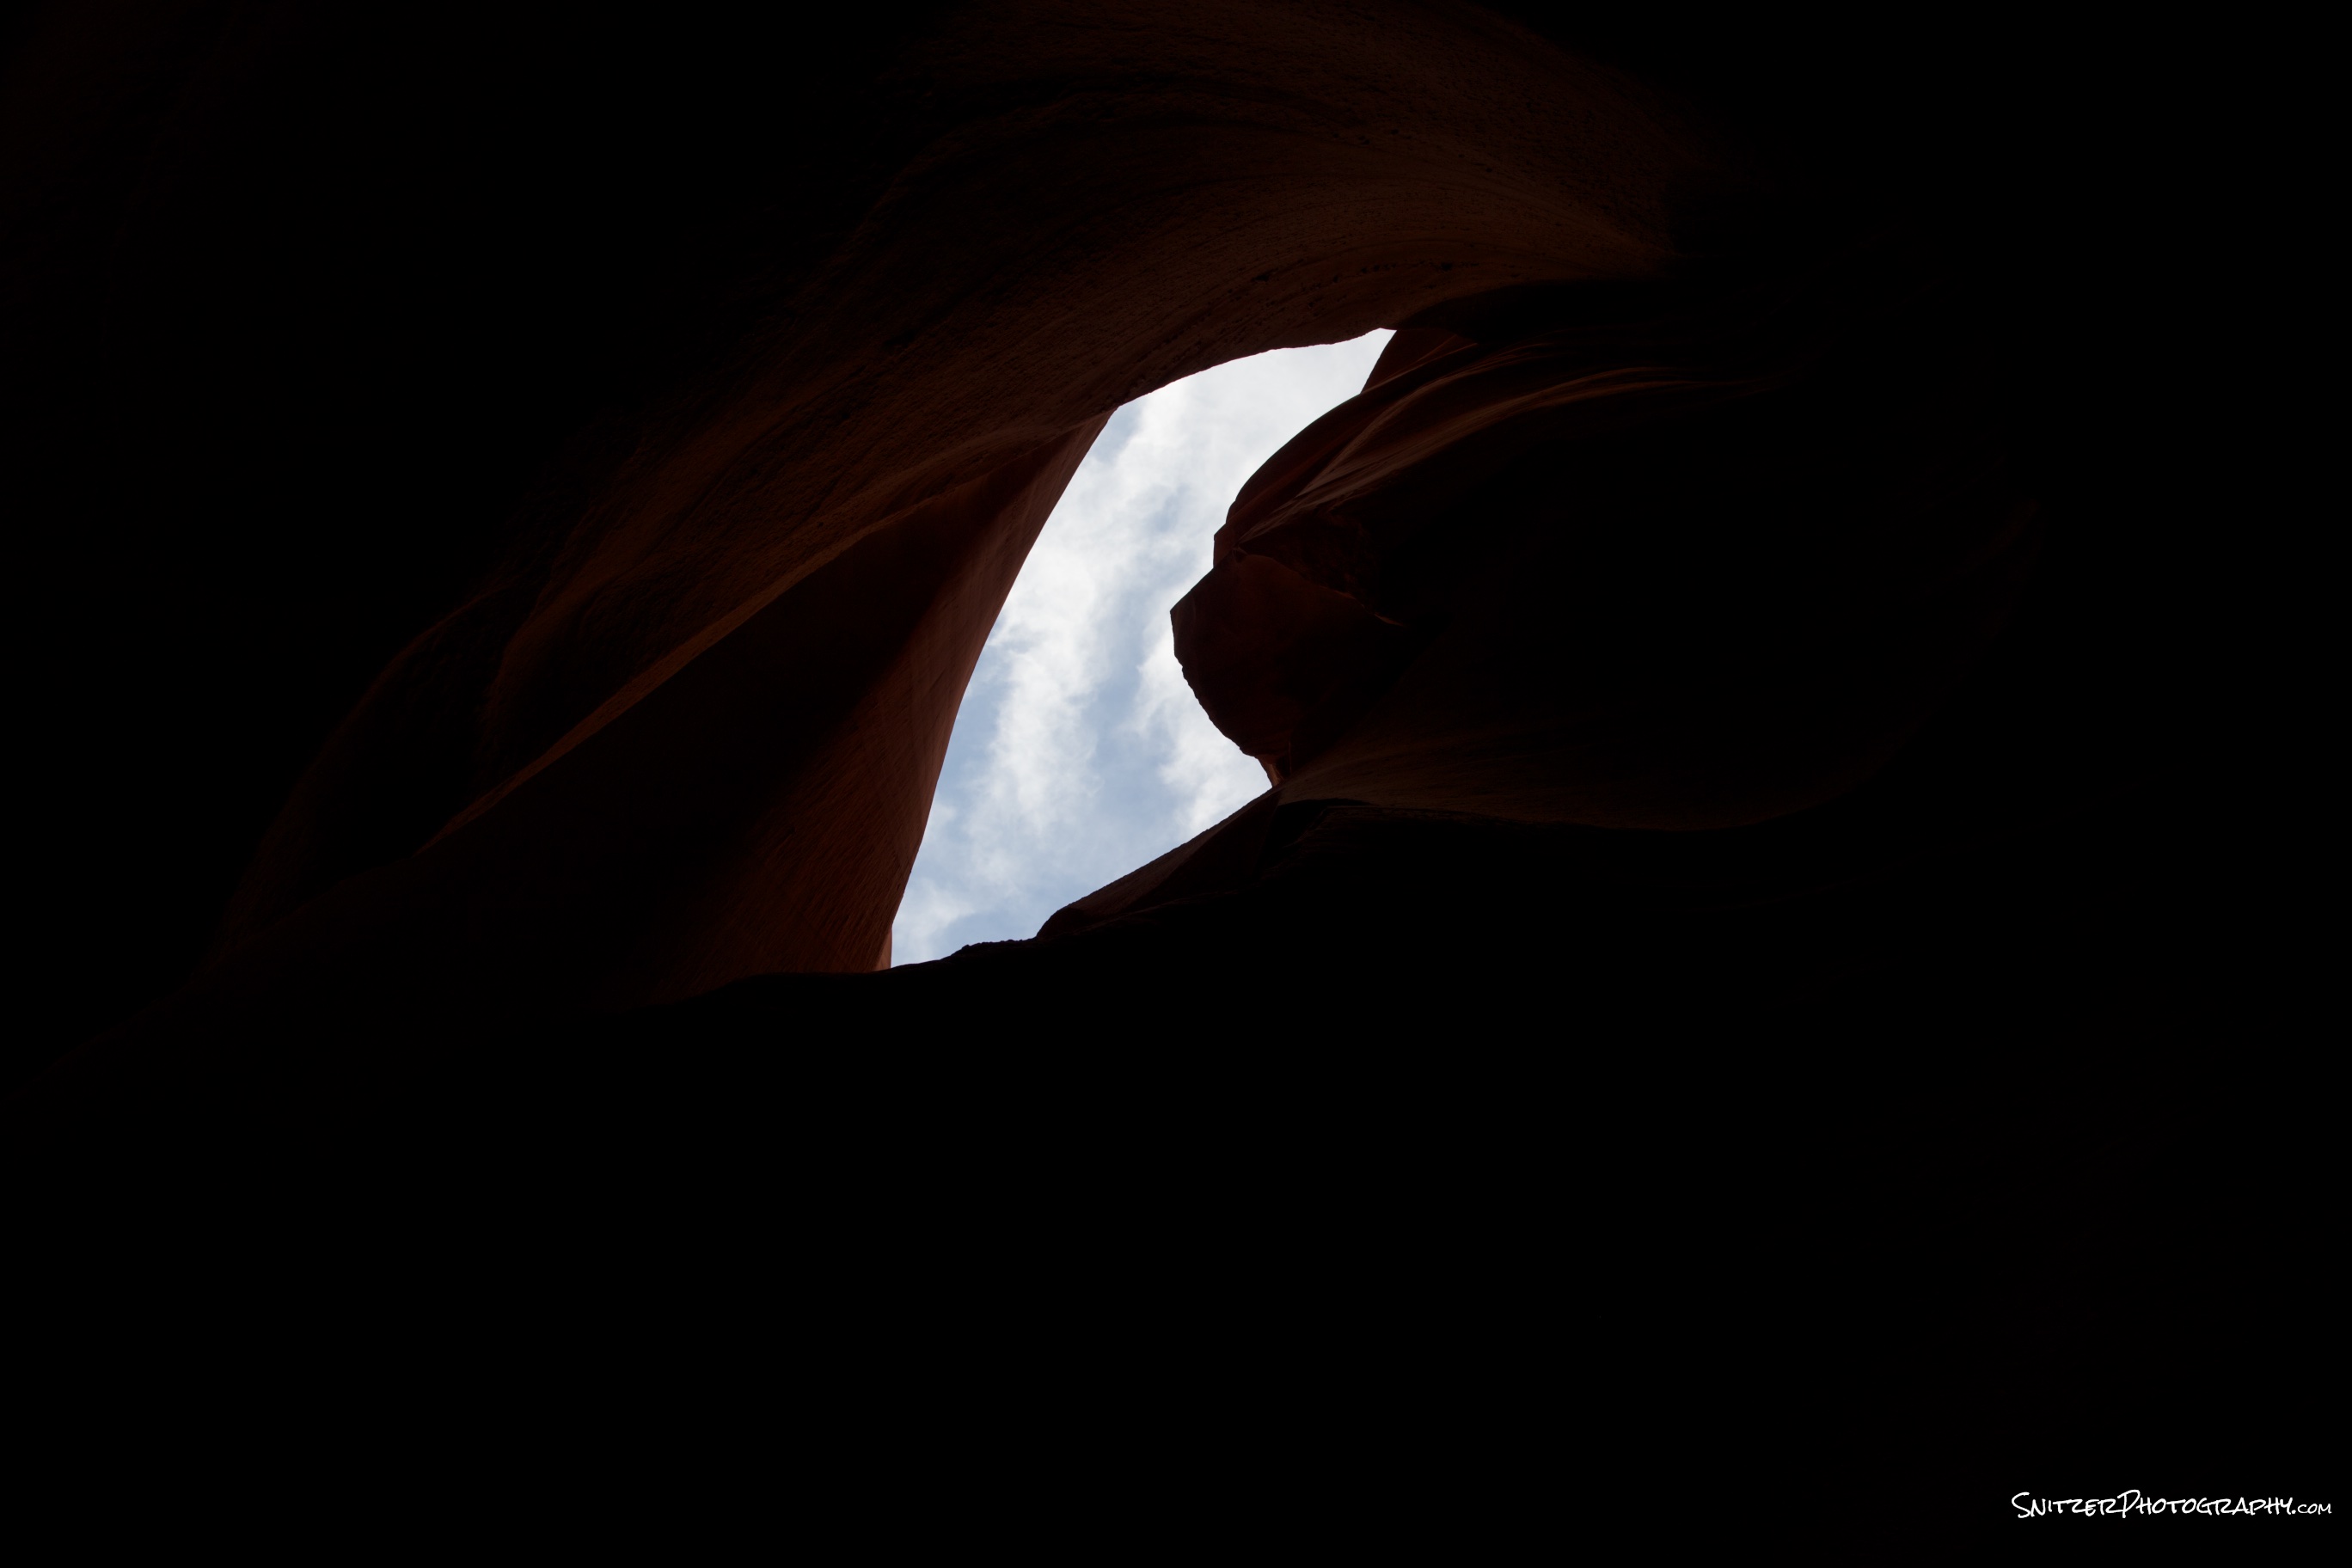
- I was hoping to convey the relationship of the sky to the canyon below. Ergo the source of light that provides the wonderful illumination effects. I set up my camera pointing up and fired off 5 bracket images (2 stops apart).
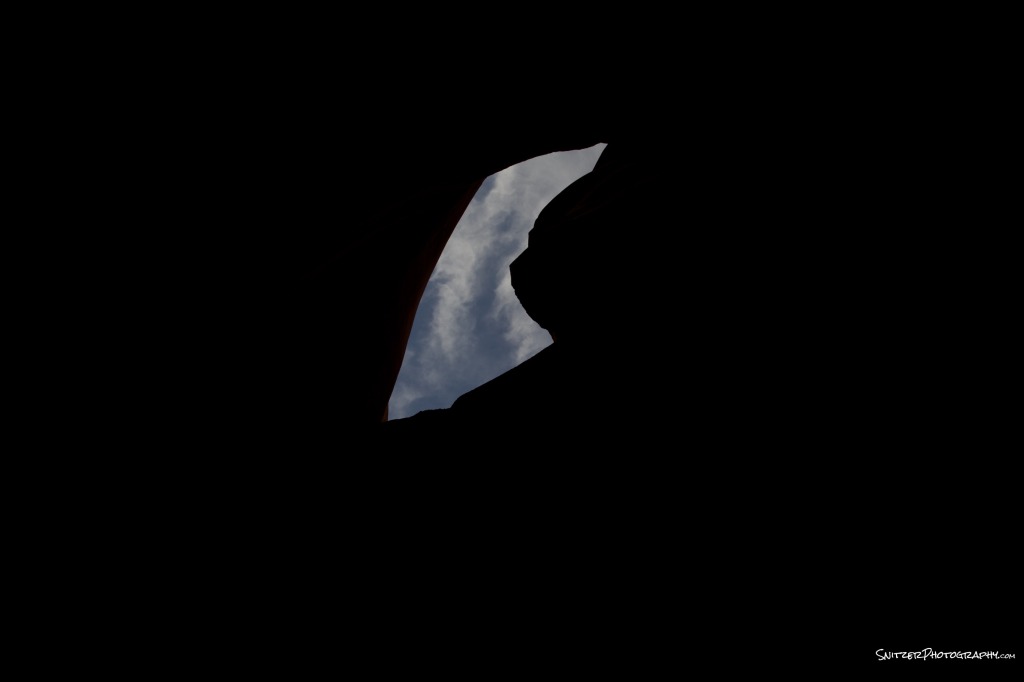
4 stops under.
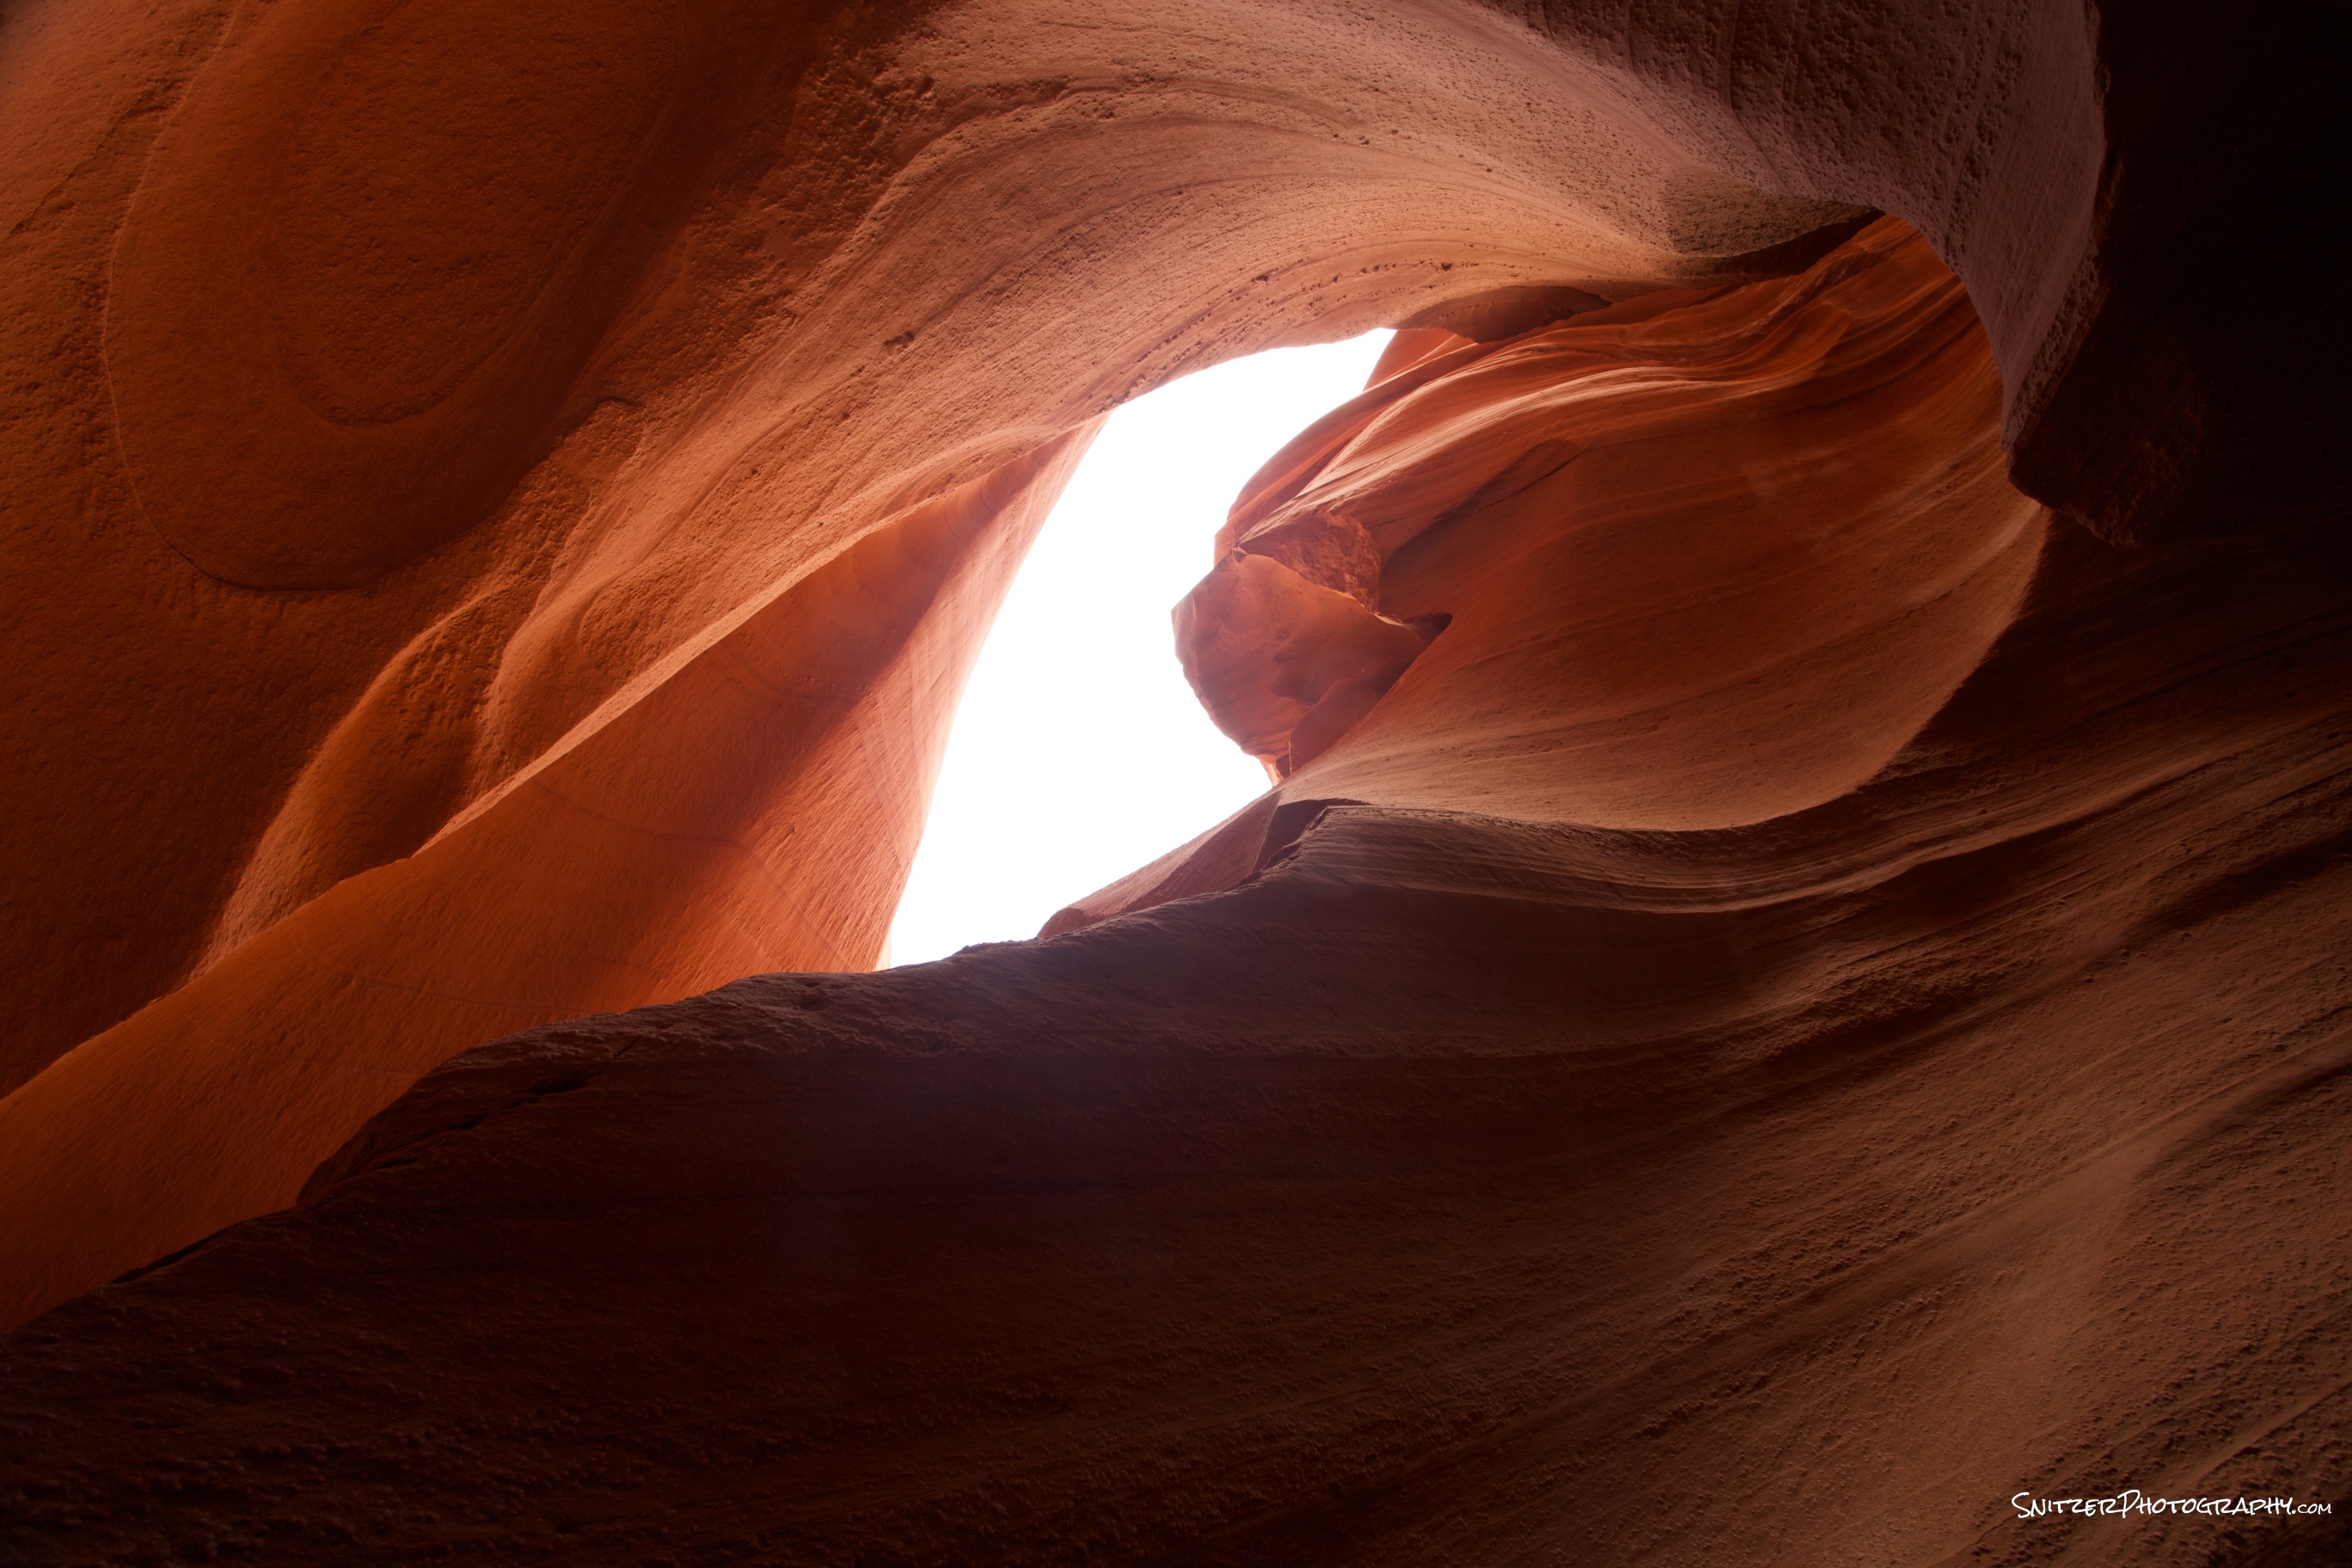
2 stops under
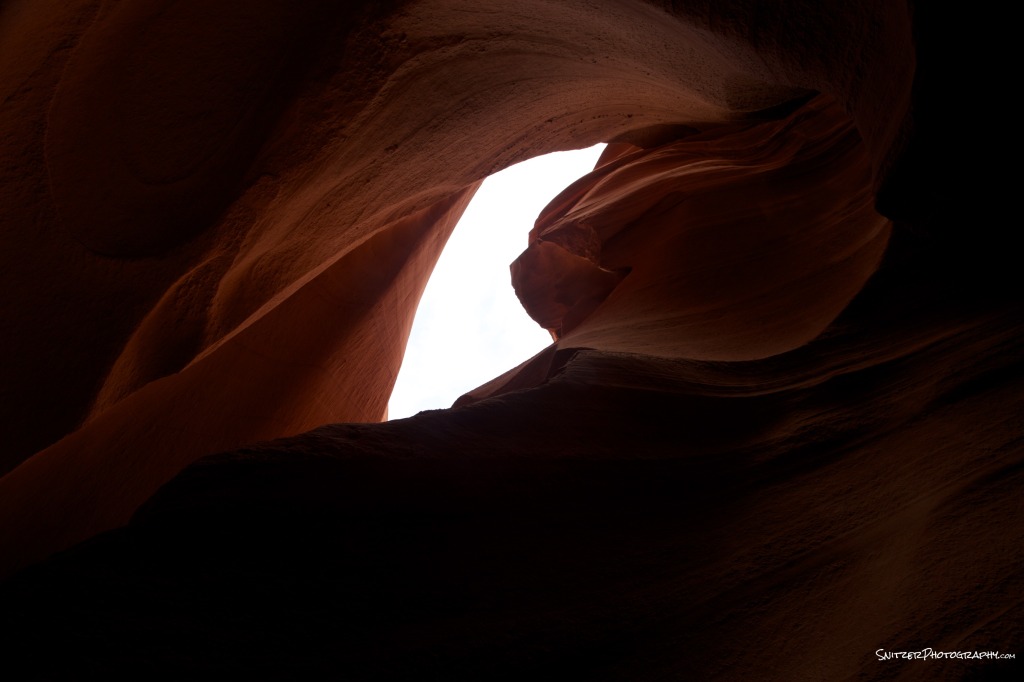
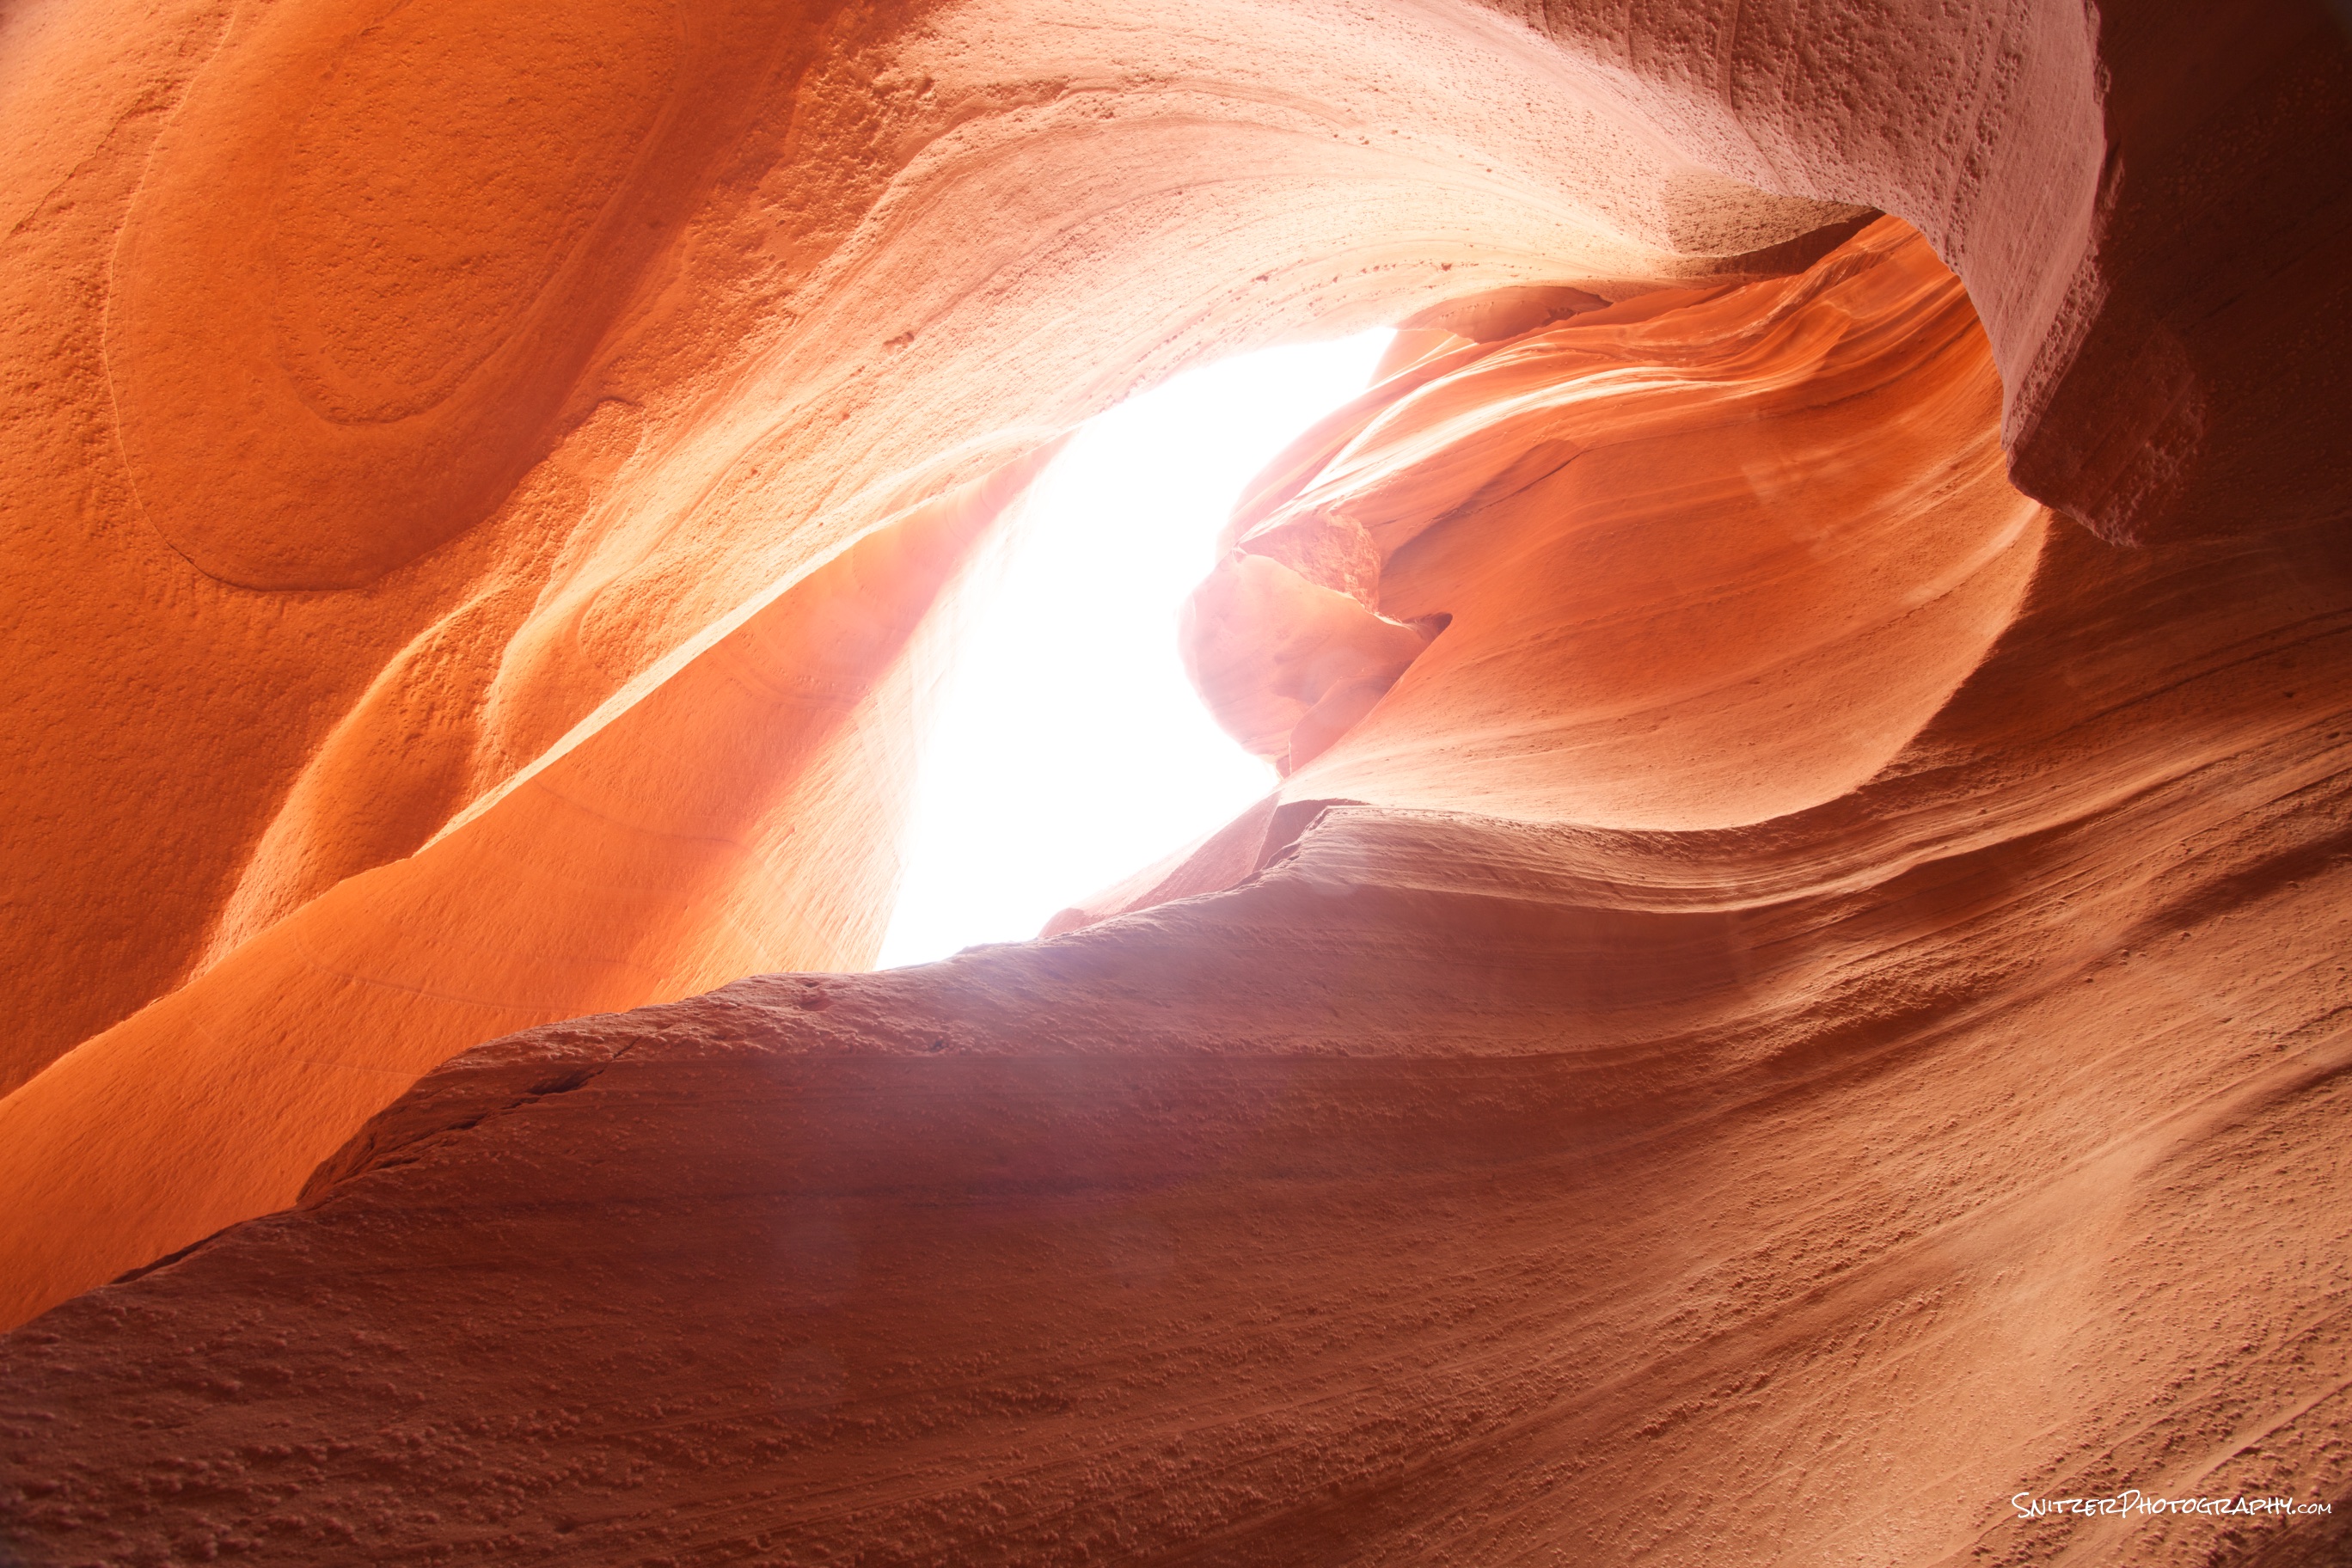
neutral

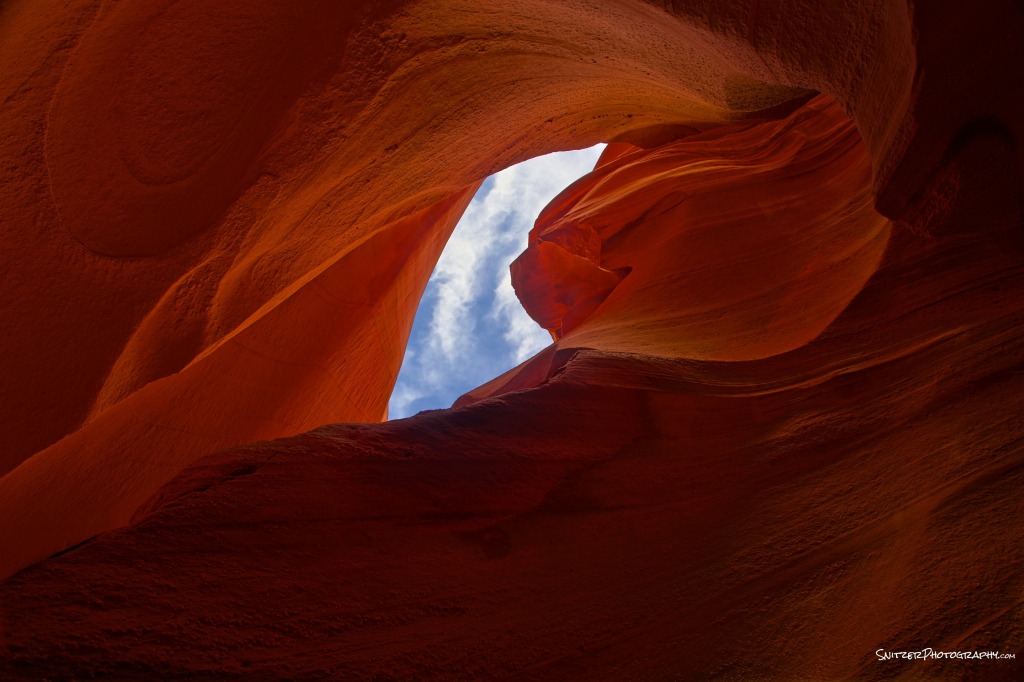
2 stops over

4 stops over
- And our merged image combining the best pixels of the above 5 shots!
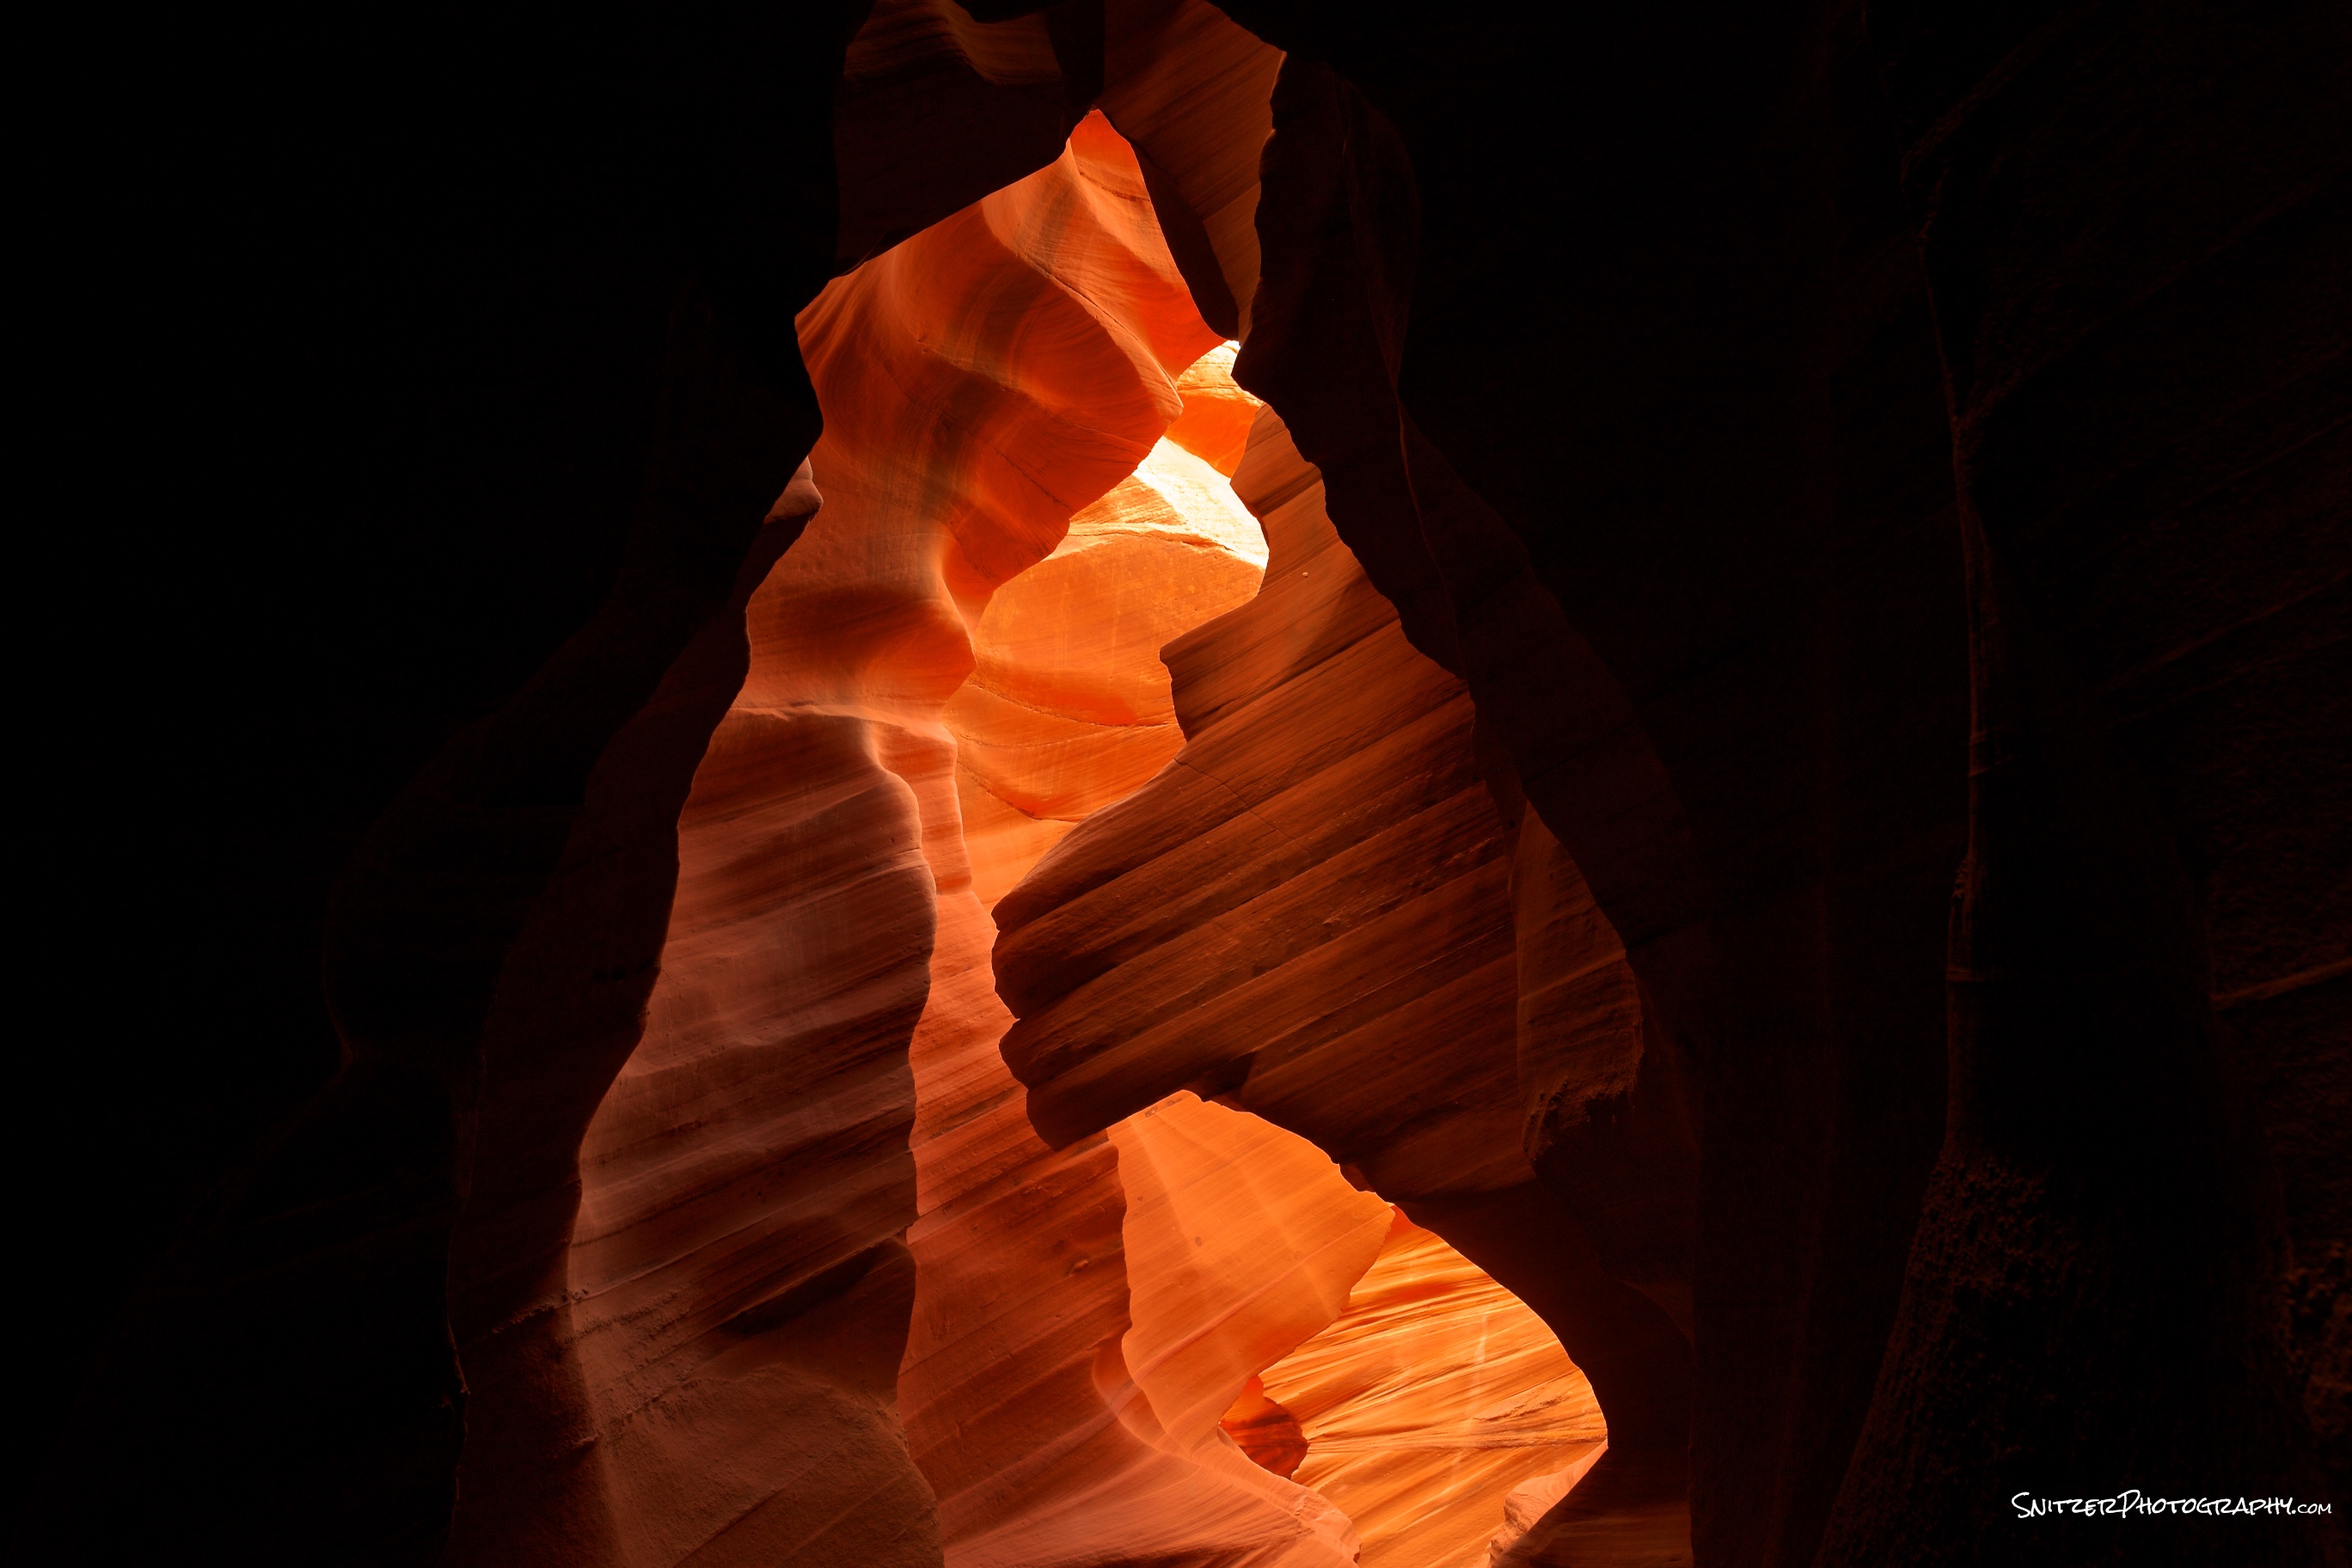


HDR post processing (in HDR Expose).
- Do HDR merge of your photos before post processing in Lightroom or Photoshop.
- Remember to select “static image option” if photo taken on tripod. Reduces noise, best image quality.
- Video tutorial page offers lessons to fine tune your photos. Some areas of special interest include “ghost removal” for merge of moving objects, removing of “veiling glare” for shots taken into the sun, basic controls/presets to control amount strength of HDR processing.
- Things best left to Lightroom/Photoshop (not HDR Software). Black point, highlight, color temp, vibrancy/saturation adjustments.


Valuable writing ! In case , if anybody is requiring to merge PDF or PNG files , my husband came upon presentation here http://goo.gl/nV2q8C.