For years, sports photographers were forced to employ use high power strobes in gyms to get noise-free, sharp images. Most of the content you viewed in Sports Illustrated was shot with expensive monolites installed in the ceilings of arenas.
Shown left is an example of this type of lighting (I shot several years ago during the Illinois HS State Tournament).
Recently, new sensor technology has produced cameras that:
1. Can produce clean images at ISOs of 3,200 or even 4,000 and
2. Are ISO invariant. Ergo, you can recover photos that are underexposed by 2 or 3 stops (actually up to 5 stops depended on the sensor).
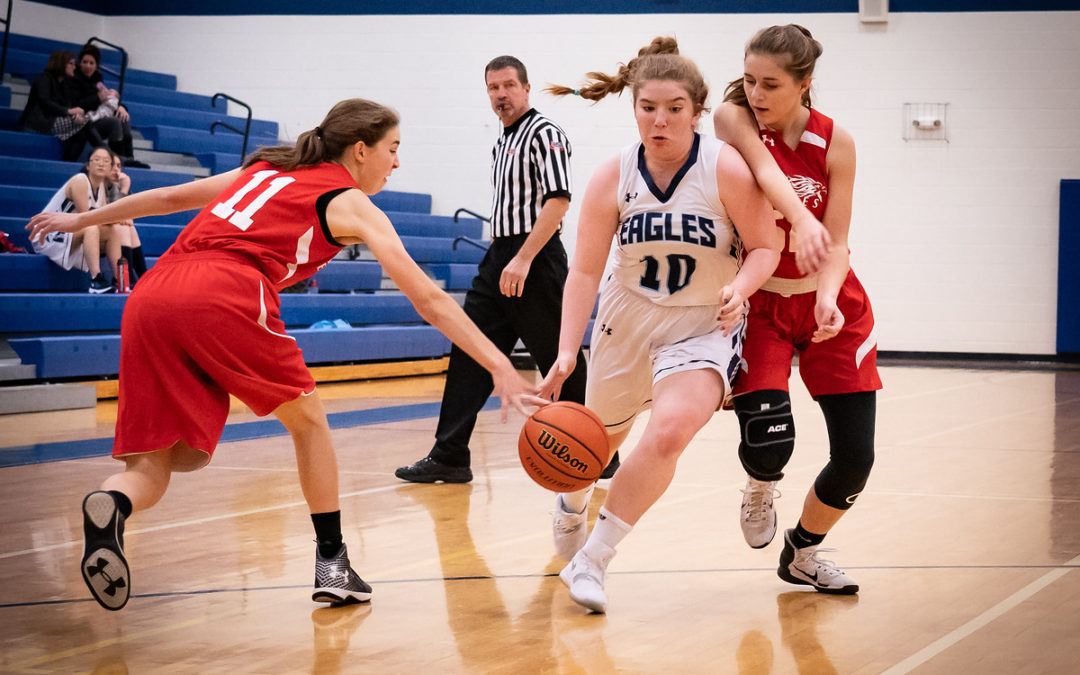
The image below (without strobes with a Sony 7A III, ISO 3200, 1/500 @ F4.5) was shot 1.5 stops underexposed and recovered in post-processing.

How I dial in my settings to get great results every time (when shooting indoors).
1. You’ll need a camera that’s ISO invariant & has a fast frame rate/big buffer.
- The new Sony 7Ar III, 7A III & Nikon D850 are well suited for this. The Sony 7A III with it’s smaller sensor has the lowest pixel density and therefore best low light performance (my fav amateur camera for sports/lowest noise at high ISOs).
- The Sony A9, Canon IDX II, and the Nikon D5, favored by Pro shooters, are also tremendous but expensive options for the amateur.
- The Nikon
- D750, D810 or Canon 5d IV are ISO invariant but have frame rates/buffers that are generally too slow for indoor sports.
- Crop sensor cameras while having fast frame rates are generally not ISO invariant and generate lots of noise at high ISO levels.
2. Start with an ISO of 3,200. Your final settings may vary depending on venue brightness. You’ll probably choose an F stop between F4 & F5. This provides plenty of light to the sensor and reasonable depth of field. Remember, you have very little time to focus on a crowded basketball floor. Depth of field is your friend for indoor sports!
3. Does your location on the court impact your exposure settings? Yes? I’m typically behind the basket or along the baseline. I’ll be shooting wide @24-35mm in tight and at long focal lengths up to 100mm to capture midcourt action. The maximum focal length will determine my choice of shutter speed.
4. Shutter Speed: Typically I like to shoot at least 3x of my longest expected focal length to avoid camera shake and blurry players. The basketball game (shot above) was photographed with a 24-105mm lens. A shutter speed of 1/400 to 1/500th would be more than sufficient to stop the action. Note: if I’m using longer glass, I’ll likely need a faster shutter speed.
5. Fine tuning my exposure. I always shoot in manual mode. I’m trying to underexpose by approx. 1.5-2 stops. My histogram will be near the left, but not clipping in any underexposed portions of the image. Because my sensor can easily be pushed 2 stops or more in post-processing, this allows me to use faster shutter speeds and achieve better depth of field. In this case (my hoop game), I was able to shoot at F5.0 and 1/500th of a second (still not having any dark areas clip on the histogram).
6. As you can see, the Sony easily produces noise-free images at ISO 3,200. Note I increased my exposure in Lightroom (adding approx 1.5 stops) & added Luminance Noise Reduction (usually between 30-40).
7. Focusing. I use back button autofocus (single point, with servo tracking) to get a critical target lock.
8. Shooting outside? Shooting with an ISO invariant camera also allows you to avoid using the crazy expensive glass when shooting outdoors. For years, my go-to soccer set up required carrying two cameras on the field (ouch, my aching back!):
- Camera I: 300mm F2.8 . Great lens yes, but over $6,000, massive and heavy. I needed a fast lens to shoot night games since my camera, at the time, would get noisy at ISOs above 1,000.
- Camera II: a 70-200mm F2.8 on my hip for closer in work.
- Walking around with two cameras was not fun.
- My go-to set up now requires only camera/lens: a 100-400mm F4.5-5.6. It’s tack sharp and with the ability to shoot at ISOs north of 3,000 I’m covered (don’t need to shoot at very large apertures). It’s a relative bargain at $2,500 & has greater range. Even at F5.6 I still get great Bokeh (backgrounds out of focus).
9. Don’t forget to turn the image stabilization (IS) off. IS won’t help you when tracking moving objects, it simply slows down your camera’s ability to focus/track.
10. Post-processing tip: In addition to increasing the exposure I often will add a vignette to the image to draw the viewers attention towards the subject.


