Frustrated by HDR lighting? The sky looks incredible in person but your photos suck? Don’t worry, read this and you’ll never miss a big shot again?
The camera vs your eyes. We can see 20 stops of dynamic range( DR). DR meaning the difference between the lightest and darkest parts of an image. Ergo you can detect something 500,000 times brighter than something else. Cameras can’t do that (at least without a few tricks).
Low-hanging fruit:
- Shoot in RAW. This provides 3 more stops than a typical JPEG image. Note: each stop represents of doubling of DR (exponential function. 3 stops means 8 times the range)!
- Lower your ISO. For example, turning ISO down from 800 to 100 provides a whooping 2-3 stops of additional DR depending on the camera.
Camera brands do matter.
- Most Nikon, Sony and Medium format cameras (Hasselblad X2D, Fuji GFX 100) currently offer 15 stops of DR. They can also recover almost five stops of under-exposed data (ISO invariance), meaning even if you underexpose, you can save in post-processing.
- Canons, on the other hand, generally offer only about 12 stops (except the 5d Mk IV & R6 at 13 and their R5 and R3 at 15). BUMMER! Except for the latter two cameras, Canons can only recover about 2.5 stops of under-exposed data.
- Olympus? Not much better; their current mirrorless model offer about 12.8 stops and 2.5 stops of ISO invariance. (Source DXO Mark)
How ISO invariance REALLY works.
The first image is taken at an iso of 3,200.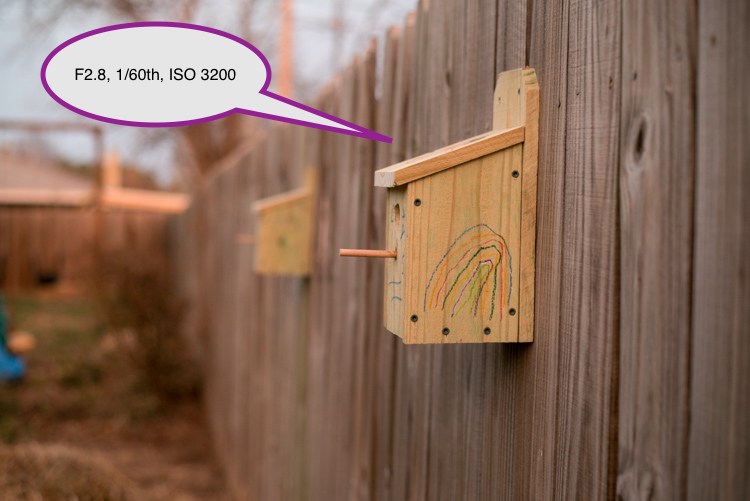
We under expose (ISO 100) by 5 stops and it’s practically black.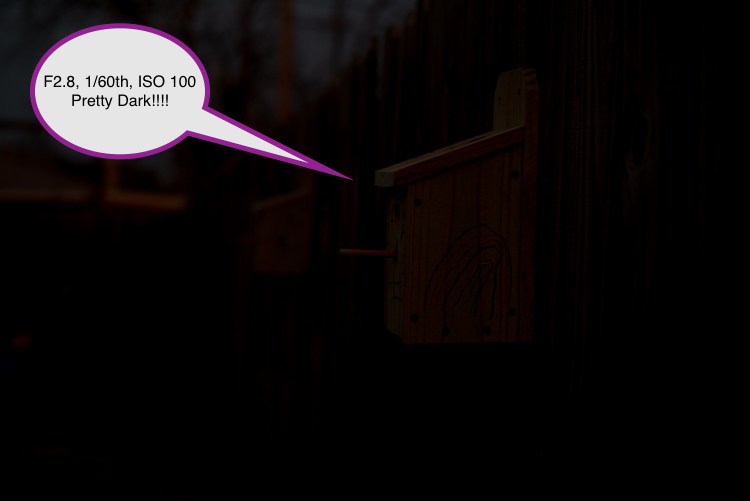
The miracle. We take that underexposed photo into Photoshop and boost the exposure by 5 stops. Image fixed! Sharp, no noise or loss of detail.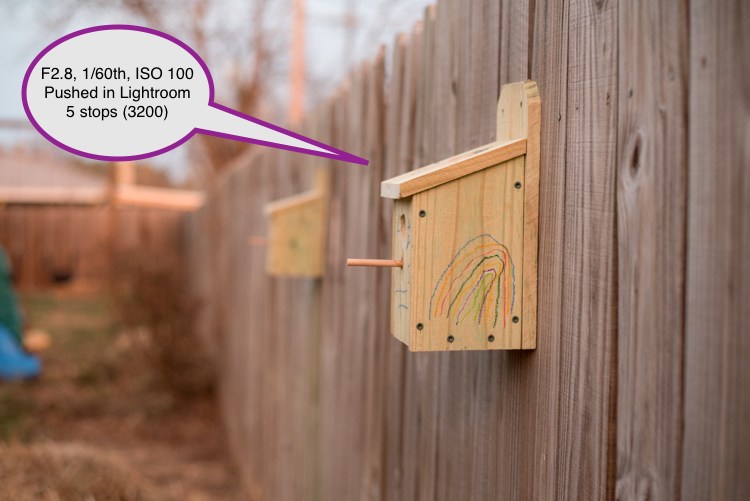
One thing to remember: Better to underexpose, NEVER overexpose (even 1 stop renders your image area white with no chance of recovery).
How to get the exposure right:
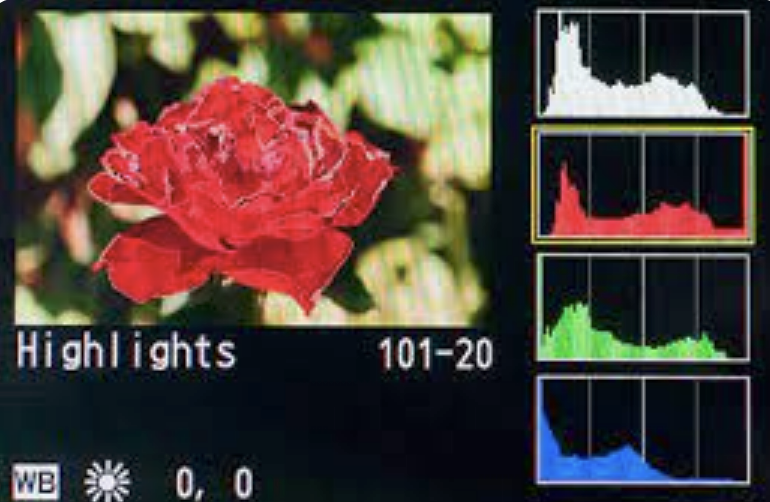
- Shoot in manual made. Use your histogram and highlight warning indicator. Turn up your exposure till you first see the highlight warning come on. Note: Your camera’s histogram is reading a Jpeg image. The RAW image you’ll be processing will have 1.5 additional stops of higher range. Meaning you can turn up the exposure 1.5 stops after you see the warning come on.

- For red/orange skies be careful. Your black & white histogram and warning indicator will typically not show clipping of your red channel. Make sure to watch this (using your red, blue green histogram) and reduce your exposure if the red channel is pushing up against it’s upper limit.
Bring back highlights in post: Ex.
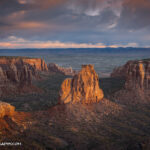
First photo is set to maximize exposure without losing the bright elements of the sky.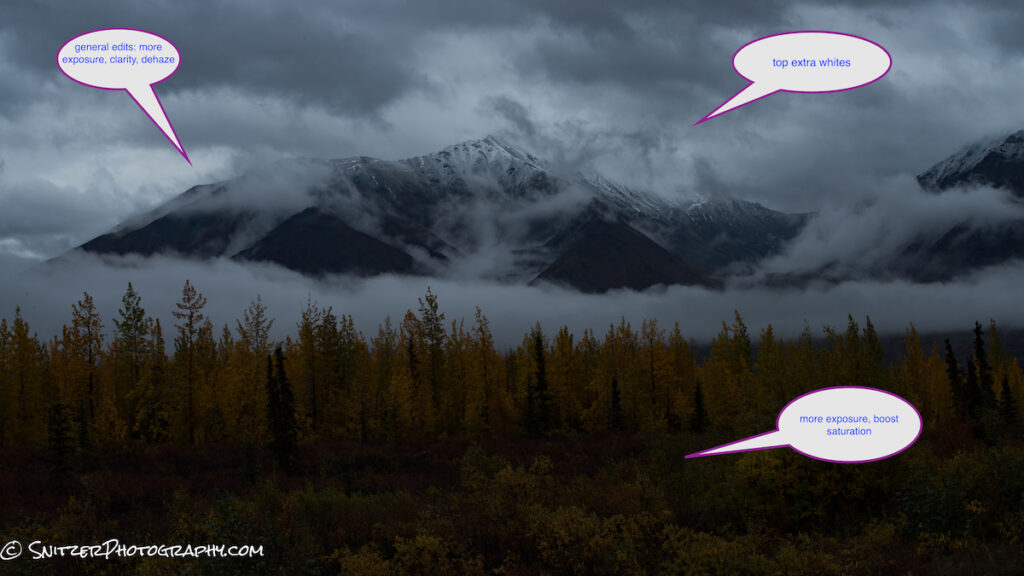
Then I use the “shadows” slider and a selective brush to add exposure to the foreground area and recover under exposed areas. Mission accomplished.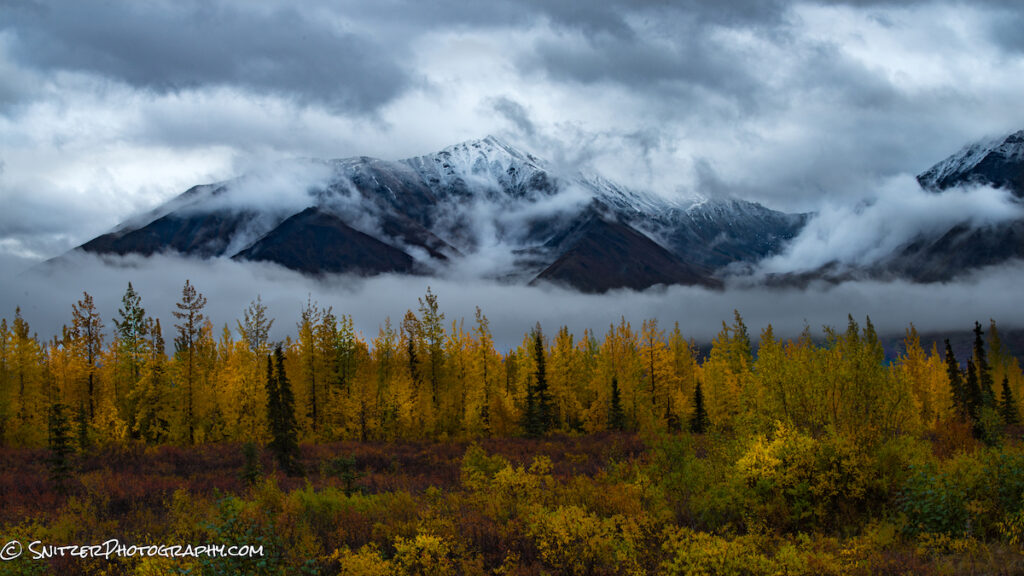
What if I can’t get the exposure right in one shot? Occasionally (a super bright sky) you will shoot at the optimal exposure and still see your histogram slammed up against the left side. That means there is additional data you’re losing in the dark areas. You have three basic options to get this data back.
Old School (Grads): Essentially a tinted windshield for your camera. These rectangular filters (graduated neutral density-Grads) slid up/down on a holder that screws onto your lens. You adjust the darkened portion of the filter to line up with the horizon of your shot.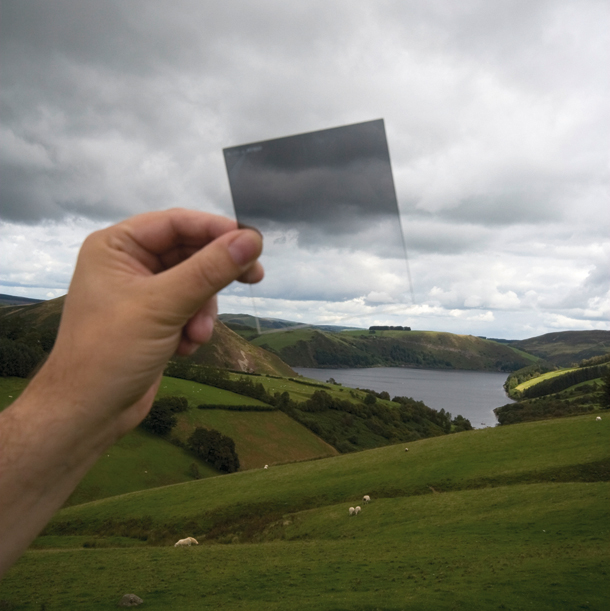
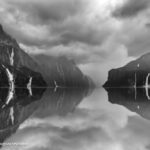
Pictured left no grad, pictured right with grad.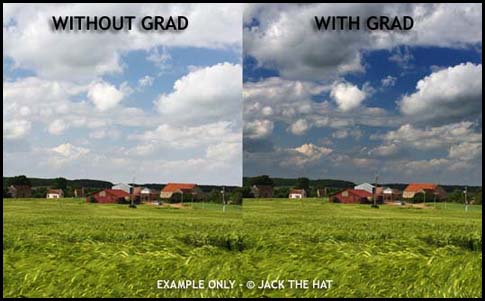
How you set up on your camera.

- Filters come in various strengths. I own a 2 and 3 stop Grad.
- They have either soft or hard transition areas(dark to clear). I usually use a hard filter.
- They can be combined in the holder with a solid grad (6 or 10 stop) to create very long exposures (good for coastal shots).
- Cost: Lots of good manufs (Lee being a popular choice). Cost for 2 Grads, 1 solid ND, holder and 2 lense attachment rings is about $500-600. Note: Stay away from Cokin (cheap but with a terrible color cast).
Photoshop exposure blending:
- Take one shot exposed for the sky. Take a second one exposed for the dark foreground.
- Combine using layer masks in Photoshop. https://www.youtube.com/watch?v=msIOb7Sg_Gc
HDR software: Take between 3 and 5 (in extreme DR situations) photos bracketing 2 stops apart. Photo below 2 stops under exposed. Sky is perfect, but the foreground is much too dark.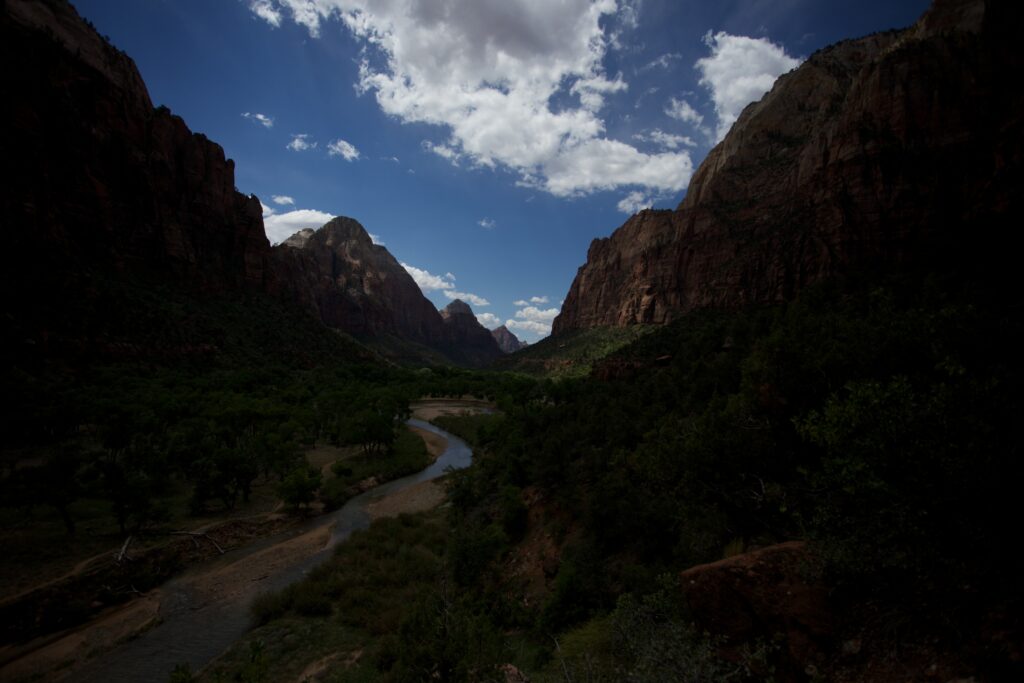
Next shot neutral exposure. Sky is a bit overexposed, foregrounds still too dark.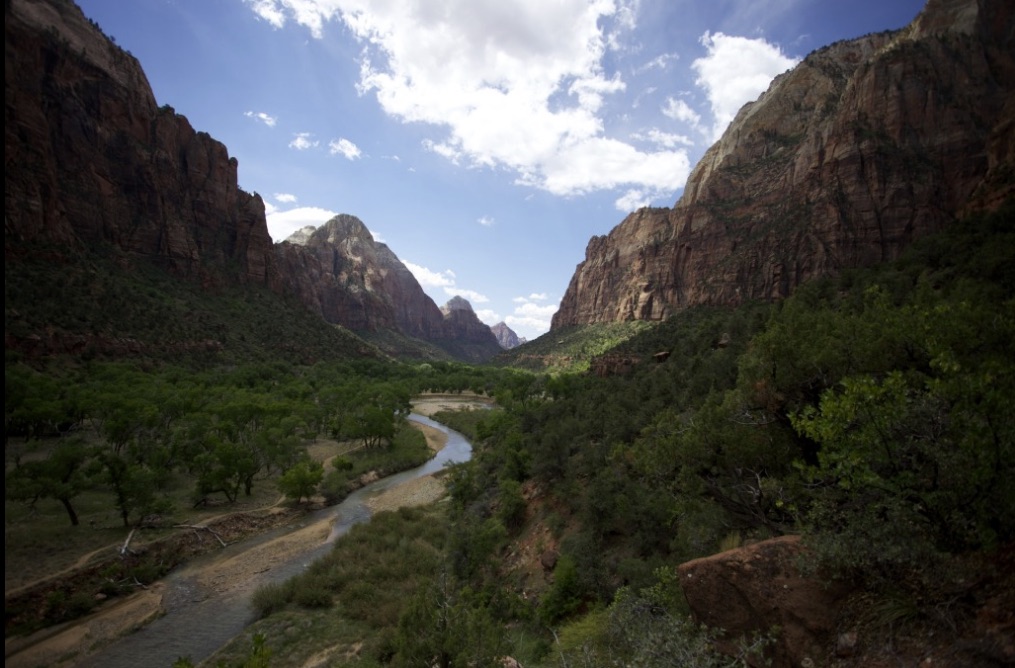
Final shot 2 stops over exposed. Sky completely blown out, foreground perfect!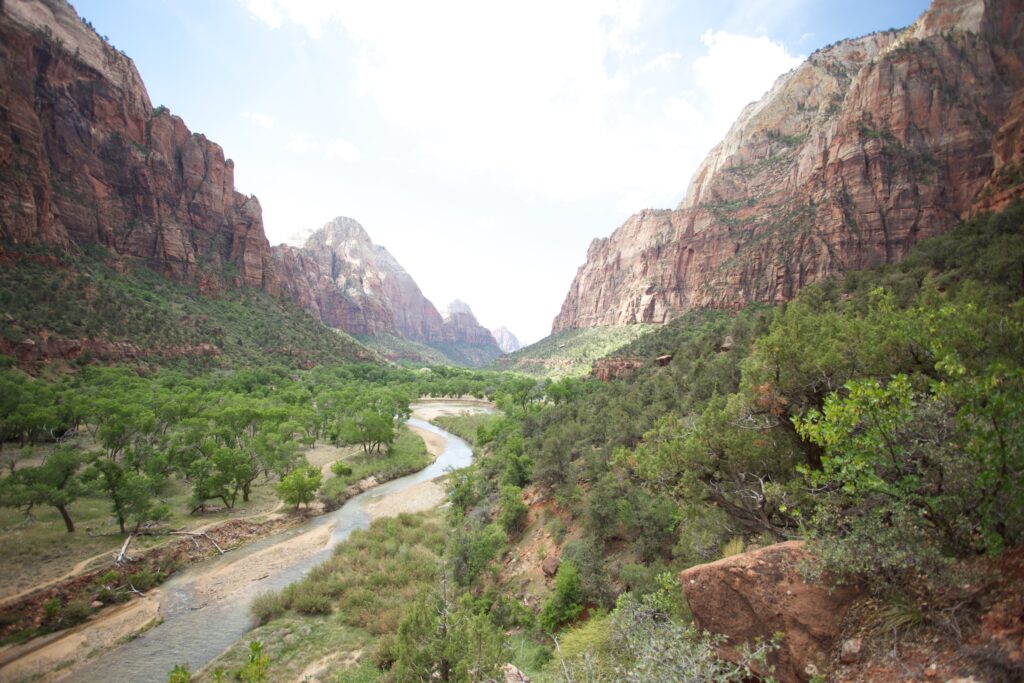
Then combine using HDR software to produce an image with huge DR! Many choices available (Photomatix, Aurora HDR). They’re all similar in quality. The best choice ironically is free, Lightroom(use auto-align feature, turn off auto settings). It keeps the resulting image in RAW format (the others return an inferior TIFF image). You’ll need to use clarity, dehaze, clarity black point and other sliders to tweak the final image.
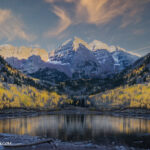
Lightroom HDR photo. Needs additional tweaking.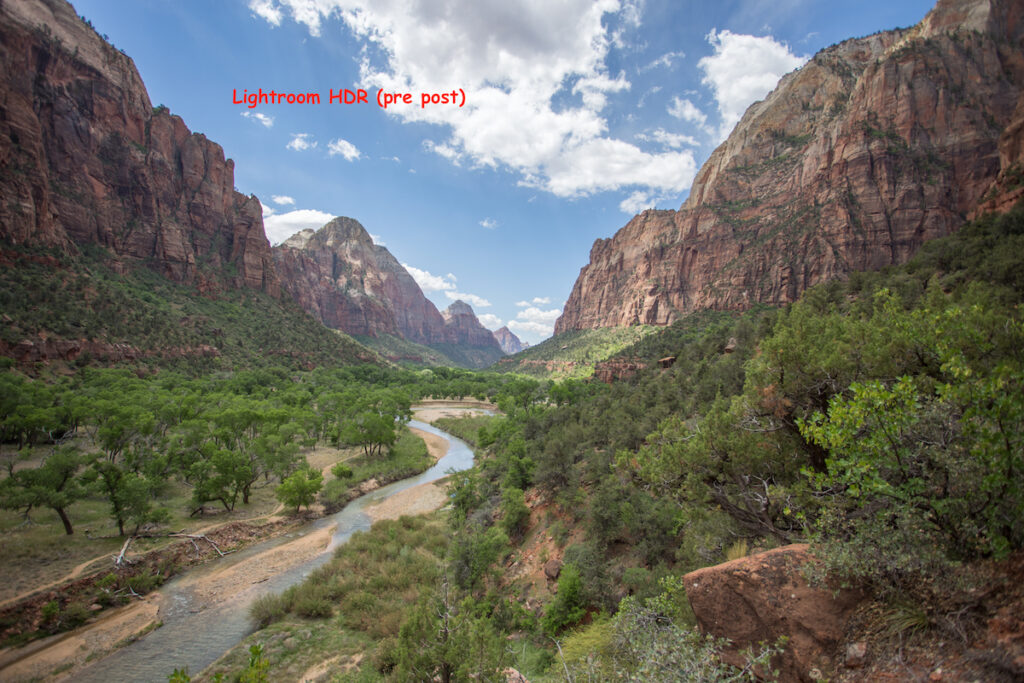
After edits. looking awesome!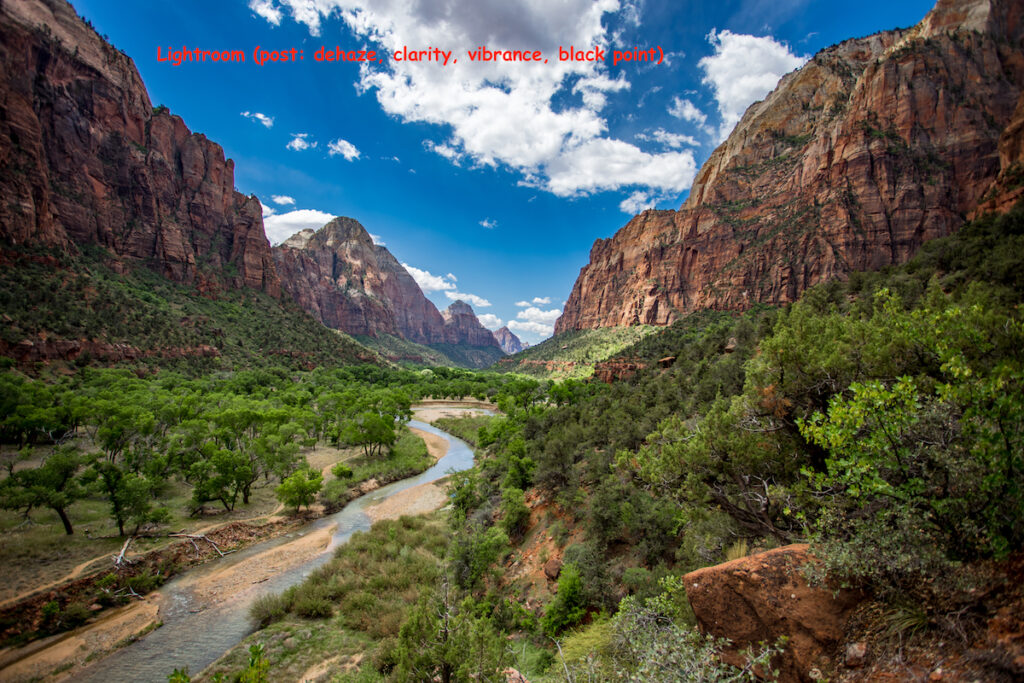
Which method best?
- Grads require almost no work in post processing. They are expensive however, a pain to set up and don’t work well with complex site lines (like mountains). Great option for beginners who aren’t yet comfortable behind a computer.
- HDR software. Works great in most situations, except brilliantly colored sunrises/sunsets (tends to get wonky look skies).
- Exposure blending in Photoshop. The only way to go for red skies. Also a great option for coastal shots with exploding waves. Take on shot for the sky another to capture the perfect wave explding over a rock.
Now go out there and get some bomber images! Wooooooo.