Digital Focus Stacking (Getting Macro pics tack sharp)
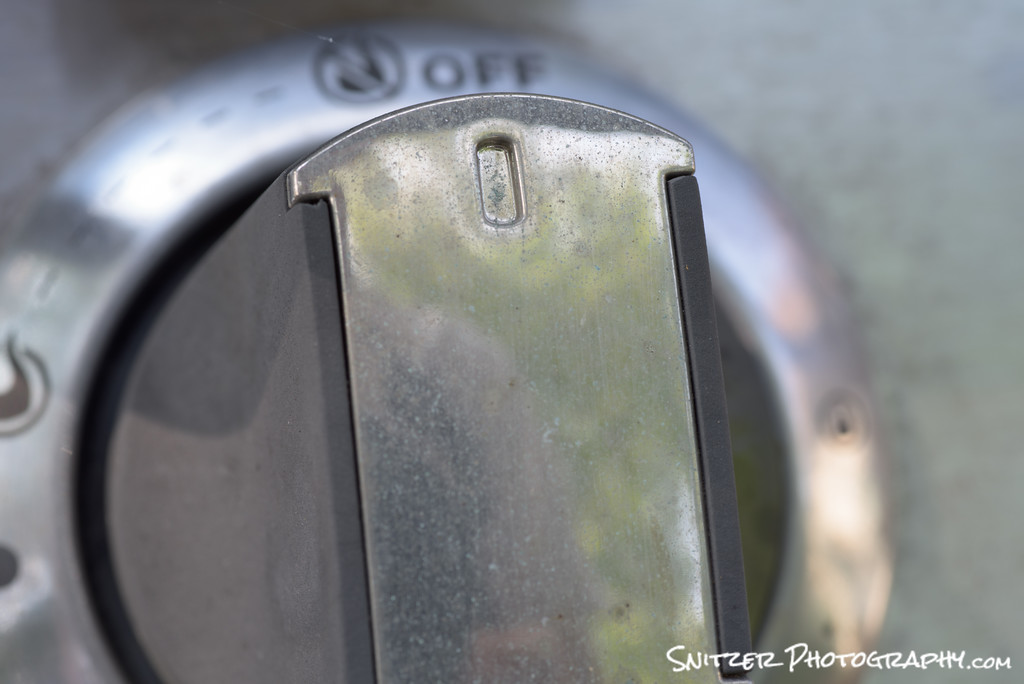
Digital Focus Stacking is a technique that allows you to get tack sharp images of close up (ergo Macro Photography) objects. The image below illustrates the problem most shooters encounter while trying to capture “close in” objects.
I’ve taken great care to get critical focus. My camera is mounted on a tripod with a remote shutter release. I’ve turned my Macro lens to manual focus and used live view to get a better look. I additionally use the “zoom in” option for live view all the way up to 10x, which makes manual focusing easy! I also remember to use my camera’s mirror lock up option as it’s a slow exposure, to avoid excess vibration ruining the sharpness. Even shooting at F16, while the front of my BBQ’s knob is in focus the rear is very fuzzy.
Using a digital focus program called Helicon Focus, can solve this problem and get you great results.

Next step: I’m going to take three additional photos of this knob, each time turning my focus knob to shift the focus point back, until my last photo has the back of the knob in critical focus. One way to get a good feel for how much to turn your manual focus dial, is to look at the depth of field gauge on your lens.
My second shot above has shifted the center focus area slightly away(back).
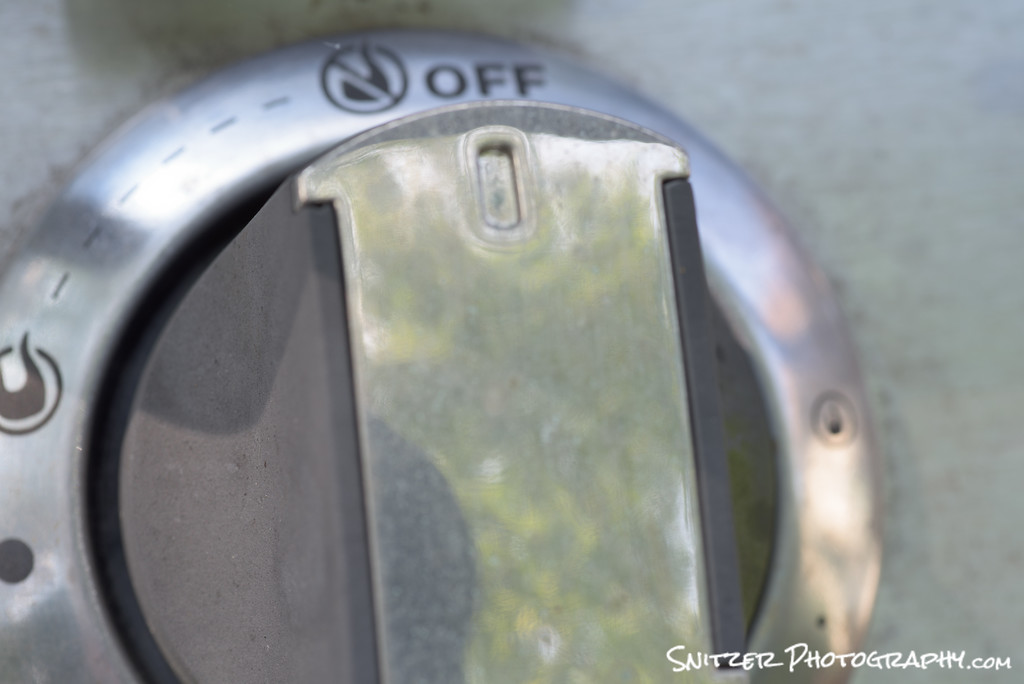
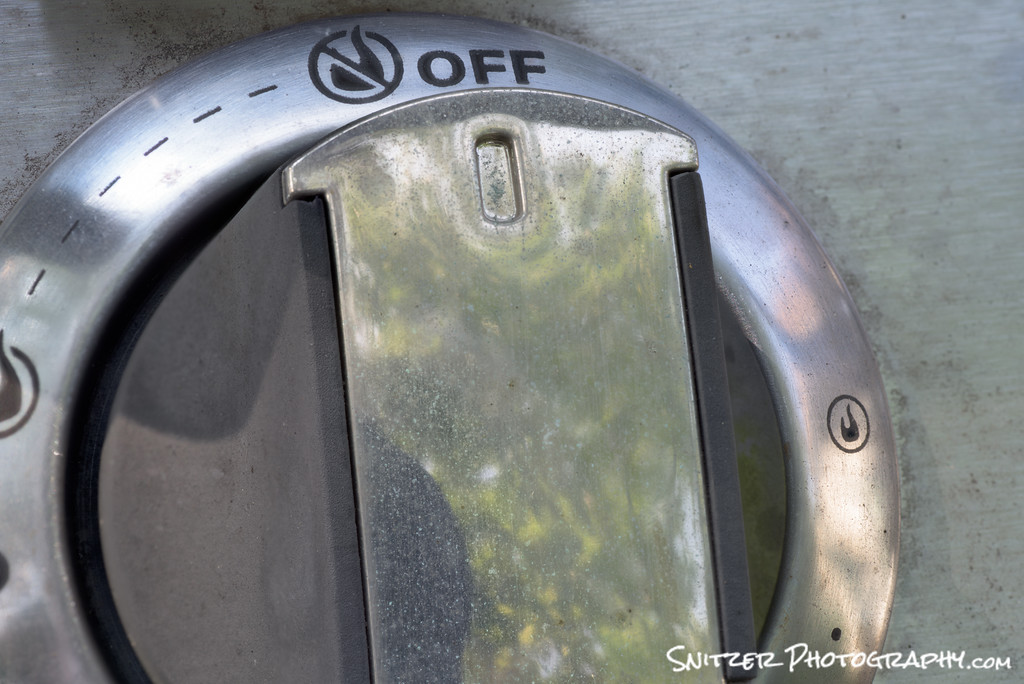
With my third shot above, the front of the knob is getting pretty “out of focus” and the markings on the back are starting to look more legible.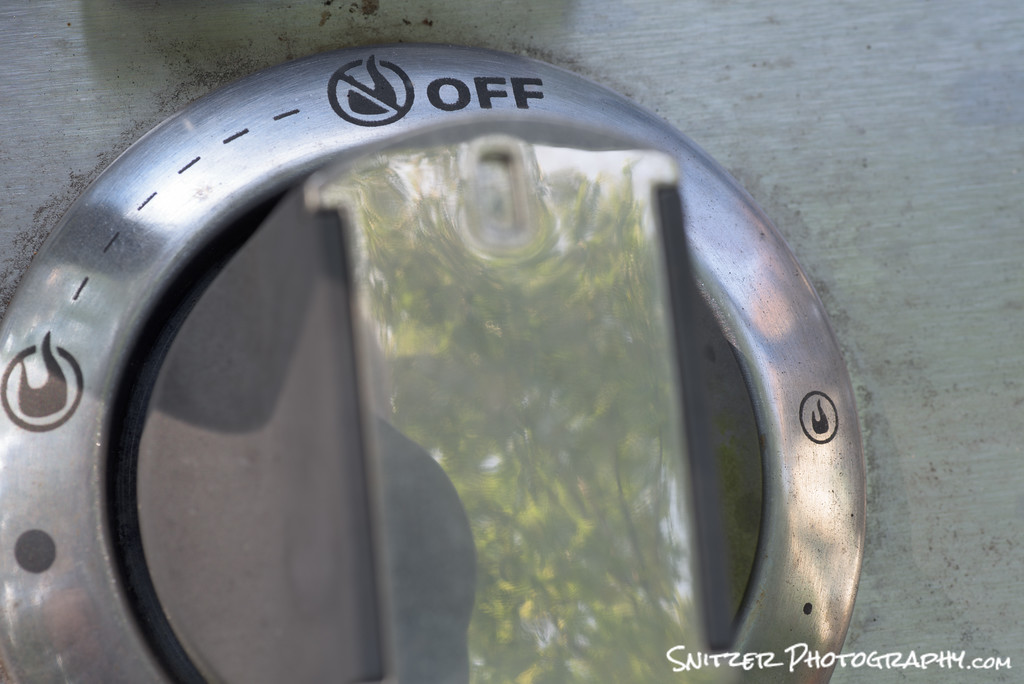
My final photo. The rear of the knob is tack sharp, the front is “way” out of focus.
Now for the MAGIC. I’m going to use Helicon Focus (a specialized focus stacking program) to merge these images into one perfectly “in focus” pic!
Woooo!!!! Our final result is one bad ass photo with everything in focus.
Hold on…I’m not done yet!!! This technique isn’t only for Macro work. There are times when your trying to get extreme depth of field for landscape photography (& shooting at small apertures isn’t giving you the desired results).
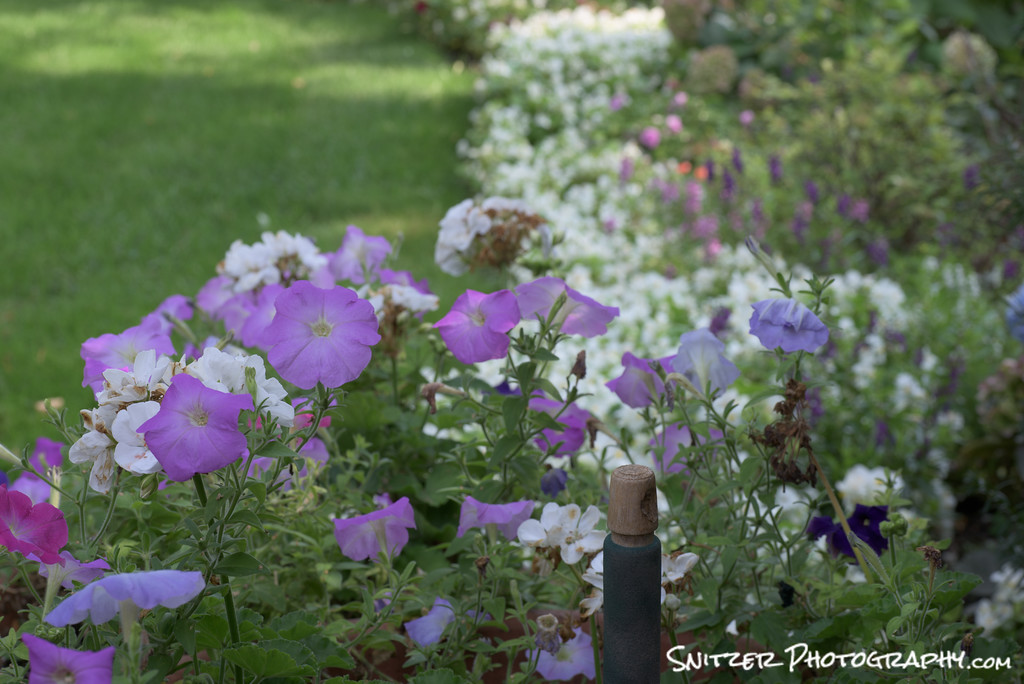
This shot is taken at F16 (90mm lens). The flowers and shovel handle in the front of the picture are sharp, but the white begonias in the rear are very soft. I also don’t want to use a smaller f stop, because the lens will start to distort at anything past F16.
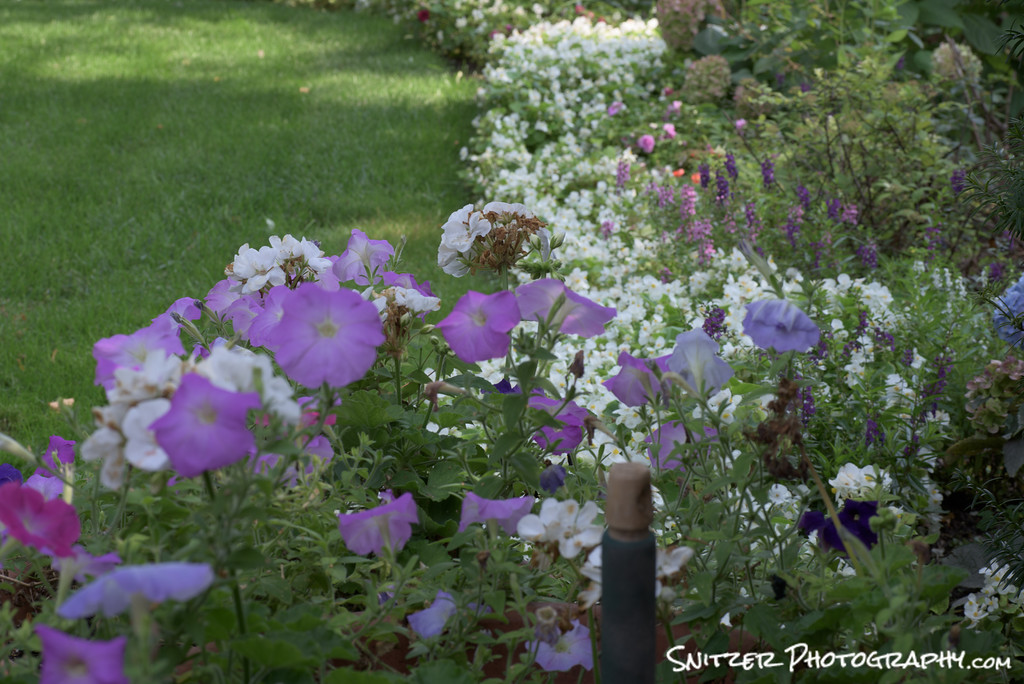
Using the same technique as illustrated above, I’m going to take another shot, shifting the focus point back.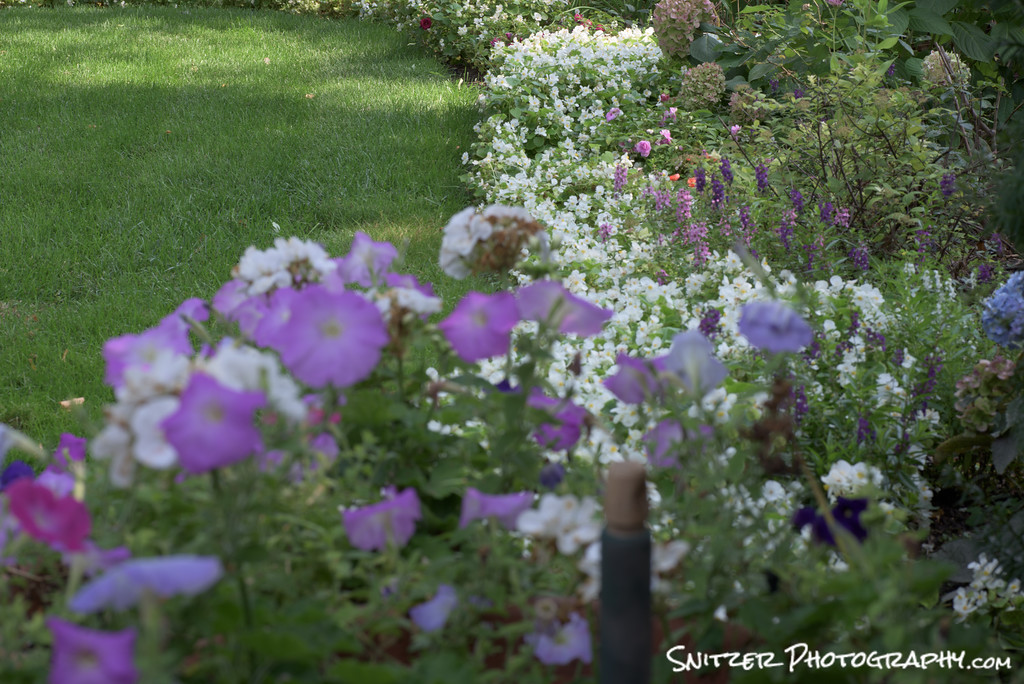
Above is photo #3. The flowers in the rear are starting to come in focus…the one’s in front are now fuzzy.

Here’s our fourth and final shot (above). Now it’s time to merge the four.

Our result. Everything is tack sharp!!!!
In these examples I’ve merged 4 photos. Helicon can merge as few as two or over 30 images. Typically 4-6 does the trick.
Below is a link to Helicon’s website. You can try Helicon Focus free for thirty days. The product comes with an included plug in to work with Lightroom.
http://www.heliconsoft.com/heliconsoft-products/helicon-focus/
Celestial Photography Advanced Tutorial
Photos, like the one shown above, combine two disciplines executed during a single exposure:
- Photographing stars as fixed objects
- Lighting an interesting foreground element using the moon or light painting techniques.
Step #1: Where/When to go
- Stars are obscured by the surface illumination of urban and suburban areas. Places like Southern Utah (Arches National Park, Bryce Canyon), South Texas (Big Bend National Park), Nevada (great op to shoot ghost towns…) or portions of Northern Michigan all offer clean, dark night skies.
- The locations also offer interesting foreground subject matter to make your photos more memorable.
- Is the moon your friend? Generally not. You’re typically trying to shoot into a jet black sky. Even a modest crescent moon overhead can ruin an otherwise great night sky.
- The Photographers Ephemeris is a great tool to find the days each month, at a specific location, which will provide either a new moon, or a time when the moon isn’t visible during the evening hours.
- Most people can actually see the Milky Way Galaxy (a great source target for your photo) once their eyes acclimate to the night sky. If you can’t, PhotoPills is another application that help locate the Milky Way for you.
- http://photoephemeris.com/
- http://www.photopills.com/
- Moon occasionally your friend? A 5-15% crescent moon, low in the horizon is a good source to illuminate foreground objects providing your shooting away from it (moon). Great for very large objects (mountains….). Will usually lower the required ISO by 500-1000.
- Time of year? Many different opinions. My take: You’ll be out for 3-4 hours (it’s fun/addictive). Go late winter/early Spring or late fall. It gets dark earlier. You might actually get some sleep. It’s cold but not freeeeeezzzing. Factor in location. Arches is great in February, Bryce another great spot will be ice cold.
Step #2: Getting the stars “right”
- The night sky is constantly in motion, rotating around the North Star. In order to get a sharp rendition of the Milky Way, & avoid star trails, your exposure time is generally limited to between 20 & 35 seconds.
- The Exposure Rule: Divide the lens focal length into 500. Ex. 14mm lens divided into 500 yields a maximum exposure time of 35 seconds. Longer lenses require shorter exposures.
- Dialing in other exposure dets. Auto exposure won’t work on a dark evening. You’ll need to rely on your histogram (see below for target exposure…bulk of your histogram about 25-33% across the lower axis). Generally speaking, you’ll need to be 1 – 1.5 stops below a neutral exposure to keep the ISO reasonable and the shutter open for less than 35 seconds. You’ll fine tune/boost exposure in post processing.
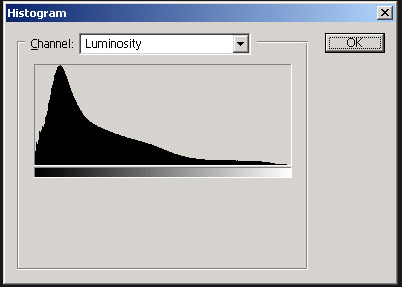
Given the dark sky, your histogram may show significant clipping on the left.
- A good starting point: 35 second exposure, aperture of F2.8 and an ISO between 2,500 and 4,000. You’ll need to generate several test shots to dial your exposure in.
- I generally set my color temp to 4000K.
- Given it’s dark, you may find it hard to frame your photo in the viewfinder or using “live view”. Each test shot, allows you to check your histogram and your framing to micro adjust the camera angle.
- Long exposure noise reduction is IMP. To save time, turn it off (while taking test shots) until your ready to take the final shot (saves time).
- Don’t forget to use your mirror lock up option to reduce vibration.
- How long after sunset? It generally takes about 2 hours after sunset for the sky to darken sufficiently to get optimal images.
- Forget about autofocusing or even manual focusing. Too dark! Set your lens to manual focus, turn the ring to “infinity” and your done. Remember that most lenses have an infinity focus mark next to the infinity logo…make sure you get that right! PS. When you move the camera between shots, it’s easy to inadvertently change your focus…check it every time you move the camera to a new location!
Step #3: Selecting Camera/Lens
- You’ll obviously be shooting at very high ISO settings were “noise” is a big issue. Full frame cameras offer a real advantage.
- If you don’t own a full frame camera, the Canon 6D (now avail for $1,399) may be an option worth considering (for this & other aps). Offers practically identical image quality as the 5DMkIII ($2,500), lower weight for hiking, albeit inferior focus ability. For nature photography and portraiture, where fast focus isn’t critical, it can be a good fit. The 6D offers better tonal range and ability to utilize wide lenses as compliment your crop sensor camera.
- Nikon full frame cameras are also great, although more costly (v the 6D) and ironically provide worse low light performance. See comparison of noise between Nikon 810 and Canon 6d.

Nikon 810 (left) vs Canon 6D (right) both at ISO 6,500. The Canon has less noise.Fast wide lenses are the ticket to capture the celestial heavens and the Milky Way.
- Fast wide lenses are the ticket to capturing the celestial heavens and the Milky Way.
- 14mm is my lens of choice offering a great view of the Milky Way (wider is typically better when capturing the night sky). The small focal length also has a short hyperfocal distance. At F2.8 everything from 20ft to infinity will be in focus. Ergo, your foreground object will be tack sharp…as will be the stars. I also shoot occasionally with a 24mm F1.4 (about 10% of my nighttime shots).
- Lens choices: Canon 14mm F 2.8 $2,250, Nikon 14mm F2.8 $1,600, Rokinon 14mm F2.8 $349

Rokinon 14mm F2.8, avail in Nikon or Canon mounts
- Which lens? The fully manual Rokinon matches the others for edge to edge sharpness and has the lowest coma (the tendency of a lens to turn stars from round pin point objects into egg shaped blobs). Save the money. Set the Rokinon to F2.8, Infinity focus and fire away.
- Remote trigger
- You’ll need a remote wireless shutter release (to light paint your subject away from the camera).
- Velo FreeWave Wireless Remote Shutter Release $35.
- Tripod
- Use whatever is in your photo gear bag.
- If considering something new: Slik Sprint Pro II. $90 Lightweight 2 Lbs. workhorse, plenty tough for your lightweight celestial set up…”go to” tripod for long hikes.
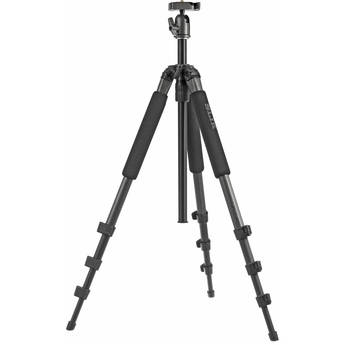
Slik Pro II Tripod: Lightweight, affordable workhorse
Step #4: Tools to Light Paint your foreground (MacGyver to the rescue)
- See at night. Get the “hat”. Digital After Dark’s hat has both white and red (to preserve night vision) LED lights in the visor. $35 Great way to see what your doing, while keeping your hands free.
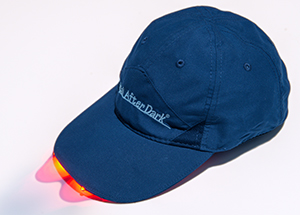
- http://www.kadamsphoto.com/catalog/digital-after-dark-night-vision-with-white-leds-p-82.html
- Light painting flash lights (right tool for the job)
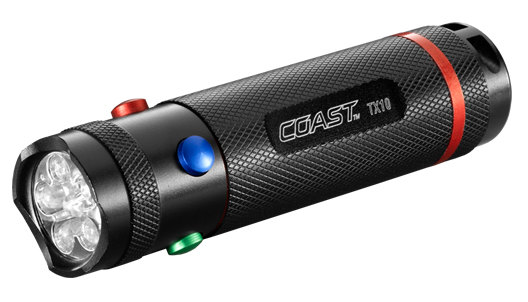
- Color made easy for smaller nearby objects. Coast TX10 Quad Color LED light $23. Select buttons offer red, blue and green light…no gels required!
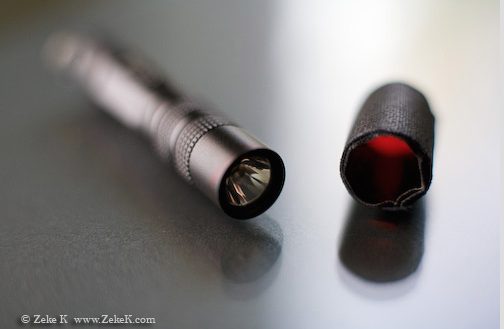
- Workhorse for near to medium size objects. Olight M10 Maverick. $40. Small, 3 options for brightness, one 350 lumens!

Olight-M10
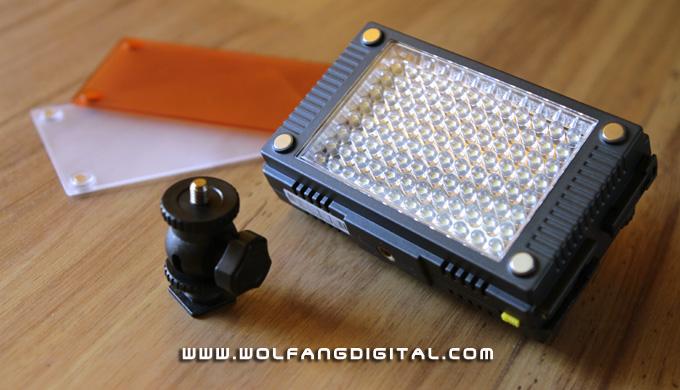
- Max power for the big jobs! Z96 LED Panel, provides an area of 96 LED lights which can be dialed in to any brightness. Comes with tungsten diffuser…perfect for painting rocks/mountains (1,000 lumens+)…etal. $86
- Color gels to modify Olight. $3. You’ll use black gaffing tap to build a small gel holder to filter your LED light. See photos below.
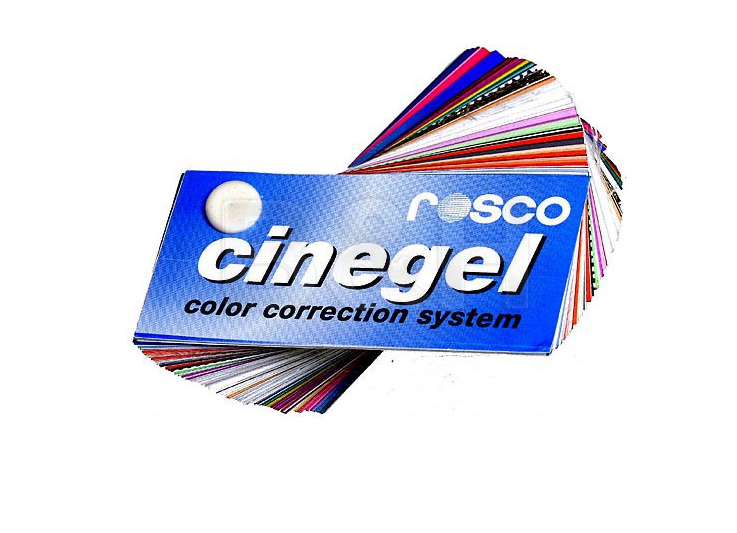
- Creating a gel filter/cap for your Olight flashlight: Having some different colored gels that you can quickly deploy to modify your flashlight is a huge winner. Let’s face it…white light for most light painting scenes looks pretty hard..ruins an otherwise great opportunity.
- Get a roll of black gaffing tape (B&H Photo carries).
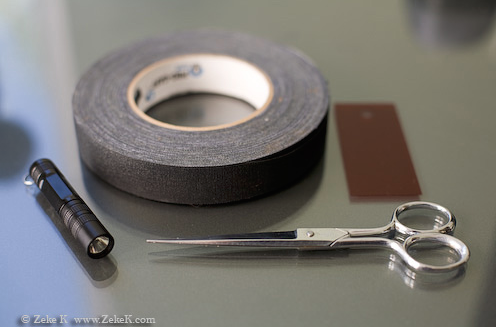
- Cut a piece and wrap around the front of your Olight, with the stick side facing OUT.
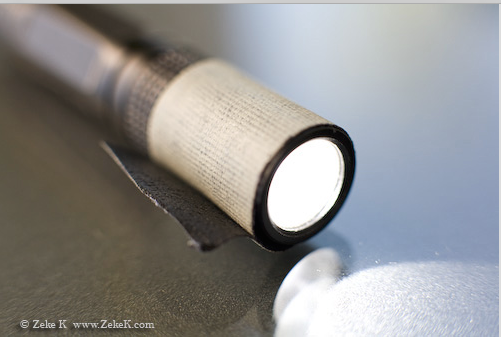
- Your then going to cut a small gel piece the approx diameter of the Olight with some small “fins” sticking out to the side.

- You now attached the gel by sticking these fins to the sticky part of the gaffing tape.
- Final step is to put another layer of gaffing tape (this time sticky side facing IN) to hold your gel in place. These homemade gel filters allow you to quickly change the color of your light painting wand.
- Get a roll of black gaffing tape (B&H Photo carries).
- Color made easy for smaller nearby objects. Coast TX10 Quad Color LED light $23. Select buttons offer red, blue and green light…no gels required!
Step #5 Time to Light Paint
- The key: Light objects from the side (like portrait photography), not straight on. More interesting shadows.
- Keep your light moving in circular painting brush like strokes. I usually avoid painting the ground area between the camera and the foreground object. If you get some light spillover, you can always darken this area in post production.
- Less is more! You don’t need much light to properly illuminate your subject, unless your doing far off mountains and such. Selecting the right light source and luminosity setting so you can paint for the full exposure time will help provide more even results.
- Remember to turn on your long exposure noise reduction for the final shot (once your settings are fully dialed in).
Step #6 Post Processing
- If using Lightroom or Photoshop, you’ll be taking your initial image and increasing the contrast, along with exposure of the night sky (use layers or magic paintbrush to make these mods selectively to the sky area only).
- Also try experimenting with your color controls, to boost the saturation levels, luminosity & range of the red, orange, yellow &/or blue channels. These colors will often present themselves at the lower part of the nighttime sky. Again apply these changes to the sky area only.
- Don’t be afraid to experiment with tweaks to the color temp.
- Splitting hairs: I’ve found that Apple’s Aperture program provides less celestial chromatic aberration than Llightroom (no idea why). Lightroom often yields stars that are occasionally bright red. If you have this problem, consider trying Aperture (assuming you have an Apple Computer).
Case Studies
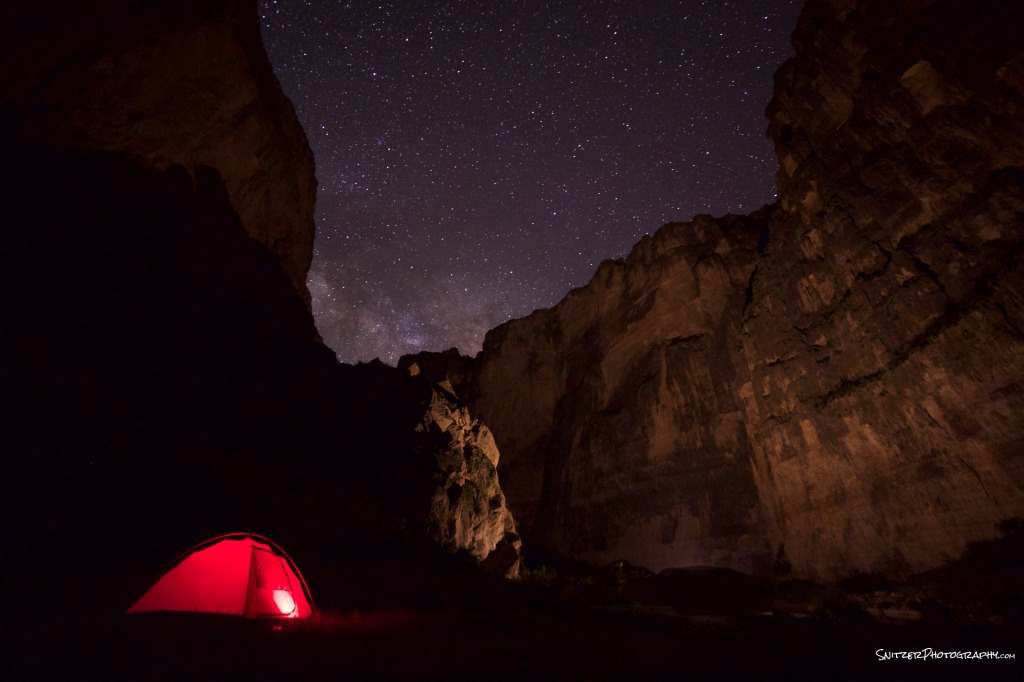
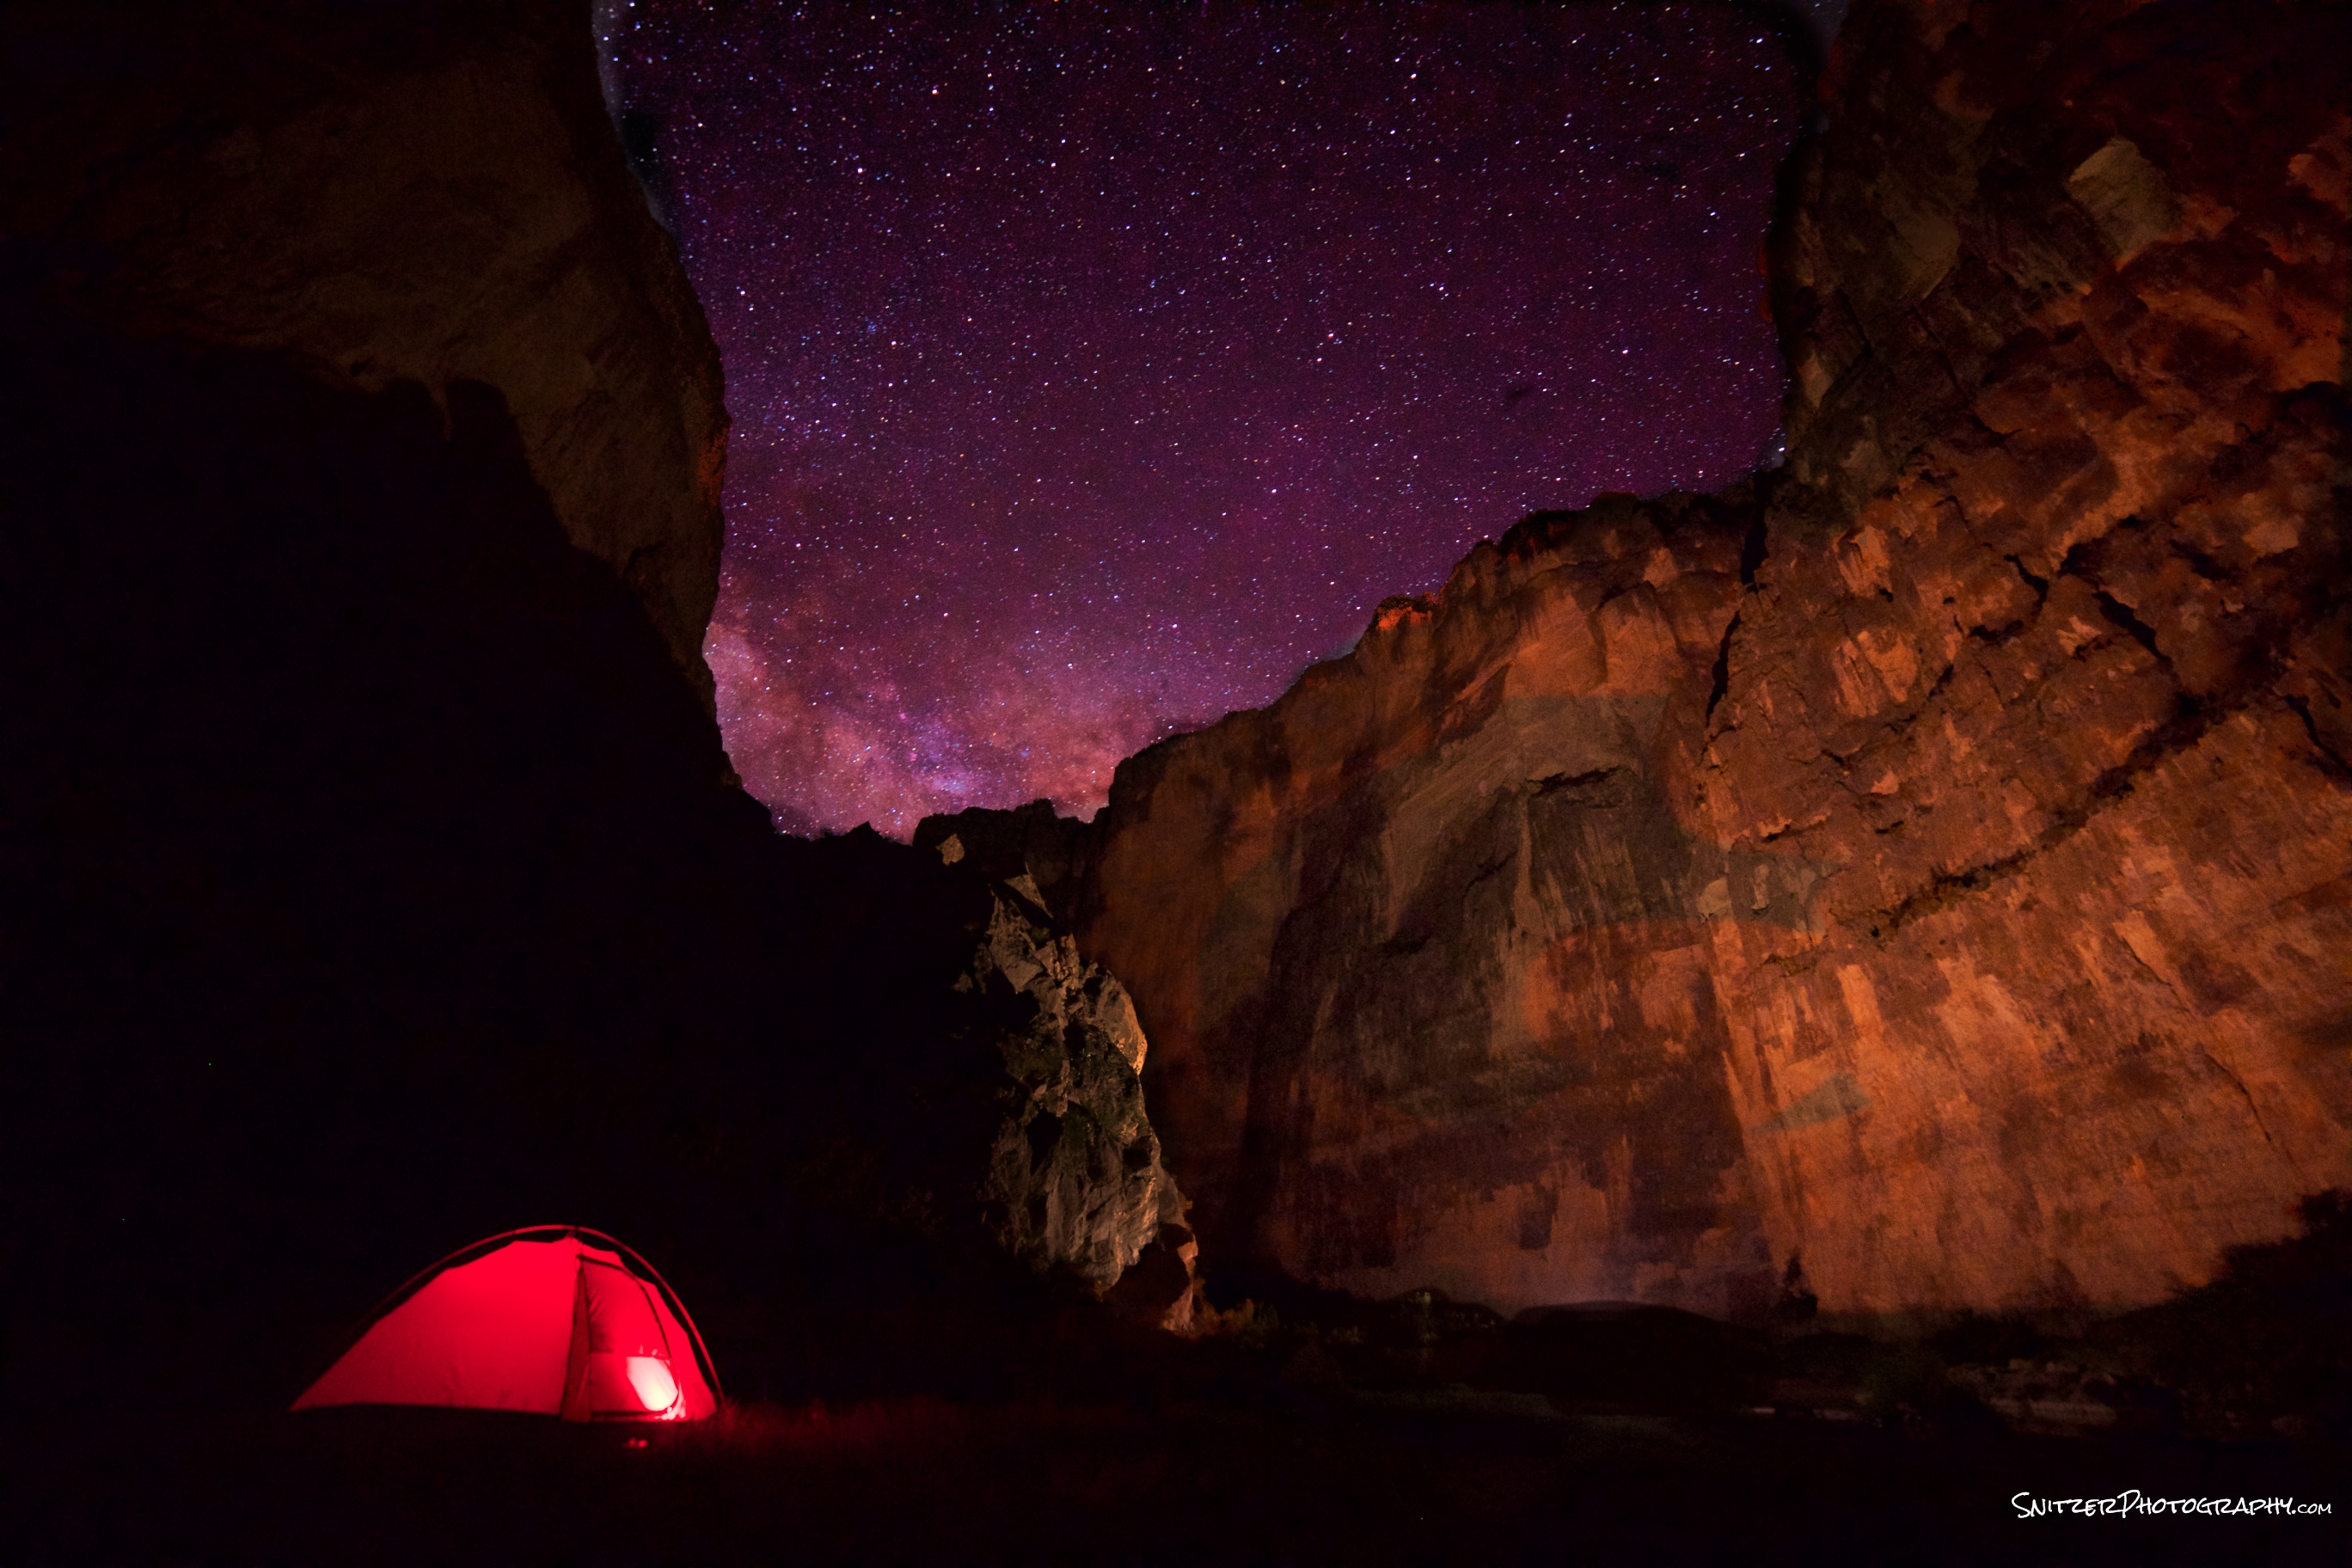
Saint Elena Canyon, Big Bend National Park
- Canon 6D, 14mm Rokinon @ F2.8, 30 sec, ISO 4000, color temp 4,000k.
- Coast Tx10 flashlight placed inside test (red). Light painted with Z96 Panel & tungsten diffuser.
- Post Processing: Increased sky contrast, boosted red channel (saturation, Luminosity & range). Dodged cliff areas to the right. Burned in foreground area between camera and lighted painted area (blacked out).

St Elena Canyon, Big Bend National park
Canyon shot before post processing

Arches National Park, Utah
- Canon 6d, 14mm Rokinon @ F2.8, 25 sec, ISO 1600, color temp 5,300
- Mountains lit by 15% crescent moon 15% above horizon (opposite direction of camera facing).
- Post processing: Dodged mountainous subject areas. Sky: contrast, black point, red and purple channels increased.
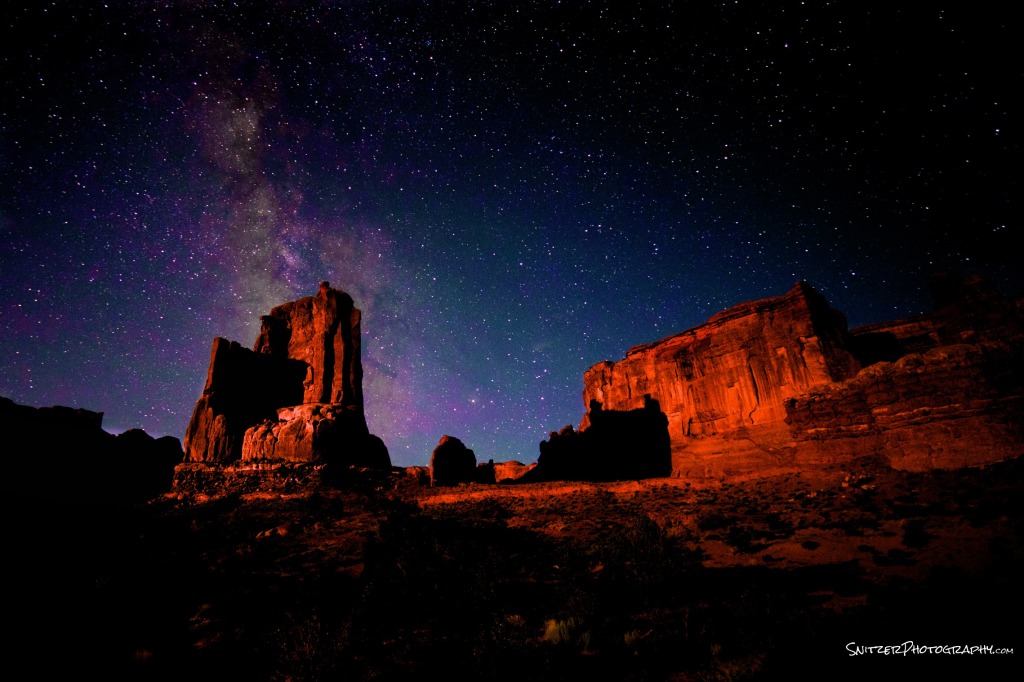
Arches National Park
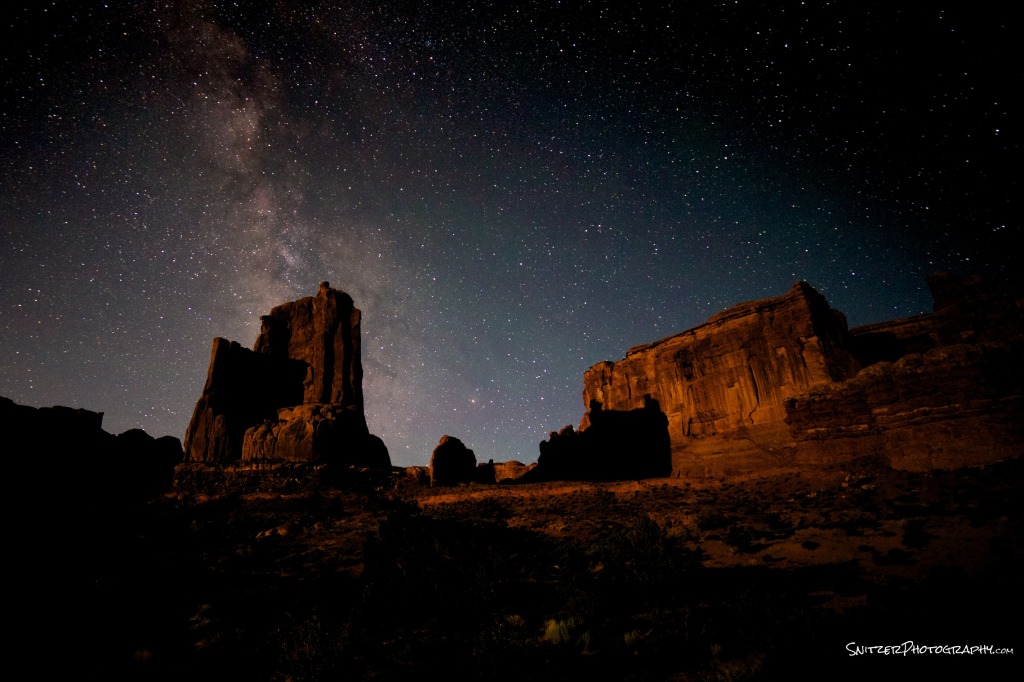
Arches before post processing


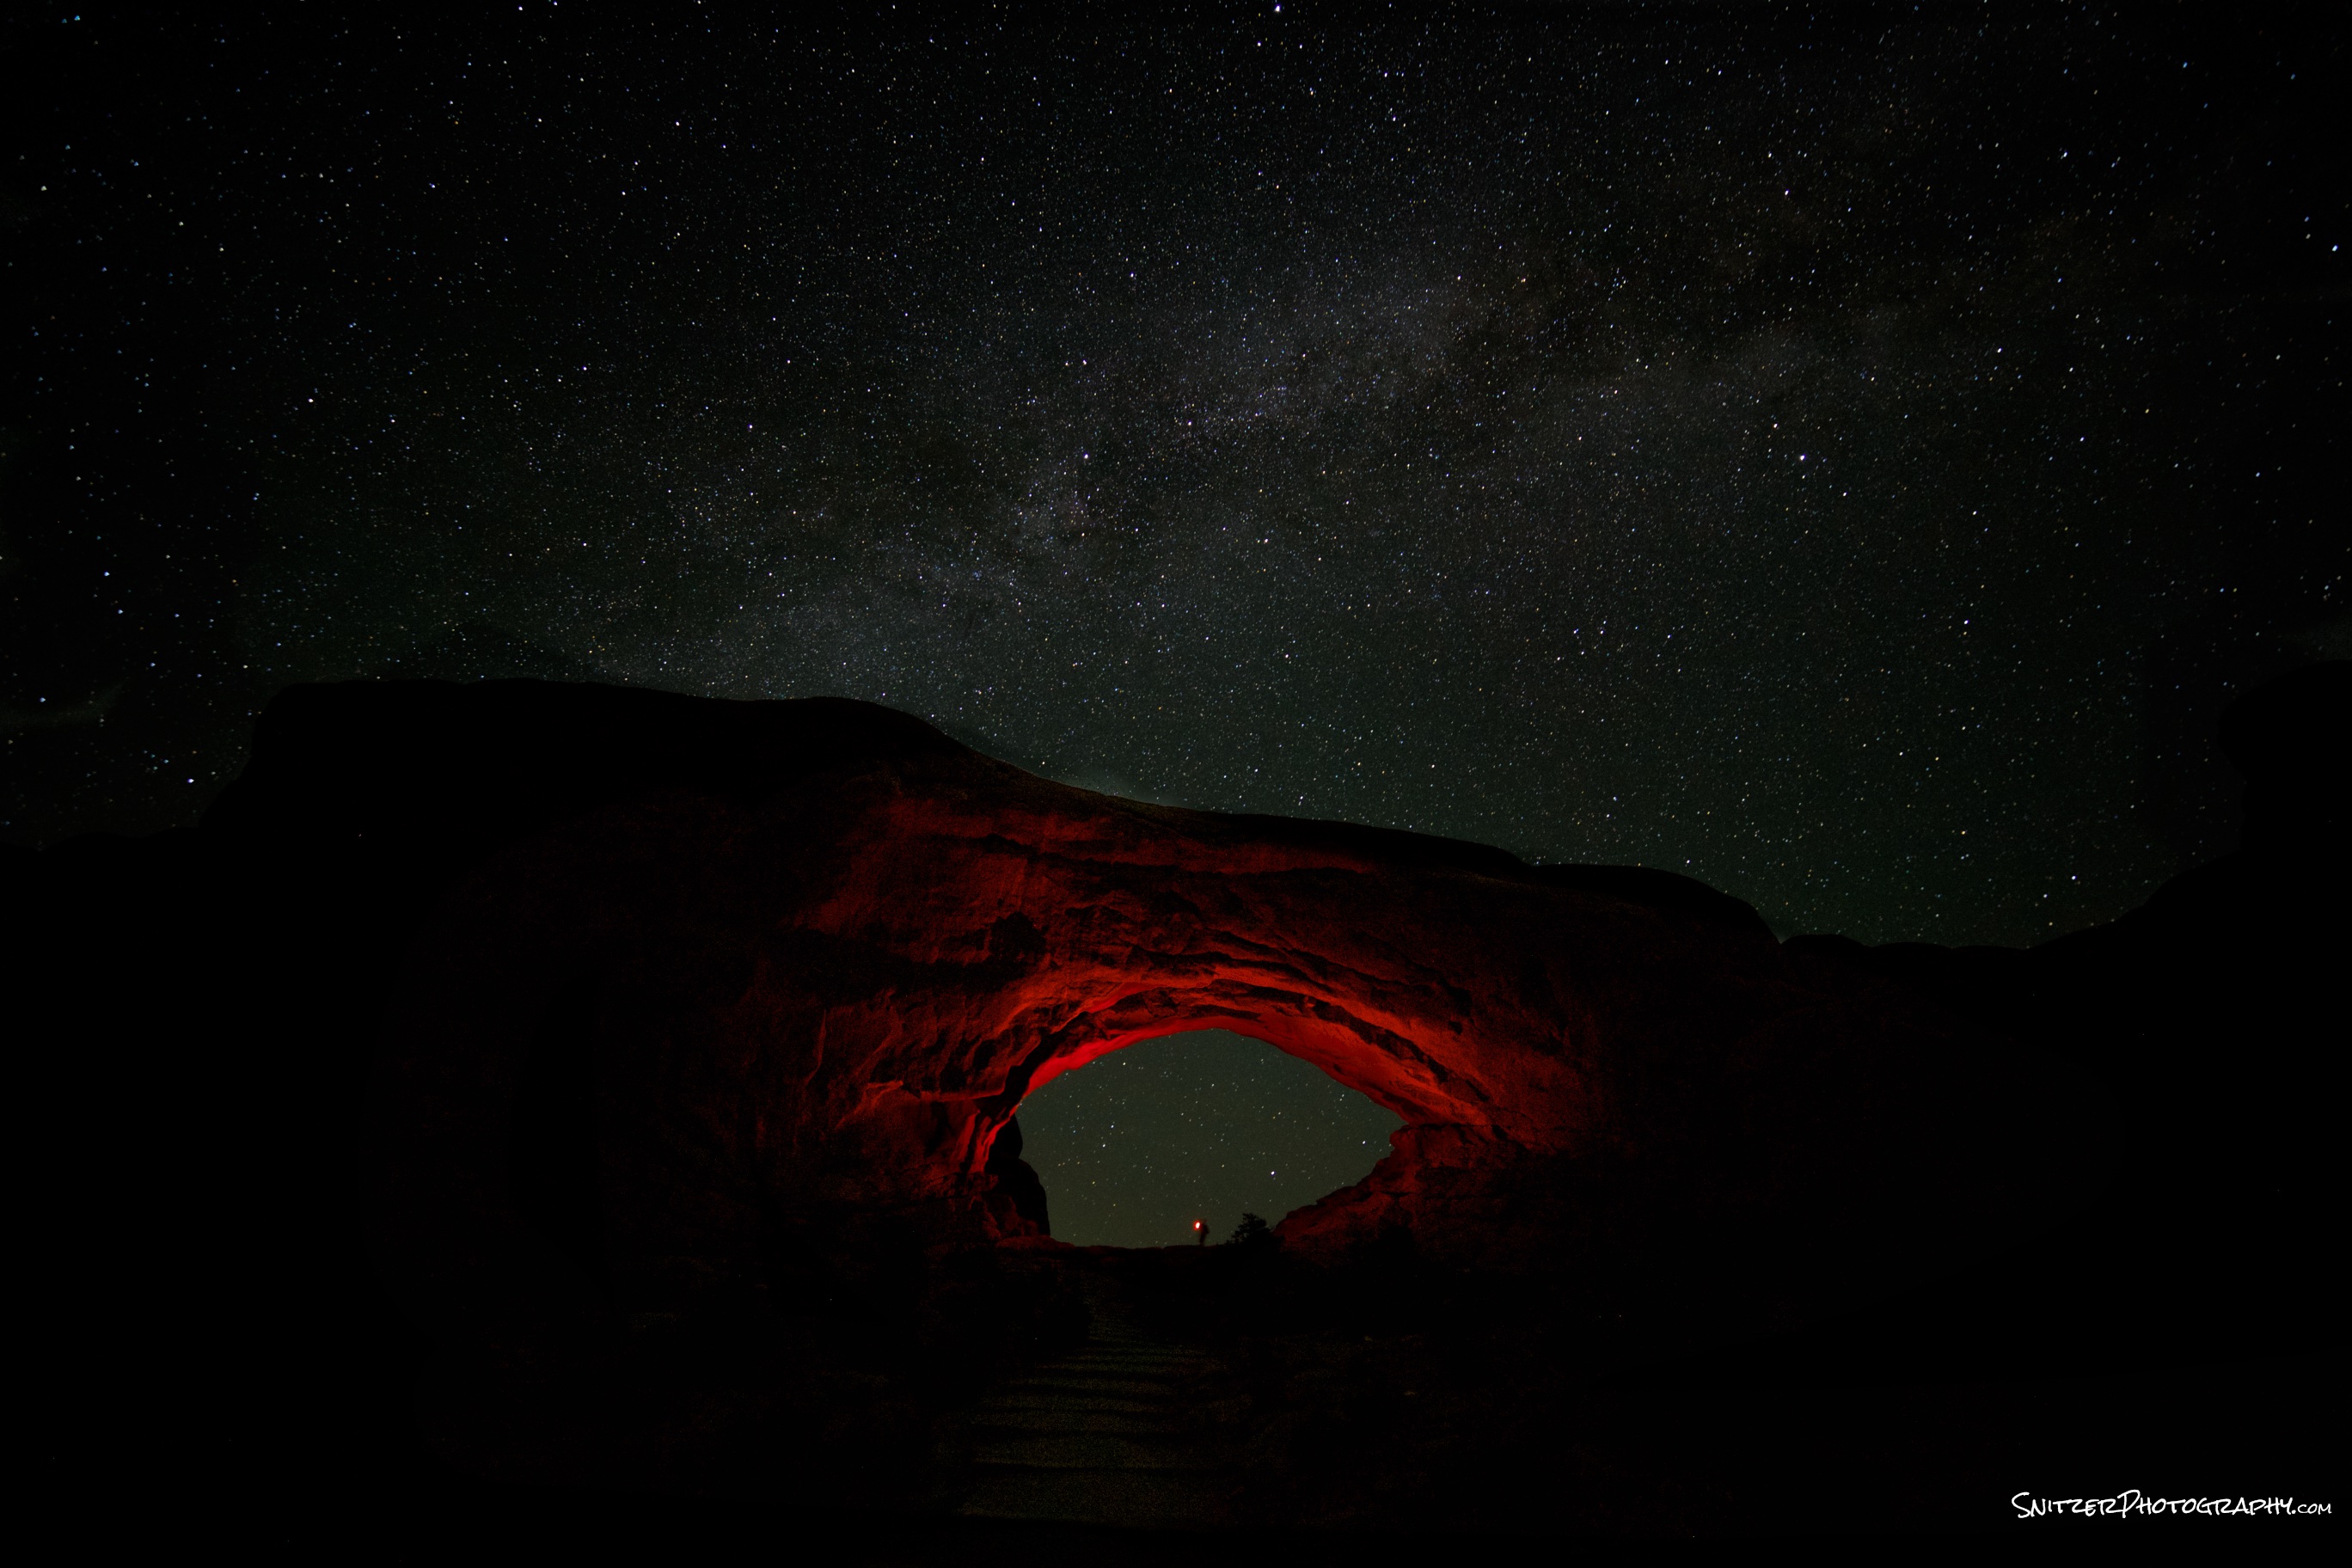
North Window, Arches National Park, Utah
- Canon 6d, 14mm Rokinon @ F2.8, 25 sec, ISO 2500, color temp 4,800
- Arch lit by a red gelled Olight, held under the arch (facing up).
- Post processing: Dodged the arch, Increased contrast, exposure and red channel for the sky.
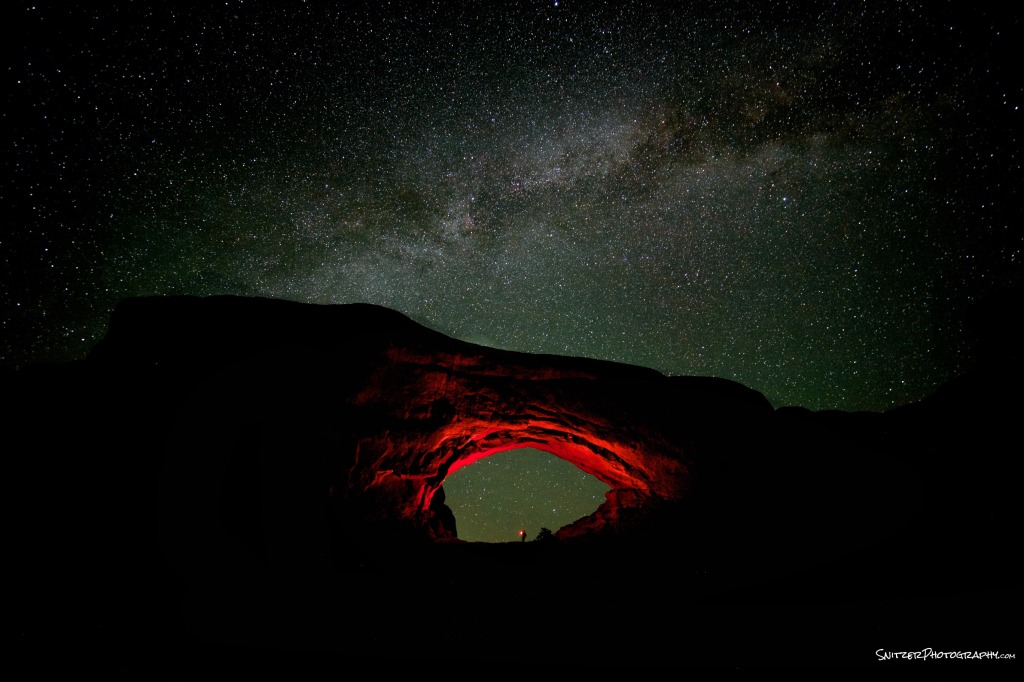
Arches North Window
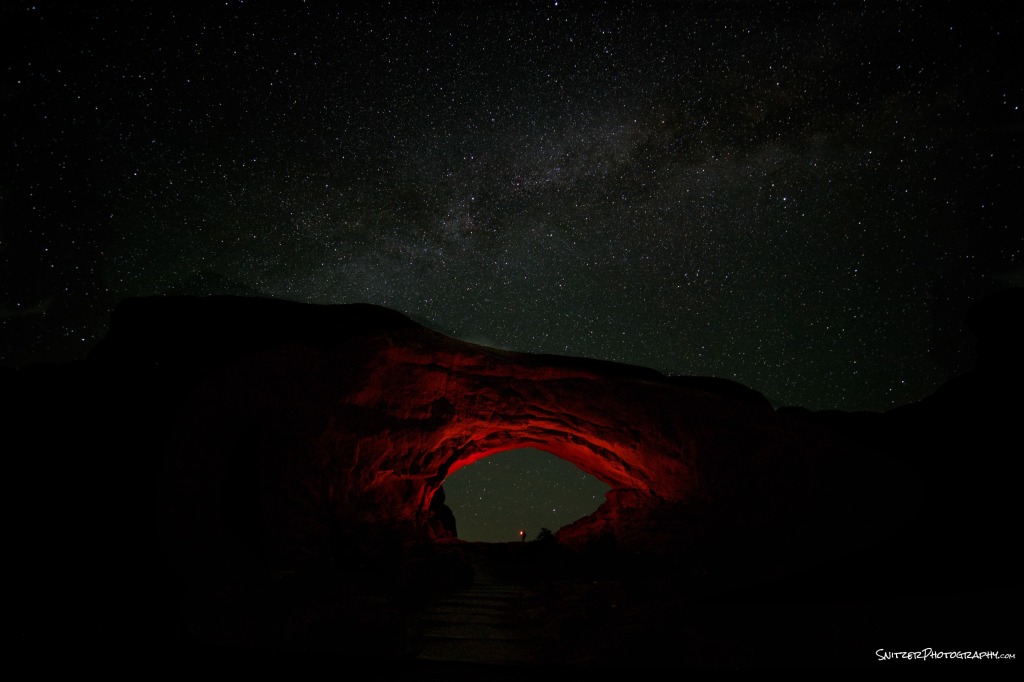
Arches before post procesing

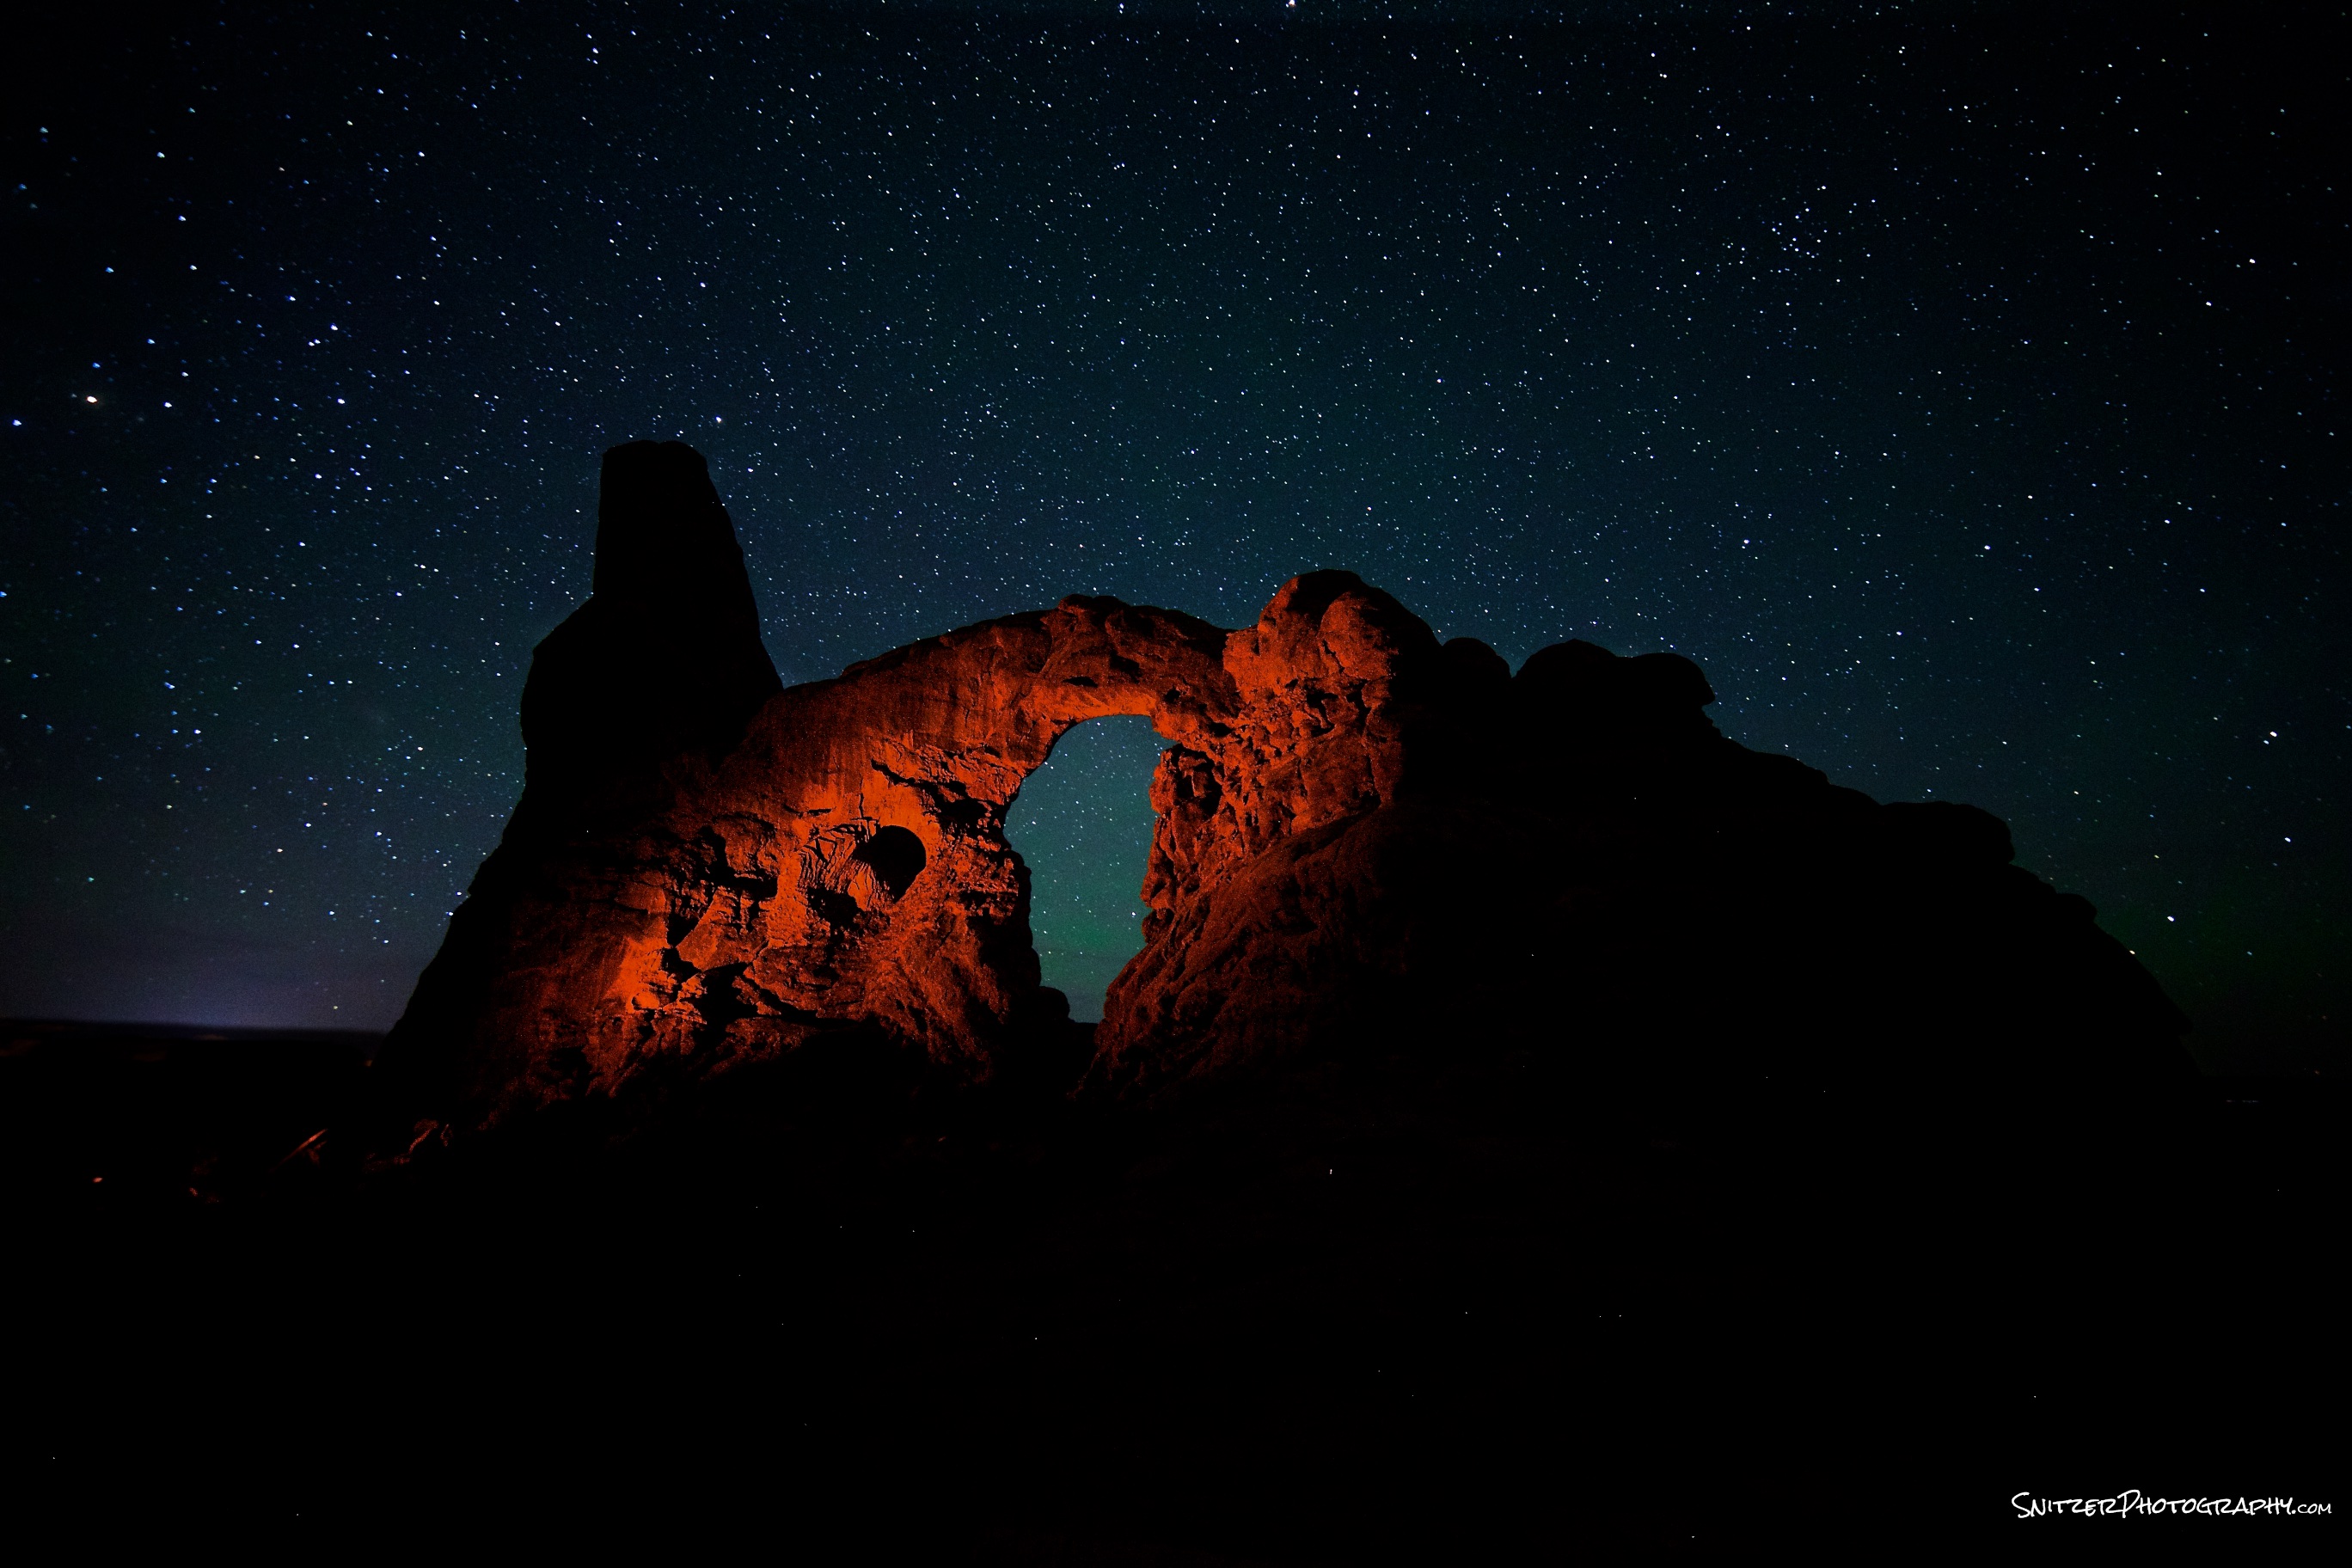
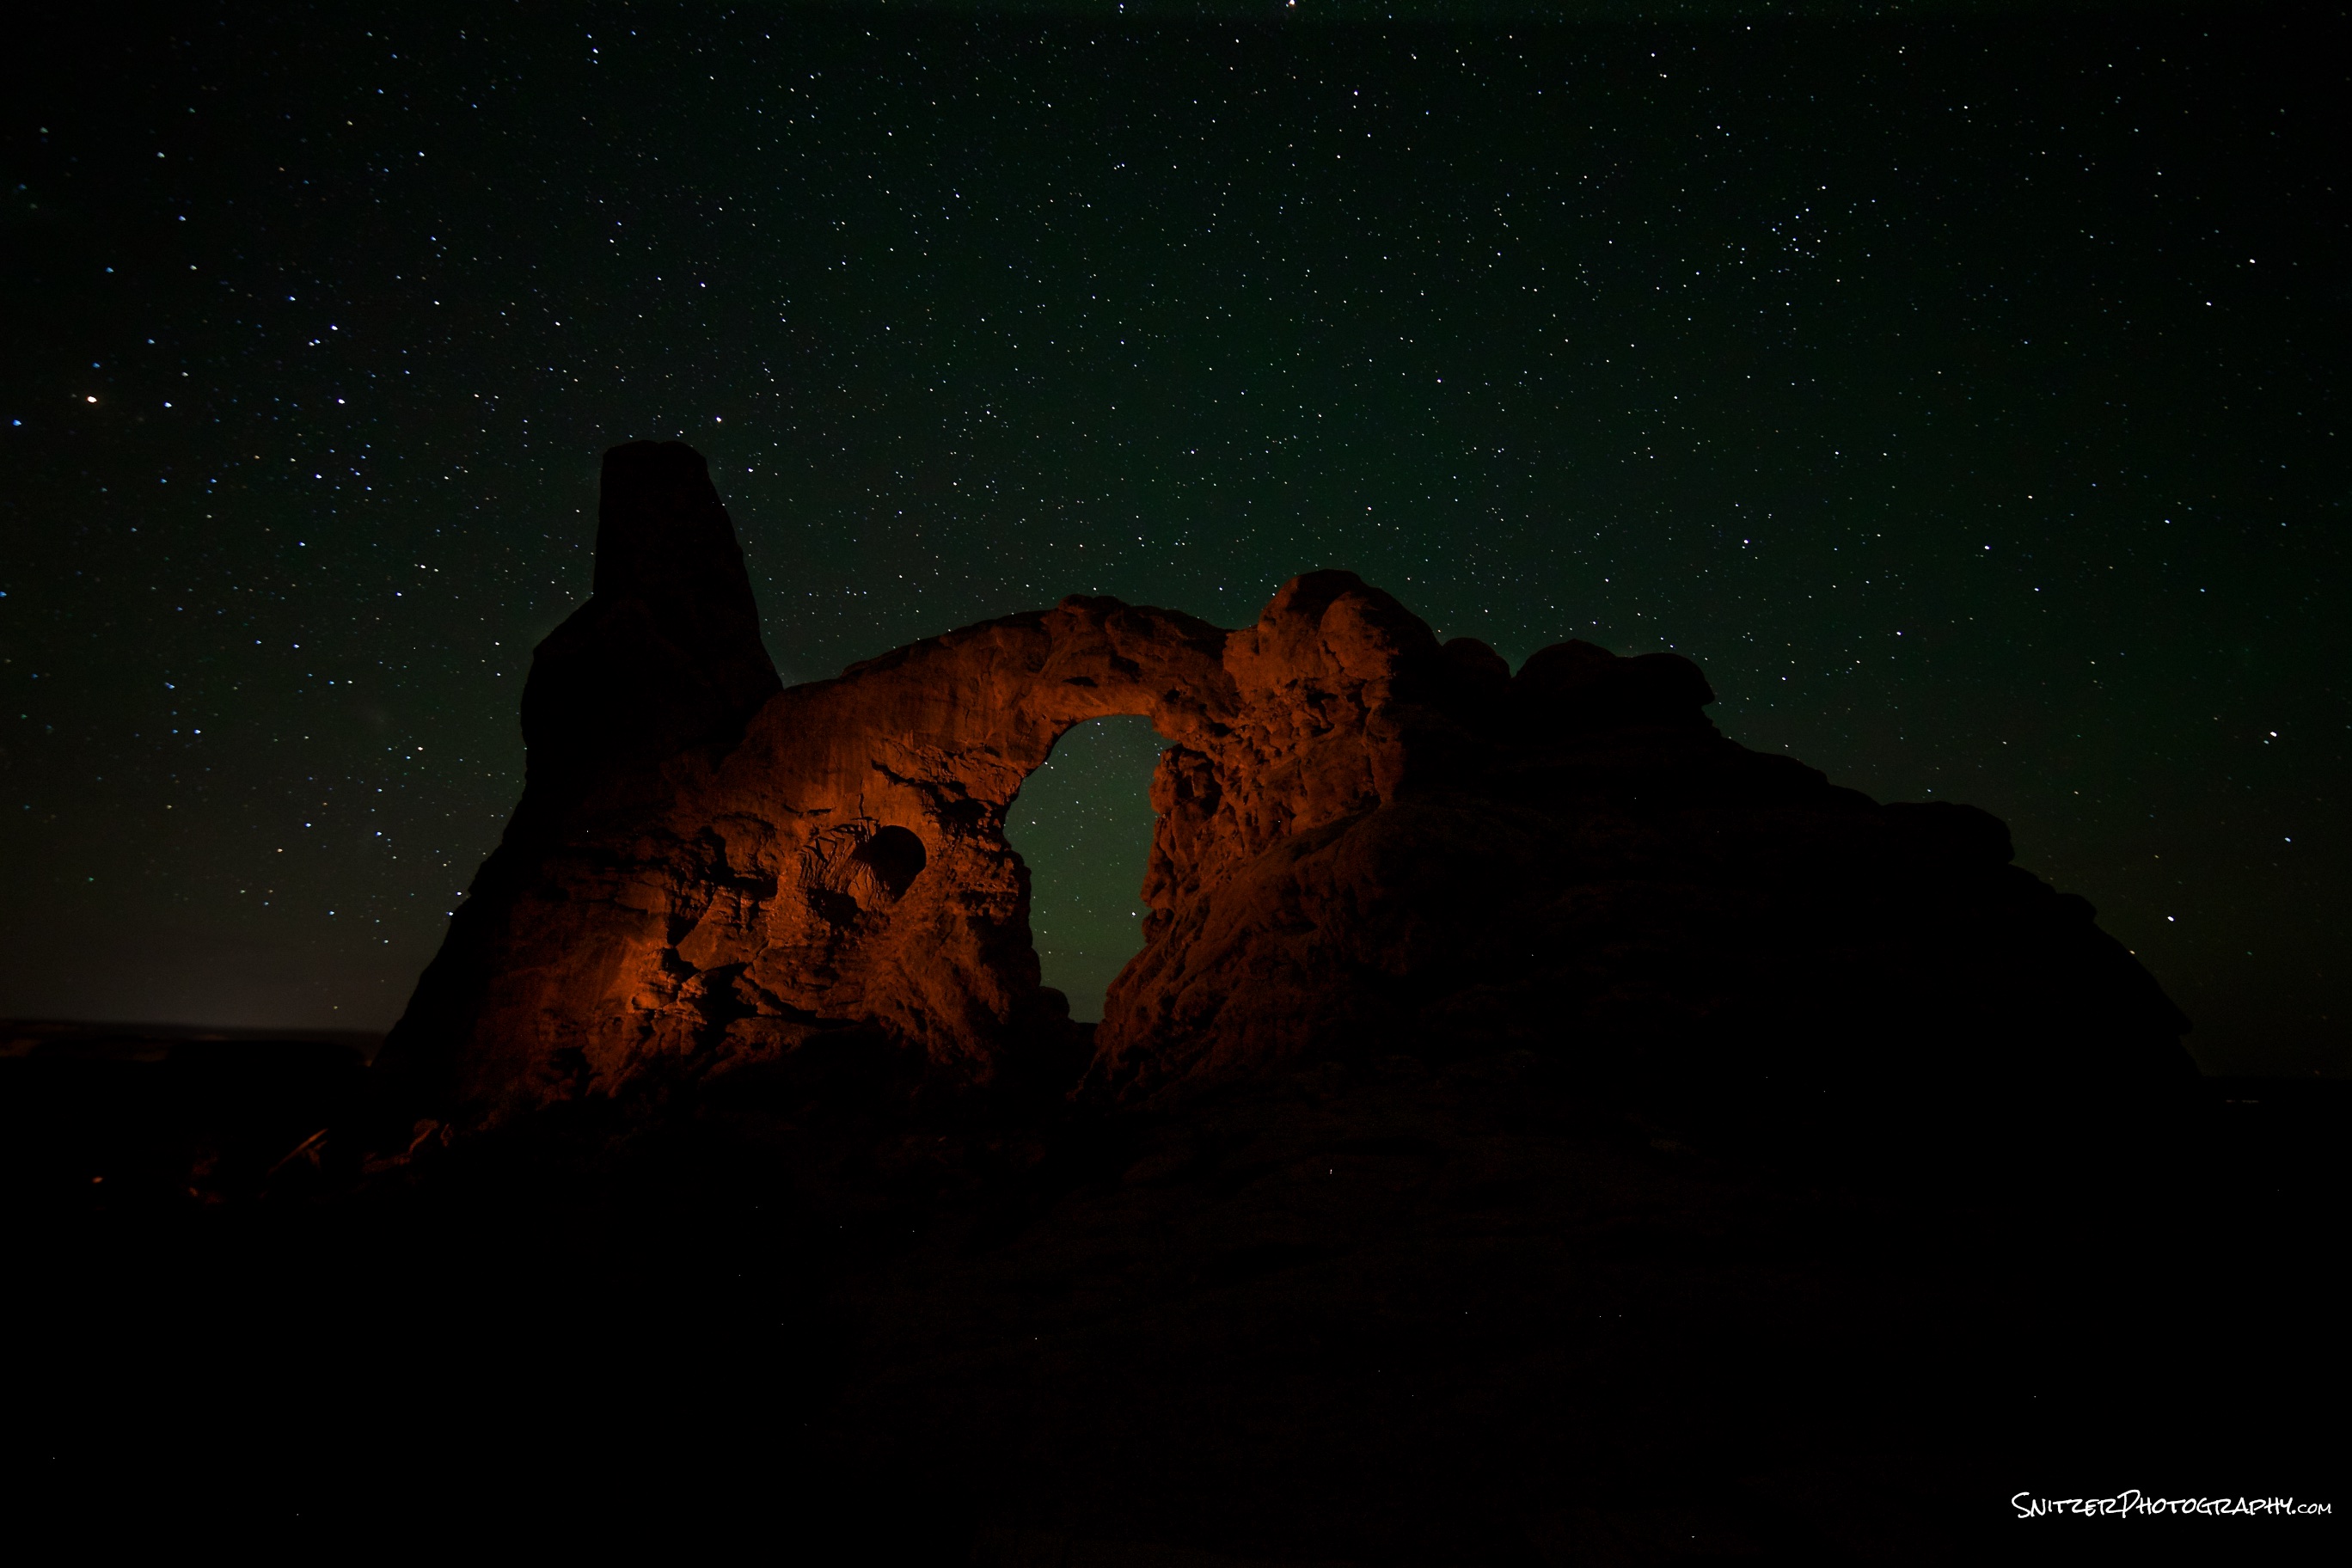
Turret Arch, Arches National Park, Utah
- Canon 6d, 14mm Rokinon @ F2.8, 25 sec, ISO 2,500, color temp 3,700
- Lighting by red gelled Olight.
- Post processing: Increased exposure, increased red channel for subject.

Turret Arch

Turret Arch before post processing
Prime vs. Zoom Lenses (little known advantage?)
There are pros & cons to choosing prime over zoom lens. Generally primes can be sharper edge to edge, faster and provide better resolution. These differences have narrowed over the years. Current zoom lenses are pretty close in image quality (remember it depends what specific two lens you’re comparing…a very good zoom beats a lower quality prime).
A lesser known advantage of primes however is the ability to render great images when shooting into the sun (either directly or when partially obscured by an object). The image above was taken with a Canon L Series Zoom (17-40mm @ F16). Great lens…however you’ll notice that there is considerable flaring around the sun. That’s detracting from an otherwise good image.
Compare the image below taken on the same Canon Full Frame back and a Zeiss Prime 16mm (also at 16mm). Very little lens flair and much better defined sun.

This time using a Zeiss 16mm prime
Why the difference? When shooting into the sun: light bounces around inside the lens, off of the various elements inside. To dumb it down…prime lenses have fewer elements…and offer fewer ops for light to be reflected inside your lens. The advent of new lens coatings has help reduced flair additionally.
Bottom line: Shooting into the sun…grab a prime.
Crop vs. Full Frame Cameras
CROP VS FULL FRAME CAMERAS
One or the other or both?
DSLR technology has come a long way, but no one camera can yet do it all. Crop and Full Frame (FF) cameras are very different tools geared for different subject matter.
WHERE CROPS RULE (Sports, Long Glass, Candid Street photog):
Crop sensor cameras in effect make your lenses “longer”. Most Canon crops (60d, 7d, 70dd, 7d MKII) have a 1.6 factor. Your 70-200mm zoom will behave like a 112-320 zoom while maintaining the same maximum aperture. Less expensive than buying longer glass.
Ex. Cheaper to purchase a 70-200 f2.8 zoom ($2,000) on a crop than a 300mm f 2.8 ($7000) on a FF camera. Both set ups can produce similar magnification (& great images). The former lens is also lighter and easier to carry.
Crop sensors cameras are also able to fire off pics rapidly. Ex. The 7d MK II can take 10 photos/sec; it’s buffer holds approx. 25 photos before it slows down. (PS, I’ve tested the 7d MK II with both compact flash and SD cards. The firing rate and refresh rate is identical…contrary to popular folklore. The SD card can fire 22 pics before slowdown, the compact flash 25).
WHERE FULL FRAMES RULE?
Full frame cameras have better dynamic range/superior image quality to their Crop brethren and tremendous low light performance. FF cameras can comfortably shoot low noise photos up to 2500+ISO (great for celestial photog), whereas Crops start producing noticeable noise over 600+.
FFs are the perfect tool to go wide! Without the crop factor, FFs are well suited for nature photographers (especially in mountainous areas). Canon’s 17-40mm zoom is a common lens of choice to pair with these cameras (or the 16-35mm if your on a pro budget). Some flagship primes produce jaw dropping results on these back. Ex. the Zeiss 20mm F 2.8.
FFs are also the tool of choice for most wedding and portrait photographers.
Drawbacks: Full frame cameras bog down when taking high speed bursts of photos. Most can only drum out 4-6 photos/second and the buffer often runs out of gas after 5-9 shots. Very frustrating for sports photography (exception Canon 1Dx).
Some have slower focus tracking as well. On the other hand, most nature or portrait photographers don’t need lighting fast focusing for moving objects. Not a big issue.
WIDE ANGLE FOR CROP USERS?
Crop owners now have some good options to go wide however. Specific APS lenses (designed only for use on crop cameras) which are good options include the Canon 10-18 F4.5-5.6 ($299) and 10-22mm f3.5-4.5 ($649) and the Tokina 11-16mm f2.8 (My fav of this bunch $525). If you want wide angle performance and have budget concerns, these are great options. Each of these three lenses with a crop factor of 1.6 will behave (plus offer similar IQ) as a 17-40mm lens (on a FF camera).
CAN YOU OWN BOTH FF & CROP + AVOID BANKRUPTCY?
Instead of buying the 5d MkIII FF($3,300) or the new 7DMK II Crop($1,800) consider opting for the 6d FF ($1,600 on sale) and the 7d Crop ($999) for a total of $2,600. The later two cameras will perform almost exactly up to their new brethren and together open a huge array of photographic possibilities.
5DMkIII vs 6d: Both cameras have nearly identical image sensors and image quality. The former has better focus tracking and slightly more robust construction (& greater weight). As I said, focus speed isn’t that critical for portrait/nature…don’t worry be happy.
7DMKII vs 7d: The Mk II has better focus tracking and slightly better low light performance. Worth twice the price (unless you’re a pro shooter…Nope). Learn single focus point and back button auto focus techniques which trump any minor improvements in the MK IIs focus system.
Closing comment: Yes the author actually owns this stuff (6d, 7d, 7d Mk II, 1Dx) and has tested extensively with a variety of glass (Canon L series: 17-40mm F4.0 zoom, 5omm F1.8 prime, 24-70mm F2.8 zoom, 70-200 F2.8 zoom, 300mm F2.8 prime, Zeiss 20mm F2.8 prime, Rokinon 14mm F2.8mm prime, 24mm F1.5 prime).
How to take sports photos like the pros
Taking game pics like banging your head against the wall? You expect “Sports Illustrated” and instead get out of focus images where your subjects are the size of ants!
Intro/summary-Three elements of winning shots
1: Composition & story telling
- Do it like the great film directors.
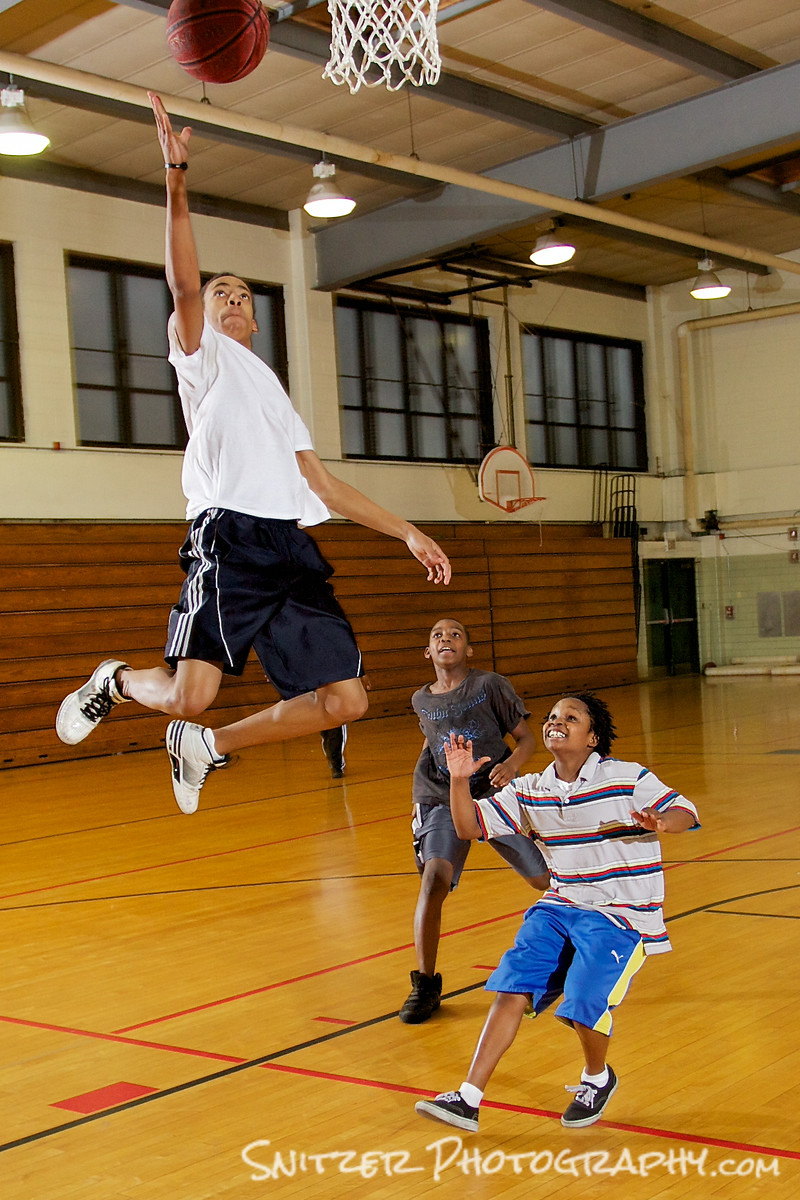
- Ex. My journey to a tough neighborhood…shooting youth basketball (having swagger when you’re scared sh-tless).

- Looking up: “taking the shot before you take the shot”. Size lens, orientation to subject, depth field.

- Warming up the crowd…becoming part of the show.


- Are you telling a story or simply showing action? Does your pic provide a window into mind of the athlete. Tech stuff (background out of focus? Where’s you eye drawn to?)


- Yogi Berra: “It ain’t over till its over”.
- Not just for Sports! Tech transfers over.


2: How to get in position to get the great photo.
- Hint: don’t shoot into the sun.
- Moving around like a pro…amongst pros.
3: What gear do I need to get started?
- Digi SLR (ideally one that can shoot 5+ shots/second)
- Good 70-200 zoom lens (good optics, at least F4 aperture, fast focus).
- Ex. Canon L Series 70-200mm F4 $700
- Why your stock zoom lens won’t cut it! Slow focus, small aperture.
- Monopod: to reduce camera shake (& look official)
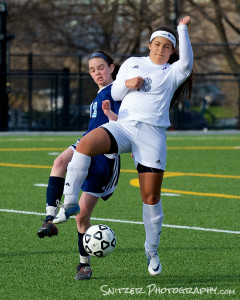
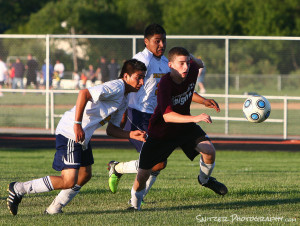
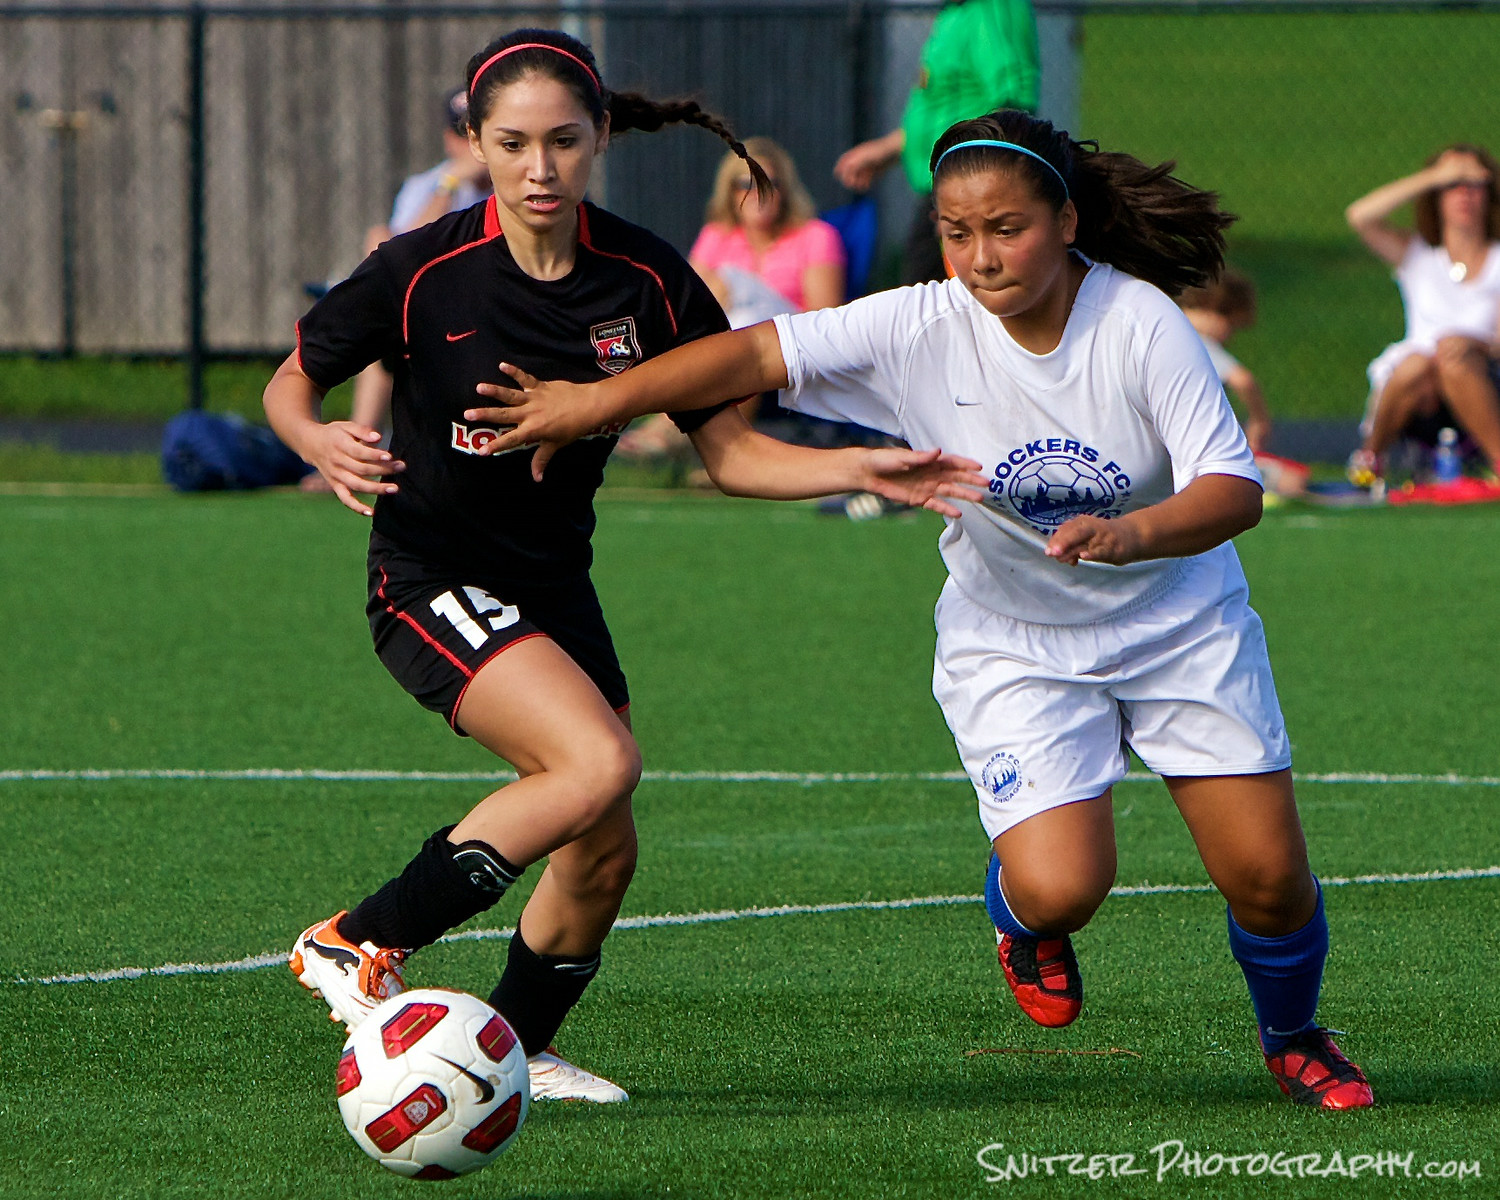
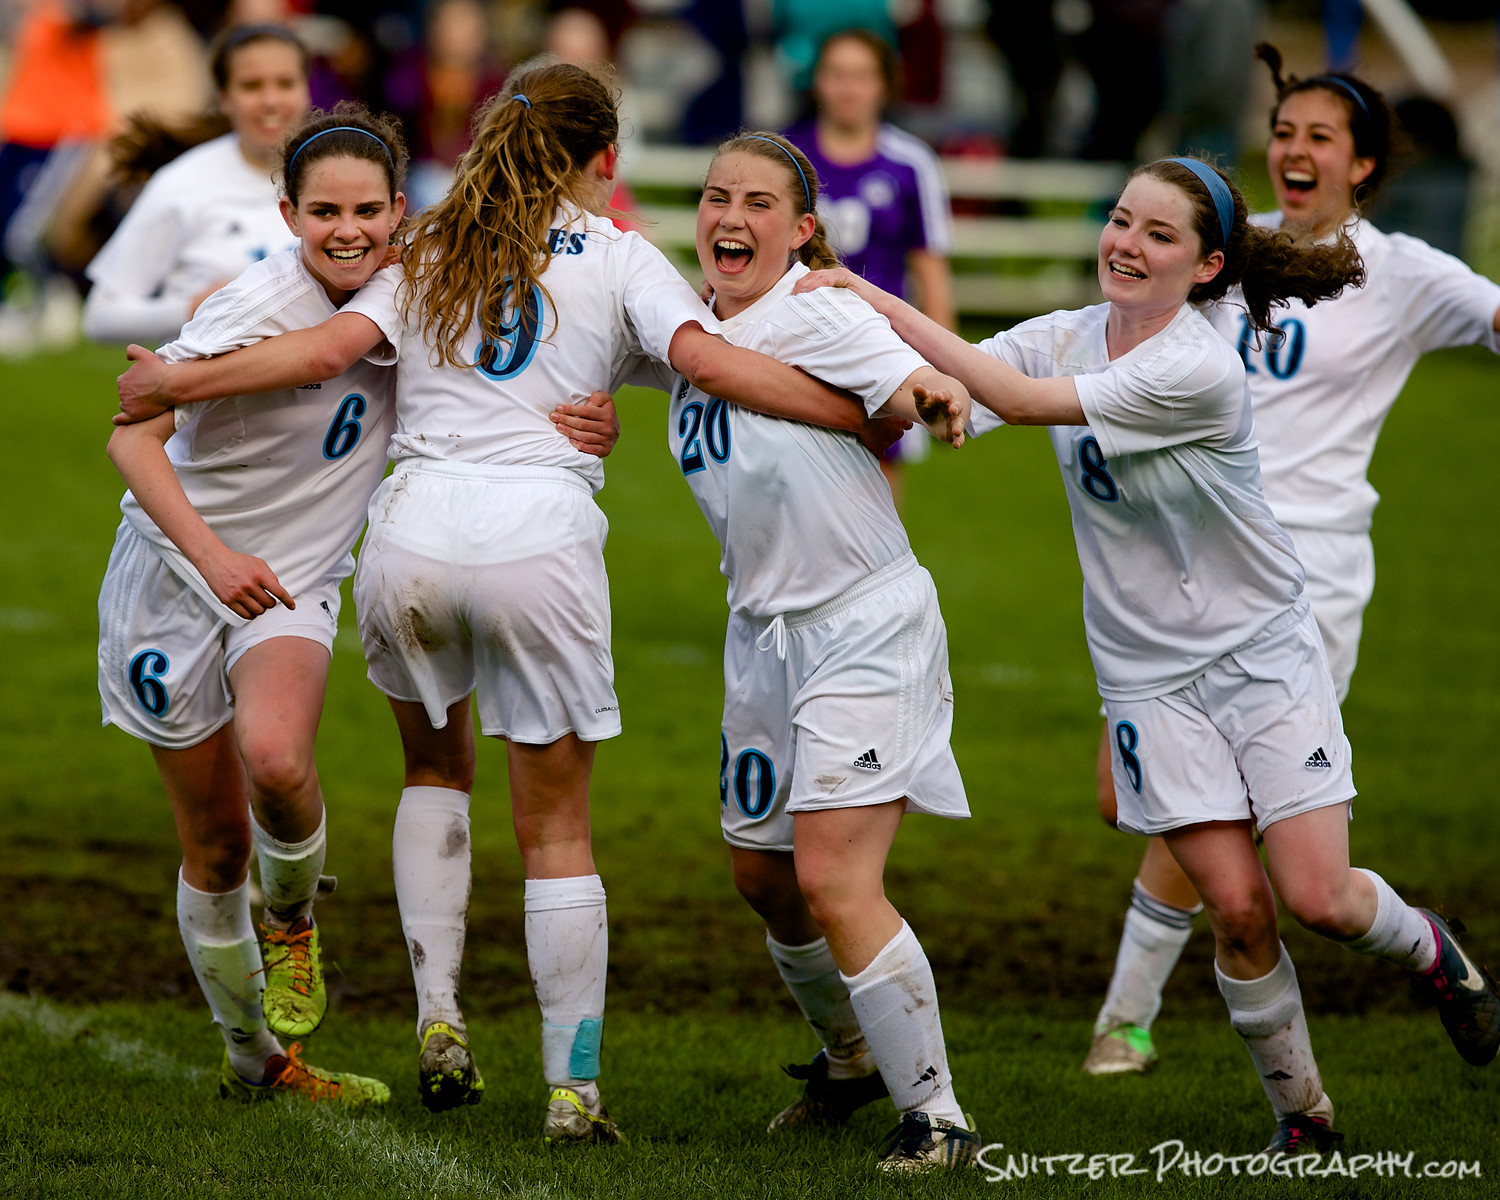
Chapter I: Soccer-What’s a good sports picture
- Tells a story.
- Get you “in the head” of the participants. Conveys emotion (frustration, animosity, concentration, joy, anger…)
- Captures a “defining moment” in the action.
- It keeps “your eye on the ball”. Ergo; Subjects typically “in focus”, background out of focus.
How to think like a sports photographer (is that different?)
- Anticipate where the ball’s going, be ready to capture the moment. That means pre-focusing on your subject before they get the ball! We will talk about how below.
Where to be on field
- Sun at your back (so faces not in silhouette)
- Typically on coaches/players side: Look like a pro/get treated like a pro. MONPOD your admission ticket.
- Shooting your team (or both)?
- Noon sun bad for sports? Side field sun vs. facing a goal (early/late day)
- Travel along sidelines (face on coming action), don’t sit still.
- Allows shots directly at players, plus side on shots
- Behind goals (best if your team controlling the ball…pummeling the opposition), otherwise you may be lonely waiting for the action to come your way.
- Zones of play
- Defense (dominant team, hard for def to clear): your down between midline & goal
- Transition (midfielders fighting for ball): your moving off midline
- Attack (your moving towards goal stopping eventually between goal and midline)
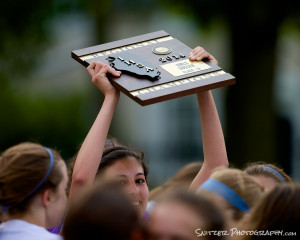
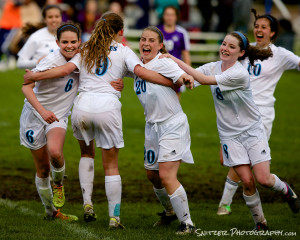
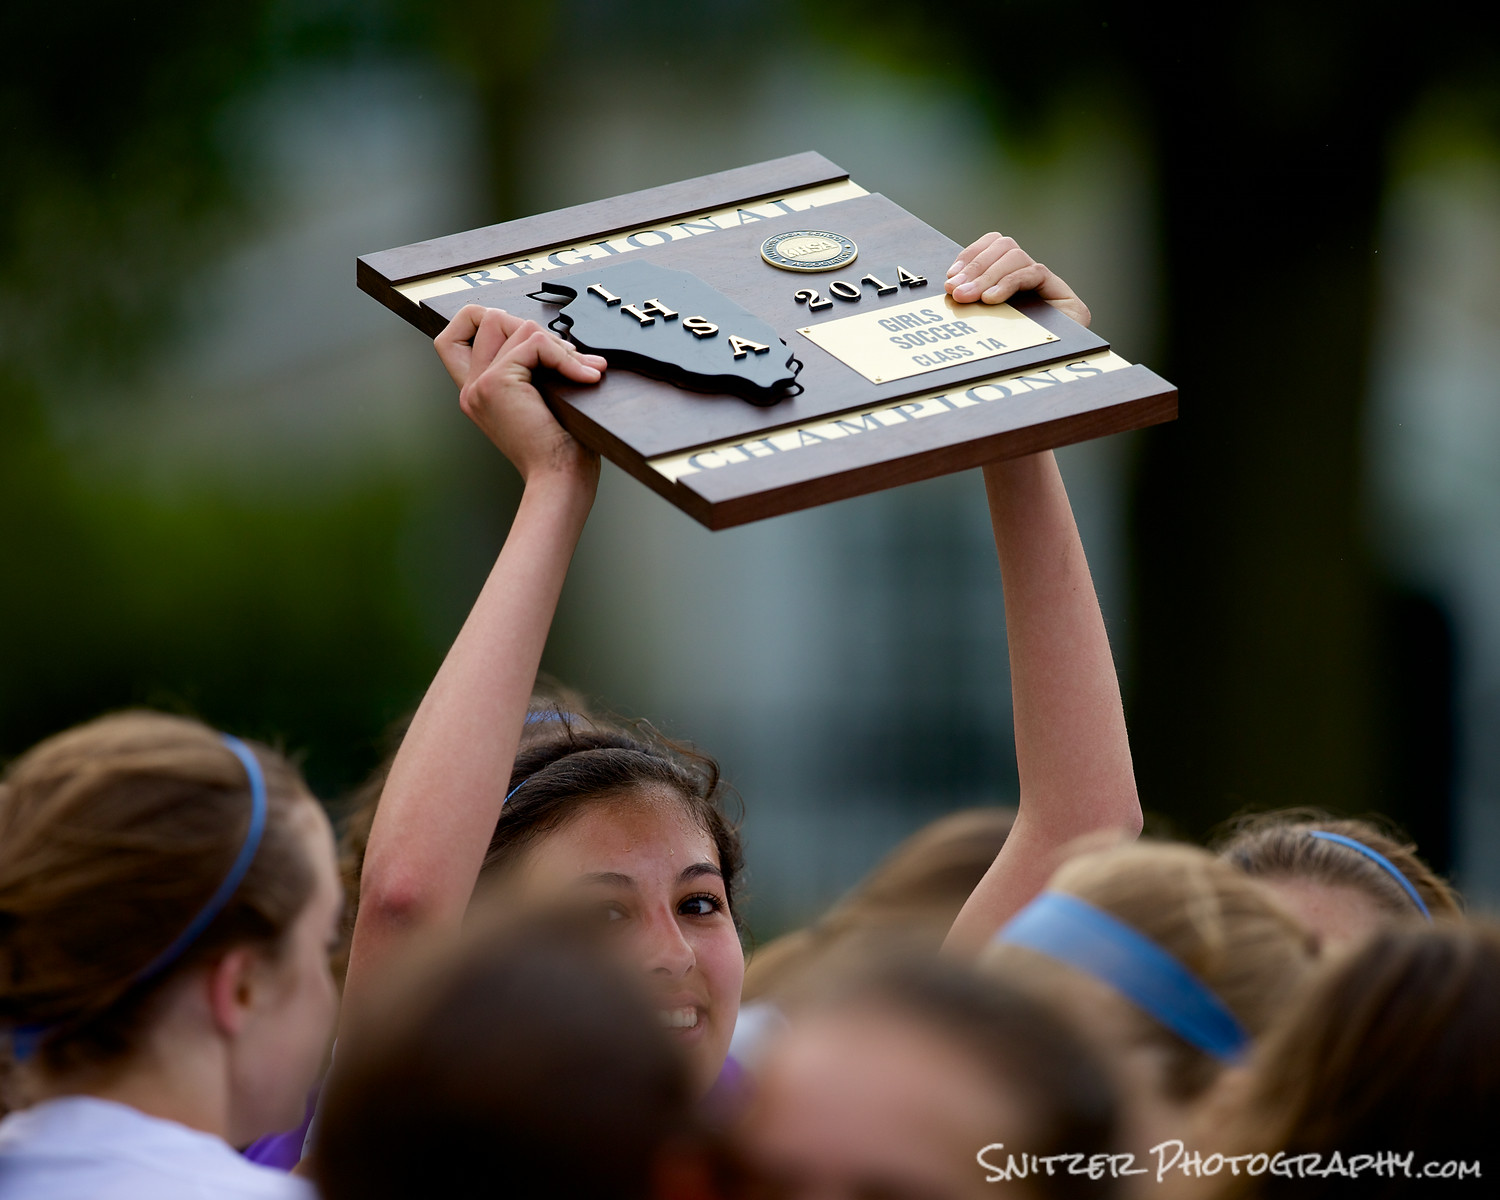
- Don’t forget to “smell the roses”
- Shots of the coach inspiring the kids
- Kids celebrating after a win
How to set up equipment (general)
- Use a monopod: reduces camera shake.
- Shoot in RAW mode (discuss why), Aperture priority, try f4 (throws background out of focus, reasonable depth of field to achieve focus).
- Adjust ISO so that shutter speed at f4 is over 1/800 (3x max focal length), ideally north of 1/1000 (to stop action). On a sunny day that’s easy with ISO of 200. Cloudy days 300-400, pre twilight 600-800).
- Drive mode set to multi high-speed burst.
- You’ll want to hold button down some times and get multi shots.
- Example: game sequence (best shot?)
How to setup for Focusing
FOCUS IS KING (toughest part).
- Even slightly out of focus creates noise…blows up otherwise good photo.
- Depth of field with tele lenses very small. Example (crop sensor camera):
- 40mm lens, shooting f5.6, subject 20ft…14ft to 34 in focus (DOF 20ft).
- 200mm lens, shooting f4.0, subject 20ft…19.7 to 20.2 ft. in focus (DOF 5 inches!)
- Canon cameras generally enlarge 1.6 times (unless full frame)
- Set autofocus for single point only (lot’s of movement, need to have bull’s-eye). Select the point directly above the “center point” to place the subject’s chest area in the crosshairs. Most DSLR will allow this point to be set individually for both hoirz and vert oreintation.
- Al Servo mode.
- Remember if your lens has image stabilization…TURN IT OFF!!! It will slow down your focusing and mess you up.
- WHAT’S THE CATCH…LIKE LEARNING TO HIT BASEBALL…YOU’LL NEED TO PRACTICE THE STUFF BELOW.
- Suggest engage “BACK BUTTON AUTOFOCUS”. Separate button autofocus, allows you to focus on a zone of field and then shoot multiple shots without changing/losing focus (see photo). If you have “radar lock” on subject while running you can depress focus button and track with AL Servo. Great articles below describes this option in more detail.
- http://www.learn.usa.canon.com/resources/articles/2011/backbutton_af_article.shtml
- http://digital-photography-school.com/back-button-focus/
- How to use Both Eyes!! One for the viewfinder, one to track action.
- Typical game assume you’ll take 300+ shots (have a 32 gig memory card or greater with you), high “throw away rate”, don’t get discouraged (1 winner for every 20 shots).
How to get good shots
- It’s all anticipating the action (collisions, headers, jumping, shots on goal…)
- Use both eyes (left eye follows general action/big pic, right eye will frame actual photo-moment of truth).
- Practice makes perfect to gain expertise “zooming”. 70 mm for players running down sidelines at you, 150-200mm for mid field action.
- Don’t be afraid to crop in tight in post processing (or use edge sharpening tool/boost def/contrast)
- Remember to capture expression of players on field (fun shots also include the bench, coach, fans….)
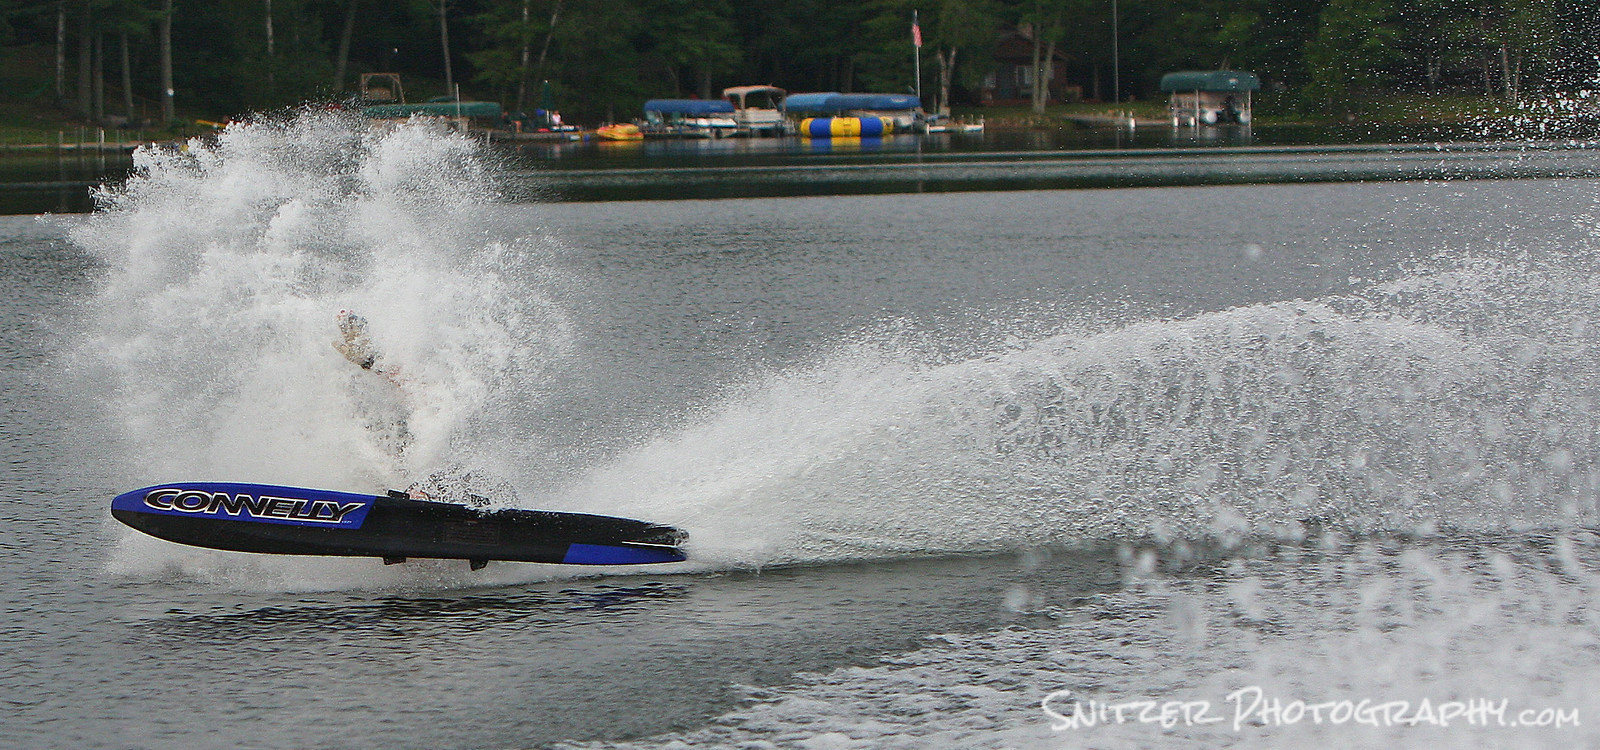
Chapter II Water Skiing (Importance of light)
- Light is slow (sun up/twilight), illuminates skier and water behind. Contrast between dim background and subject, water rooster-tail.
- Flat water (no boats, no wind)
- Zone focus, high shutter speed, F4.5, 300 ISO

- be ready for the unexpected.
Chapter III Crossfit Competition (Get in close) 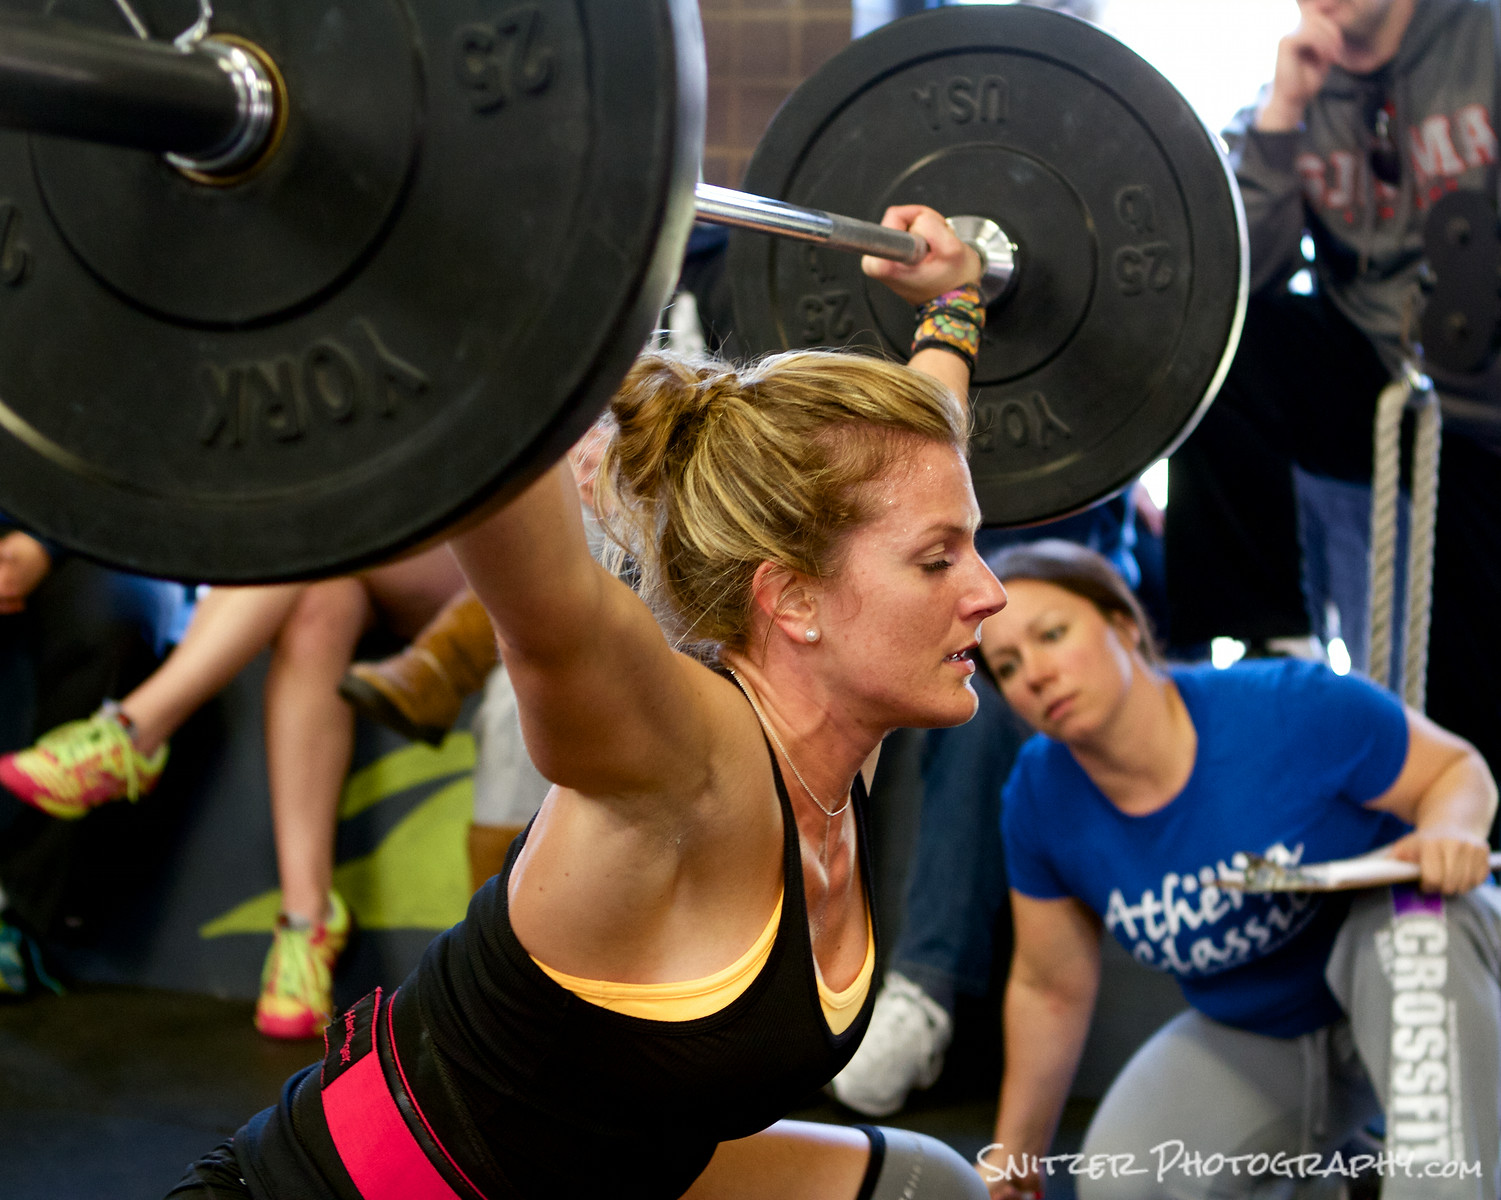
- Used full frame camera to shoot in low avail light.
Chapter V Cross Country 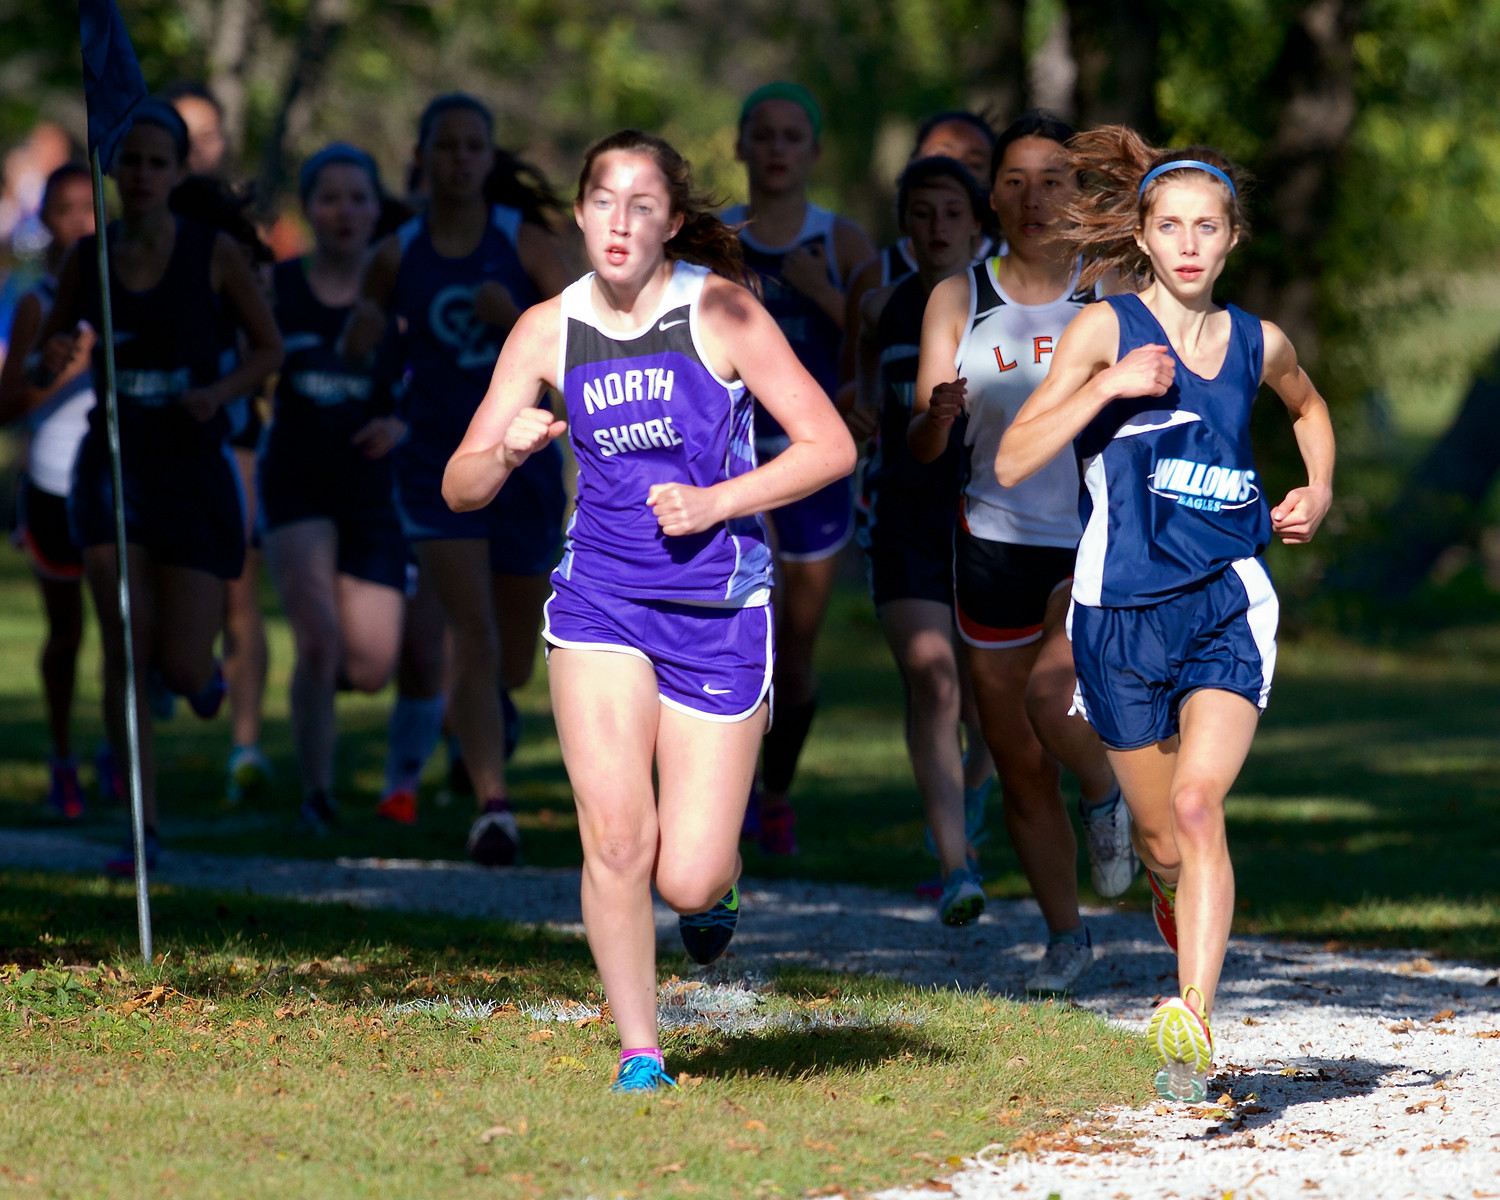
- Large aperture to isolate subjects
- Look for interesting lighting, highlighting a few competitors.
- Easy to track subject, hold down back button focus in Servo Mode to track will firing off burst of pics.1
Chapter VI Cycling 
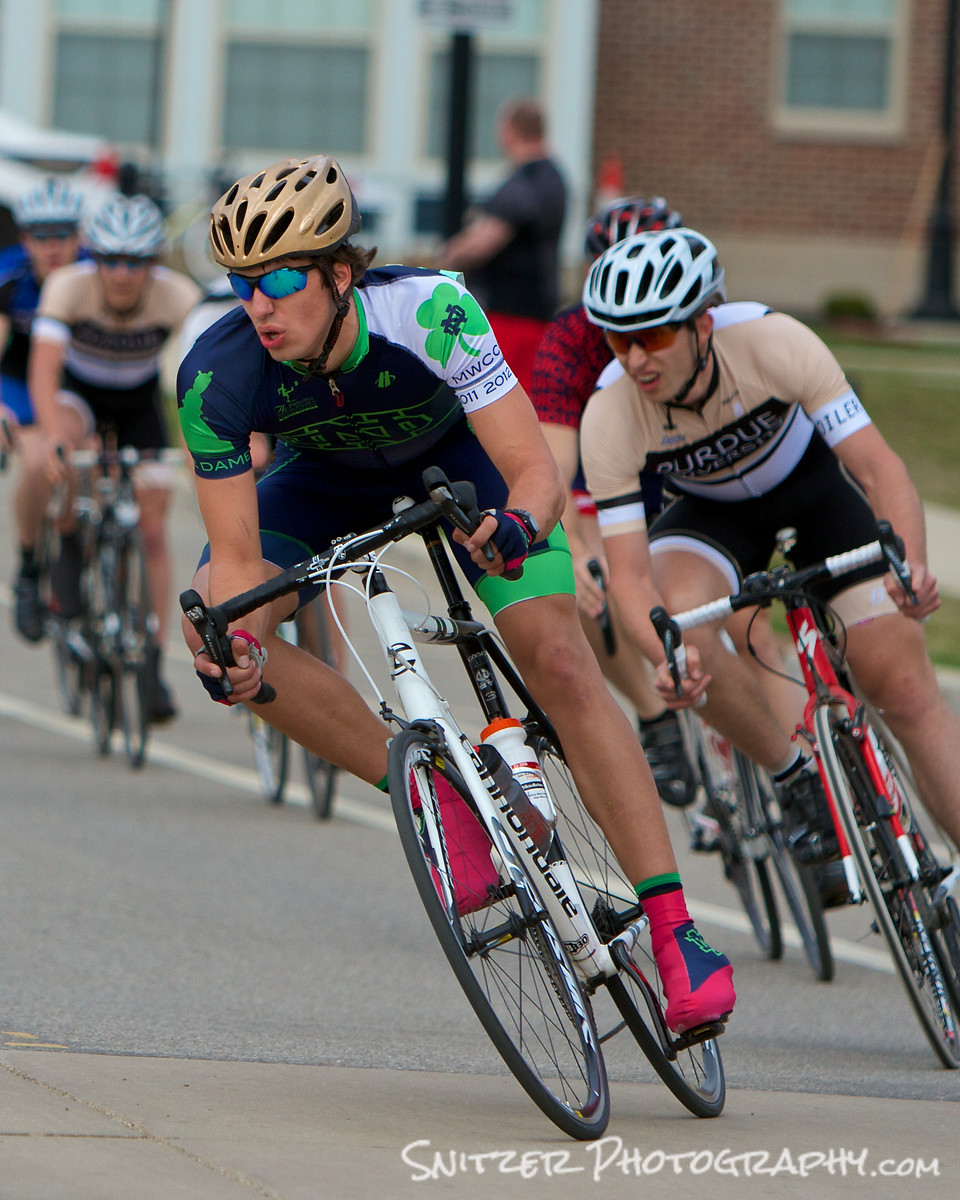
- Subjects moving at very high speed. Impossible to track through viewfinder.
- Zone focus beforehand, use moderate aperture f4 for slightly large depth of field.
- Keep fingers crossed.
Chapter VII Skiing
- Pre-focus on area
- Lots of light, use small f stop (f8 or greater/big depth of field),
- Over expose about 1 f stop (explain exposure compensation option). Experiment or skier will be under exposed.
Chapter VIII Basketball
(Indoor sports with high power strobes)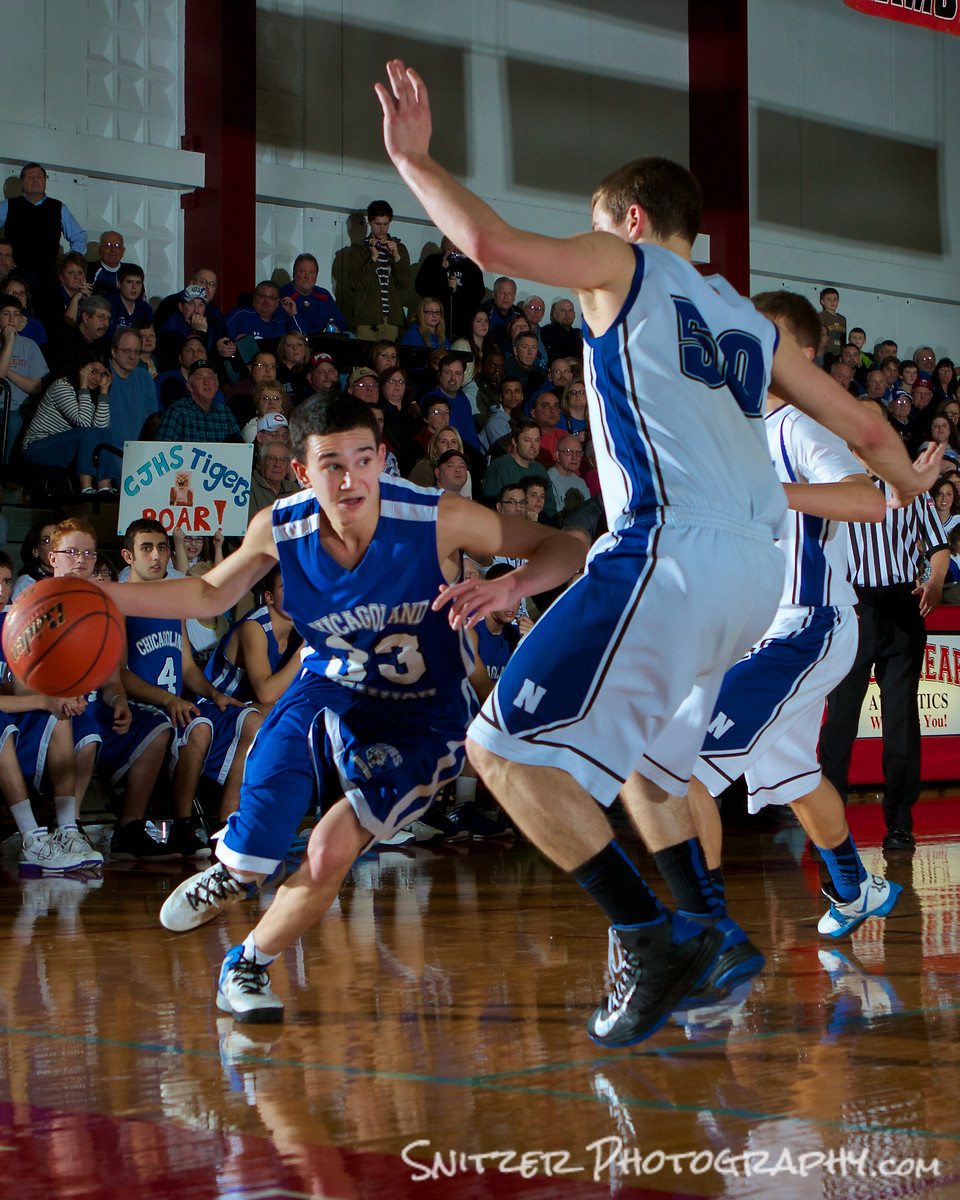
- Very hard to shoot with gym lighting. You’ll need ISO 2000-3000. Only way to work is with a full frame sensor with high burst rate. Very expensive camera options (Canon 1Dx). Or
- All the photos you see in SI are done with strobe lighting.
- Set up high wattage strobes in the four corners of the gym (up high 10ft +, aimed at center of 3 point line).
- Use two strobes at a time (2 for one side of court, 2 for the other). Strobes are tripped with blue tooth system (one end in your camera’s hot shoe, the other plugged into the strobes).
- The strobes will allow you to get an exposure 3 stops greater than the ambient light. The camera will only see the light generated in the strobes brief flash. Everything else is dark. Stops action!
- For more advanced work, additional strobes bounced off ceiling to create more fill lighting.
- Make sure you check with the coaches/refs beforehand? Start with low strobe settings till players, coaches eye get attenuated to flash, then turn up.
- I’m typically positioned behind the baseline (the area behind or within 10 ft/either side of the basket) and shooting with a wide angle zoom. 17-40mm (for crop sensor cameras) or 24-70 zoom for Idx (full frame). You’ll need to be on one knee (shoot low) and use both eyes (one for viewfinder, the other to watch the action developing around you. BE PREPARED TO MOVE QUICKLY to avoid getting slammed by fast approaching ref/players.
- The little dets:
- I’m using Einstein strobes sets at approx 125 watt secs (action mode/flash duration < 1/2000 sec!), which allow the flashes to fire approx 7x/sec and syncs nicely with the camera’s high speed burst option. My strobes bounced off the ceiling will be dialed up to about 400 ws.
- Manual Mode: 1/250 sec. I fine tune the aperture based on the cameras histogram. Looking for about f5.6.
- At the start of the game I dial all the strobes to half these setting to allow the players eyes to attenuate.
Chapter IV What kind of equipment
- Digi SLR
- Ability to take at least 5 shots per second and crank off 7-10 without the camera’s buffer crapping out. That rules out most full frame sensor cameras (other than $$$ pro models).
- Crop sensor cameras excellent for sports. Makes your zoon lens….longer. Ex. 200mm lens on a Canon 7d is the equivalent of a 320mm lens (1.6 crop ratio)
- Canon 7D vs 7D II. Canon 5d III vs 6D. One vs two camera photographers?
- Zoom lens (70-200 range, f 2.8-f4), Ex. Canon L series $700 for f4, 2x more for f2.8, 3x more for 2.8 II series.
- Why spend the $$? Large enough aperture to blur background, Super fast focus (2 motors); tack sharp, great for people shots, candids.
- Monopod (to reduce camera shake/gets you on field-no questions).
- I want a “pro” set up. Ok you asked for it!
- You’ll be shooting with two cameras. One on a monopod, one draped around your shoulder mounted on a BlackRapid system strap.
- Canon 1DX as main cam body (full frame sensor, 14 pics/sec).
- Canon 7d MKIIas 2nd body (crop sensor, 10 pics/sec).
- Canon 300mm F2.8 your main lens (non zoom)…sharpest tele in the Canon line ($6,600) or if your concentrating on football/large stadium work consider the 400mm F4 (same price) or the 400 F2.8 (only $10,500 this month!).
Glacier National Park Fall 2014
I’ve been been chomping at the bit to explore Glacier for many years. This September seemed like the perfect op as the park was starting to show it’s fall colors and the park’s summer crowds were subsiding. In fact with only 2 of the park’s 10 hotels open, I had the place all to myself. An added bonus was some spectacular weather…cool mornings, mid 70s during the afternoons.
That’s not to say that storms can’t hit without warning…the park received 14 inches of snow the week before I arrived.
The first part of the trip started in the Many Glacier section of the park, which is considered to be the best single spot for hiking. The view below is right in front of the Many Glacier Lodge perched above Swiftcurrent Lake.
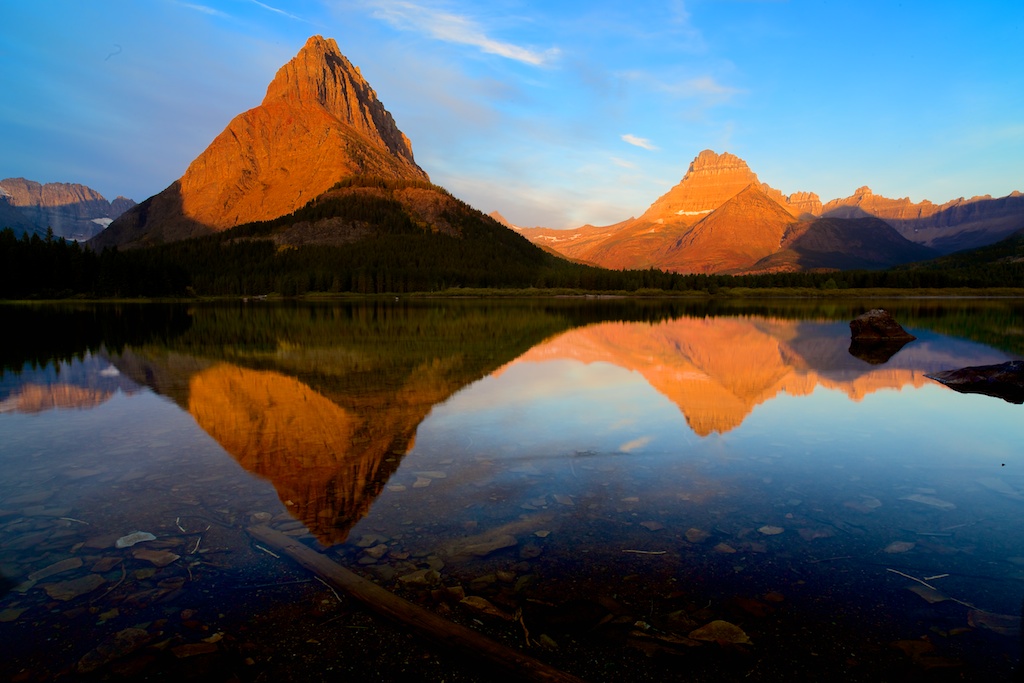
Swiftcurrent Lake at Daybreak
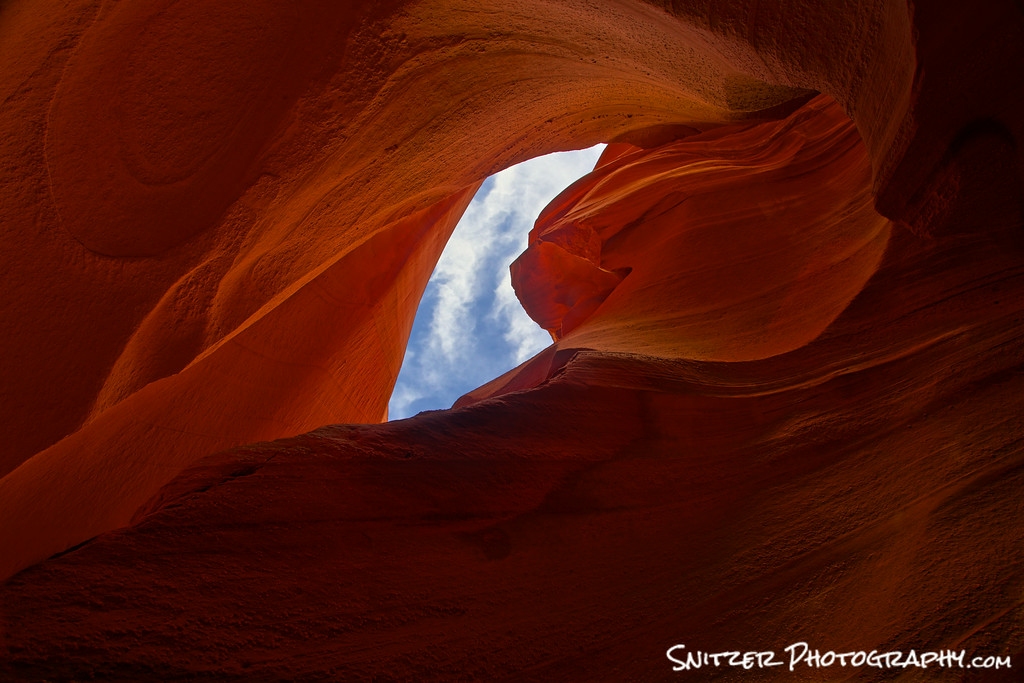
Some tips for photographing the iconic Antelope Canyons
I had an opportunity to do a multi stop photo vacation in Utah and Arizona (this past April) which included both the Upper and Lower Antelope Canyons (Page, Ariz). For many years, I’ve enjoyed wonderful images from this area and figured I’d check it out on route from Zion to the Grand Canyon.
Very very worth it!!! Below is offer some advice for photo-bugs looking to enjoy the wonderful scenery and come back with some spectacular shots:
Where to start (about 10:15am): Lower Antelope Canyon offers the unique ability for “serious photographers” to take self guided tours. A serious photographer means you show up with a tripod and and SLR (not kidding you need both). That gives you the right to pay about $20 more for admission and tour the canyon by yourself! For two vs. one hours (with a group).
Not kidding folks. I was walking around the canyon, enjoying the solitude and taking my time grabbing tremendous photos, while two groups of tourists (each with about 16 people) were tripping over each other to get a good view of the site. All I had to do was go someplace, where the groups weren’t and enjoy myself!!
On to equipment/how to: To get great photos, you’ll need to shoot long exposures (for sufficient depth of field) which will allow you to use smaller apertures (f8-f11/16). Remember to bring a manual shutter release. As for lens selection (wider is better). Most of my shots were taken with a 16-40mm Canon L series lens (with a warming polarizer) and a full frame SLR (Canon 6d). Don’t think about changing lenses in the canyon…there is a fine dust in the area that will get into your SLR if you open.
I had a private guide assigned to me that would stop by ever 20 minutes or so and see how I was doing. How cool is that! I had the guide throw some fine sand into the air about 30 ft from me, directly below where a ray of light was coming into the opening from above. Makes for a great pic.
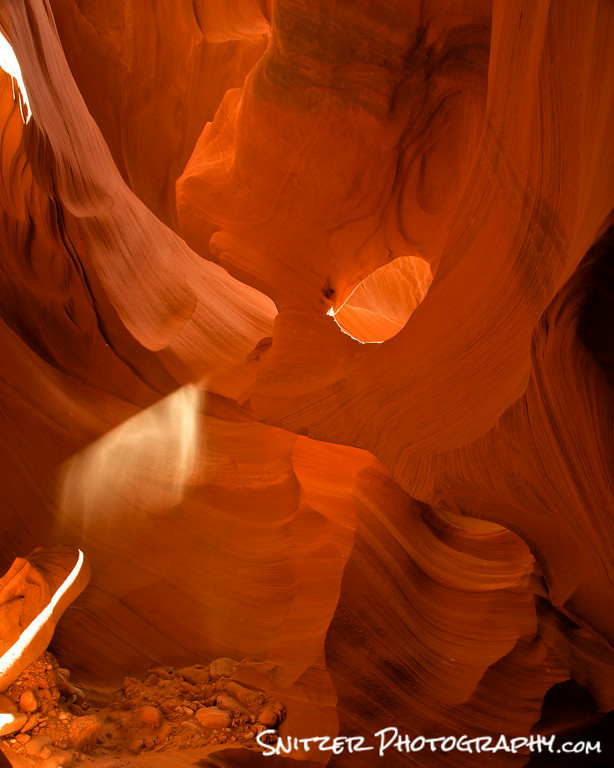
My guide threw some dust into the air allowing me to capture this beam of light.
Moving on: Once I completed touring the lower canyon I immediately hoofed it across the street where the entrance to Upper Canyon is located. You can book with a variety of tour guides to see the upper canyon, but there’s only one located right at the entrance (the others drive in from about 15 mins away). I went with Antelope Canyon Navajo Tours…they did a great job.
What’s different? Upper Canyon is a tourist trap. You’ll be enjoying the sites with about 16 of your closets friends (that is in your group) plus your group will be exploring the canyon along with another 10 or so groups of enthusiasts. Just think of returning home from work at rush hour.
So is it worth it? Yes…the upper canyon is very different than lower. Not better just different. Wider expanses…different rock formations. Yes it’s crowded but its very very cool. Quit complaining…suck it up and enjoy the magic. Just forget your enjoying the magic with the rest of humanity.
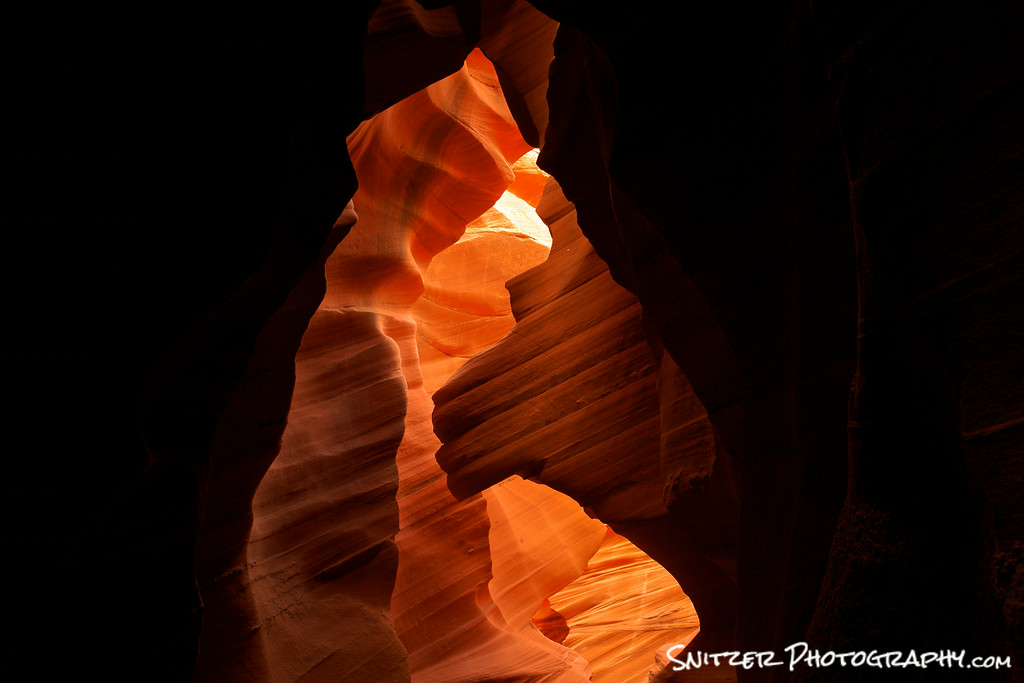
For you HDR photography fans. Most photography done in the canyon is done without looking up at the sky (it’s cropped out of the photo). For those of you familiar with HDR photography, suggest you try a few shots using 5 bracketed photos (2 stops apart). You’ll need that many to capture the wide dynamic range.
Don’t be afraid to try HDR. I shot 5 exposures 2 stops apart for this pic.
Good luck!
PS. Your a stones throw from Horseshoe Bend. Make sure to check it out!
Lots of great angles to explore! This shot is looking straight up.
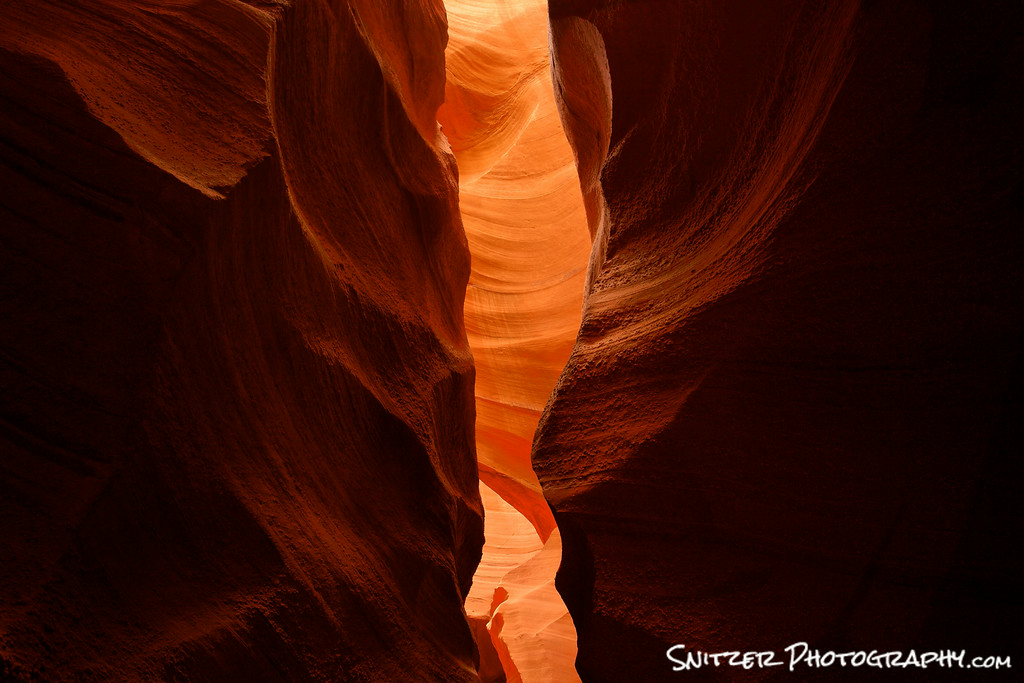
Bracketing your photos allows you to capture the subtle differences in the light. Shoot 3 shots, w 1 stop incrmts.

Not only breathtaking in person…offers unsurpassed photos ops!
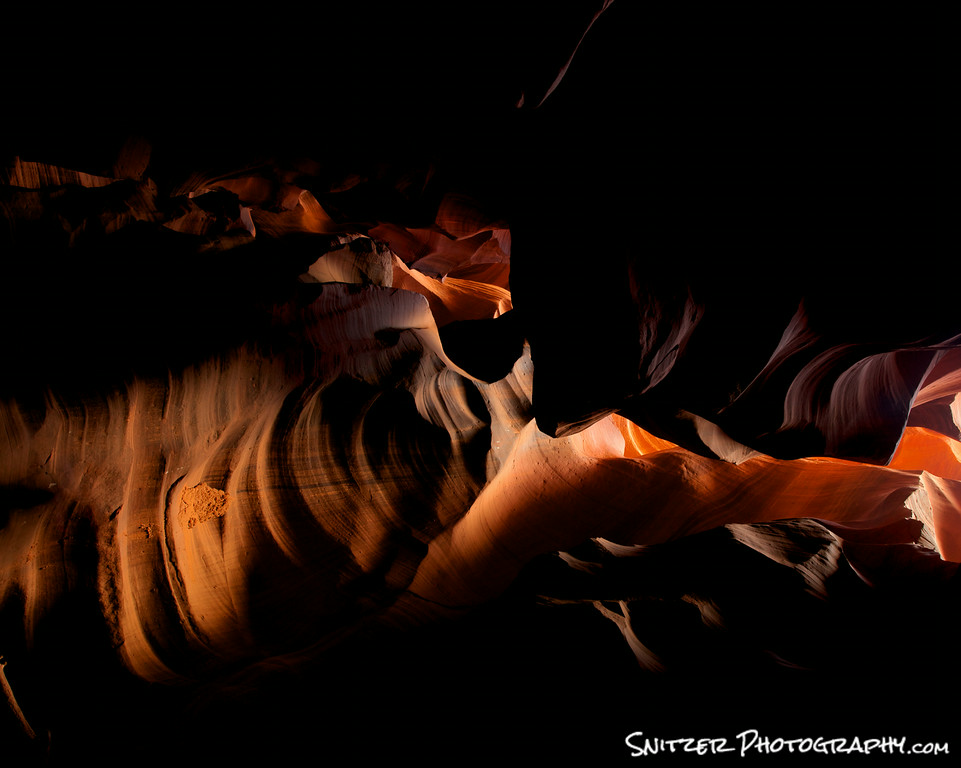
Don’t be afraid to have certain portions of your frame “blacked out”. Creates drama.
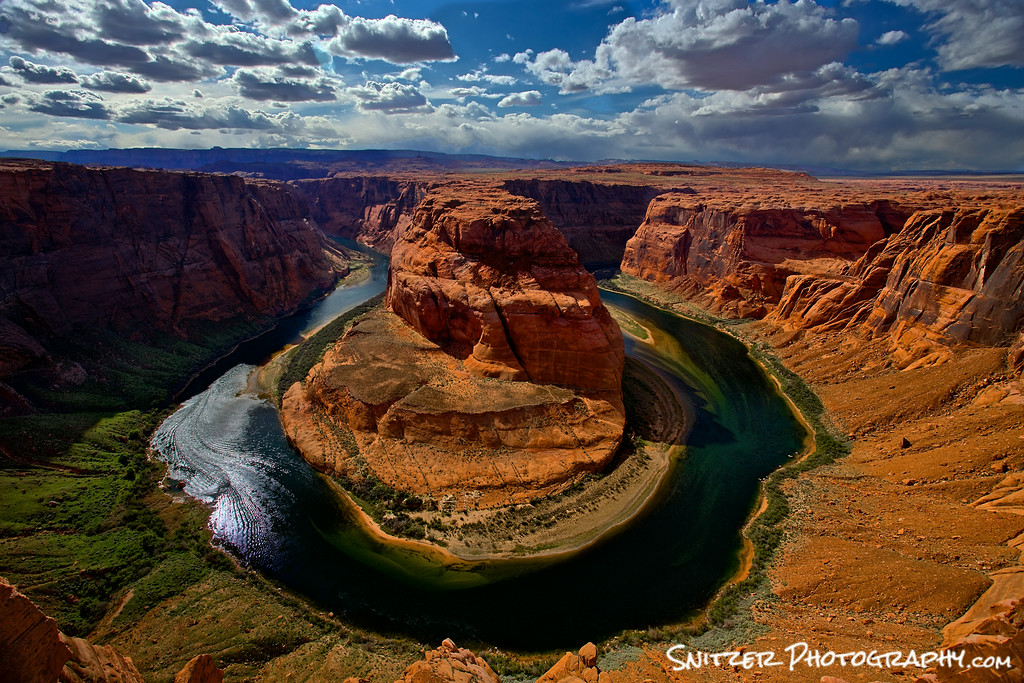
Your only a 20 minutes drive from Horseshoe Bend…absolutely check it out.
Some great “water” pics near Steamboat Colo.
Mount Zirkel
I recently had the opportunity to hike the Mount Zirkel Wilderness Area (located about 40 minutes from Steamboat, Colo.) in late June. Many of the high elevation lakes were still covered by snow & frozen over. Three Islands Lake, however, had recently thawed and the 2.5 hour hike to it afforded some great flowing water shots along a stream bed running a “full bore” with the Spring runoff.
The silky effect for the water was achieved by using long exposures of between 10 & 25 seconds (camera mounted on a tripod). I also used a polarizing filter to cut glare.

Looking downstream on route to Three Islands Lake
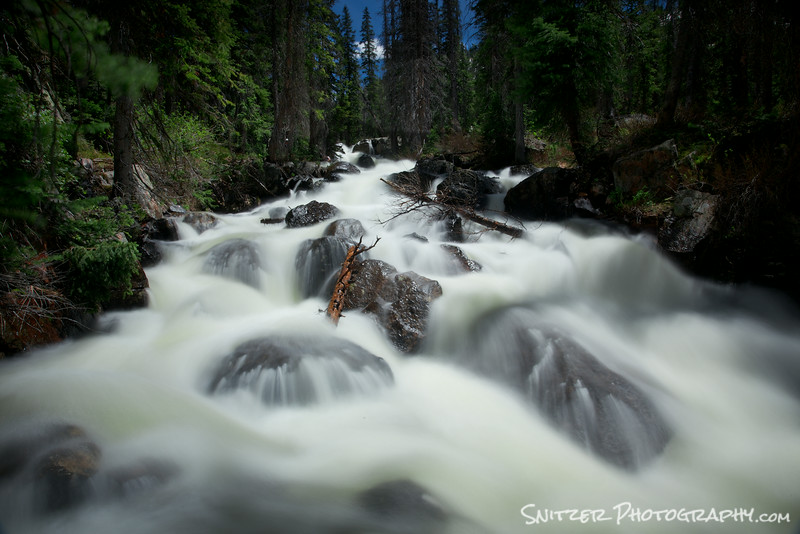
View upstream a few miles further along the trail.
Rabbit Ears Pass
Later that evening, we enjoyed a great sunset at Rabbit Ears Pass.
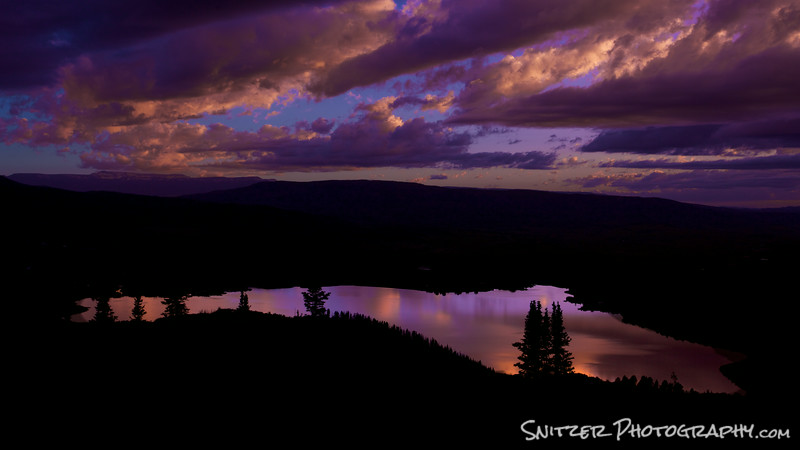
Sunset on Rabbit Ears Pass, looking down upon Lake Catamount.
Fish Creek Falls
One of our final stops was Fish Creek Falls, one of the favorite hiking spots near the ski area…also heavily travelled.
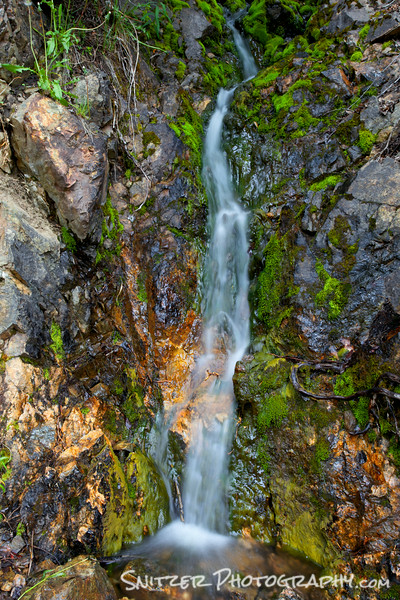
A small trickle of water on the hike down to the falls
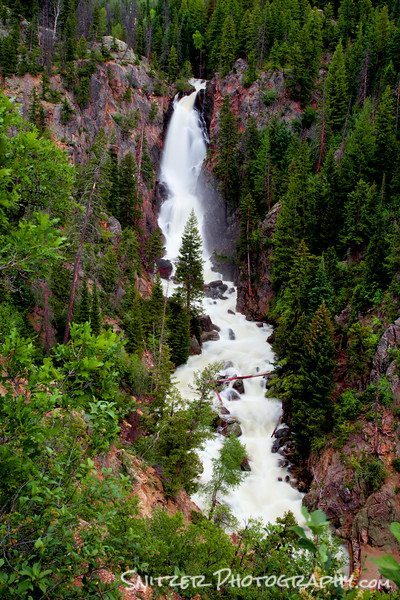
Fish Creek Falls viewed from above.
Celestial Photography at Arches!
Just returned from 10 day biking/hiking trip to Steamboat Co. Had the opportunity to do a great side trip to Arches National Park (outside of Moab Utah) and grab some great shots of the spectacular/iconic rock formations against the backdrop of the Milkyway Galaxy!
I started shooting about 10:30pm when twilight had receded and the night sky was in full bloom. For you tech-heads out there….here’s how I grabbed these images:
- I used a full frame SLR with a very fast fixed focal length lens (Canon 6d and Rokinon 16mm f 2.8).
- The Camera was mounted on a tripod, with the lens held open for approx 25 seconds (F2.8 @ 2000 ISO). Long enough to get a proper exposure, short enough to avoid star trails. Ie. the stars rotate around the North Stars….if you leave the lens open too long…you get streaks.
- I illuminated the rock formations using two techniques. A. I started using LCD flashlight with colored gels…to bring out the natural color of the rock. I typically positioned the camera in front of the arch, then painted the arch with light from the side. I trigged the camera using a remote blue-tooth shutter release. B. When the moon came out later in the evening, I used that as the additional light source.

North Window. Snitz standing beneath with gelled light.
Milkyway Galaxy creates a great backdrop!
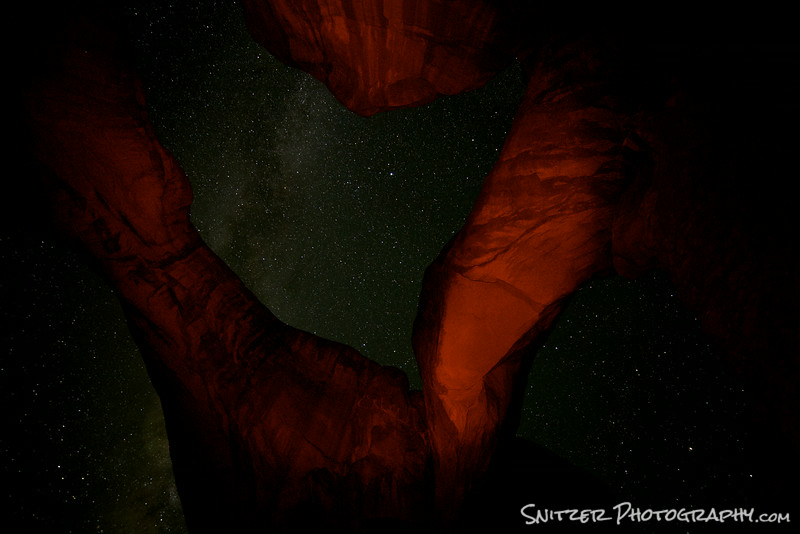
Looking up through the Double Arch
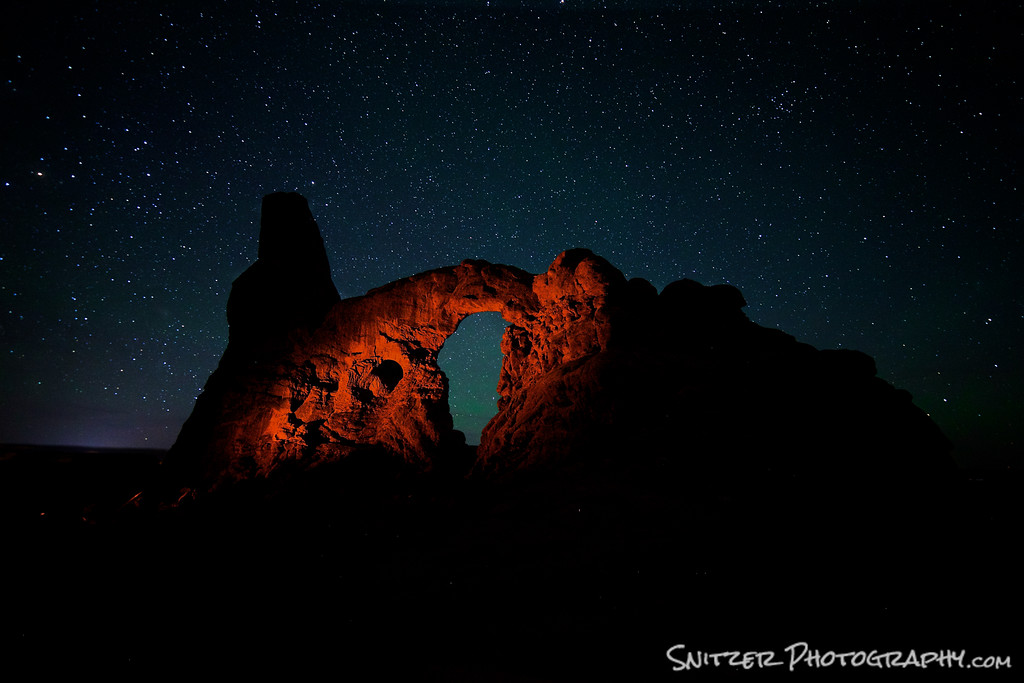
Author providing side illumination for Turret Arch.
-
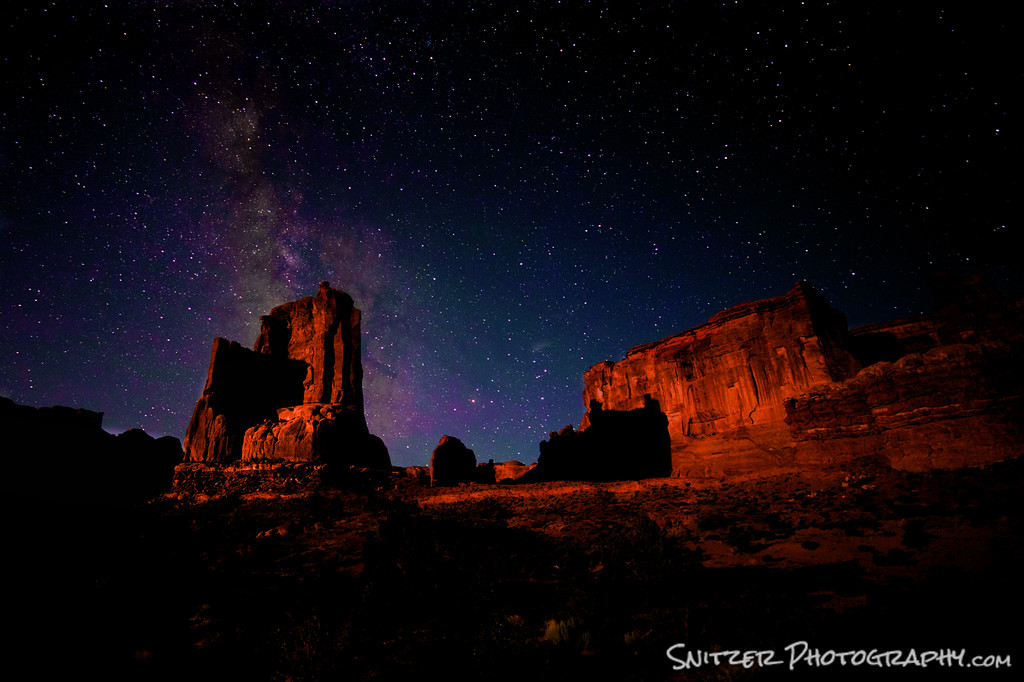
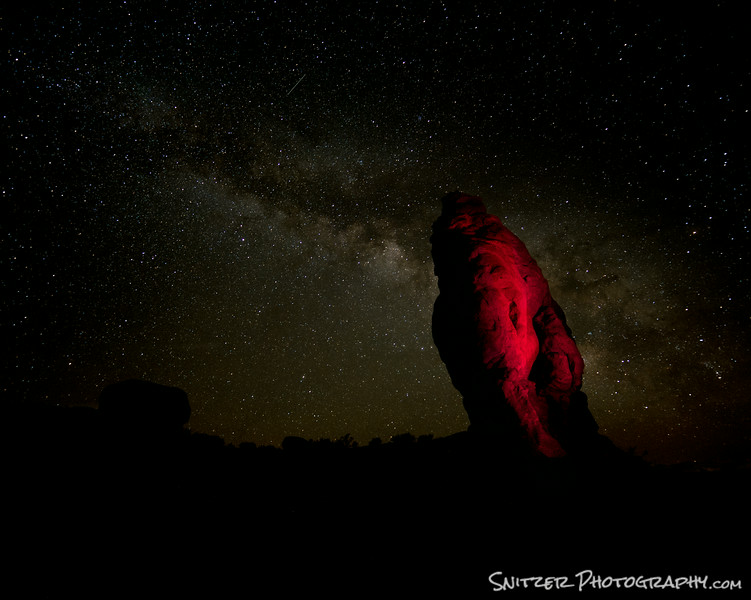
The Tower of Babel, moonlit later that evening.