What’s better Lens Image Stab or In Body Image Stabilzation?
The new crop of mirrorless cameras features crazy good “in-body” image stabilization. Of course, this feature doesn’t work if you shoot with a lens that has image stabilization. WTF! The camera body will defer to the lens and shut down its own stabilization utility.
You know where I’m taking this. I’m going to pit my expensive Sony 100-400mm zoom lens ($2,500) against a cheaper Tamron 70-300mm lens ($545) without image stabilization (which can use the IS in my Sony A7rV). Caveat, the Sony will perform much better for fast-moving objects (aka sports) where IS doesn’t work. Our test will be for a stationary object (a good hypothetical test for Wildlife that’s not moving quickly).
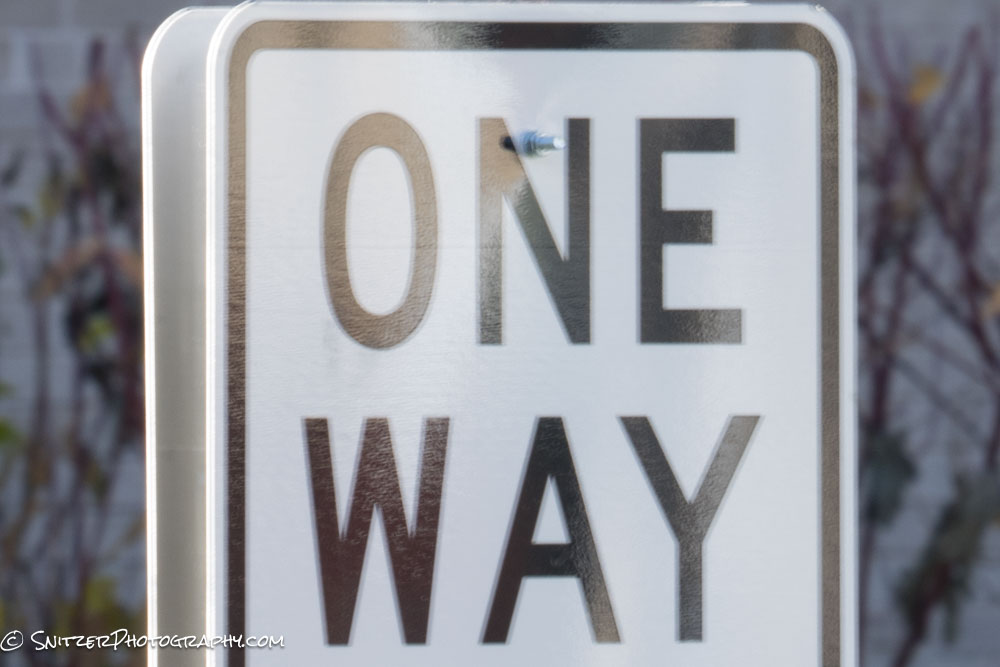
Ok let’s start with hand held shots taken at 100mm, 10/10th of a second. Normally you’d want to shoot at 1/100th or faster at that focal length(1/local length). At a 1/10th we’re at 4 stops below recommended. At full size, both images look acceptably sharp.
Sony 100mm w lensIS turn on.

The Tamron using the Camera’s IS looks the same.
But cropping in at about 400% (in Lightroom) the Sony is showing some motion blurr.

The Tamron lens using the in body IS is sharper.
This becomes more apparent at longer focal lengths where there’s more potential motion blurr.. Let’s try the same thing using 300mm (the image cropped at 200% in Lightroom). First the Sony. Yup, definately not in sharp focus.
Next the Tamron. Much better!
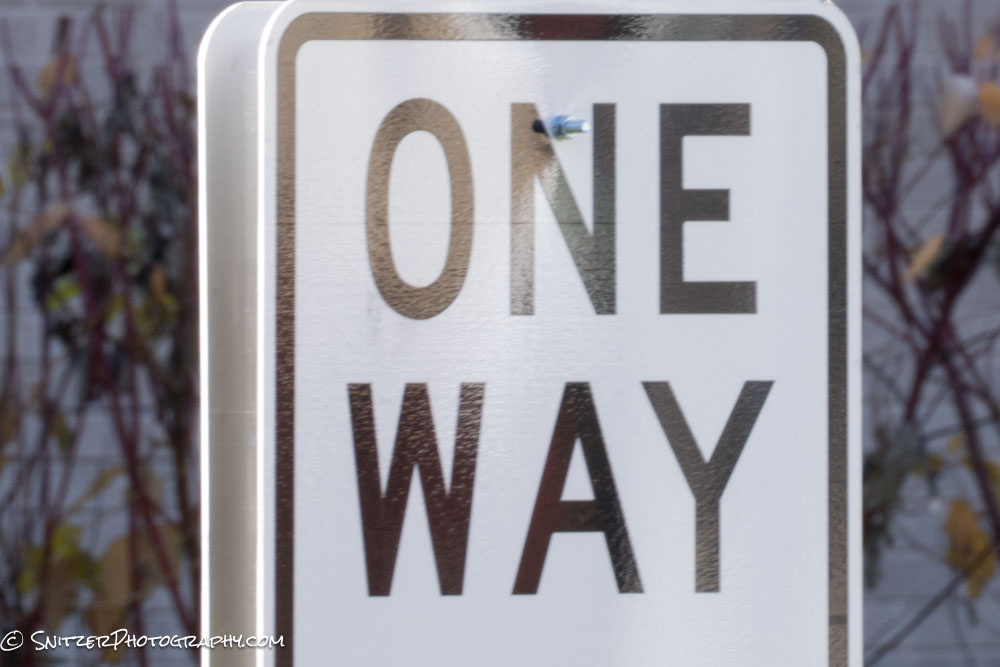
There you have it. The cheaper Tamron bests the expensive Sony (when IS is possible).
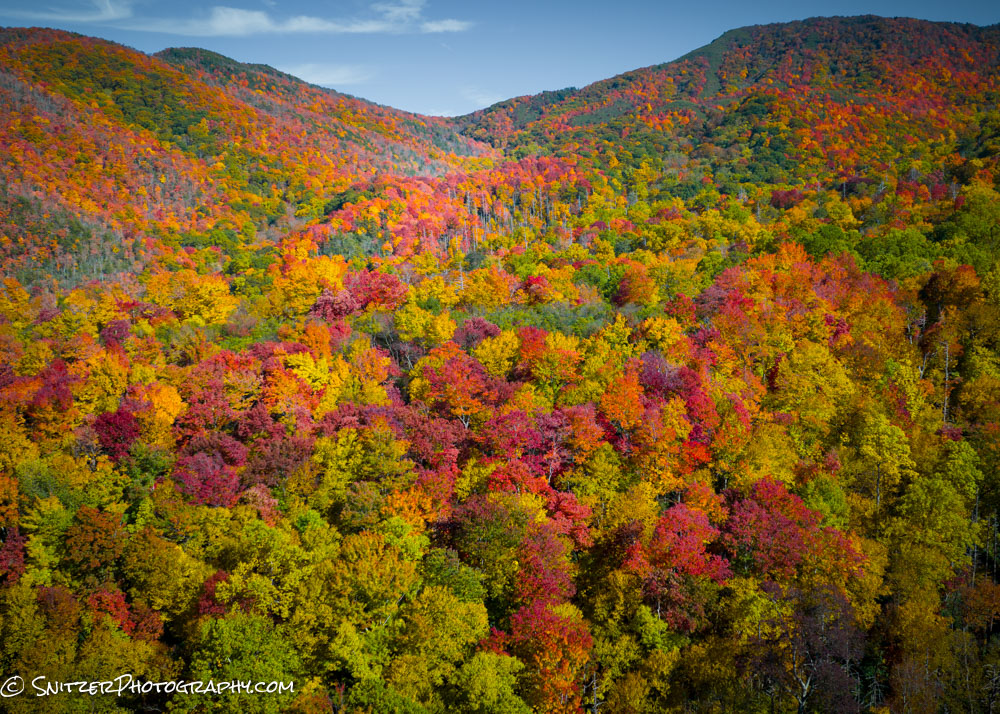
Snitz’s guild to explore Smoky Mnt NP
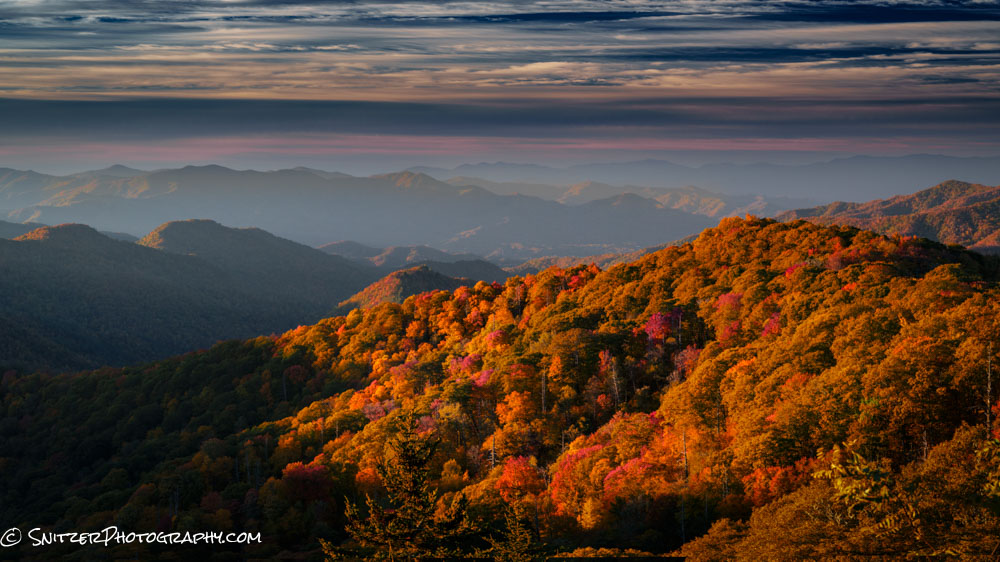
The Smokies are a great place to view fall color and hike! The mix of Maple, Oak, Birch, Beech, and Pine trees create postcard scenery and a diverse pallet of yellows, reds, and orange glowing foliage (reaching peak color around the 3rd week of Oct). That can change from year to year based on weather.
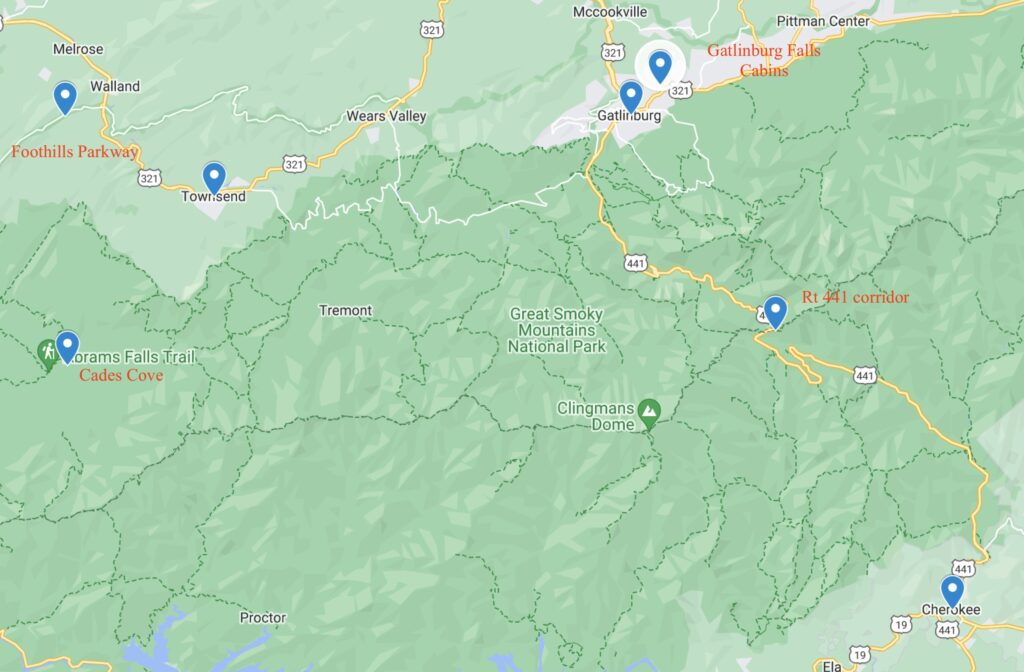
Unfortunately, this area can remind you of rush hour in LA. Others have discovered my secret. Tips on how to navigate around, and see the great stuff while avoiding the crowds: Let’s start with a map.
Most viewing/hiking in the park is centered around Cades Cove (& surroundings), the Foothills Parkway, and the Rt 441 corridor (which is a very target-rich environment). If you’re doing a week trip, the best place to stay for the first two days is in Townsend, a charming small town with excellent lodging, some solid restaurants, and few crowds.
The bulk of the epic views & hiking however is off of RT 441 and Gatlinburg is closer (saving you an hour of driving each way). Sadly, Gatlinburg is like the Wisc Dells on steroids. My compromise is to stay a few minutes North of the town (Gatlinburg Falls resort/cabins) and visit the local restaurants North of the City. Ergo stay out of the downtown!
The other key point: hit the trails early (like at sunrise). That way you’ll completely avoid the traffic and crowds on the trails. Leave late morning and you’re asking for a beating.
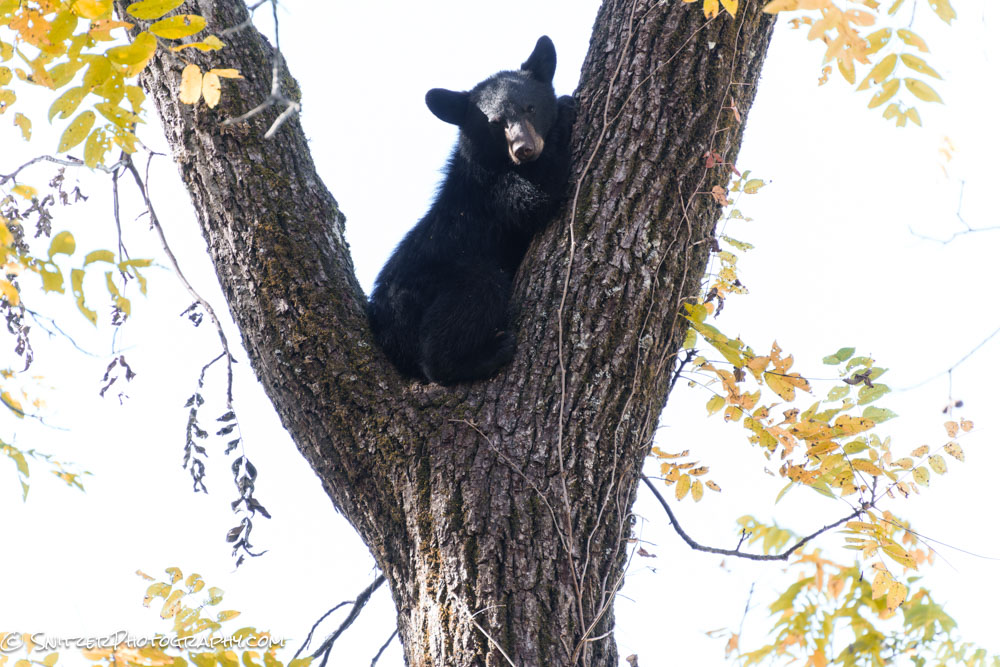
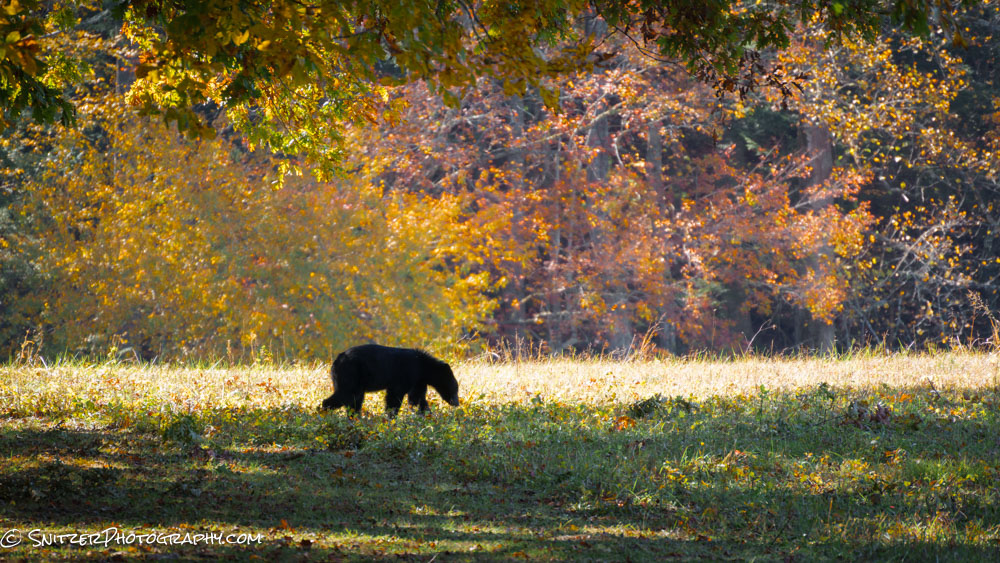
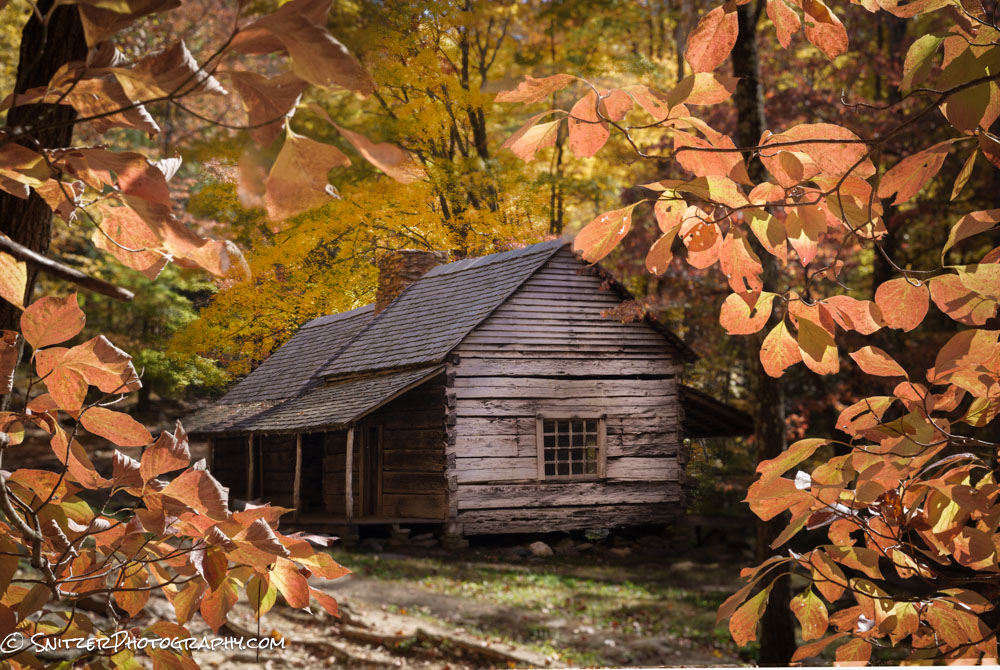
Time to hop aboard the Snitz tour bus. Let’s start with Cades Cove. This can be crowded with cars (avoid weekends) but offers some great wildlife viewing, cool frontier cabins and the popular Abrams Falls hike. This little guy was being protected under the watchfull eye of his mom at the tree’s base.
A nearby suitor waiting to put the moves on Mama Bear.
Some of the structures in Cades cover are almost 200 years old.
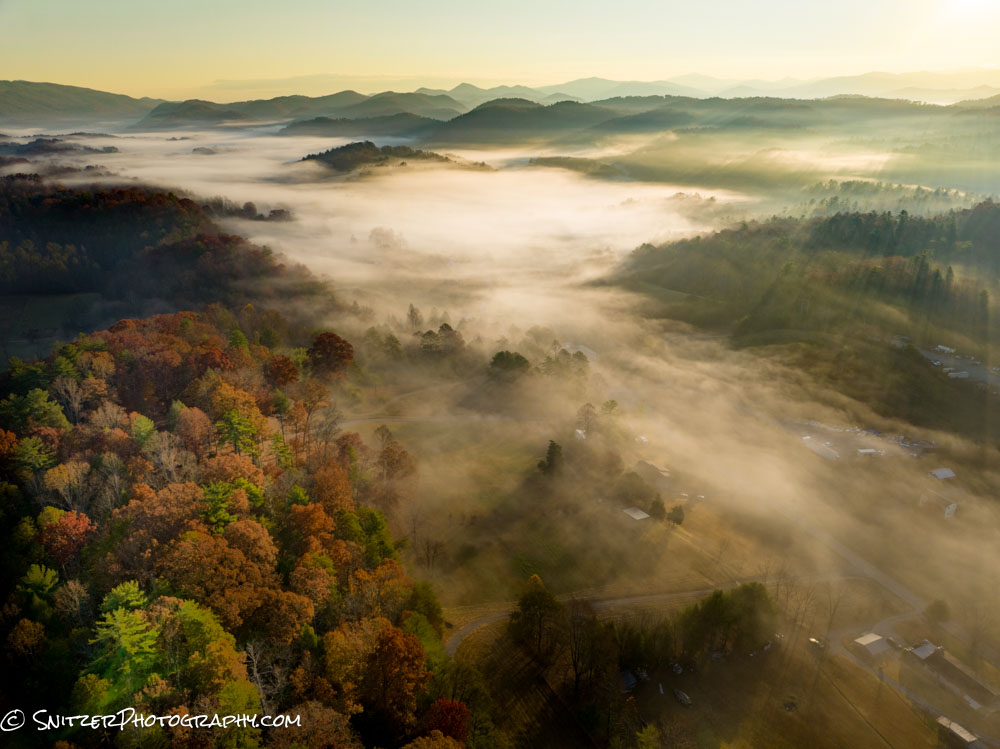
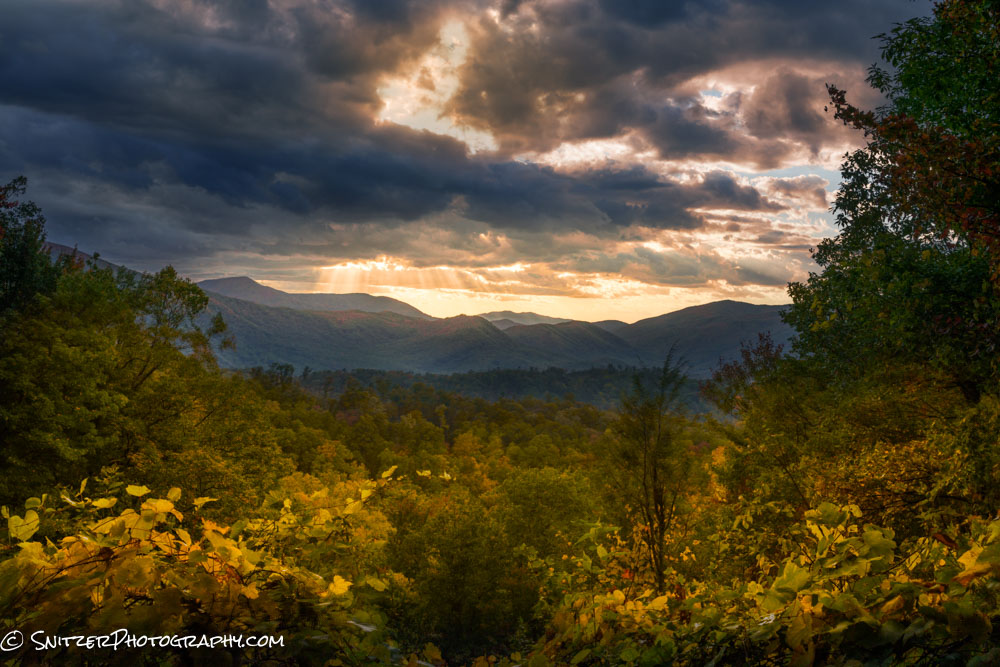
Next stop, the Foothills Parkway which has some fun hikes and pull outs featuring great views ot the valley floor. Fog builds up on particularly cold mornings provide great ops for sunrise imagery.

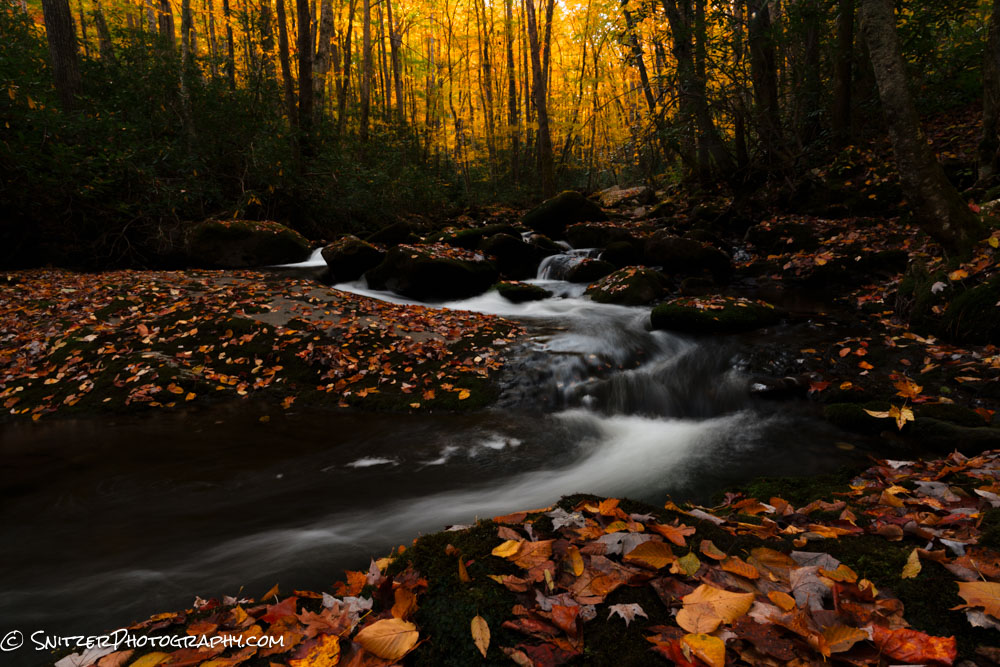
About 20 minutes from Cades Cove is the Lynn Camp, Middle Prong trail. One of my fav hikes in the park, the first several miles follow a colorful gorge with lots of rapids and small waterfalls.
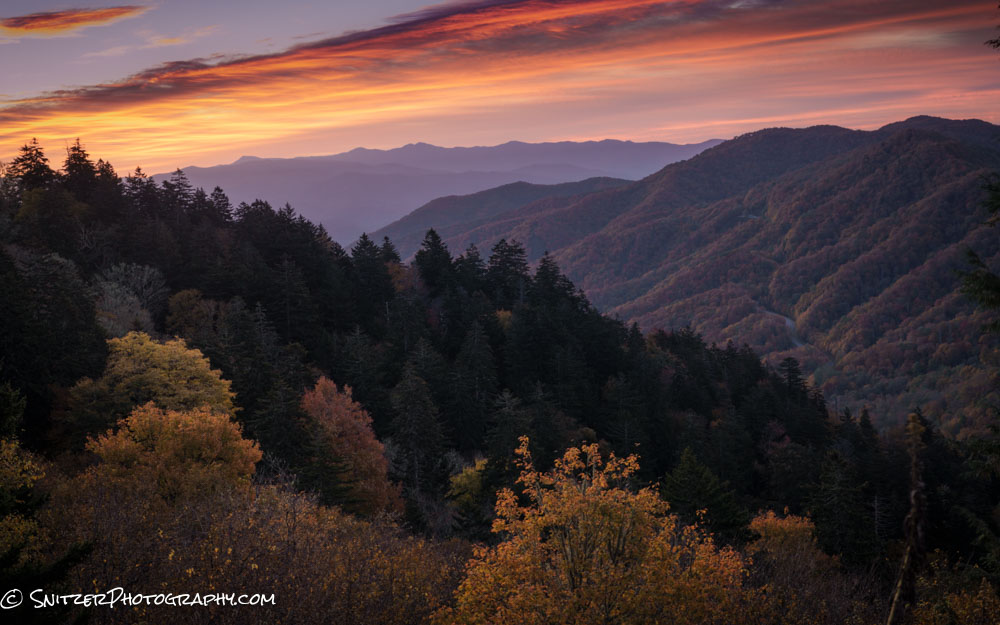
As I mentioned the 441 corridor features some fantastic views (Newfound Gap, Clingman’s Dome) and epic hiking (Alum Cave to Mt Leconte, Chimney Tops).
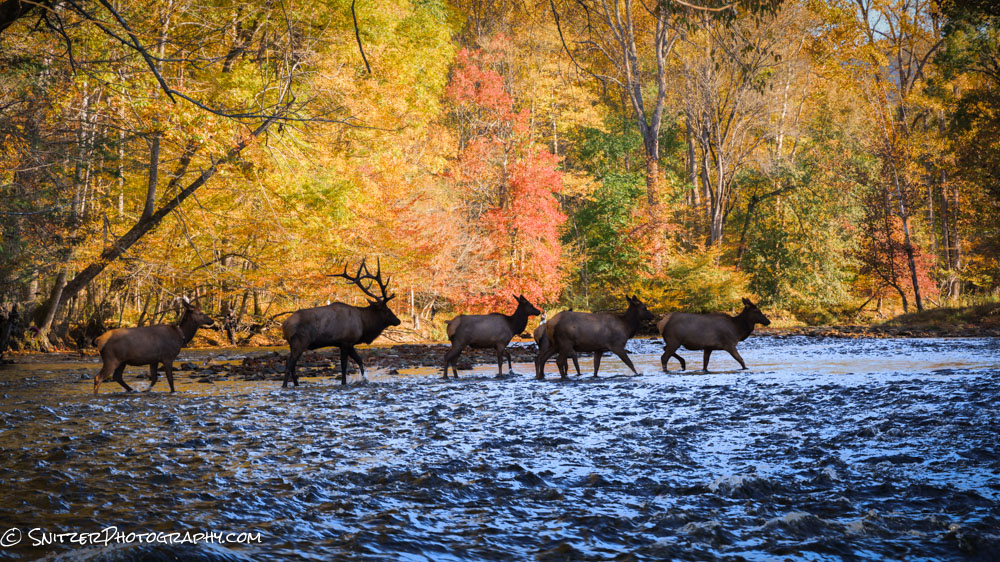
Toward the end of 441 lies the town of Cherokee and the Oconaluftee Nature Center. A great place to hike along the river and if your lucky see herds of Elk.
Closer to Gatlinburg is the Roaring Fork Nature Trail Road which also features some impressive views.
I couldn’t resist launching the Spritzler Drone from this winding trail to capture the crazy canopy of color from 1200 ft up.
Lot’s more photos to view. Click the link for my full gallery!
https://www.snitzerphotos.com/Other/Galleries/Smokies-2023/n-5SqM6v/
The Minn Northwoods & Lake Superior
Silver Bay, Minn, a town formerly built on mining, is also a great base camp to explore the western shore of Lake Superior along with some exceptional nearby state parks that feature small inland lakes and some impressive waterfalls. I had no idea this type of diverse scenery was available in the Midwest. The area is located approx. 45 miles North of Duluth.
A great place to start exploring? Nearby Split Rock State Park has some great beaches, an additional cool rock shoreline and a photogenic lighthouse! 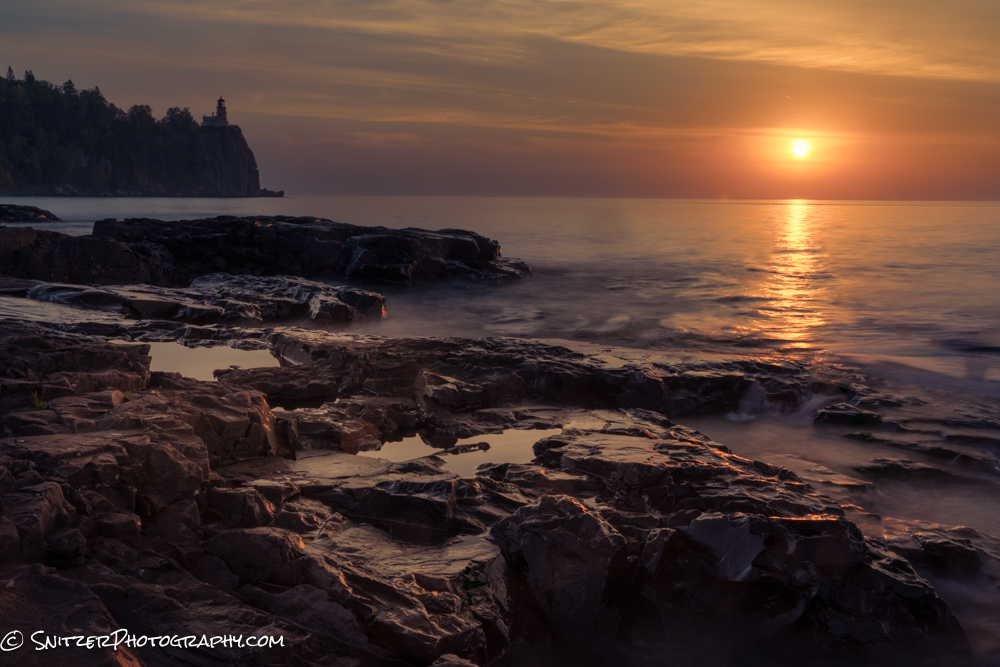
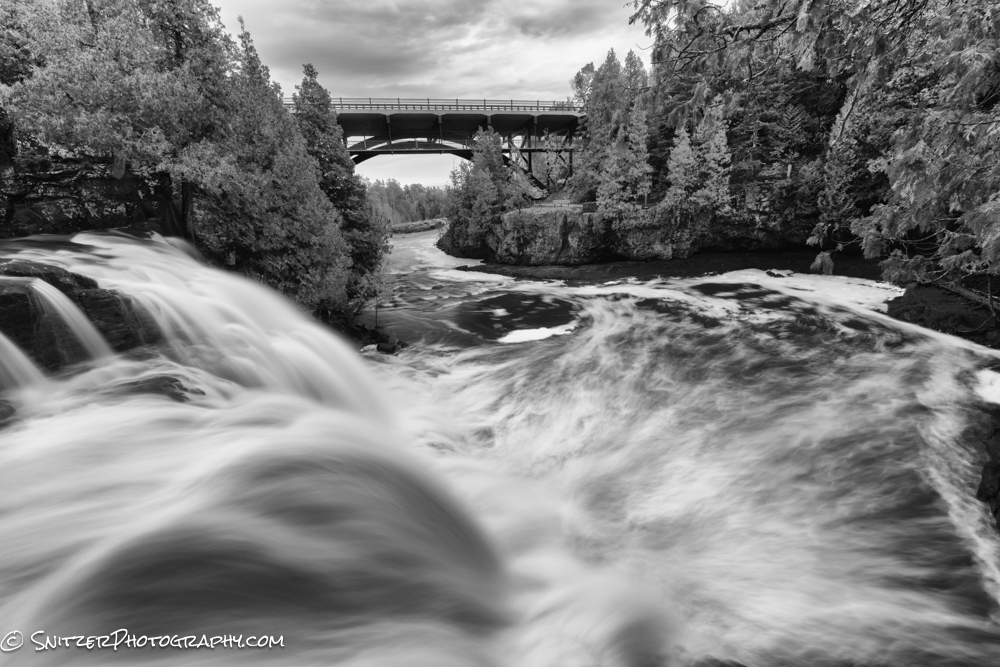
Fifteen minutes away lies Gooseberry Falls State Park. A rainy late fall has the rivers running “full on”.
Tettegouche State Park is similarly spectacular and impossible to prounounce…haha.
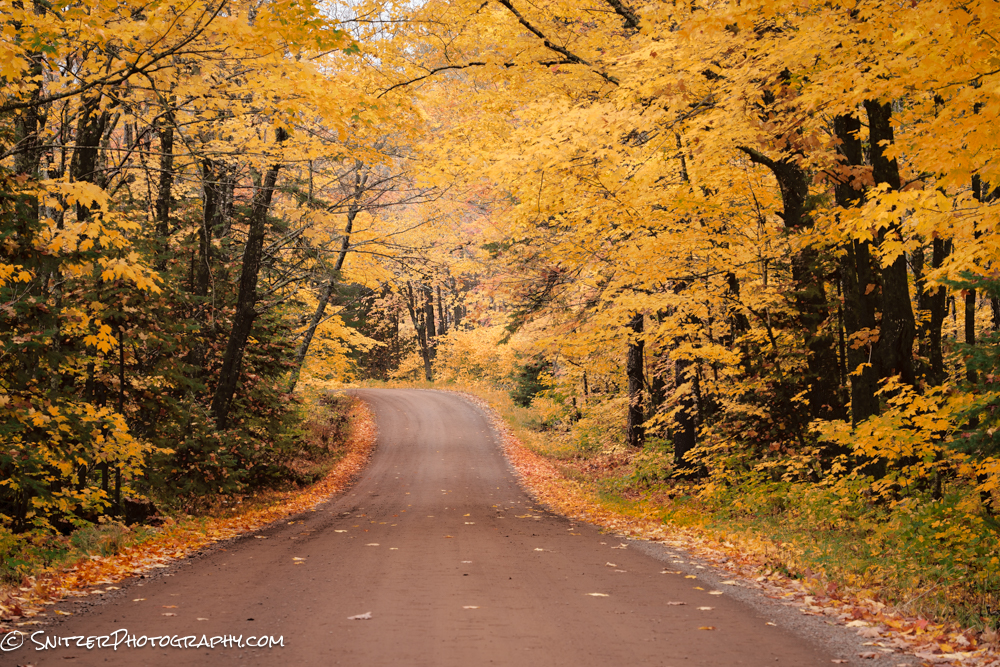
BTW, pull off almost anywhere and you’ll find a seldom travelled gravel road with amazing folliage!
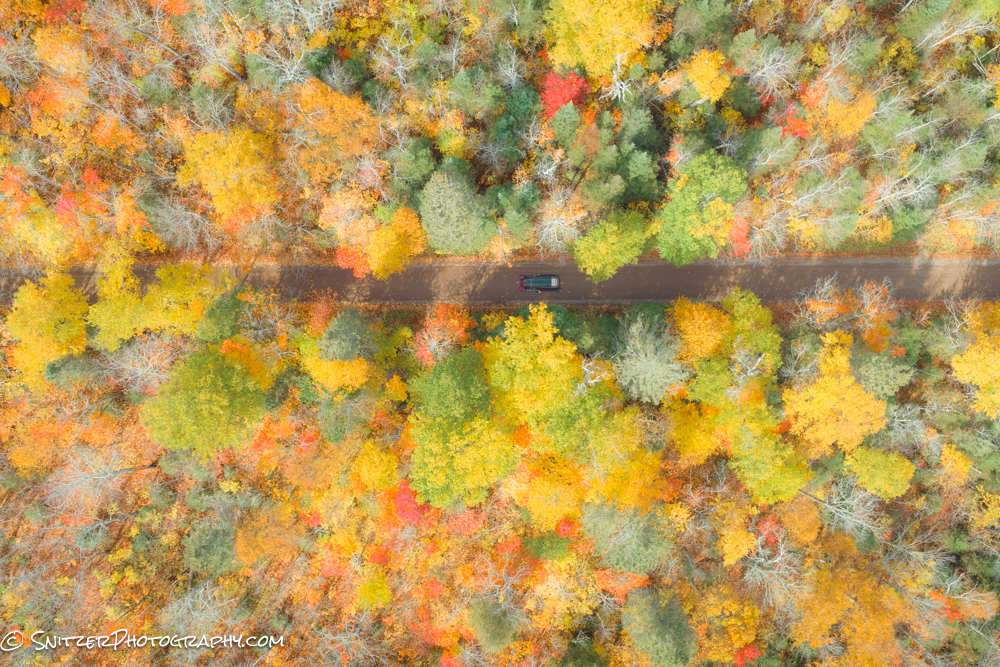
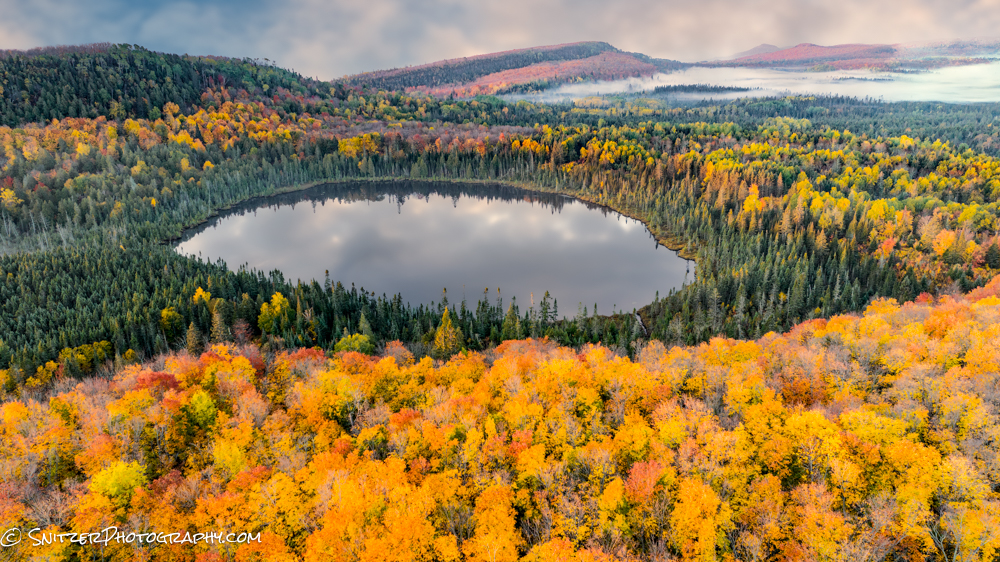
This scene looks entirely different viewed from 400 ft above (The Snitz Mavic 3 drone)
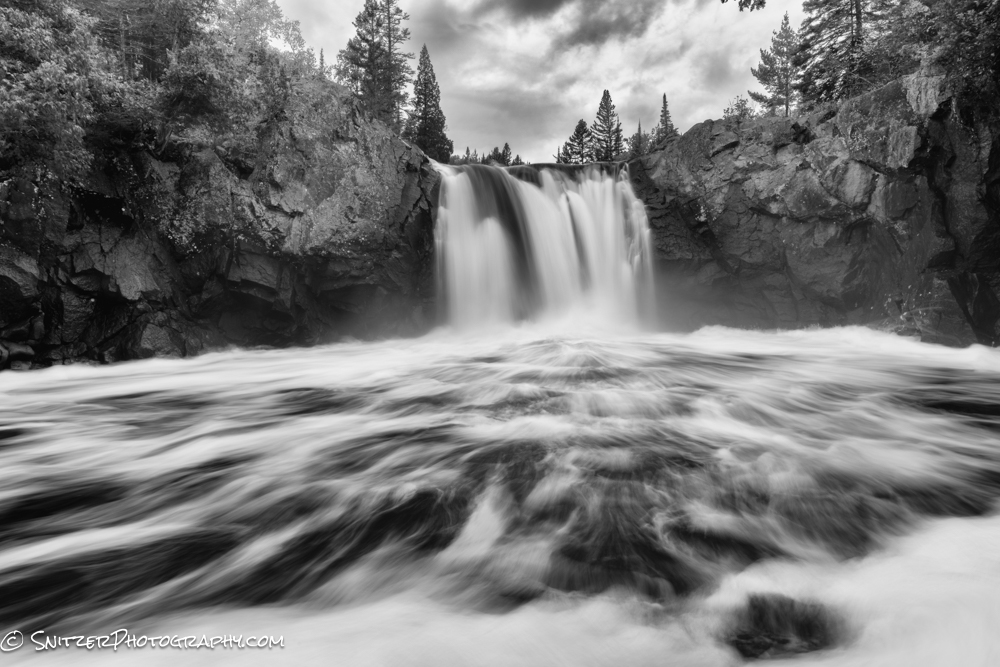
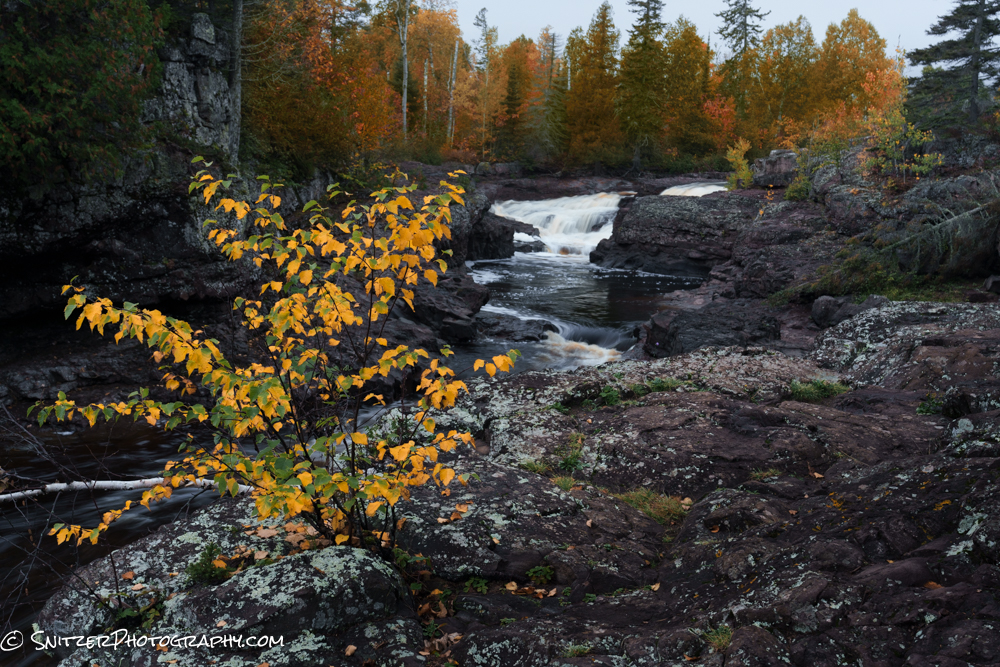
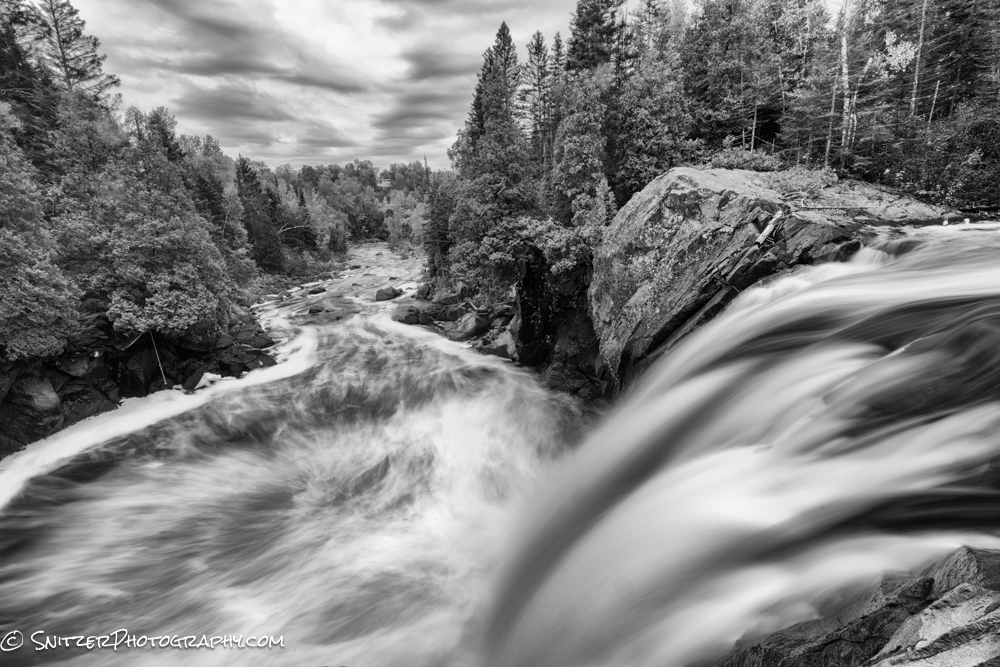
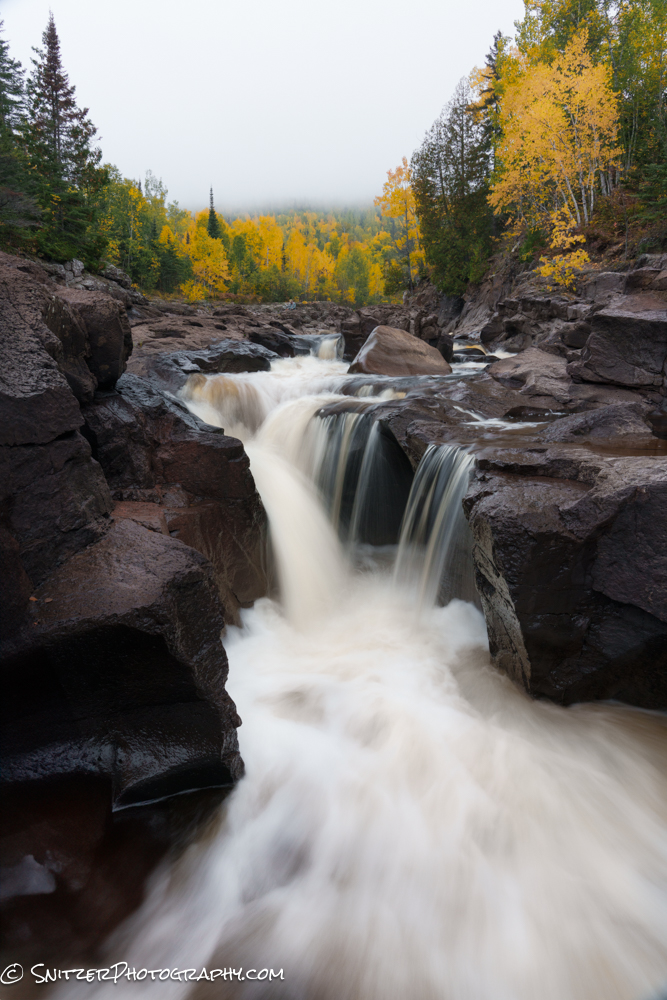
Temperance River State Park offers both intimate river scenes and some massive waterfall drops with tall gorge walls!
My favorite view of the trip? Mt Oberg! Captured this after hiking in the dark @ 5:30am to catch first light. Image taken with a Mavic 3 drone to get the right vantage point.
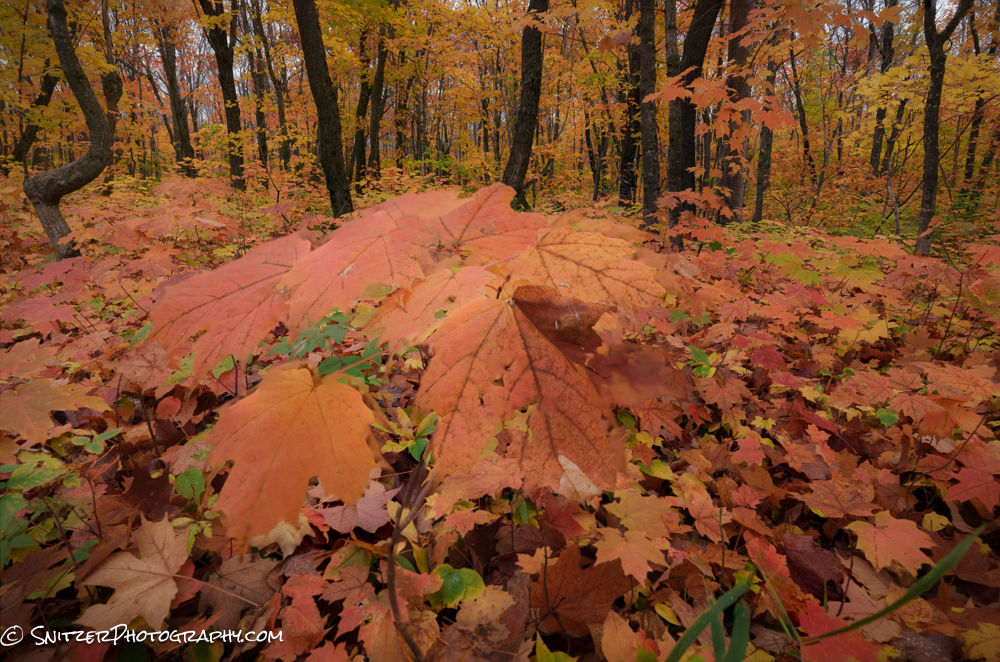
The foliage on the way down wasn’t half bad either!
Link to the full gallery of images https://www.snitzerphotos.com/Other/Galleries/Minn-North-Woods/n-XPqRPR/
Snitz hits the Canadian Rockies!
I’ve been gumshoeing around mountains most of my life. The US has some amazing scenery; the Rockies, Sierra’s, Cascades, Uintas, Denali, and Smokies. None of these places hold a candle to the scenery between Lake Louise and Jasper, Alberta. Sorry America, the Canucks have you beat.
The peaks are higher, more frequent and seem always to have some bomber lake in the foreground—a photographer’s paradise.
Shown below is the view in front of the Lake Louise Chateau Hotel. The hotel is a great starting point for a number of great hikes.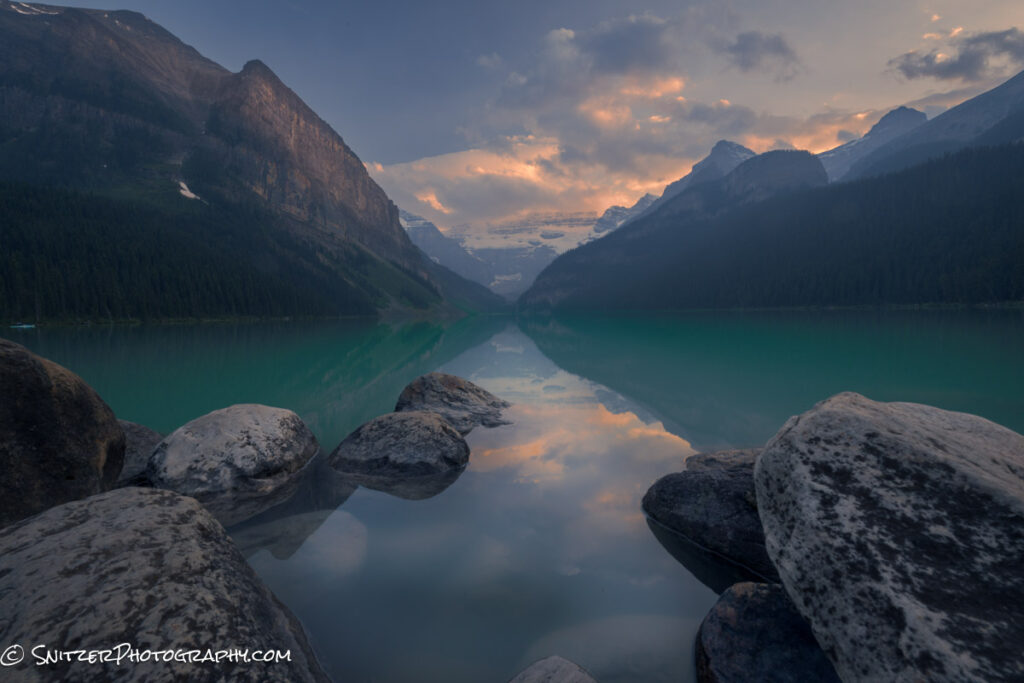
One of these, the Plain of Six Glaciers, takes you about 4.5 miles up a canyon (2,200 ft vert) we’re we unexpectedly ran into a tea house! Not kidding. How cool is that? They also serve a mean vegetarian Chili.
Hanging with the Mrs.Talk about a great lunch spot with a view.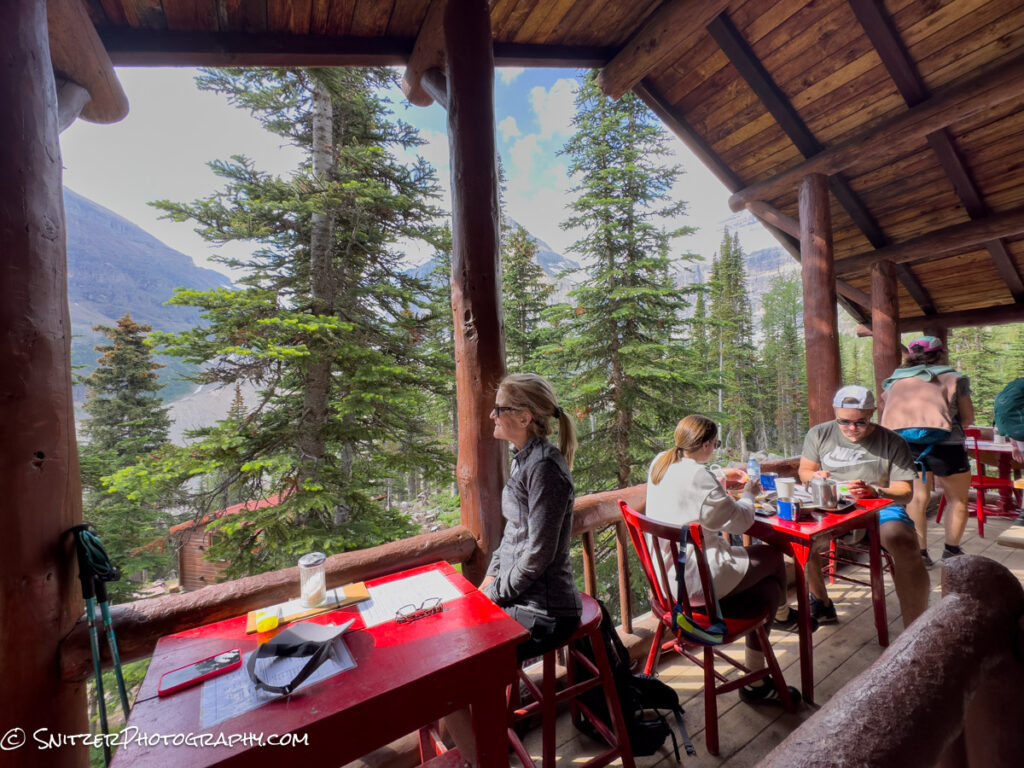
Perhaps the most photographed icon in this Region is Moraine Lake. Crowded with people…you bet.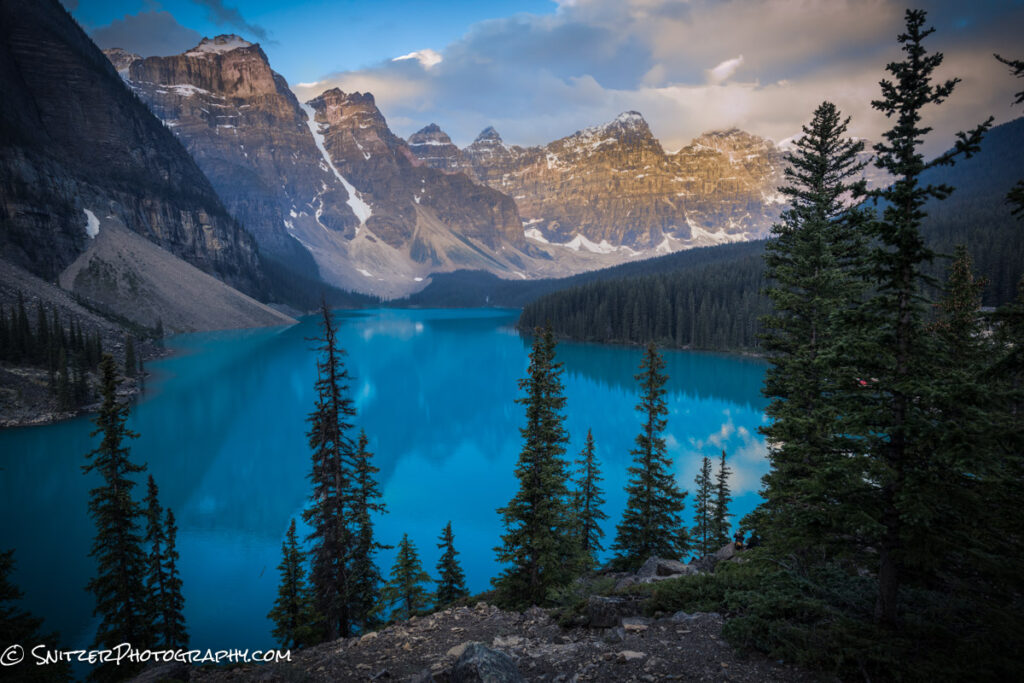
A quick 10-minute drive takes us to Herbert Lake. Sadly, the sun rises at 5:30 am! Ouch, I’m out of bed at 430am for this sheet. The rocks along shore make a great foreground. 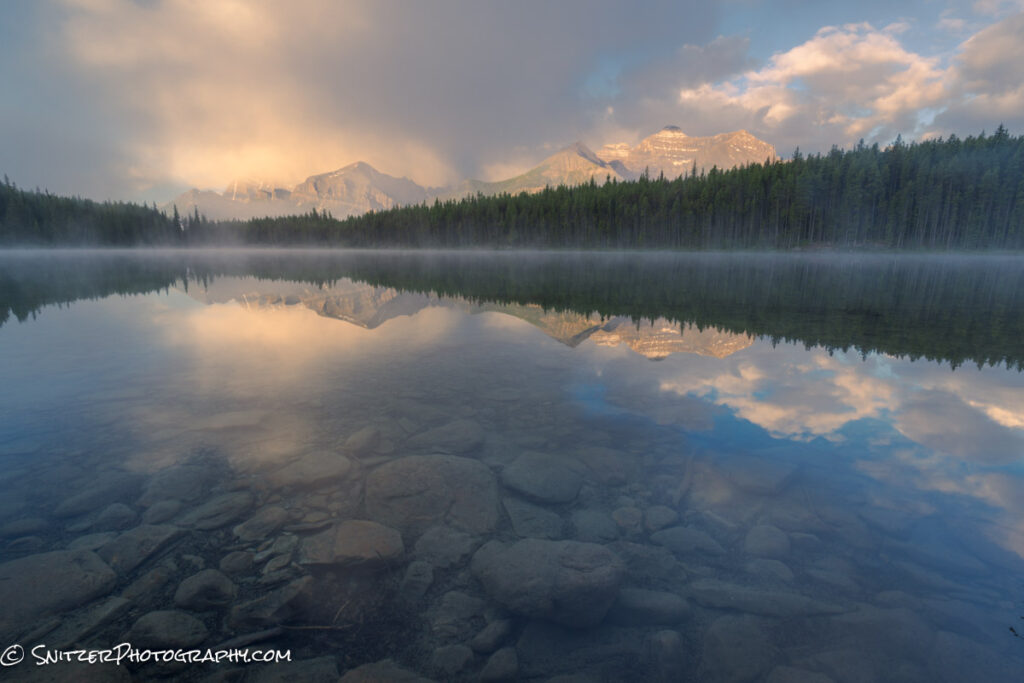
Southwest of Lake Louise lies the very remote area around Lake Ohara. It took us two years to get a cabin in the Park: only 13 cabins and very limited camping. You basically have this crazy area to yourself. Did I mention we showed up after they got hit with 3 inches of snow (in late June)! The view below taken from the lake’s North Shore.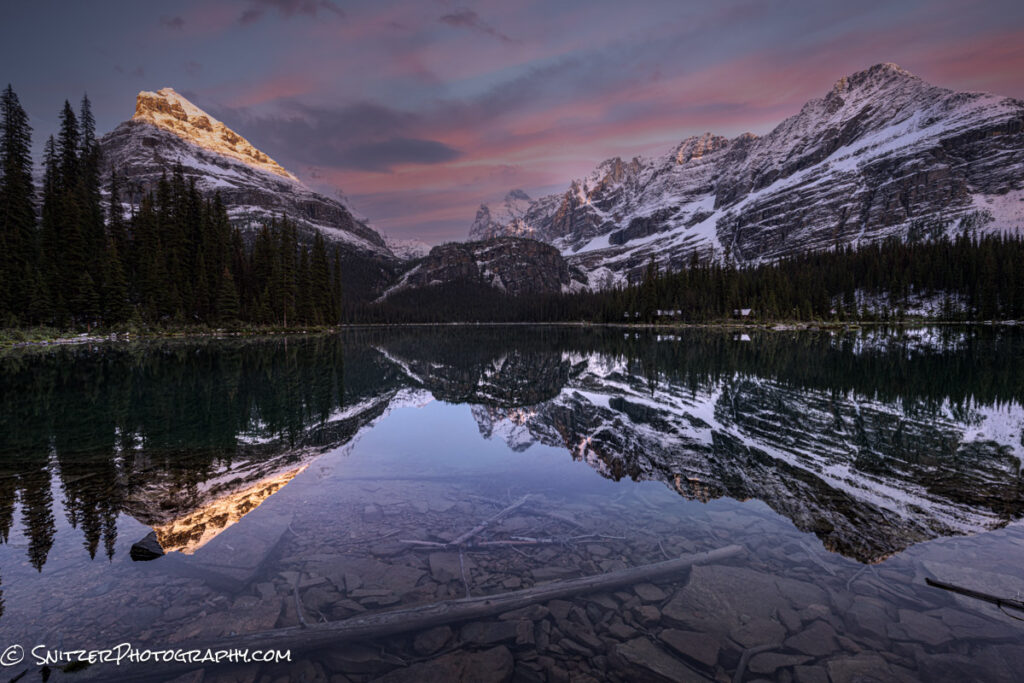
This lake features a variety of “killer” views! This one taken looking Northwest.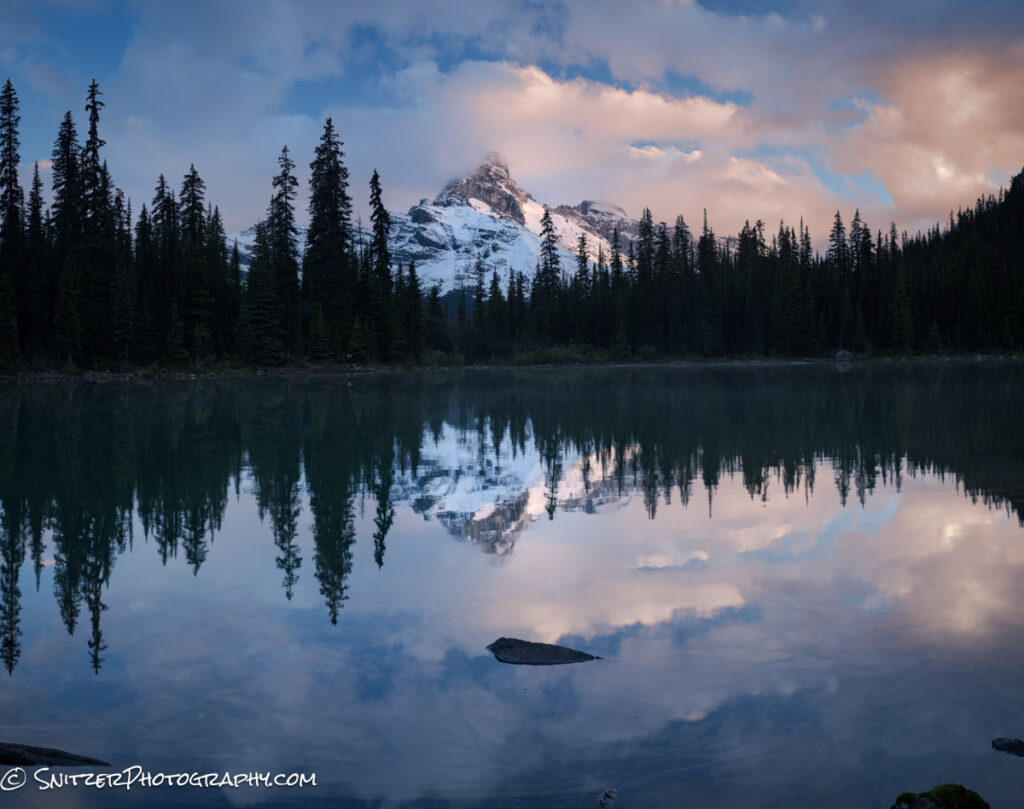
Hiking from our Lake Ohara Lodge, your fearless leader gaining altitude looking down on Mary Lake(justSouth of Ohara).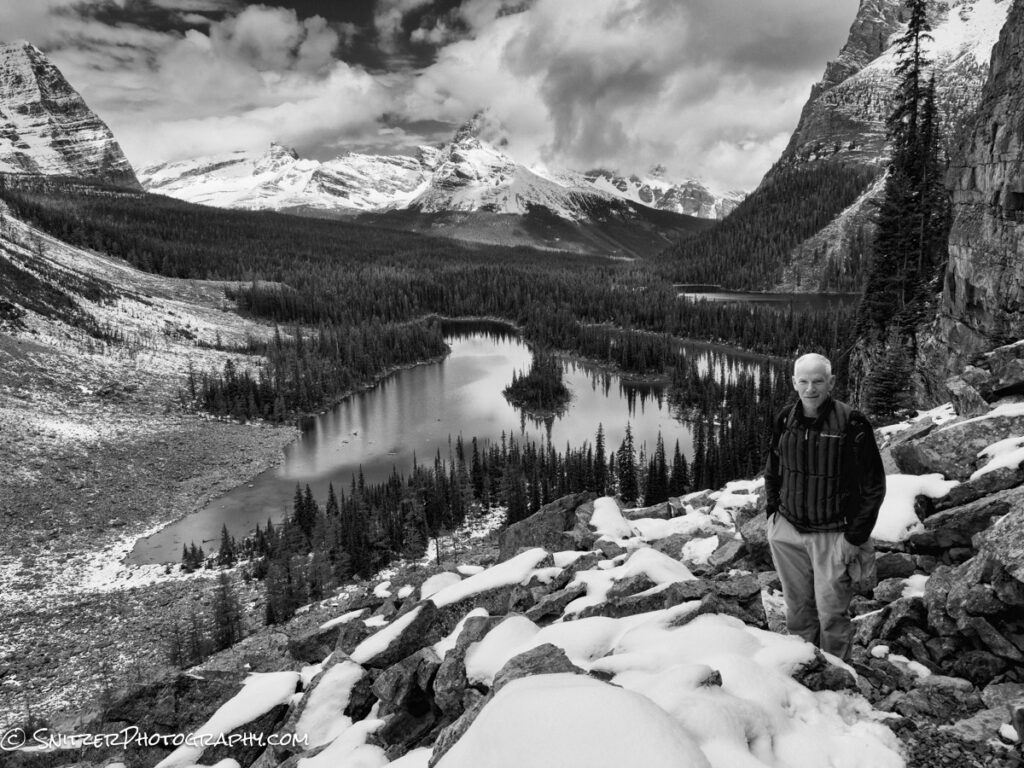
Speaking of altitude, I got the bright idea to hike about 1,500 ft up another drainage to get this waterfall at dusk. Fortunately I had my trusty flashlight for the hike down as things darkened significantly. No bears however!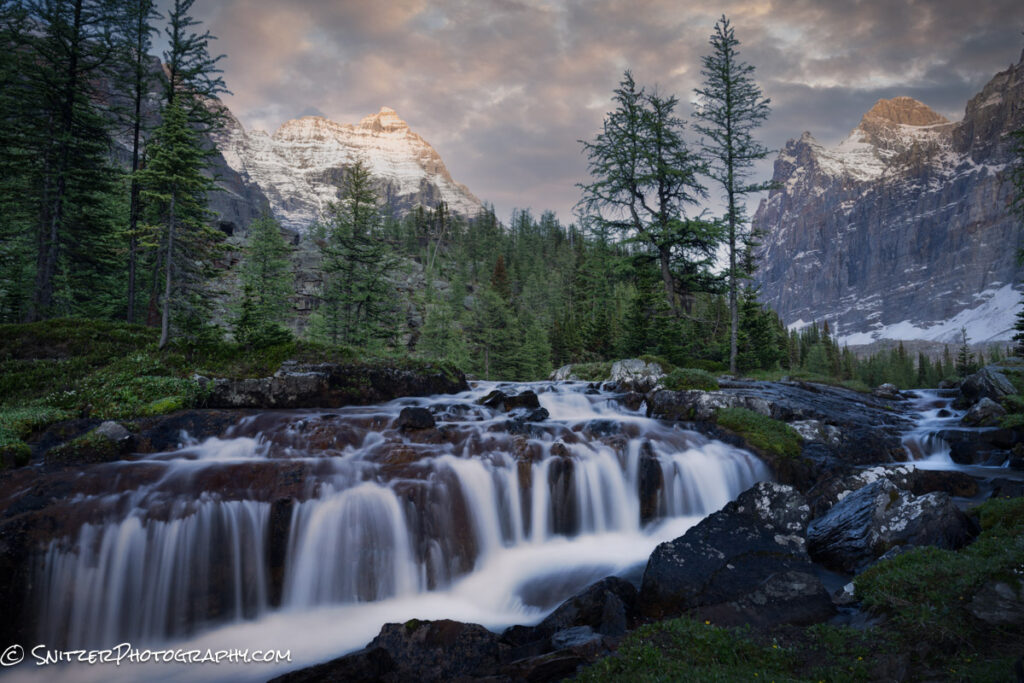
All aboard! The Canadian Pacific railroad runs what seems like 30+ trains a day through the mountains. If you are patient enough, you might catch one! This shot captured at the well known Morant’s Curve vantage point.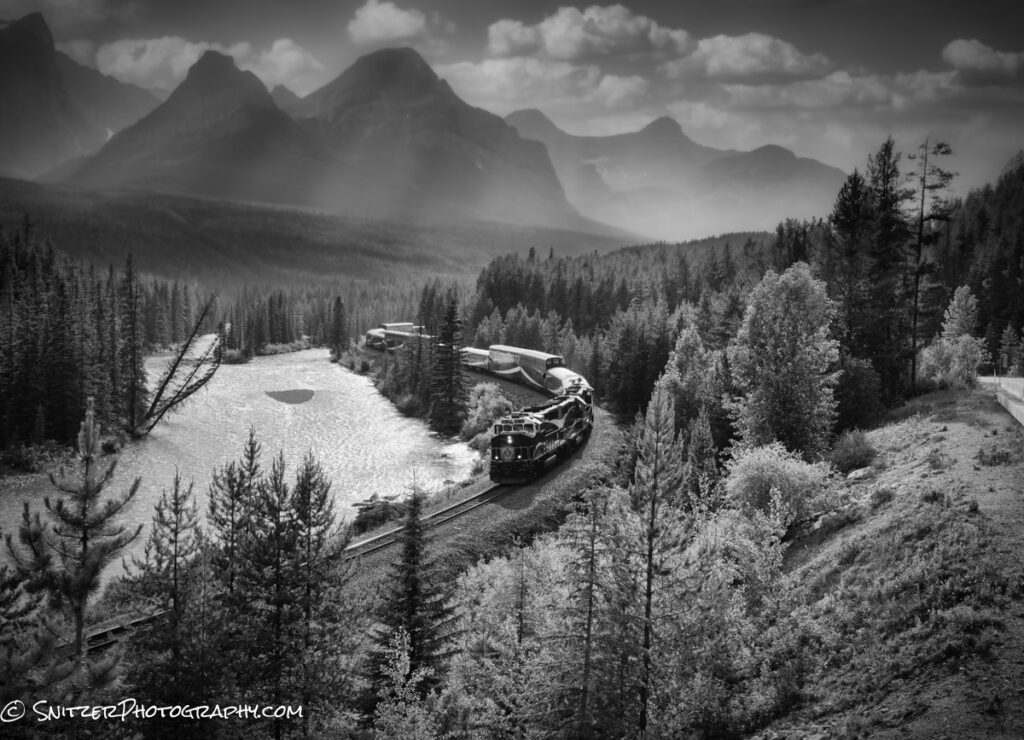
Slightly up the Glacier Parkway (heading North) is Bow Lake. I arrived as another snowstorm was just breaking leaving more snow on the mountain and surreal skies.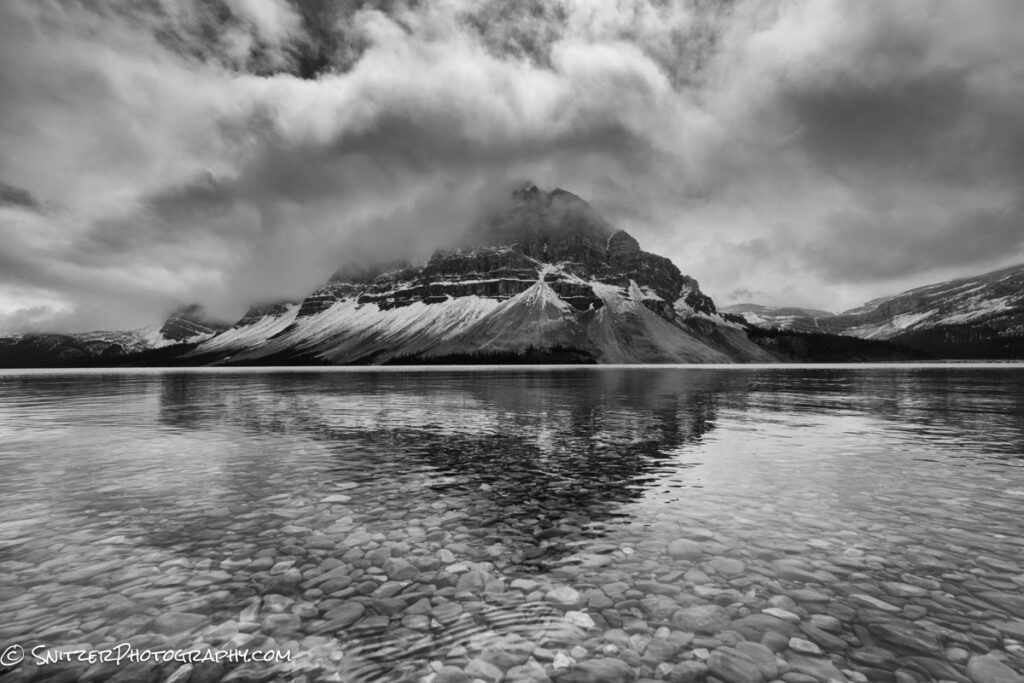
That’s Mrs. Snitz standing atop Peyto Lake one of the other most photographed spots in the area. 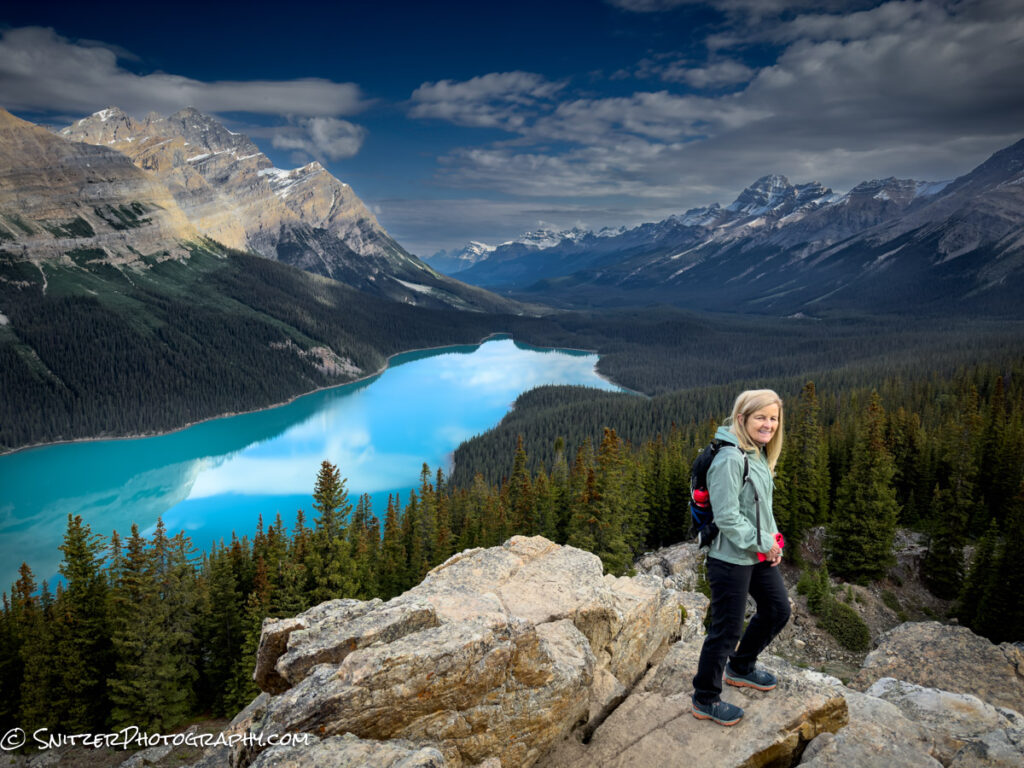
And below our pet Marmot named Rover.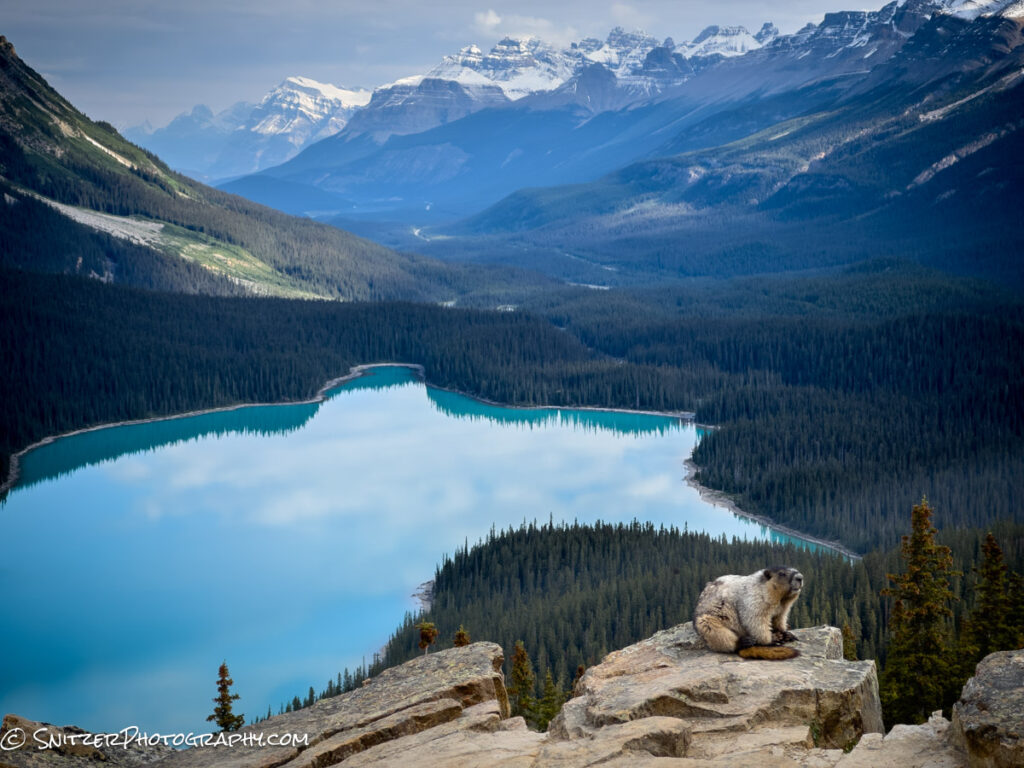
Athabasca Falls (just outside Jasper).
There’s lots more. Check out the link below.
https://www.snitzerphotos.com/Other/Galleries/Canadian-Rockies-Summer-2023/n-hLDVt7/
Snitz visits Croatia & Slovinia
These Slavic countries offer some wonderful unspoiled scenery, a little like the Italian Dolomites. Punctuated with historic (I mean 500+ years old) small towns they’re inhabited by a friendly populace that likes American tourists! Plus, you can walk anywhere at night and feel safe. The price to stay in great lodging and enjoy bomber dining is substantially less than in the States—a comparative bargain.
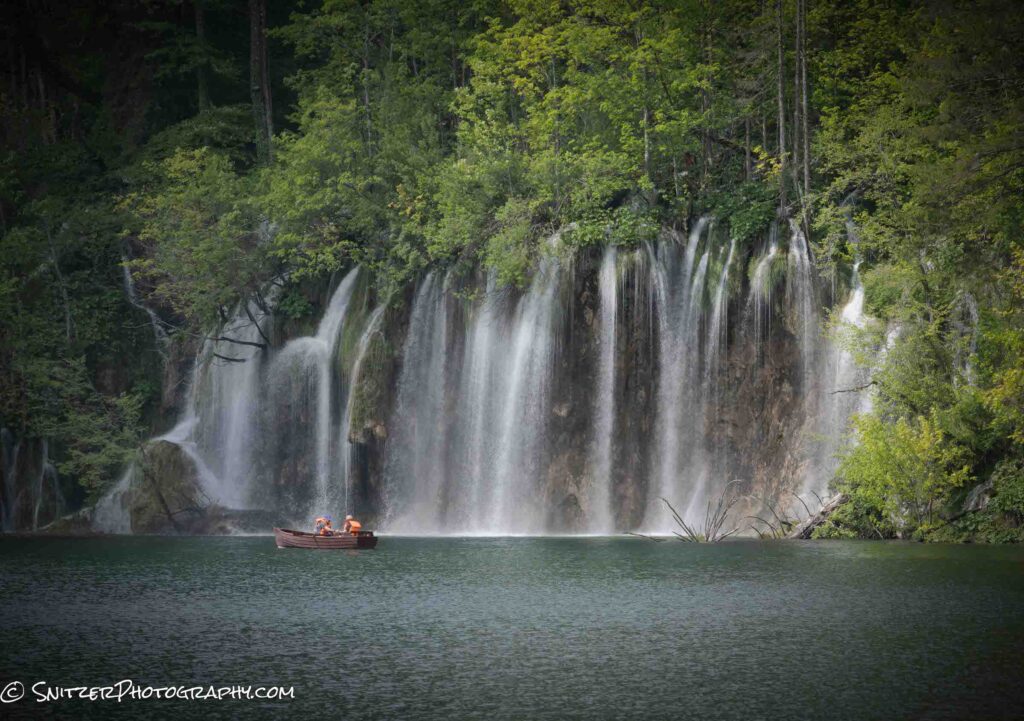
So what’s there to see? Let’s start with one of the craziest massive waterfalls on the planet, Veliki Slap which falls 300ft. (Plitvice Lake National Park, Croatia). Why they call waterfalls Slaps is beyond me.
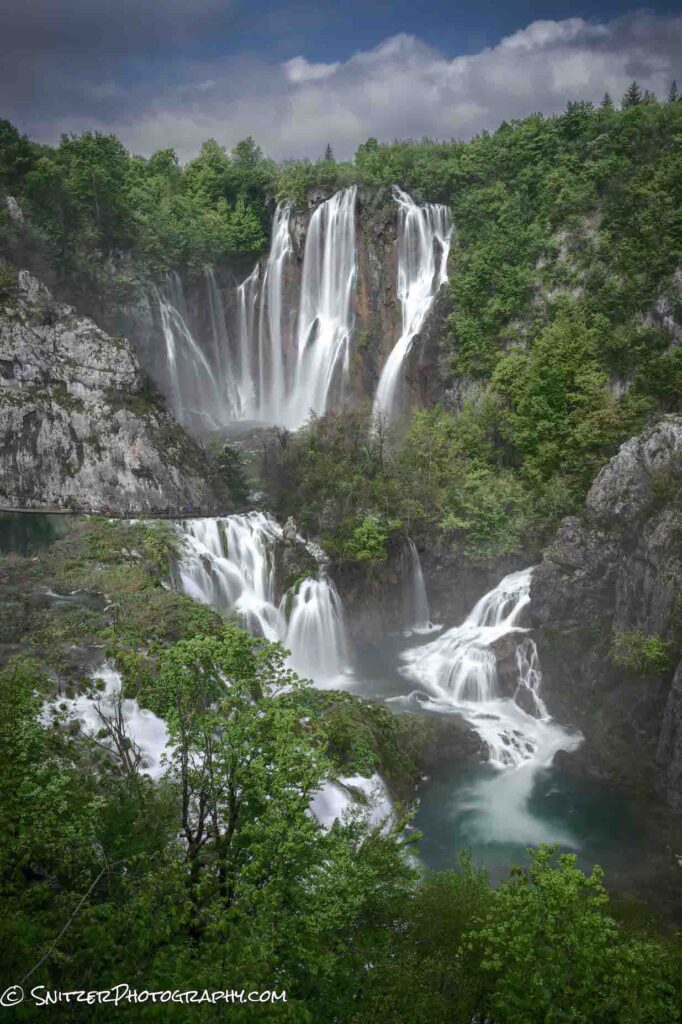
Yes, the fishermen are getting wet.
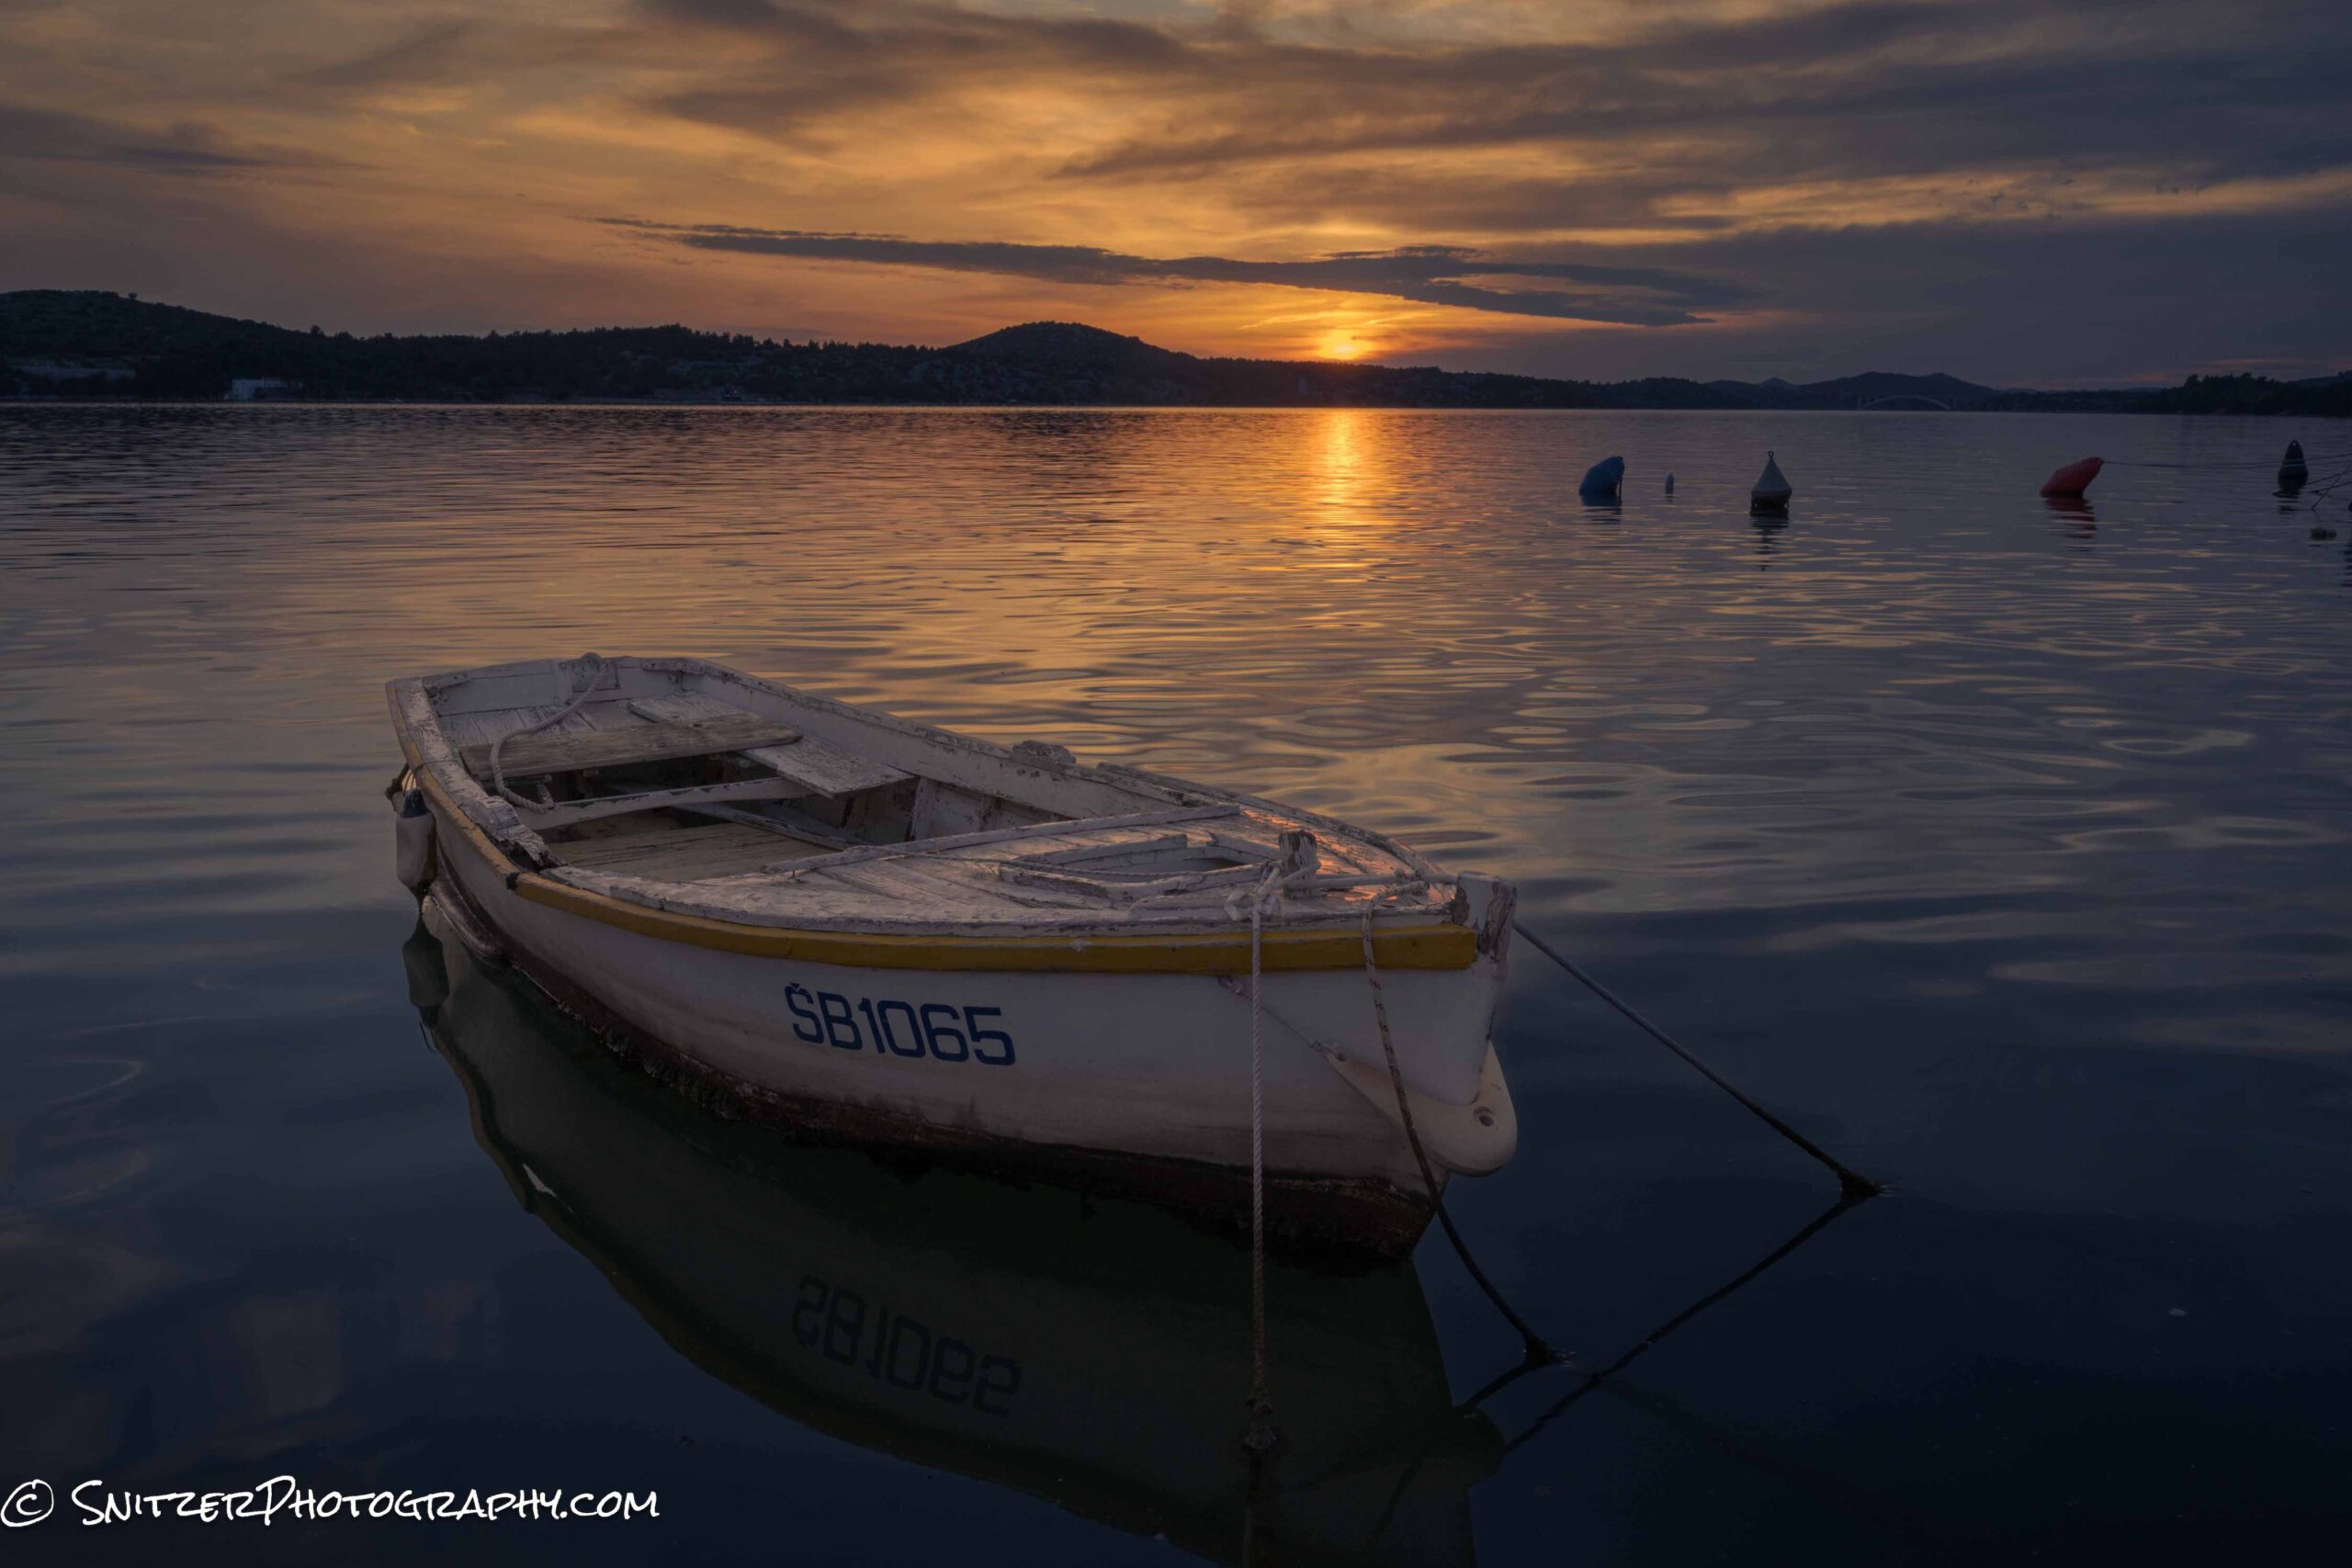
Sibenik, a coastal town (also in Croatia).
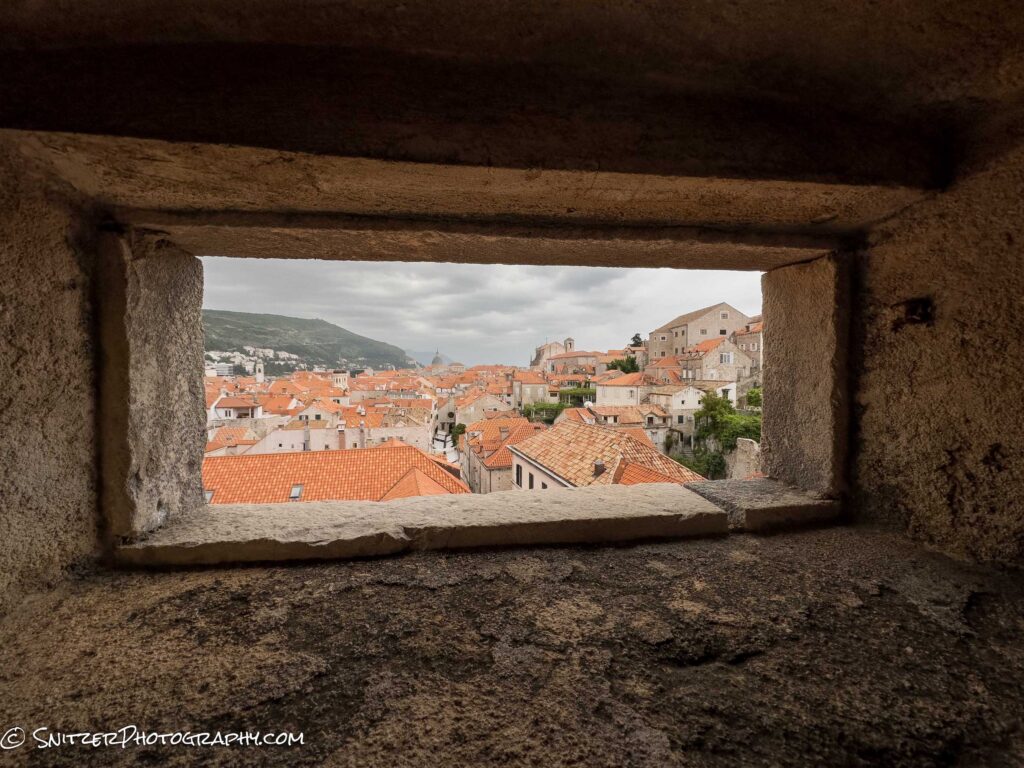
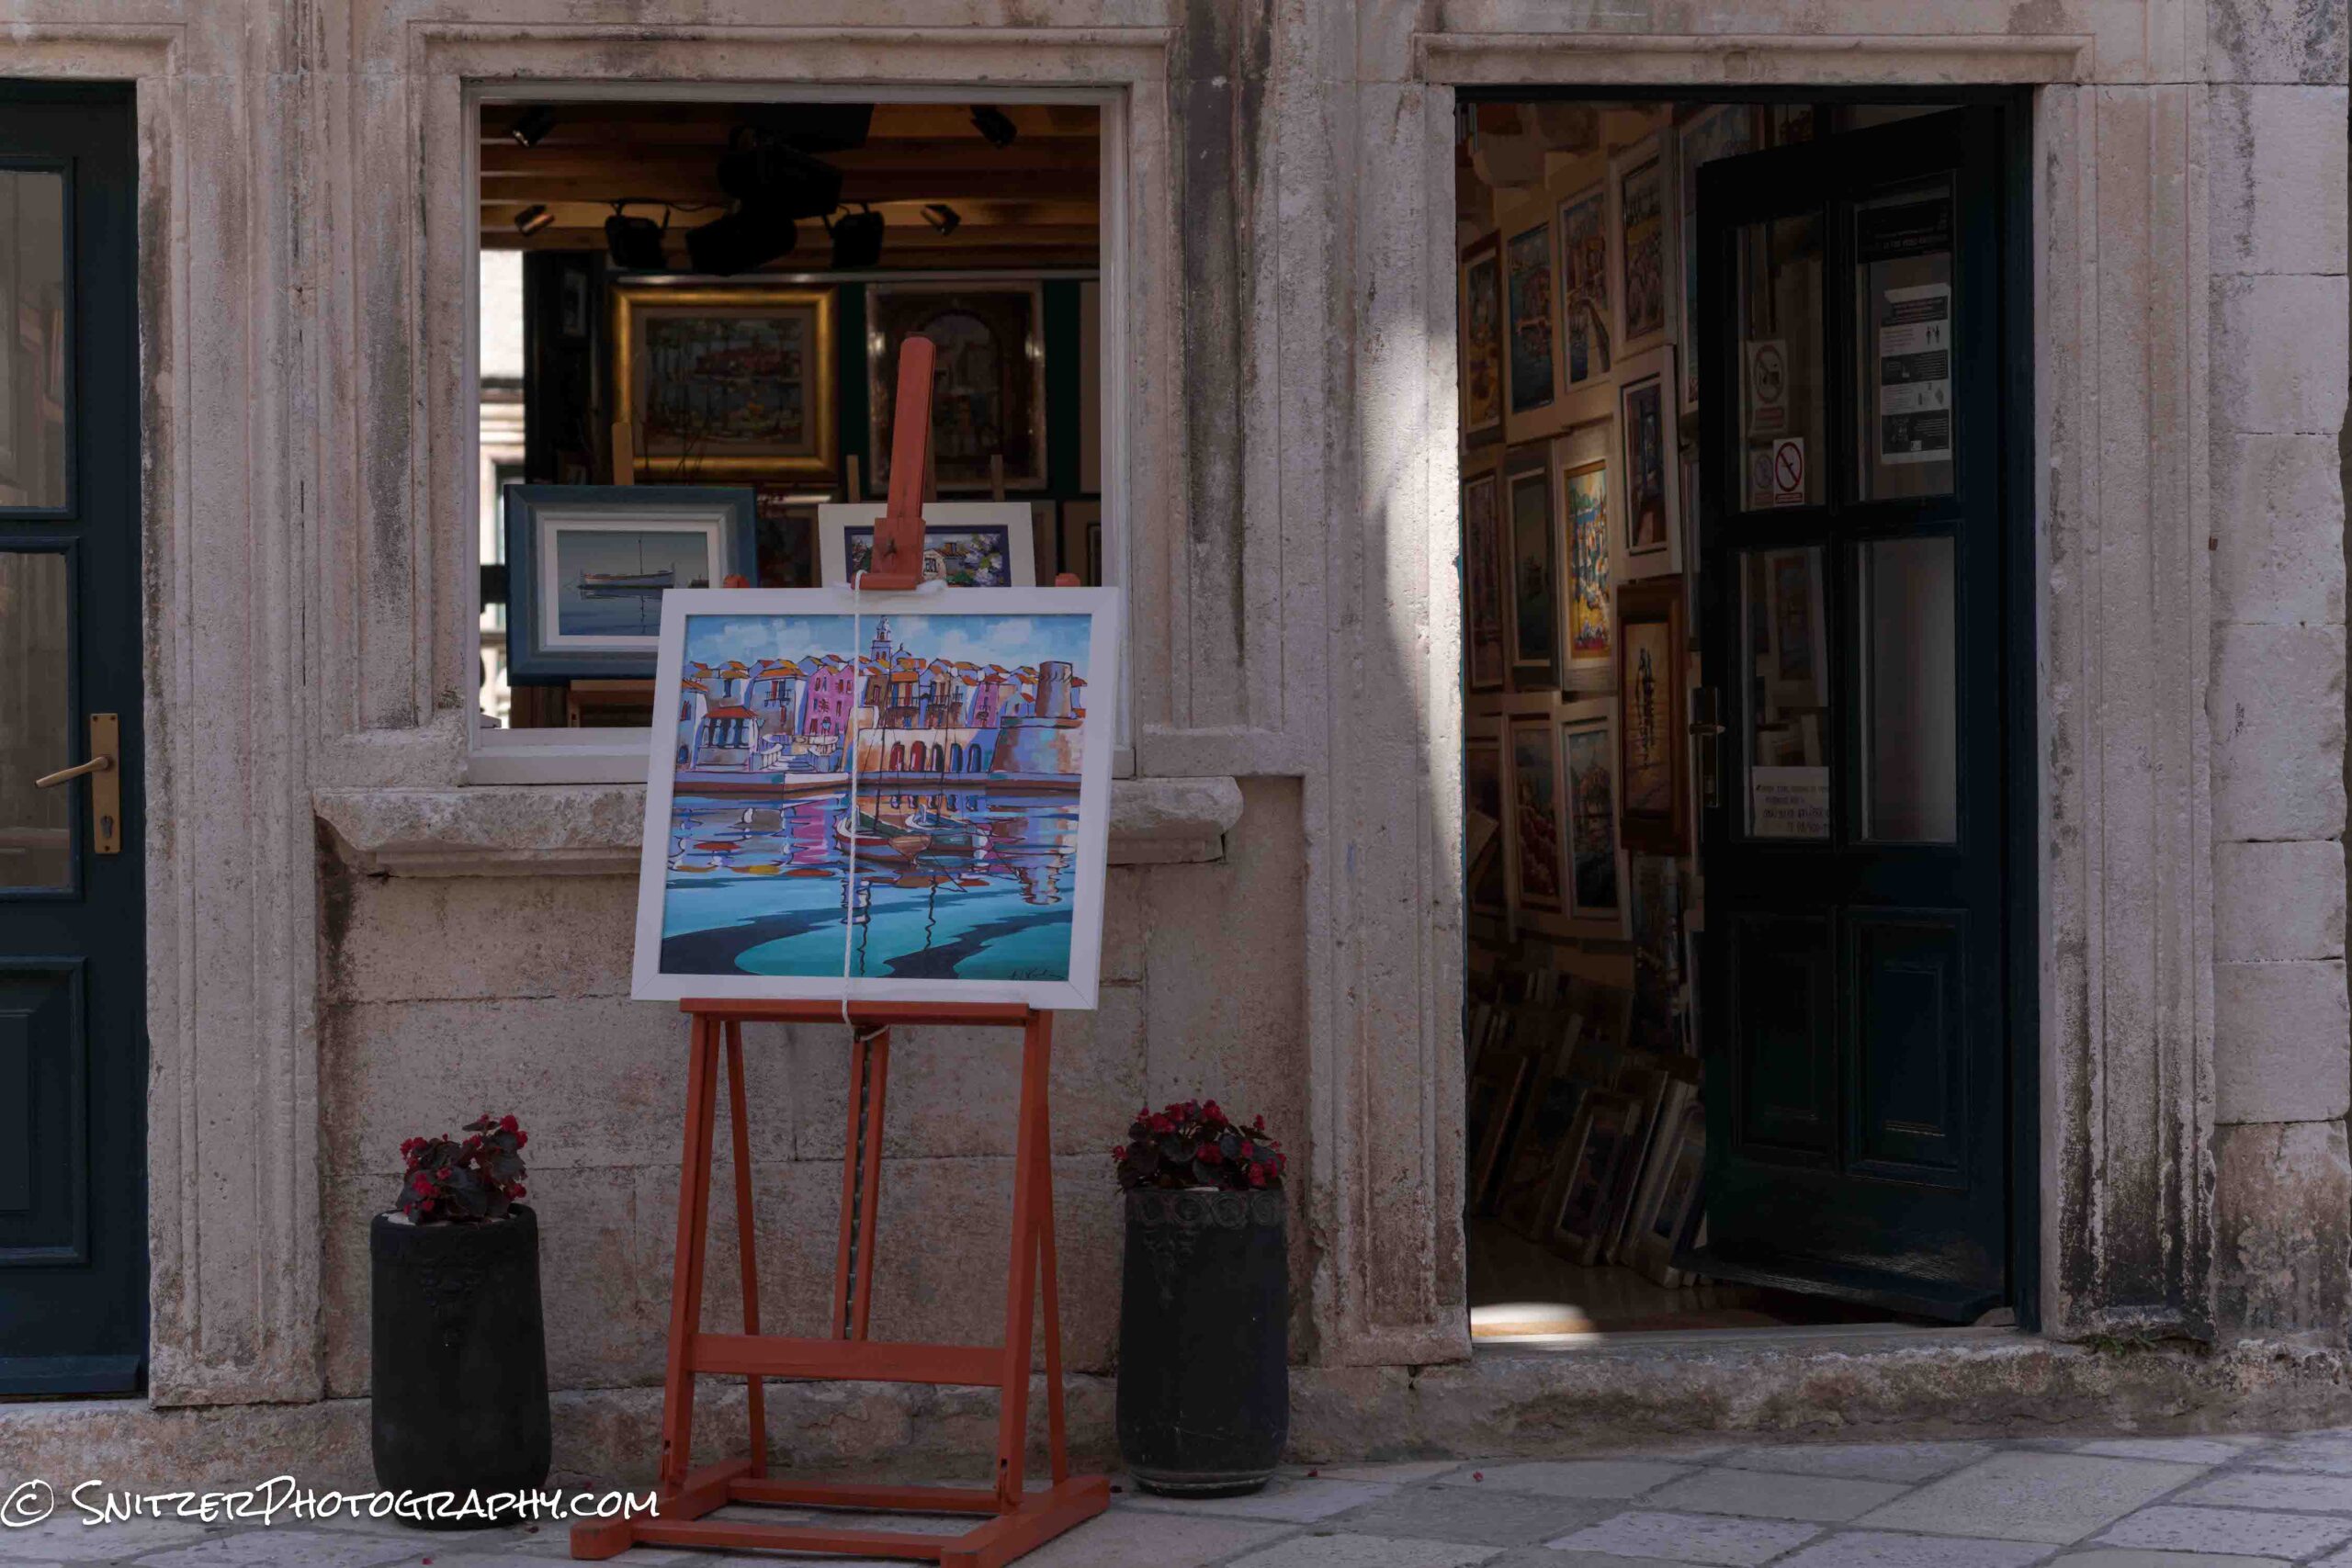
And the very old City of Dubrovnik. How old? Like 7th Century.
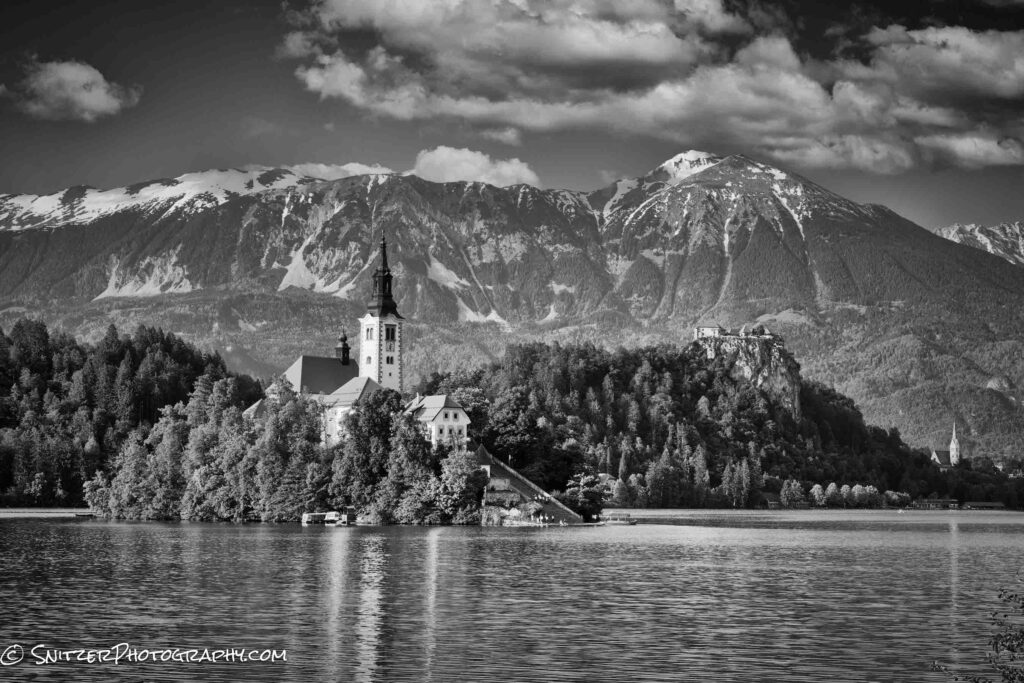
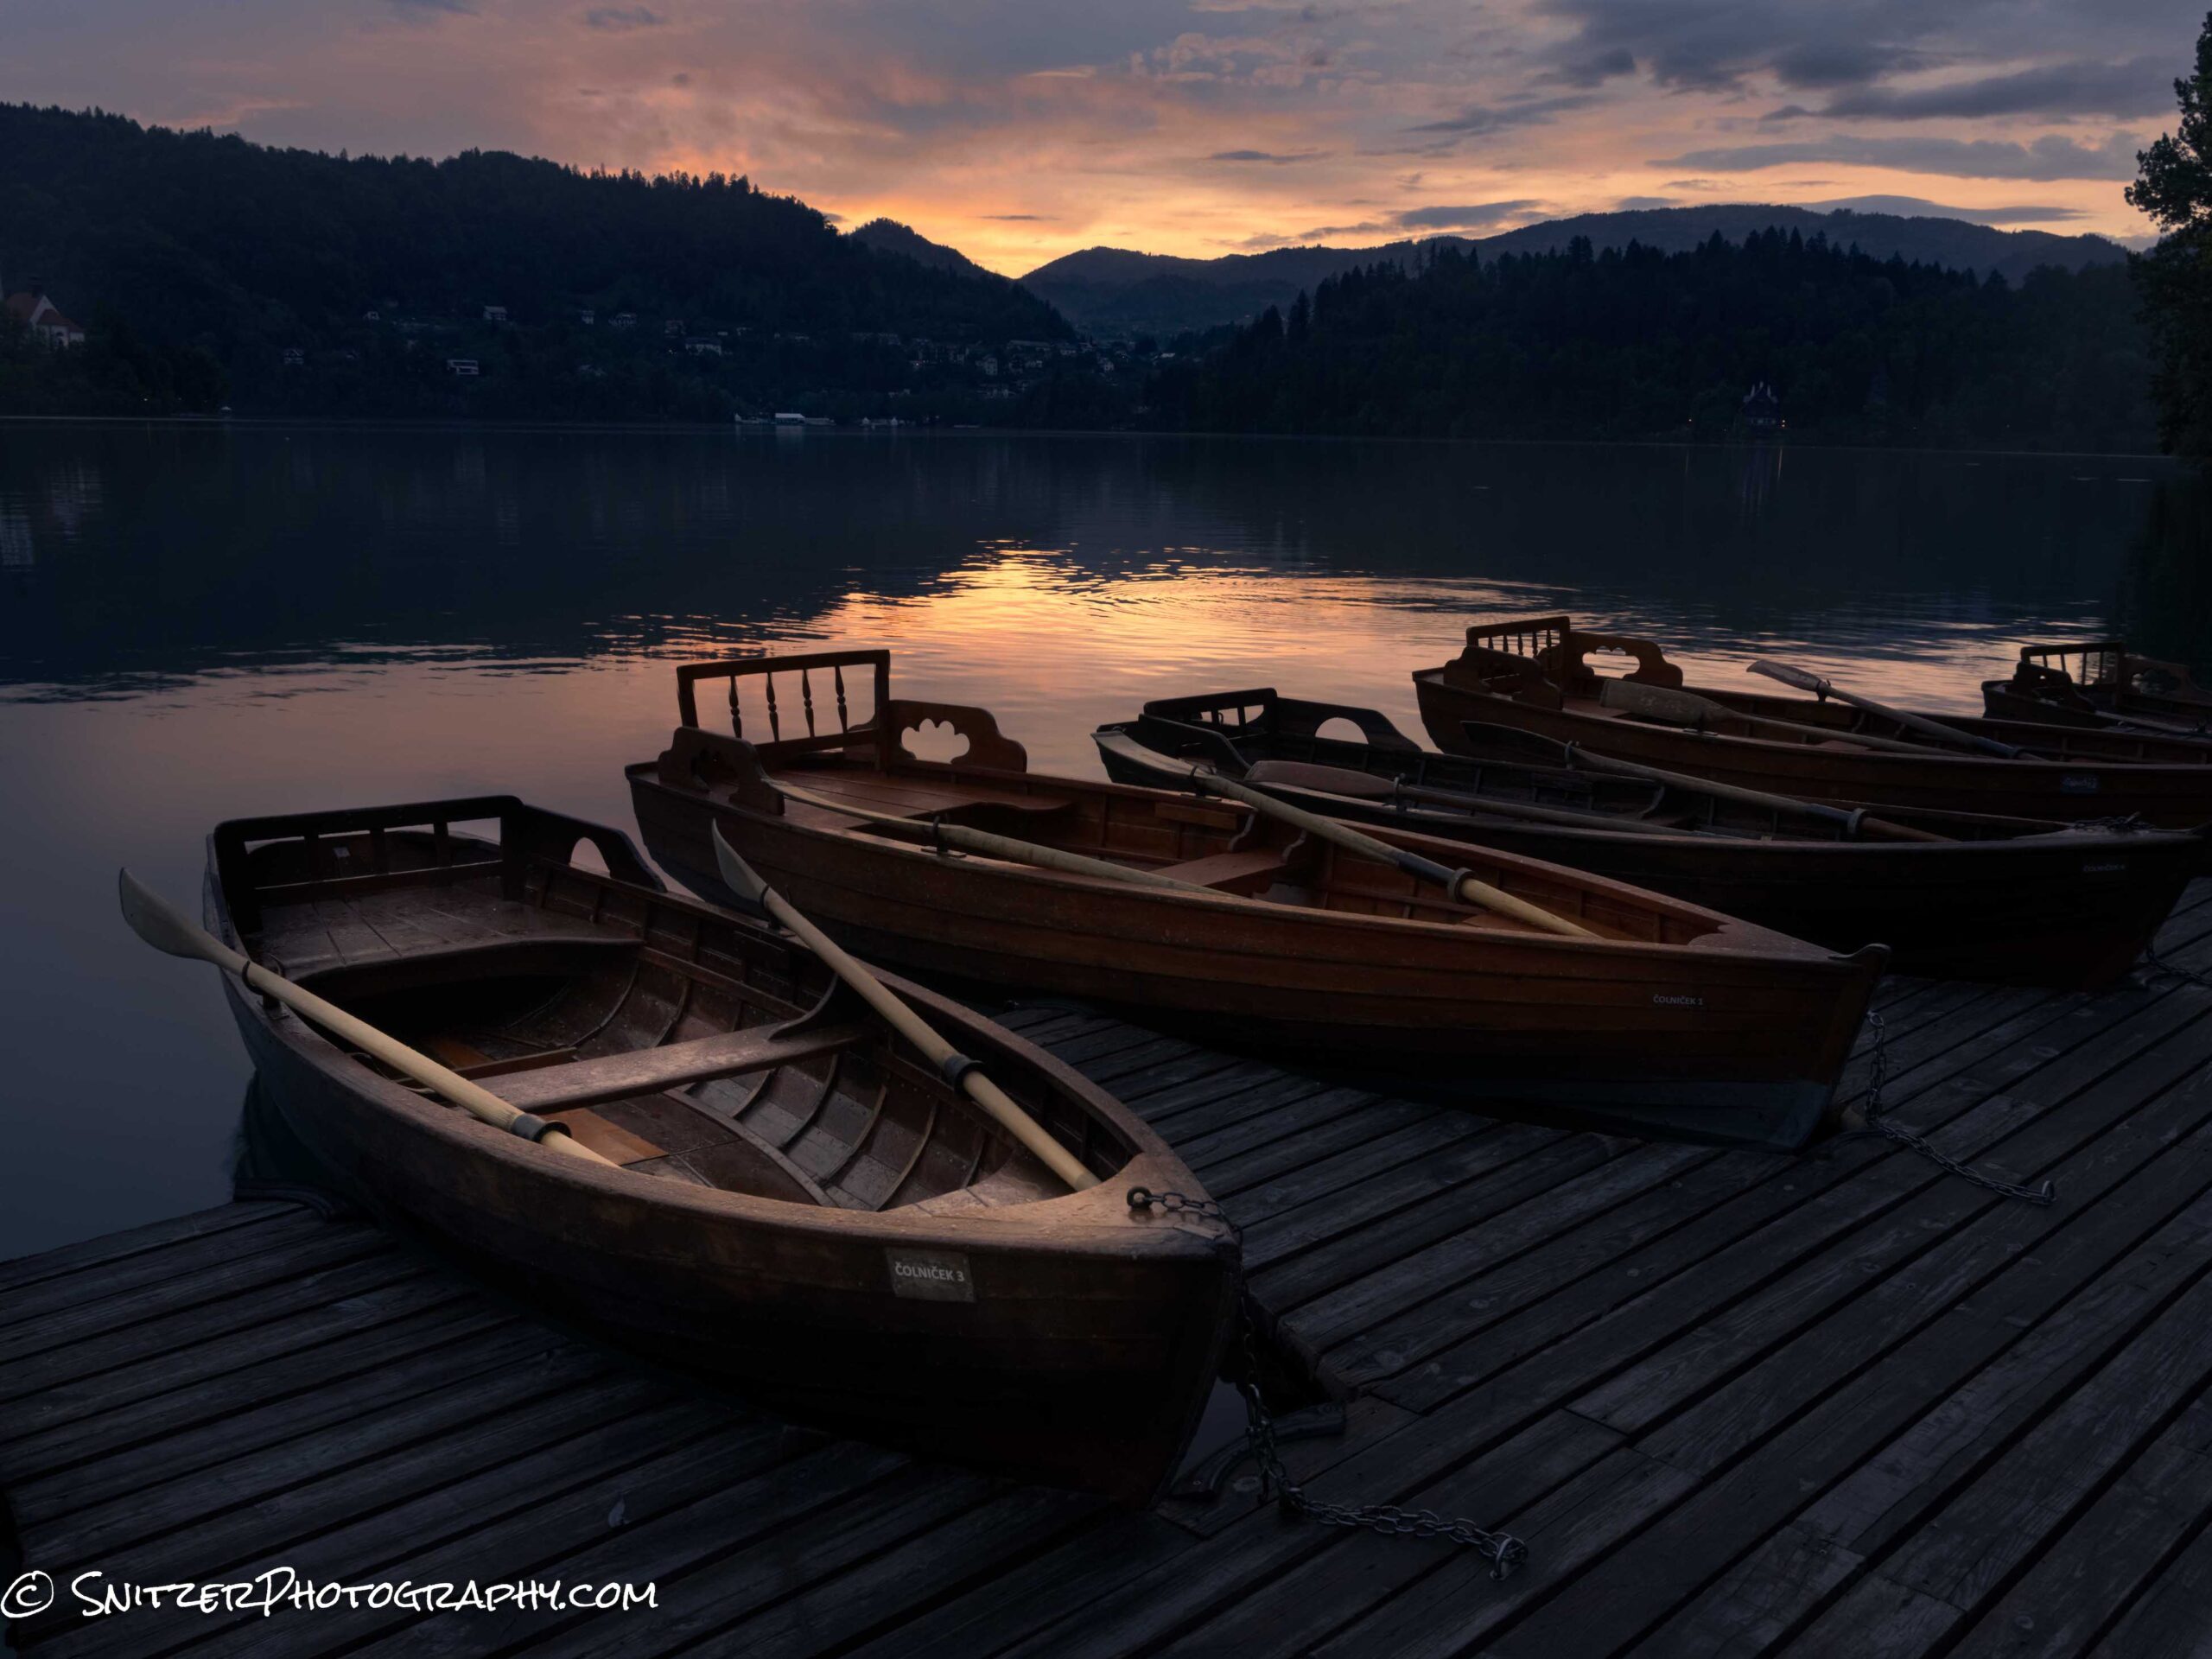
As we drive North we enter the nation of Slovenia. Lake Bled reminds me of the Sound of Music. Some fun shots taken from the footpath that circles the lake. The Church of Mary the Queen dates back to 1534.
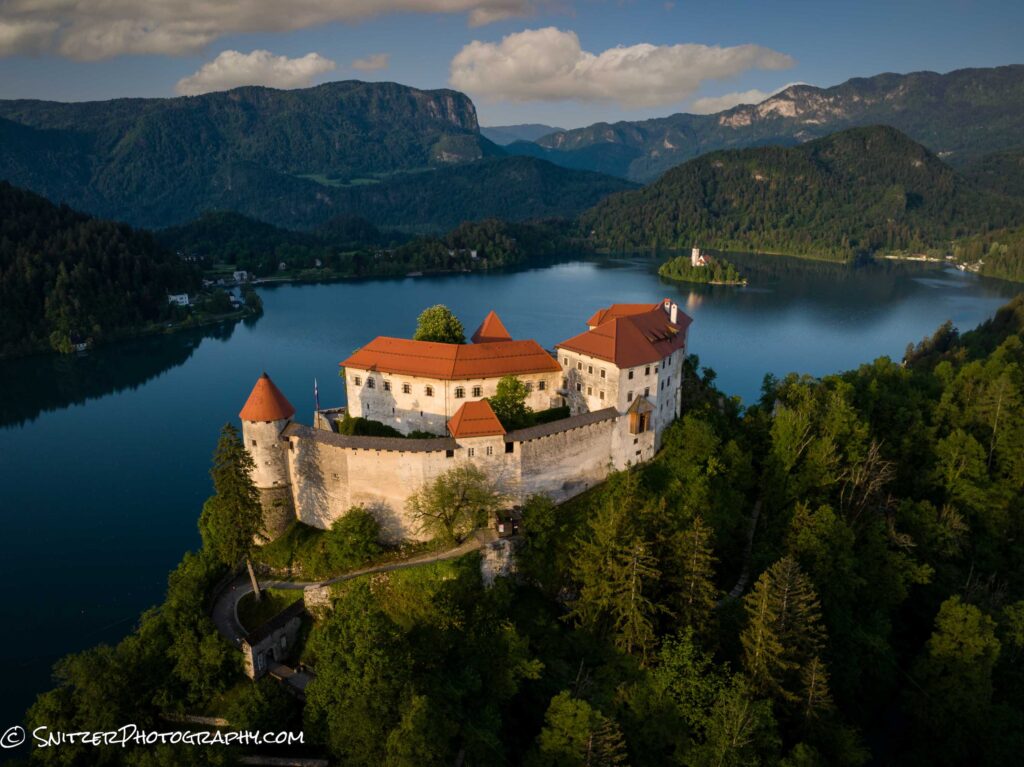
Ok, time to fire up the Spritzler drone. Pictured immediately below is Bled Castle (circa 1011).
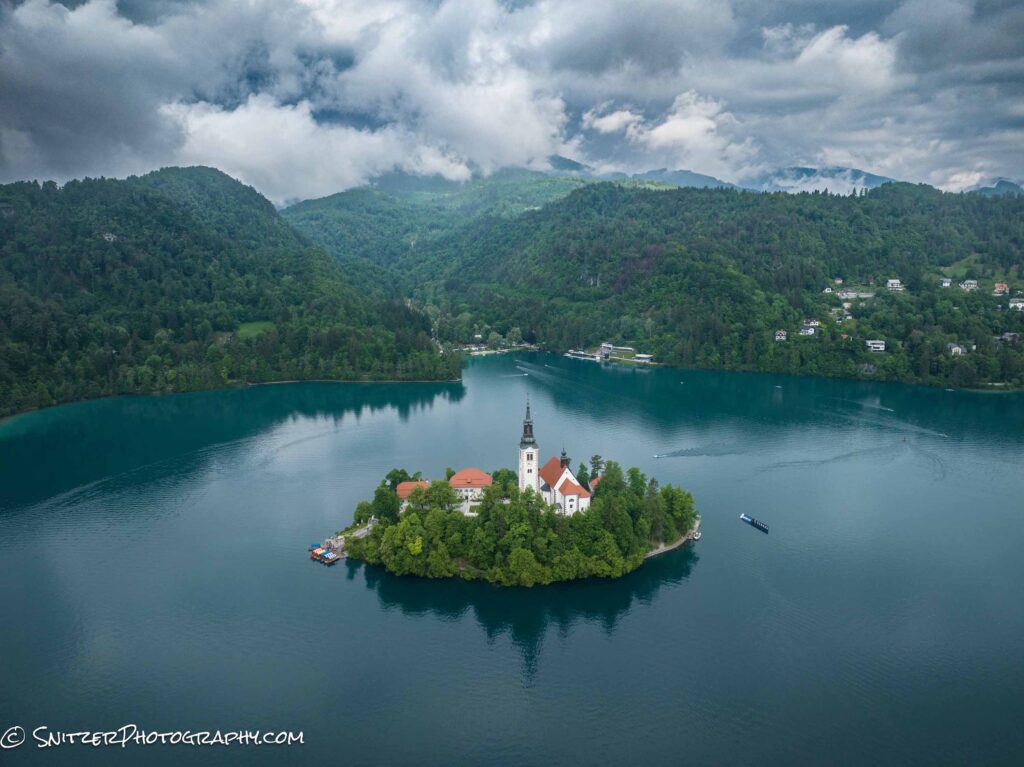
High above the church. I’m getting a nose bleed.
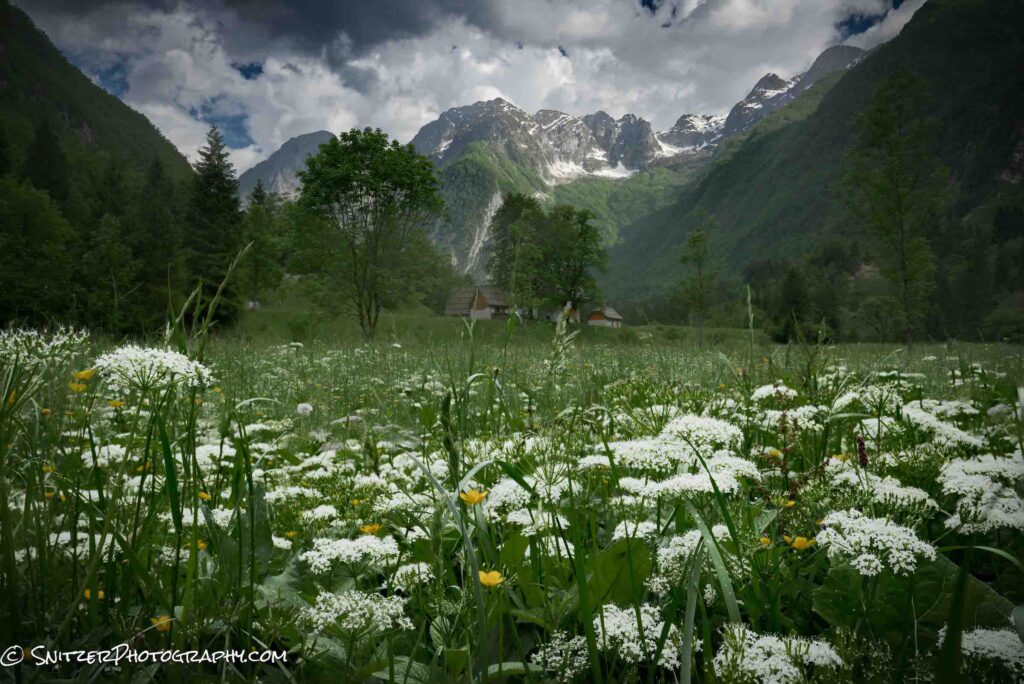
And Bohinjsko, Slovinia
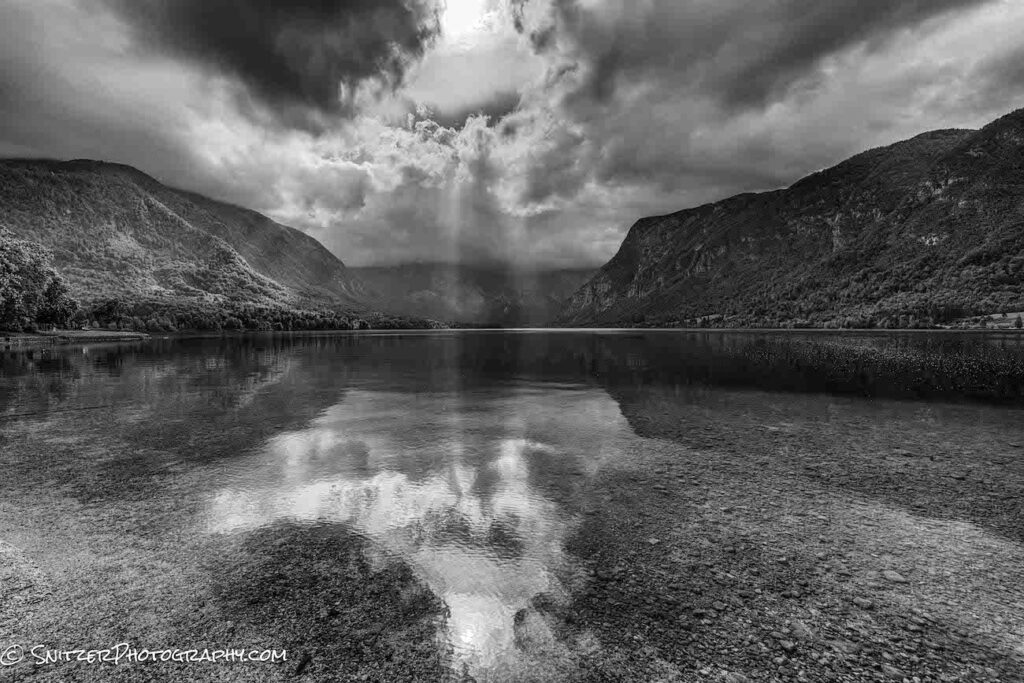
Continuing to head North we reach the Soca River Valley.
What a cool place to Kayak!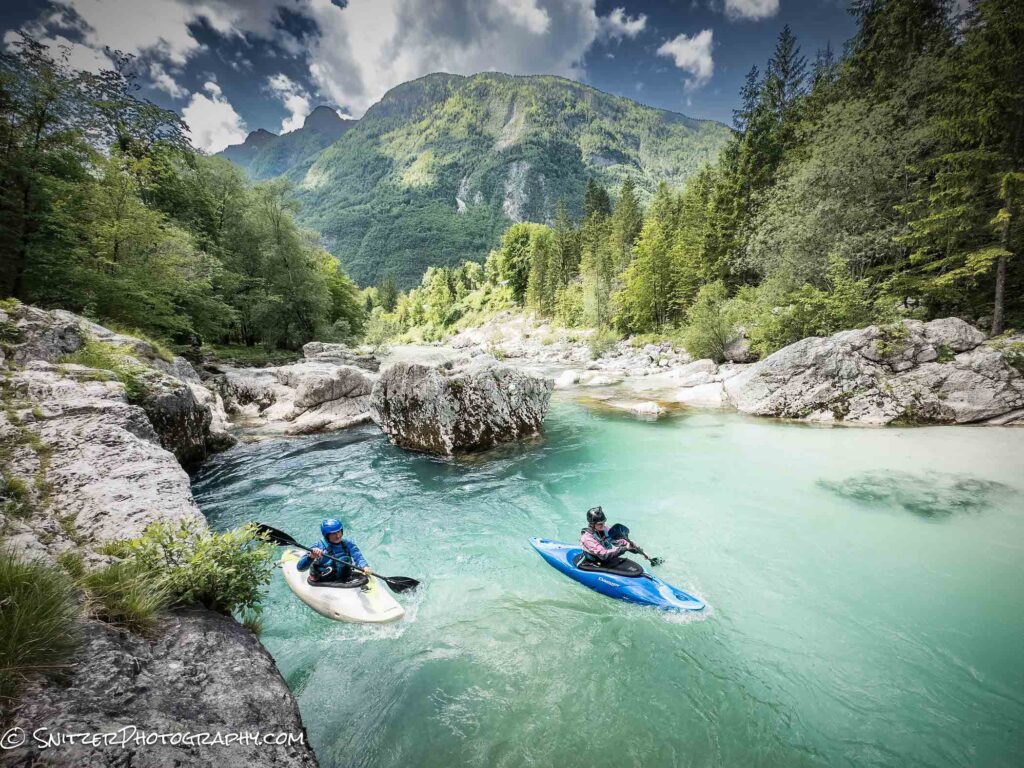
Link below to high res gallery of photos
https://www.snitzerphotos.com/Other/Galleries/Croatia/n-ZZJr4F/
Snitz hits Zion, Death Valley & a Martian Desert.
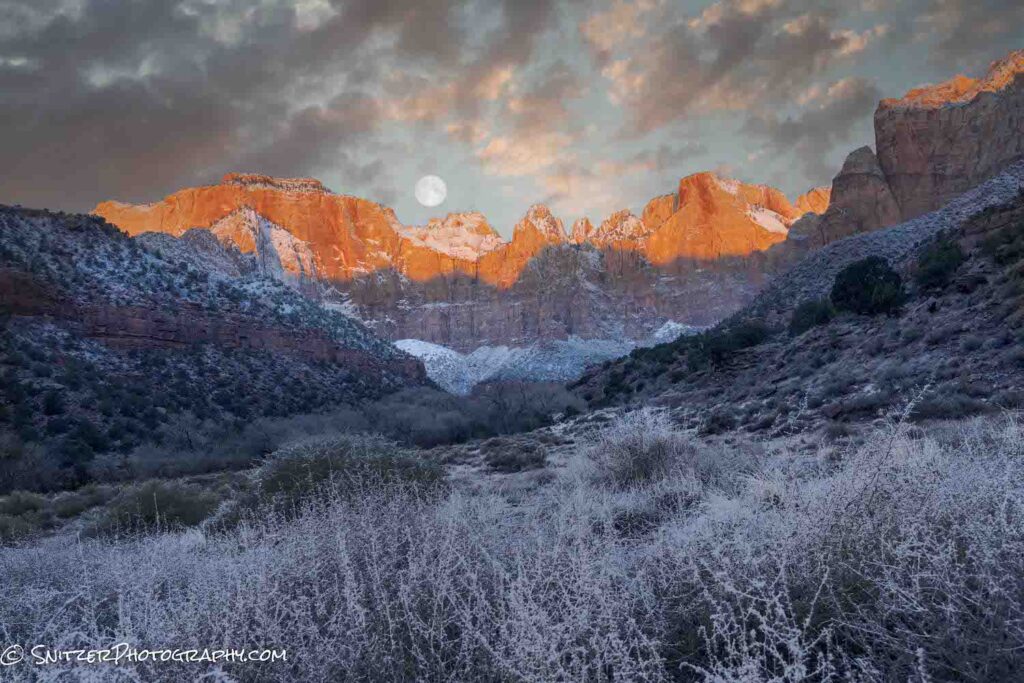
Wondering how to get the full moon to show up on cue? Ans. you need to be a tech geek. I use a program called the Photographer’s Ephemeris to figure out when the moon will be full and, more importantly, when it will be setting to the West around sunrise (sky not too bright or dark). Ergo, I want the sun coming up behind me and the moon in front of me. I also, need to figure out how to get the angle of the moon just right (in relation to what I’m photographing). I told you this requires a photo geek!
Zion’s Canyon Overlook lined up just perfectly a few weeks ago!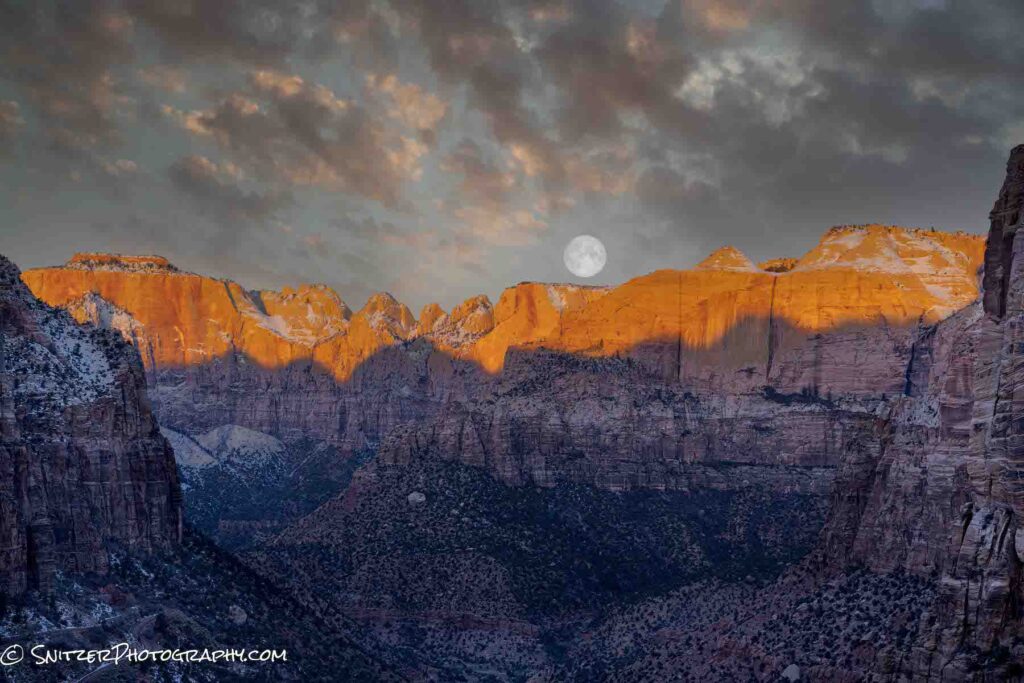
The next morning I tried another Zion spot (just behind the Human History Museum) and BAM.
Not done yet. Hopped in the car and made the 5 hour drive to Death Valley. The next morning I’m chasing that moon again, this time at an the iconic Zabriskie Point.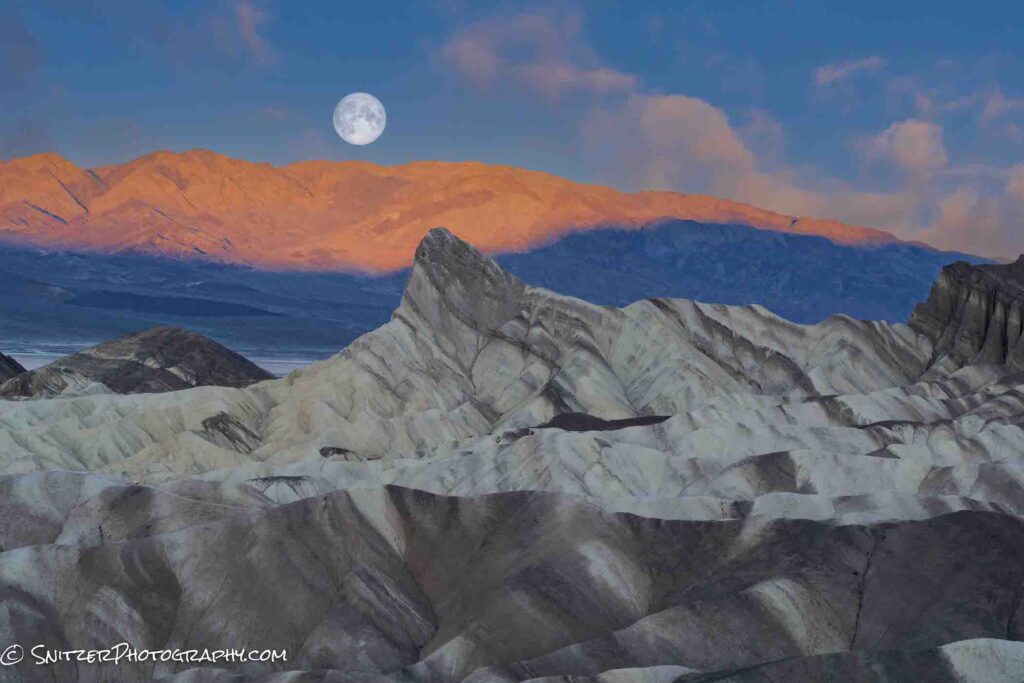
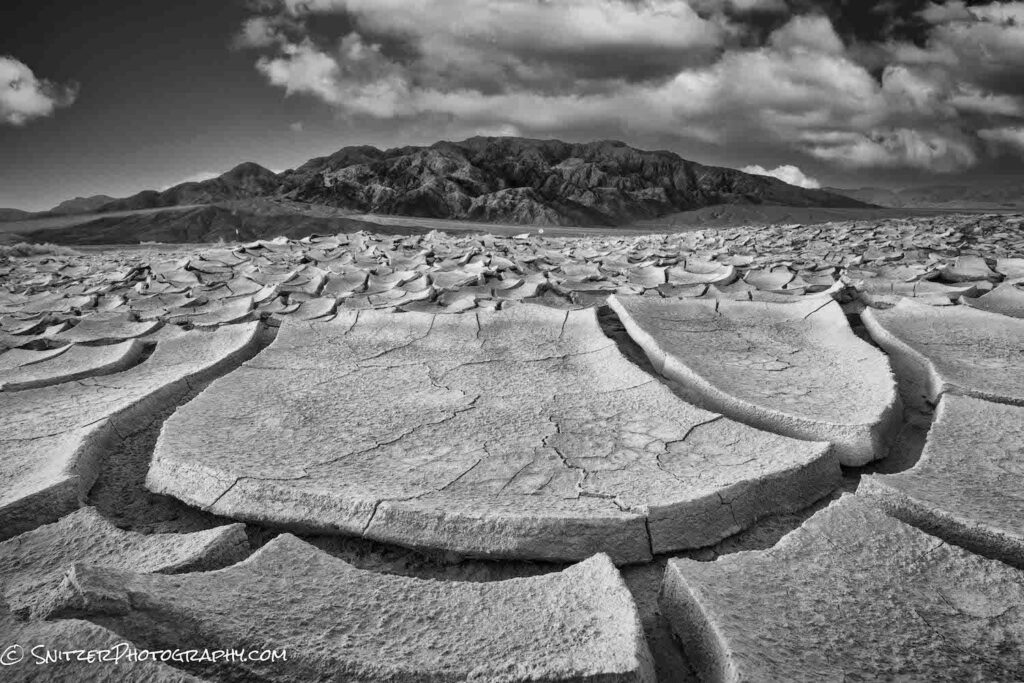
Death Valley, of course, has a bunch more to offer! Portions of the desert floor flooded last August causing the mud bottom to dry into a mosaic of fantastic shapes.
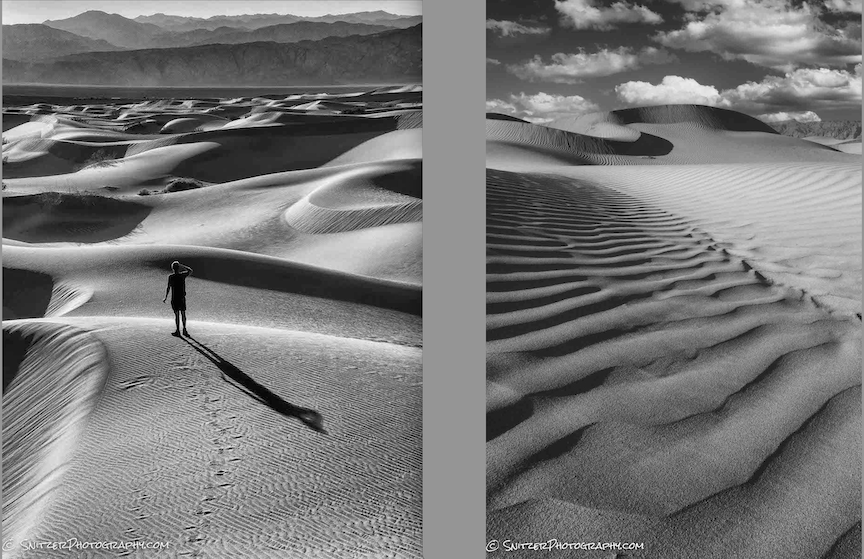
There are also miles of cool looking sand dunes, bracketed in the rear by the Cottonwood Mountains. One of my buddies shown below to put things into perspective.
If you look hard enough, you can even find water in America’s hottest place.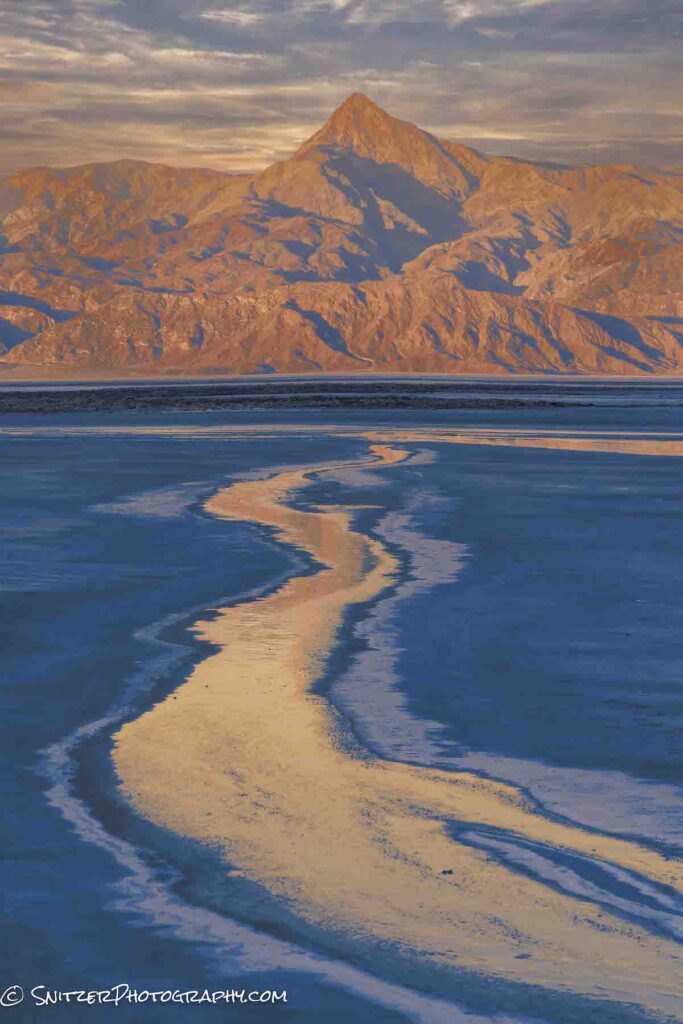
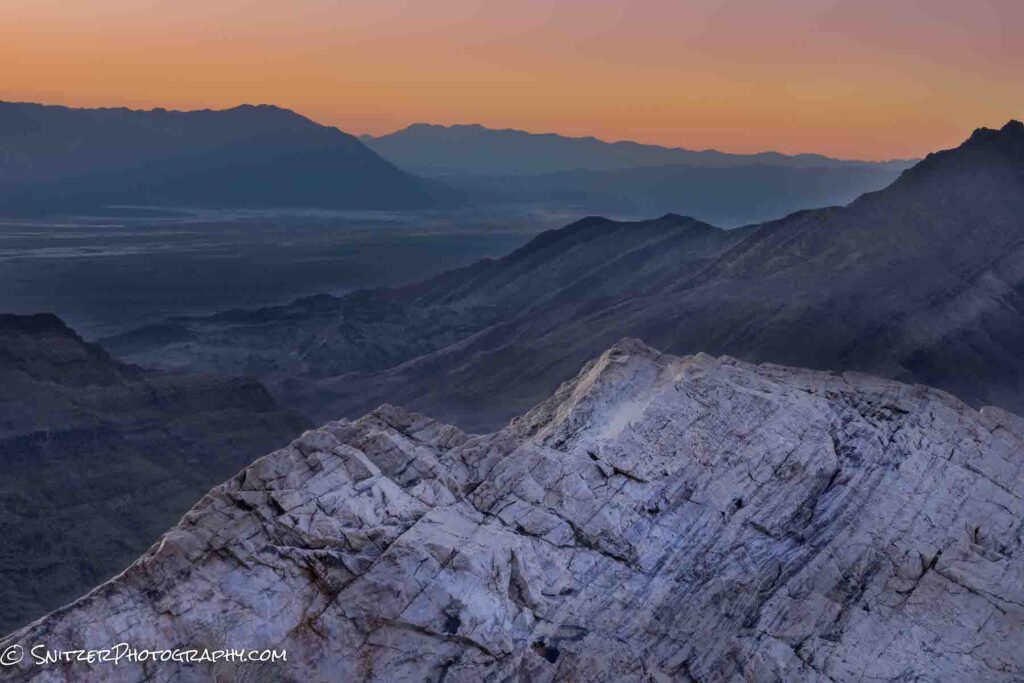
The pictures above are literally taken at sea level. Parts of the park sit almost 5,000 ft higher, offering spectacular views.
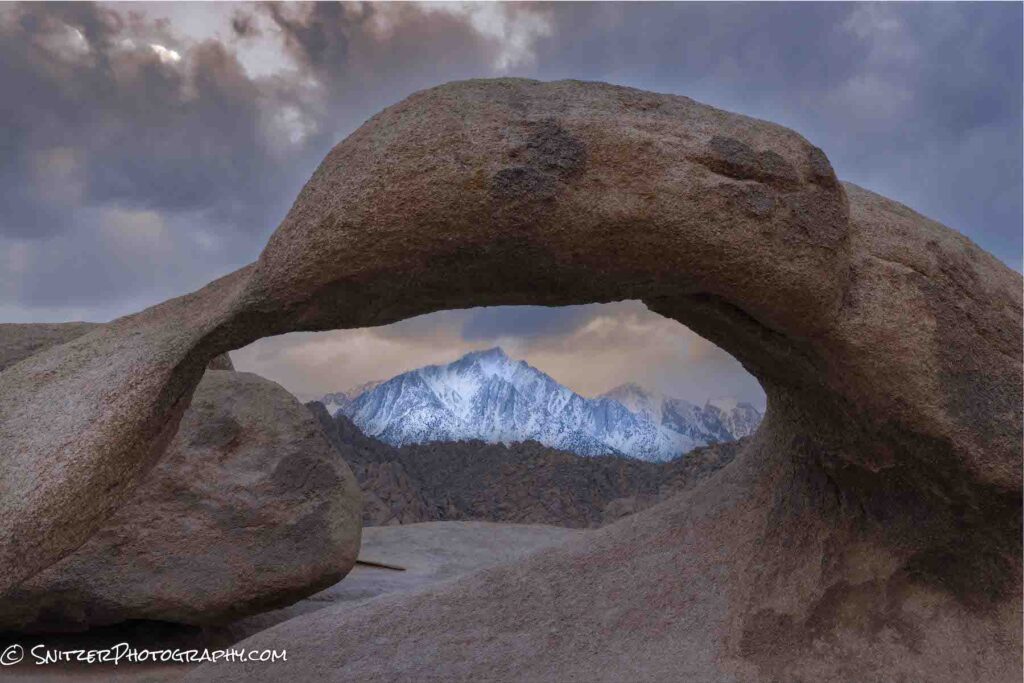
About 90 minutes West of the Park lies California’s Alabama Hills. At the base of Mount Whitney, this area was home to hundreds of westerns. Pictured below is the iconic Mobius Arch.
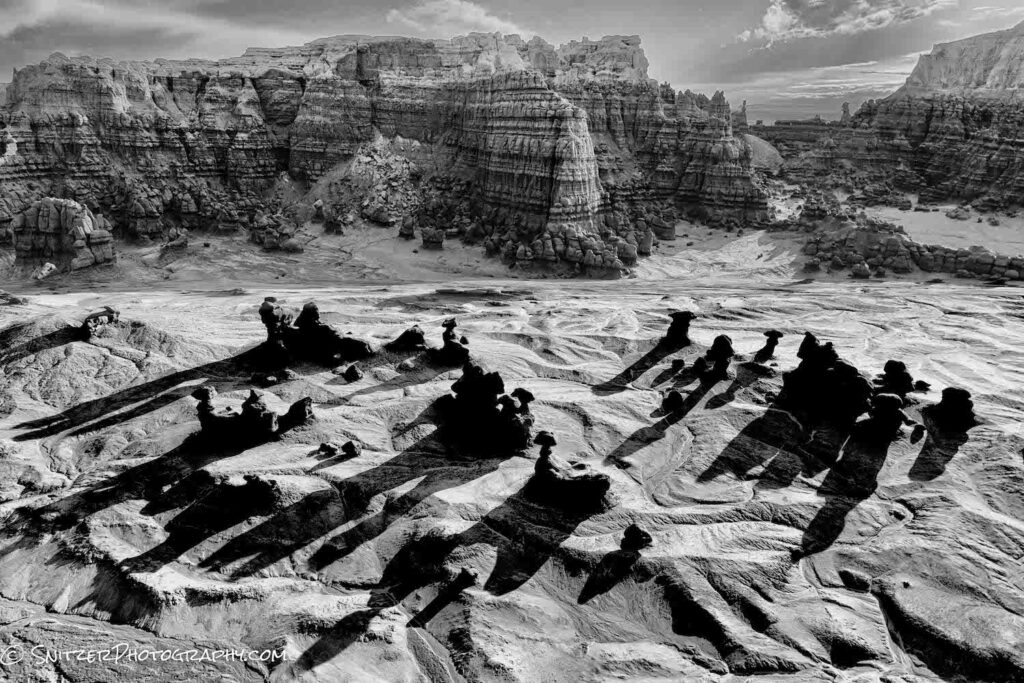
Hey, gotta keep moving. Time to start heading back. On route is an other worldly place called Goblin Valley. The early morning sun creates some long shadows across the desert floor. Those funny looking sculptures down there are called “hoodoos”.
Last stop, a Martian landscape in the Utah Badlands. Ironically at ground level the scenery looks very uninteresting. Boring in fact! But fly a drone 1,600 feet above and you see some incredible patterns.
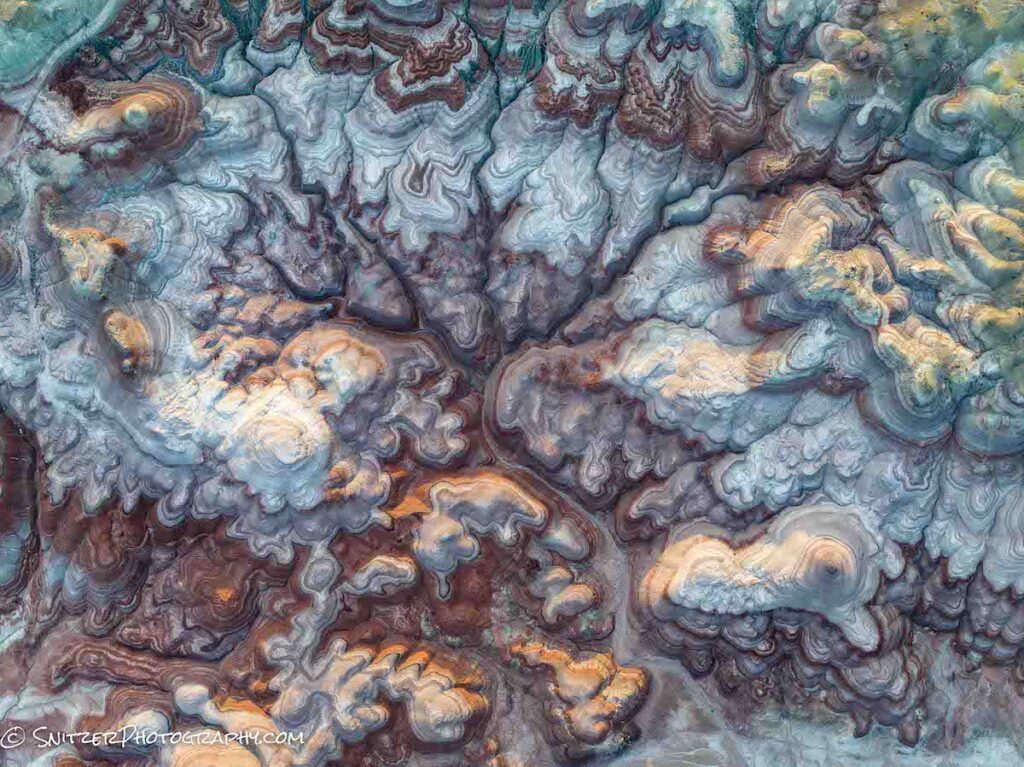
More cowbell?
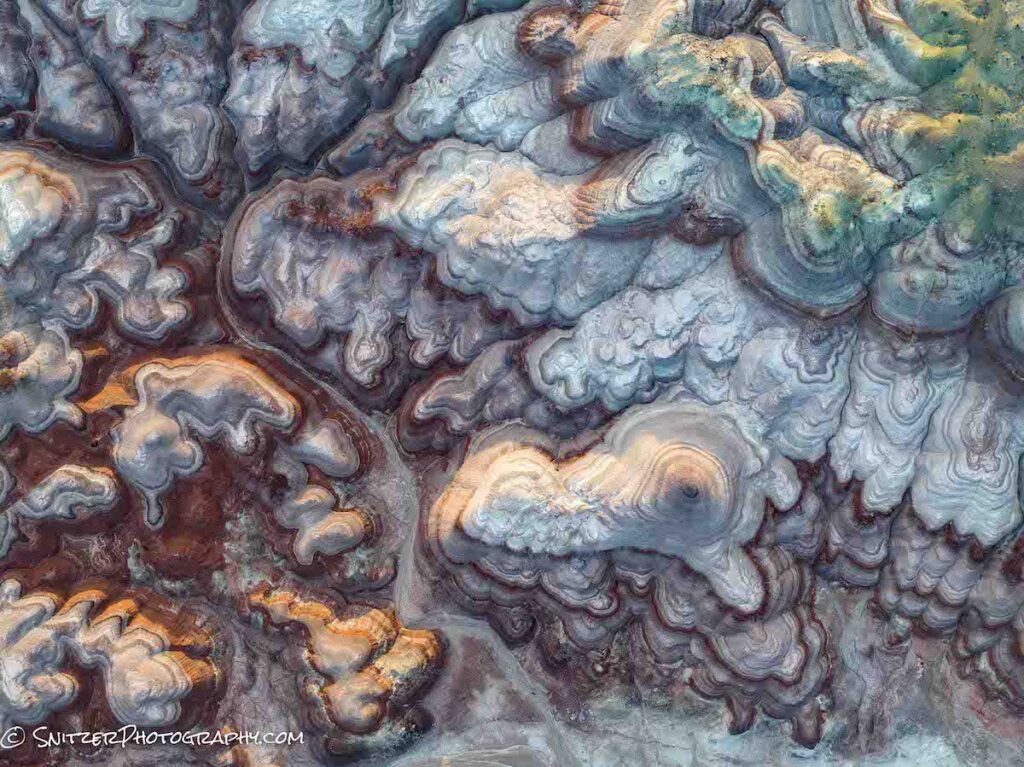
Coming in for a landing we angle the camera up a little to see the surrounding neighborhood.

There’s plenty more to see! Click the link below to check out the entire gallery:
https://www.snitzerphotos.com/Other/Galleries/Zion-death-valley-alabama-hills-utah-bdlnds/n-cmhVLf/
Topaz Sharpen AI vs Lightroom
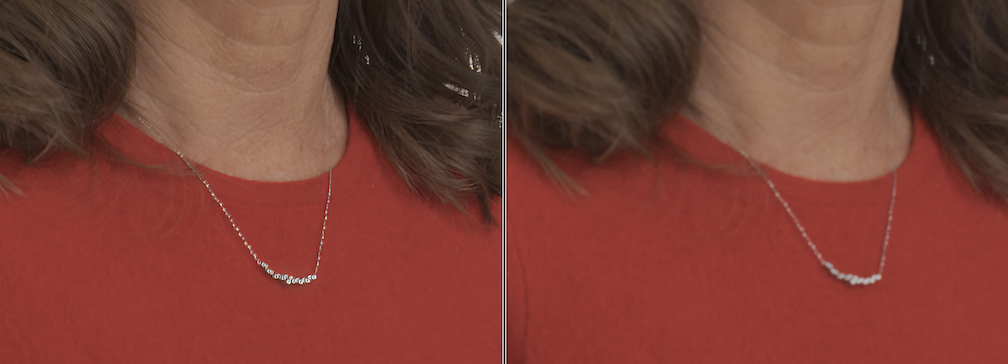
If you’ve tried sharpening an image in Lightroom or Photoshop, you’ve probably realized that the improvement is pretty marginal. The two images below are both blurry and identical. FYI, the one on the right is sharpened by Lightroom.

Check out the improvement after we sharpen with Topaz (image on the left)!

Zooming you can see the bracelet is tack sharp on the Topaz version (left) and way out of focus on the original (right).
For more info on how to use Topaz Sharpen AI check the link. You can purchase with a free 30 day trial. https://www.youtube.com/watch?v=gPhKz4qpOdI
They also have a great denoise product as well. Click here for the Topaz website: https://www.topazlabs.com/
The new Sony A7r V vs. A7r IV vs. A1
The new A7r V ($3,800) uses the exact same sensor (61MP) as it’s predecessor, the A7r IV ($3,000). Still worth upgrading to the latest and greatest? What’s new.
- Onboard image stabilization goes up from 5 stops to 8 stops. Three stops is a massive jump and allows handheld shots that previously would have required a tripod.
- Full articulating “flip up” (either horiz or vertical) LCD screen with much greater resolution. I shoot low (2-6″ off the ground) all the time. With A7r IV, I can’t flip the mirror to take vertical shots. A big problem when I’m composing. The A7r V solves this.
- Vastly superior object tracking and detection. If you’re a wildlife shooter, this will make a big difference. One minor problem. The camera shoots at 10 frames/sec or 6/FPS if shooting lossless RAW. On the other hand, who will be shooting lossless RAW with 61MP files.
- Massive buffer allows over 500 continuous shots at 10FPS. Run and gun.
- Improved camera menu. Easier to navigate.
- Option to have shutter close and protect sensor when changing lens. Helps keep dust off sensor!
How’s this compare to Sony flagship A1 (50MP,$6,500)?
- The A1 has slightly superior image tracking than the A7r V. It also offers 30 frames/sec, vs 10/6 for the A7. It’s the penultimate choice for wildlife. As for in-flight bird photography, the A1 is the obvious choice, whereas the A7r V is certainly solid.
- The A1 doesn’t have a flip-out LCD that allows vertical shooting. Plus, it provides only 1440k dots of resolution vs the A7r V’s 2095. Eckkk.
- The A1 only offers 5.5 stops of image stabilization.
My thoughts
- If you’re a nature photographer who likes wildlife (& shoots birds occasionally), the choice is easy. Save $2,700 and get the A7r V. Better camera for your purposes.
- If you’re a hardcore birder, a serious sports shooter, go with the A1.
How does this compare to Canon’s R5 (the other powerhouse choice)
- Canon doesn’t feature the flip up LCD for composing vertical shots down low. For me that’s a deal breaker.
- Canon is 45 MP vs 61 MP for Sony.
- Canon has the edge at 20 FPS vs 10 FPS for Sony.
- Canon’s lenses are wonderful but insanely expensive & they don’t really offer many third party lens choices.
- Otherwise both cameras have identical dynamic range, ISO invariance, image stabilization, image tracking/focus.
- Canon’s great, but I still believe Sony still comes up on top by a hair.
Apple 13Pro vs Sony A7r IV in difficult light
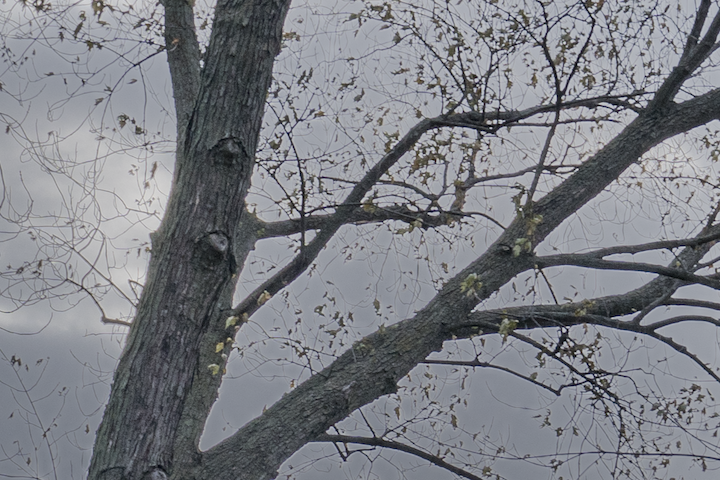
So how good is an iPhone against state-of-the-art 61MP Sony? Also, while we’re at it, which produces the best results for the Sony? HDR processing or exposure blending in Photoshop?
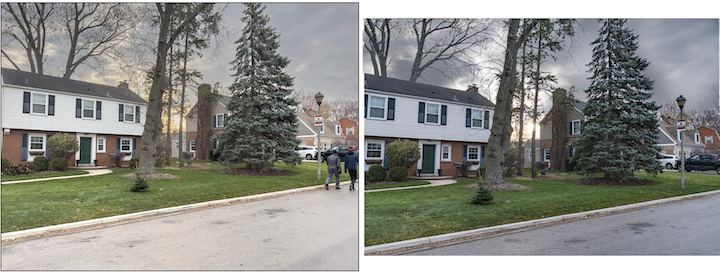
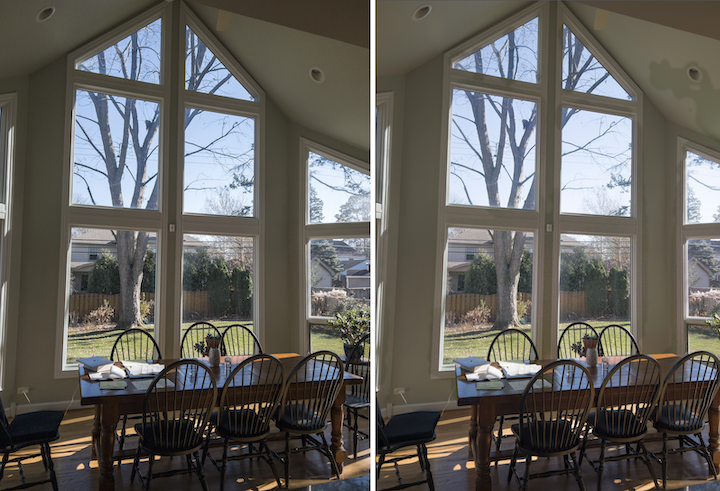
I took three bracketed shots (2 stops apart) in difficult light. The foreground is quite dark against the brilliant morning sky. The photo on the left was produced by exposure blending the darkest and lightest exposures in Photoshop. I used the “select sky” tool to quickly create a mask to insert the darker sky into the brighter foreground photo. On the right is the HDR image created in Lightroom. Zoomed out they look pretty similar (although the Photoshop version has a bit more snap/cleaner).
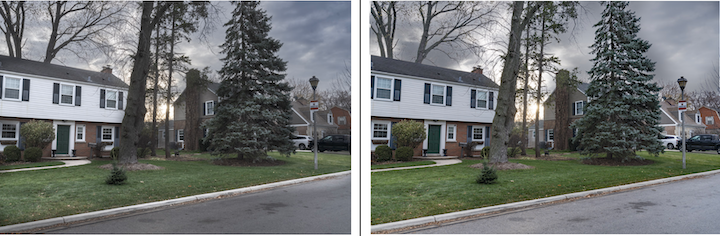
However, when you zoom way way in at 300% the HDR photo (on left) looks pretty weird. The leaves have some funny ghosting on them and we’ve lost some sharpness. HDR software can have a hard time with fine details against brightly colored skies. The Photoshop image on the right is much cleaner.

Even more noticeable when we zoom in to 800%.
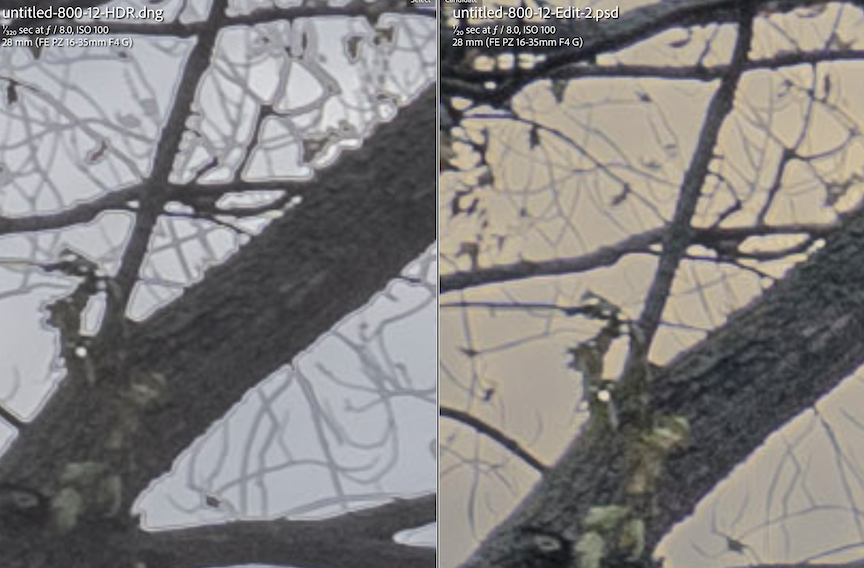
Another portion of the photo. The Photoshop version on the right looks superior.

So while HDR is a great (quick/easy) tool in Lightroom it’s not fullproof. I usually try HDR first and if it begins looking wonky, I dive into photoshop to exposure blend. More work, but in tough conditions better results.
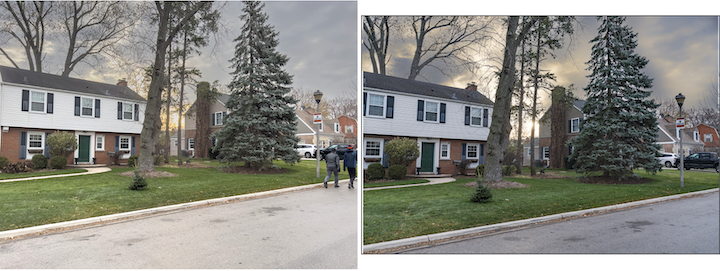
Now let’s compare the Iphone shot to our Photoshop masterpiece. Note: The Iphone 13Pro on left has a taller aspect ratio. For a quick phone shot (one frame in RAW mode, processed using Apple ProRaw profile in Lightroom) it’s fricken magnificent. The Sony shot on the right looks a little more natural, less contrasty, but both photos are pretty good! In fact, the Apple captured a little more of the color in the sky.
Of course that’s easily corrected with a small tweak in Photoshop. The Sony high res files allow me to tweak and adjust the sky in a way that the Apple HDR photo can’t match.
Let’s take a closer look at our IPhone shot at 300%. Nuts! We have that funny ghosting again. The IPhones Apple ProRaw IA algorithym has combined several shots and applied HDR processing. Same problem we had with our Lightroom HDR.
The Photoshop exposure blend is super clean. Great detail, no ghosting.
Conclusion: The Iphone does a terrific job and can produce professional looking work (especially the new IPhone 14 Pro with the 48 MP sensor vs the 13’s 12MP). That said, a top end mirrorless camera w exposure blending is probably the way to go under extreme lighting conditions when you plan to publish your work. Otherwise your phone is pretty darn good for social media posts and such.
PS. Want to know the best way to post process your IPhone photos? Click here: https://snitzerphotography.com/education/apple-proraw-best-for-iphone-photos-lightroom-editing/
Apple ProRaw best for IPhone photos? Lightroom editing?
Love taking pics with your iPhone? You have several options which produce varying degrees of image quality.
- By default, your phone takes Jpeg photos. These are great for amateur shooters (also sport small file sizes/about 2-3 MBs).
- For serious photographers there are better options that take RAW images. RAW images have a wider dynamic range (for capturing sunsets, sunrises & difficult lighting) and more adjustability to modify/edit the image in post-processing programs (Lightroom being my favorite). The only downside is they produce much larger files. Therefore, they’re good only for important shots you really want to keep!
- Apple’s new ProRaw format (30 MBs iPhone 13 Pro/70MB iPhone 14 Pro*)
- Third-party apps that also take raw images (10/20 MBs iPhone Pro13/14) with your iPhone (Pro Camera being one of the best)?
How do these RAW apps compare? Let’s find out by taking some photos in difficult light (wide dynamic range, the room is quite dark whereas the exterior views through the windows are very bright) with three options:
- Apple ProRaw image
- Third Party Raw image using the Pro Camera Ap.
- Three bracketed shots were taken in Pro Camera (2 stops apart) & processed using Lightroom’s HDR software.
Below left is the single Third Party Raw Image and right is the HDR merged version. Both look quite similar. The HDR processing hasn’t improved the image much.
Below left is the Apple ProRaw image and on the right the HDR finished product from Pro Camera. They look also pretty similar when you’re zoomed out.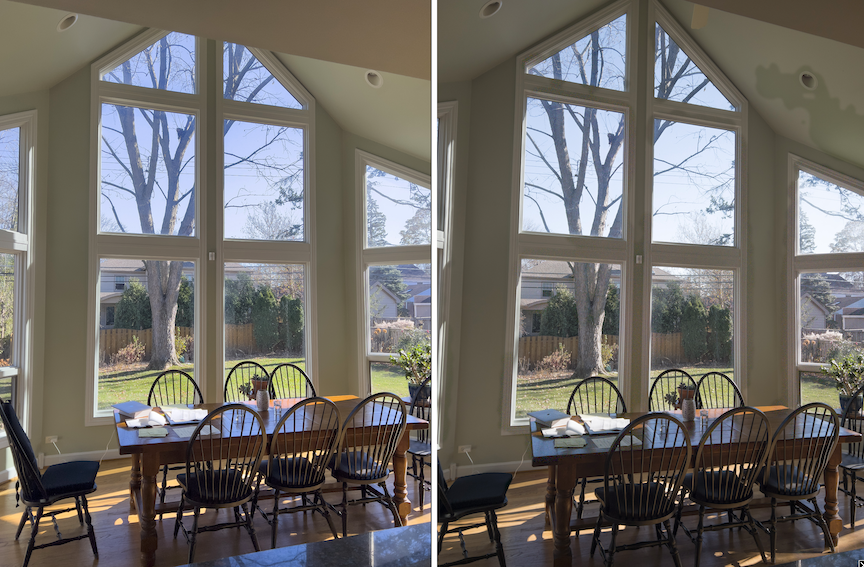
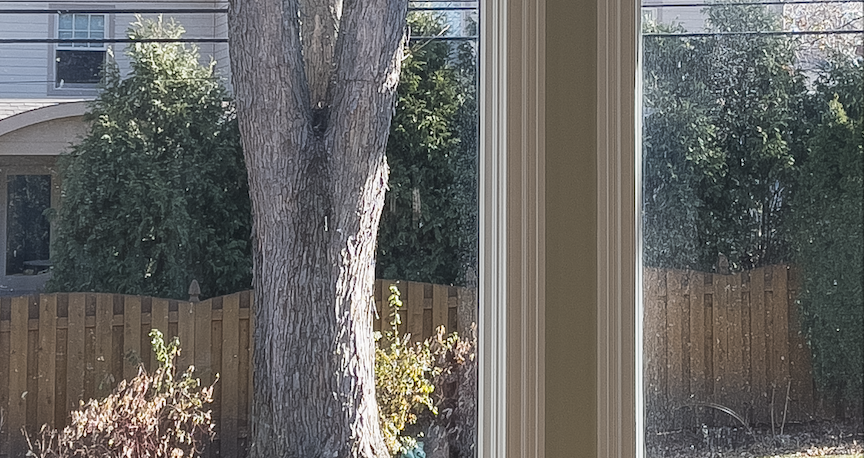
But zoomed in at 300% tells another story! The HDR ProCamera image (below) has tons of noise! See all the colored dots inside the green column?
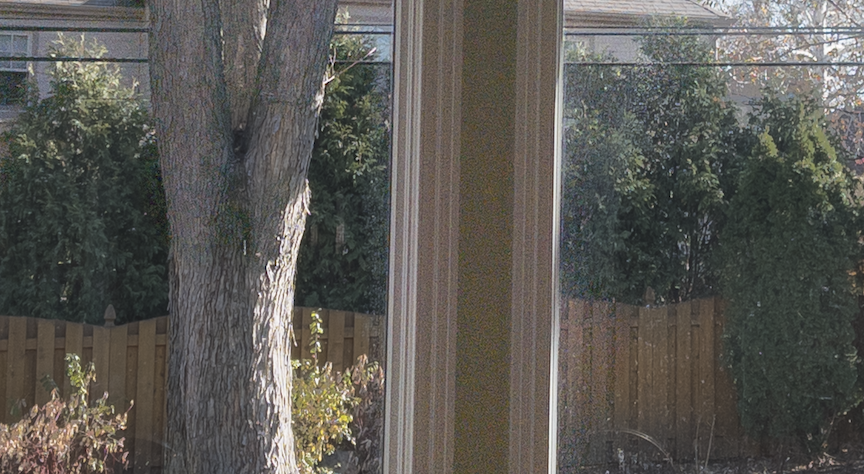
The Apple ProRaw version below is much sharper and practically noiseless. Much better!
Likewise, in the dark areas of the photo, the Pro Camera isn’t very sharp and has lots of noisy artifacts in the dark areas. Check out the chairs.

Not so with Apple ProRaw.

Some thoughts on optimal work flow:
- As mentioned before, using Apple ProRaw produces large files. Use Apple ProRaw only for IMP images you may want to keep.
- IMP note: The new Apple 14 Pro has a whopping 48MP sensor which produces amazing resolution compared to the 12MB that’s on the IPhone 12Pro & 13Pro, plus superior color rendition. The Apple ProRaw images from this phone will be approx 70MB. Can eat up memory quickly if you don’t delete your “duds”.
- The Apple ProRaw file is hybrid Raw file. If the the scene being photographed has a great deal of dynamic range, the IPhone will automatically take multiple bracketed shots and combine into one HDR image.
- How to turn on Apple ProRaw on your IPhone 12, 13 or 14. Earlier versions don’t allow. Click link for instructions. https://www.youtube.com/shorts/gFDgUC1mah4
- For Lightroom users, when you process the Apple ProRaw file into Lightroom remember to select the Apple ProRaw color option in the Basic menu section. Your image will look much much better.
![]()
Final thought. How does the Apple IPhone 14 Pro stack up against the Samsung Galaxy S22 Ultra or Pixel 7 Pro? Below is a great overview. Bottom line. If you’re a muggle and don’t shoot in Raw model the S22 is a great camera. On the other hand, for serious photographers, the Apple product using ProRaw software is clearly the winner. Personally, I’ve used both Android and Apple devices and prefer the latter.
https://www.youtube.com/watch?v=iIBYa1ZEzFQ
Update April 2024: Samsung with it’s new Galaxy 22 Android smart phone has introduced it’s own version of Apple ProRaw called Expert Raw. It’s only available to work on the 21 and 22 version of the phones and is still a little tougher to operate than Apple’s version. I suspect it will soon be fulled “baked” and Apple’s equivalent.
Ergo, if you love Android you’ll be able to enjoy the better camera processing features as well.