Programs I use to process photos
Lightroom(LR): The main product I use for most editing, photo file storage, and organization. New AI updates allow for sky, subject, color and luminosity masking. Allows me to massively edit photos and come back later to easily tweak/improve any edits. Harder to update edits in Photoshop without massive file sizes. My go-to program also for pano stitching and HDR. The new SuperrRsolution tool allows for doubling photo resolution.
Photoshop (PS): I’ll export from Lightroom to PS when I need to photostack, noise stack, exposure blend or modify image perspective using warping tools. Also great for creating Orton Effect glow. In general, the go-to program for complex masking applications.
Starry Landscape Stacker: Mac-compatible plugin for celestial photography. Noise stacking when sky is moving but the foreground isn’t. Link for Starry Landscape Stacker
My other Lightroom plugs. Ergo, programs launched from inside Lightroom’s Photo<Edit menu.
Topaz Sharpen AI: The Cadillac of sharpening software. 10x more effective than sharpening tools in LR or PS. Link for Topaz Sharpen AI
Topaz DeNoise AI: Go to tool for noise reduction. Note, in the case of noisy/out of focus images, use this first before trying to sharpen with Topaz Sharpen AI. Link for Topaz DeNoise AI
Nik SilverEffects Pro: Fantastic plug-in to create memorable black and white imagery. Link to Silver Effects Pro
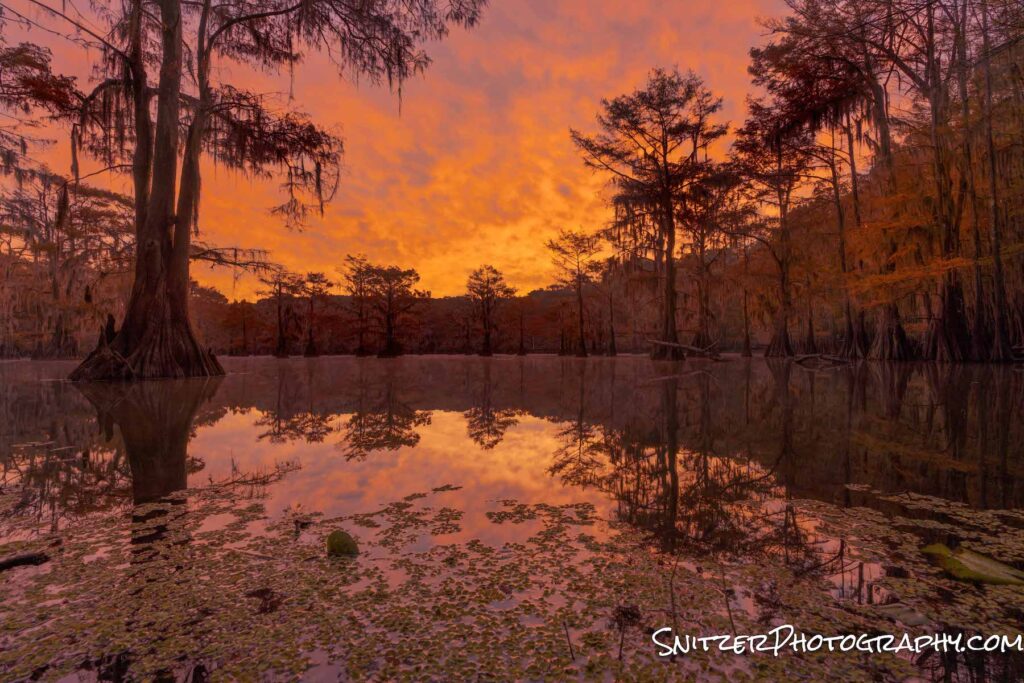
Caddo Lake: Apocalypse Now?
Caddo Lake, located in Northern Texas, is becoming one of the most photographed Cypress Forests in the United States. This unique landscape is both gorgeous and pretty darn mysterious looking.
The wetland lake area is massive encompassing over 25,000 acres and stretches into Lousiana. By the way, since 1965 apparently, there have been literally hundreds of Bigfoot sightings on the lake. Not kidding!
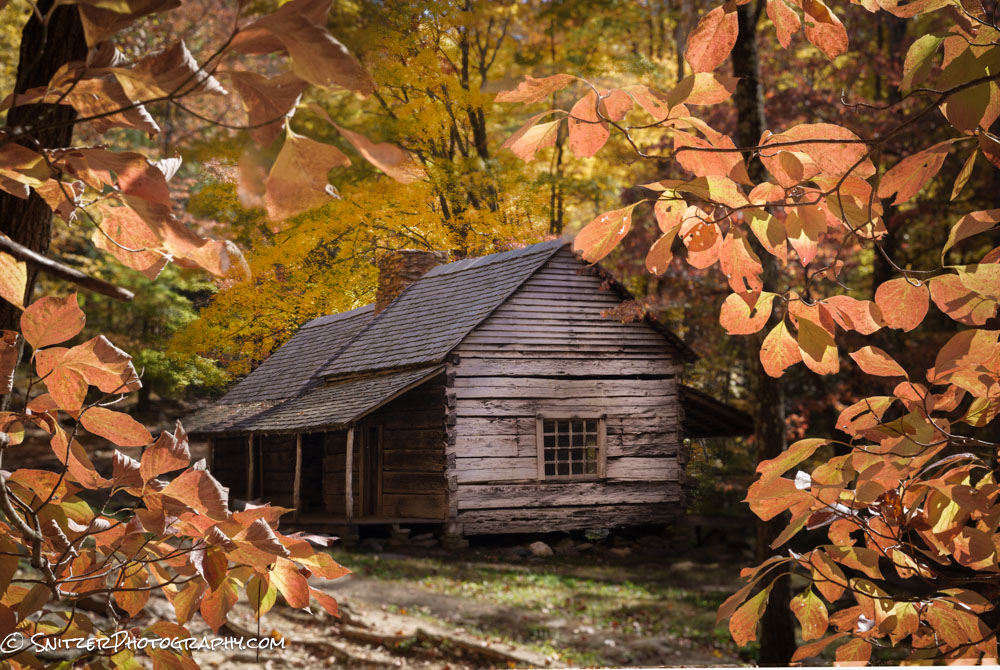
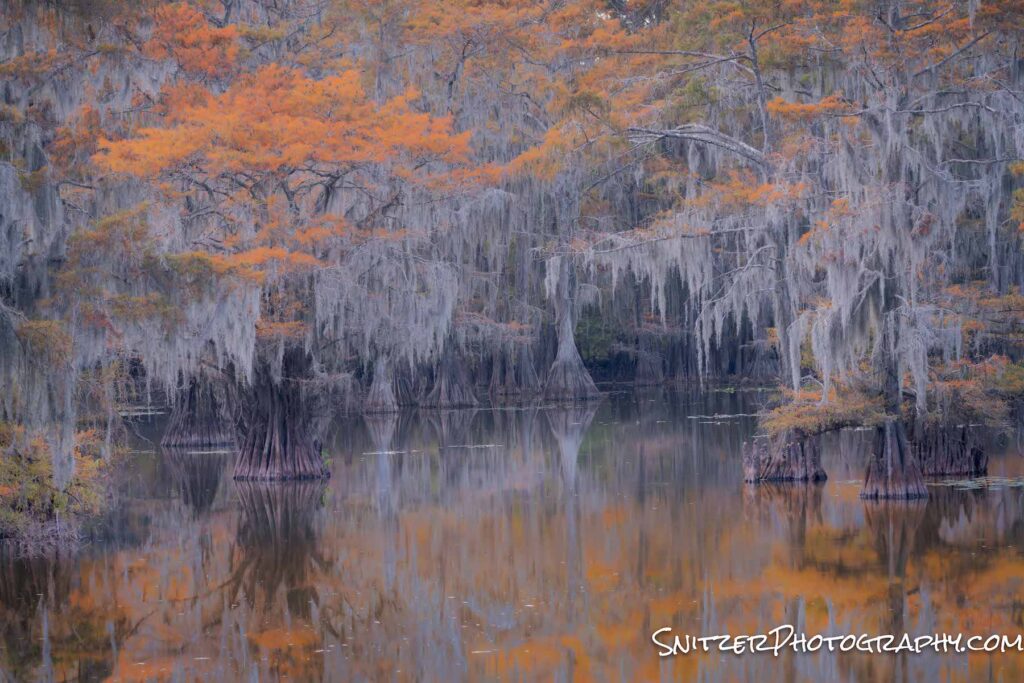
Each fall (Mid November down there), as the colors of the Cypress trees change, legions of leaf-peeping photographers converge on this place… including T Snitz Esq!
There are essentially two ways to view the lake. The first is from shore, inside the Caddo Lake State Park.
20 minutes before sunrise.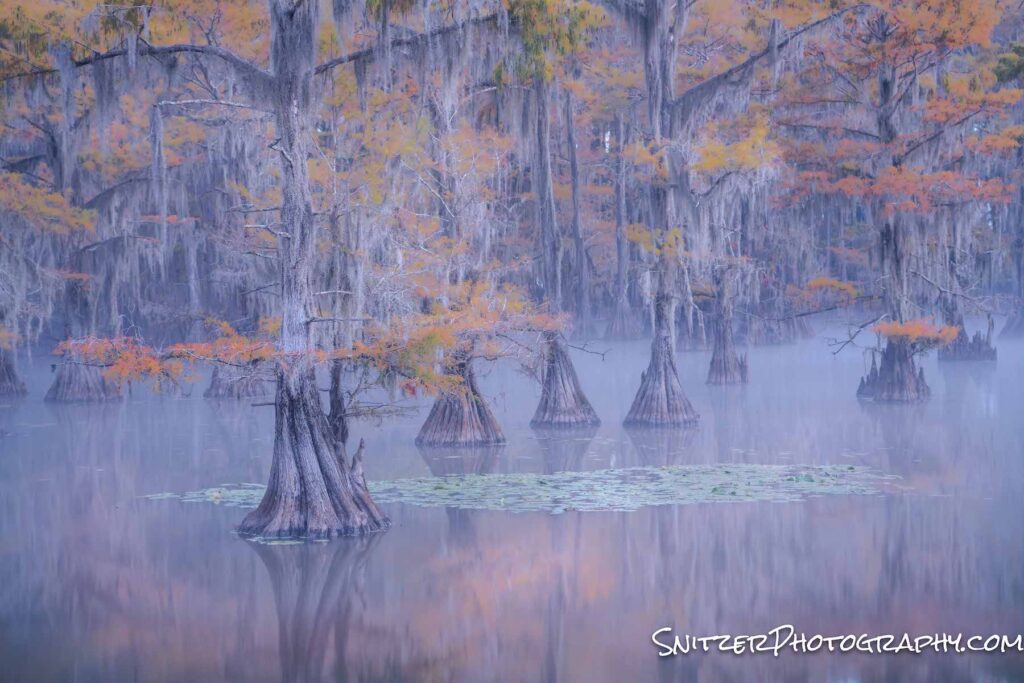
Five minutes before sunrise.
The background forest begins to glow about one hour later! Badabing.
Occasionally you’ll see some folks out paddling in the park.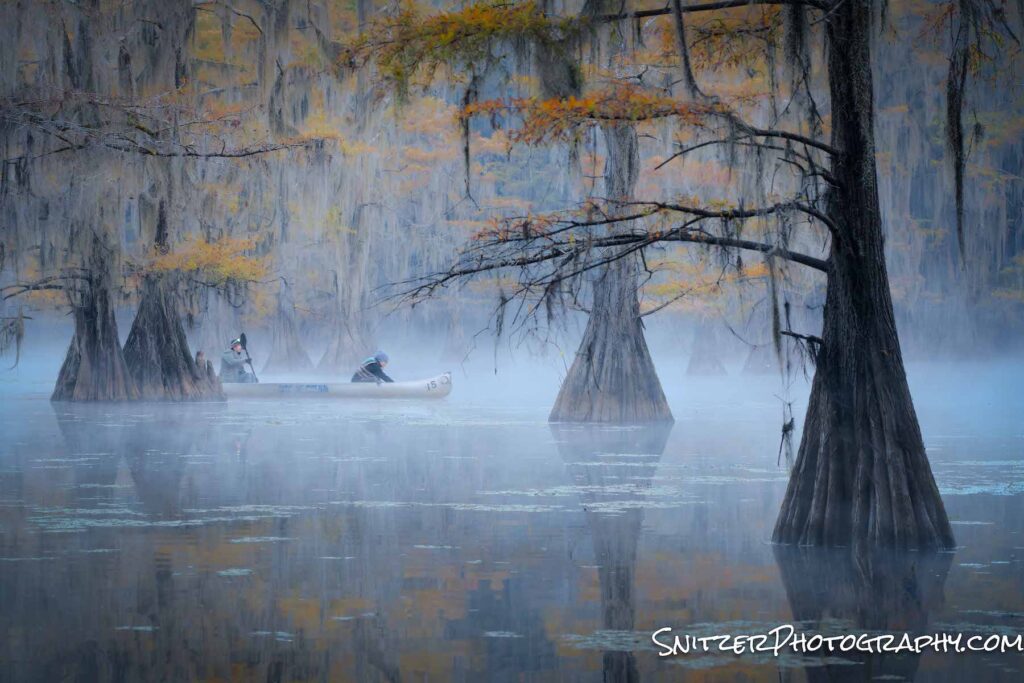
To view the main lake, you need to be on a boat. It’s difficult to view from the shore in most spots. Dawn patrol. Fisherman locked and loaded (with Coors Light)!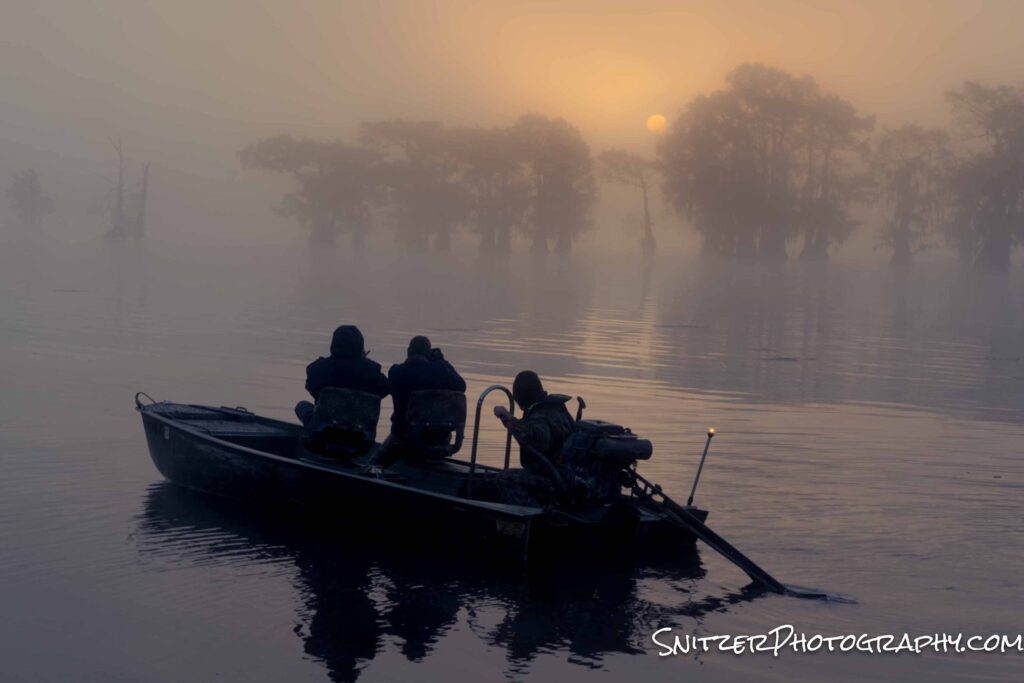
It’s pretty spooky out here.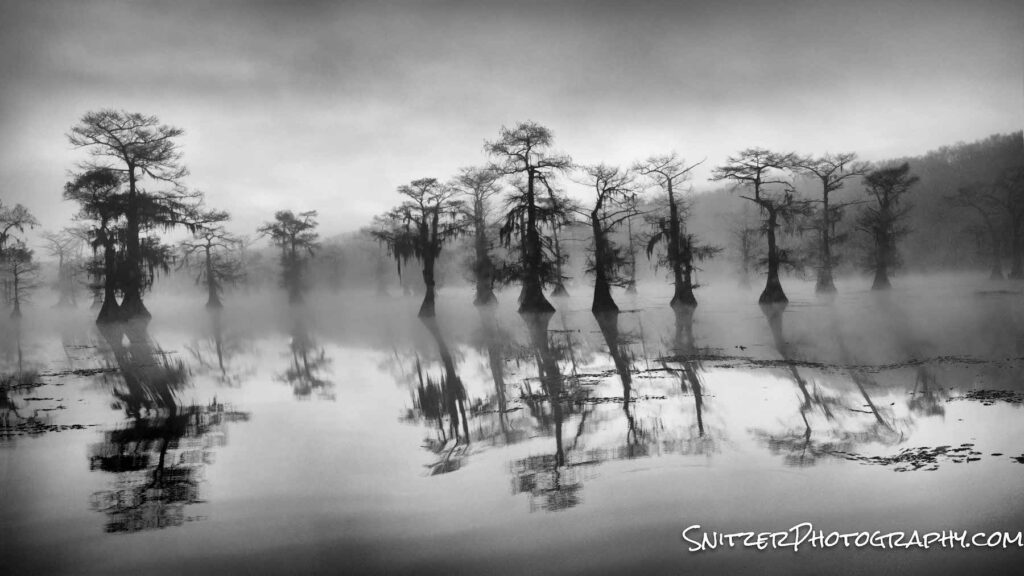
The colors really pop when the sun is obscured by clouds!
An Egret keeping watch.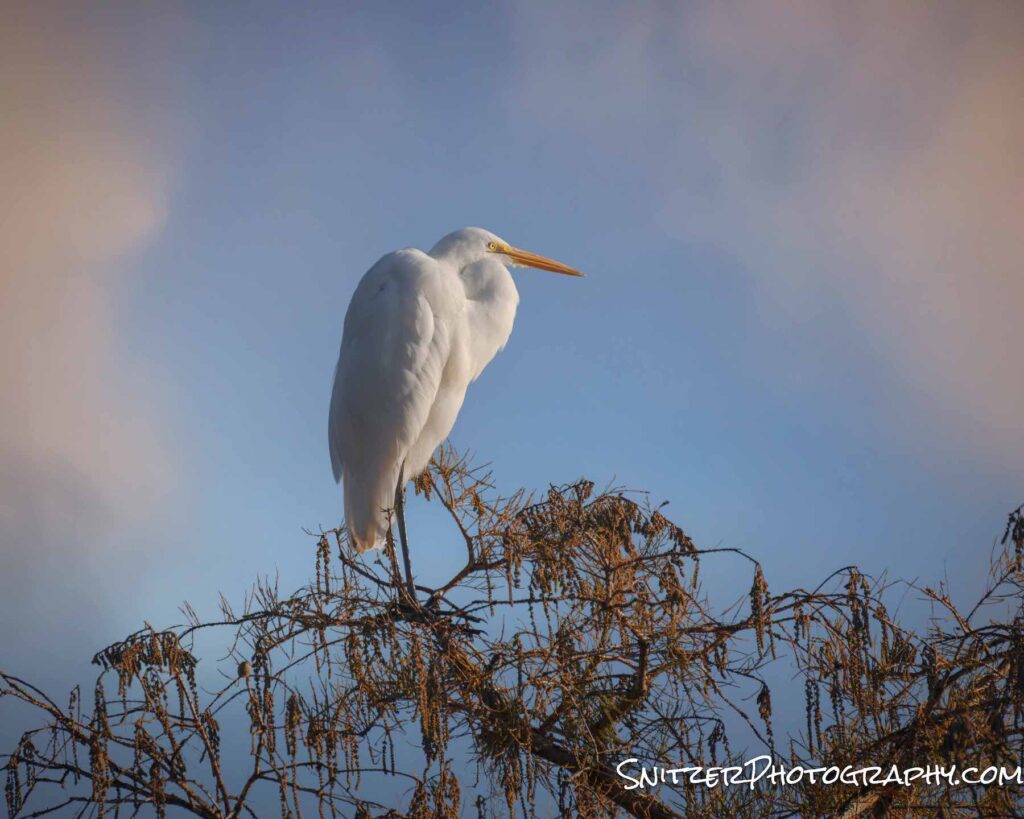
Saying goodbye to the Bayou, I had the op to drive through the Ozarks on route home to Illinois. Armed with a Mavic II Pro drone…got a great vantage point to view the fall color.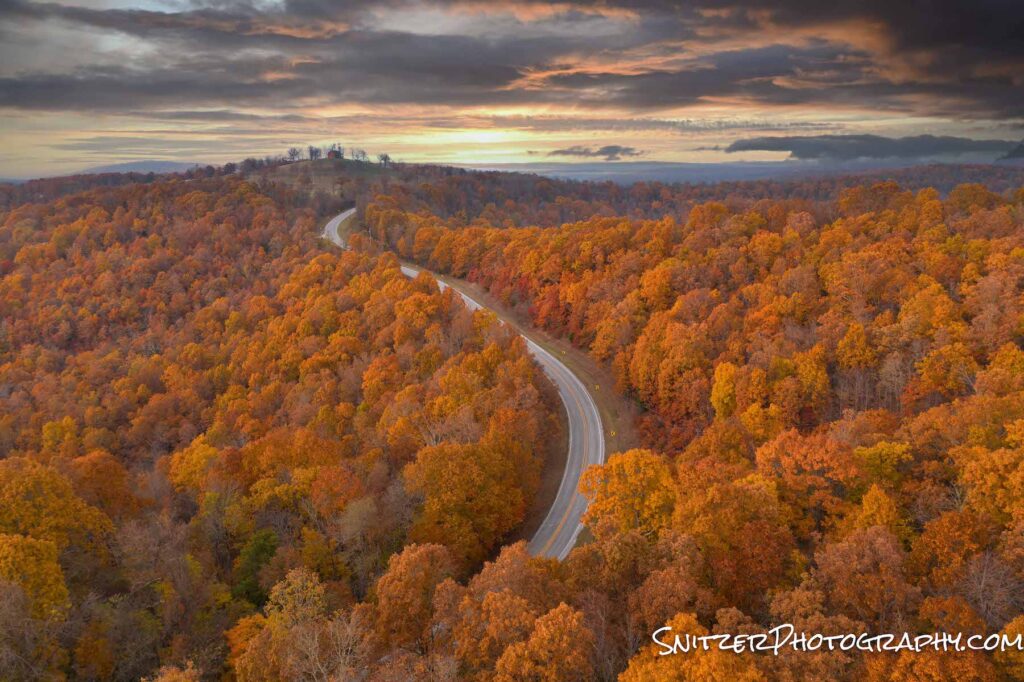
See the rest of my pics by clicking the link: Link to the photo gallery
A final word of caution: Caddo Lake is rapidly getting discovered. Motorized boat rentals which typically come with a guide (lake can be difficult to navigate) are already getting booked up for next fall!. For serious photographers looking for a guided experience, many photo workshops for next fall (2022) are likewise already full. Ergo, plan your trip now!
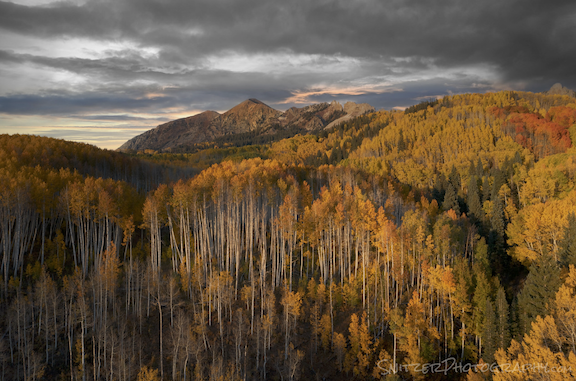
Fall colors explode over the Rockies
Every fall the Colorado Rockies erupt with bright colors, making late Sept & early October prime viewing. It’s hard to pin down the exact week for peak color in advance as the previous winter’s snowfall, rain and fall temps all impact when/how the leaves turn color.
Three primary ecosystems produce the amazing light show. Large groves of Aspen trees turn yellow, with Cottonwoods typically morphing into an orange or bright red. Bushes and ground covers often can create a yellow, orange or dark red carpet which enhances the foliage display.
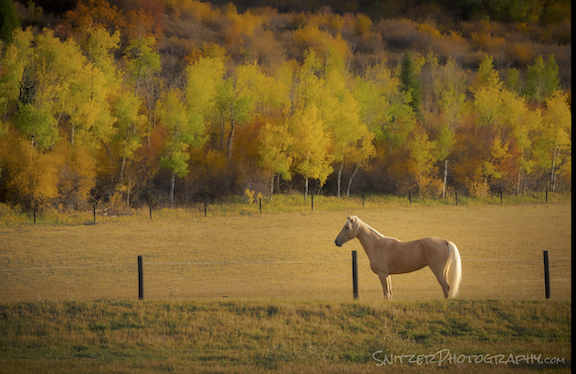
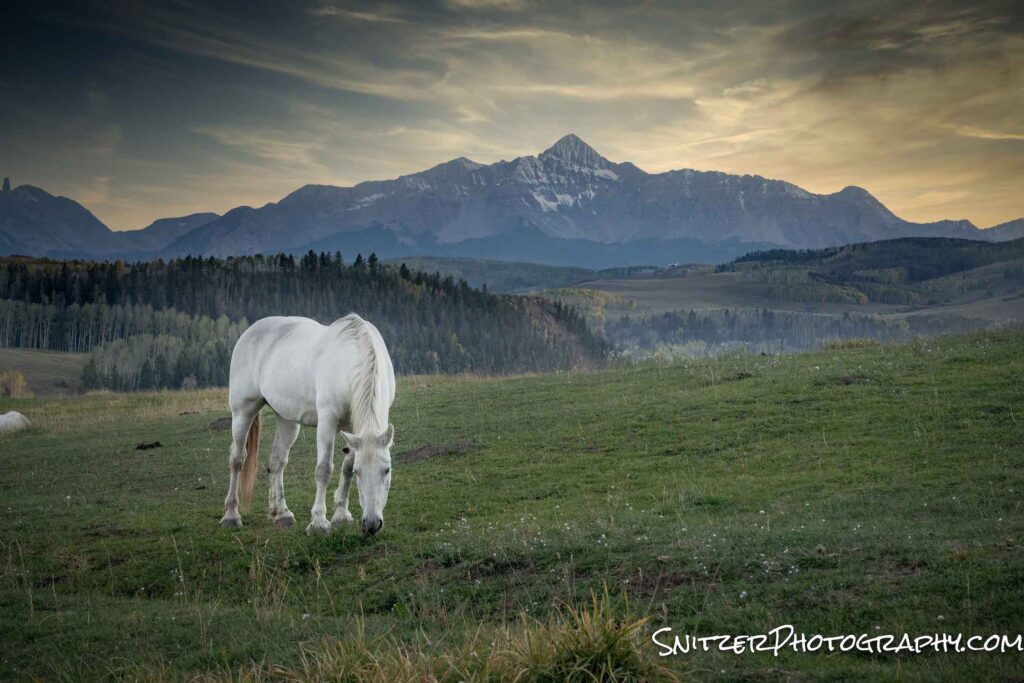
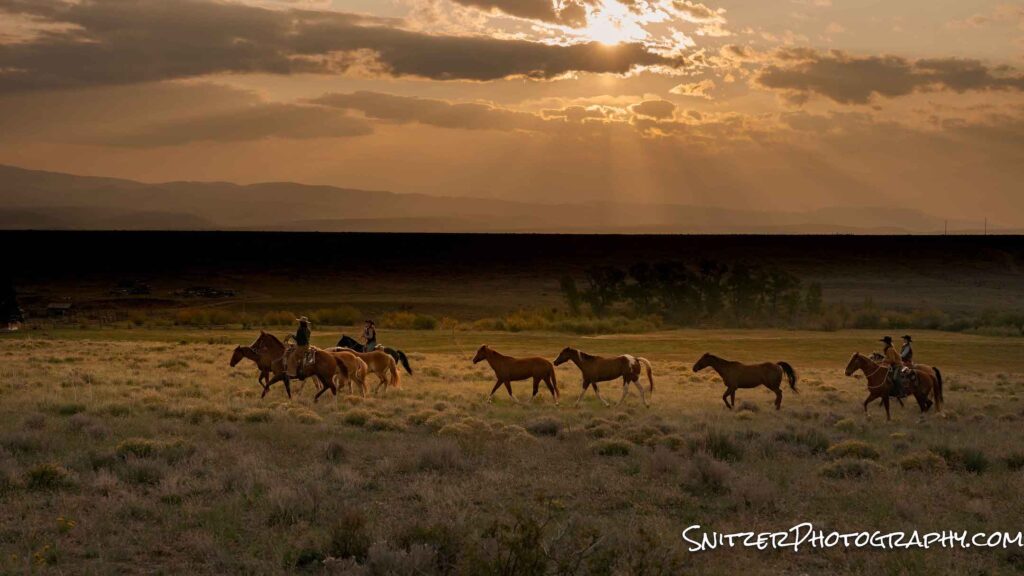
We started our travels in Steamboat Colo. The ski area is surrounded by hundreds of farms and there are great ops to grab photos of horses, cattle, and such.
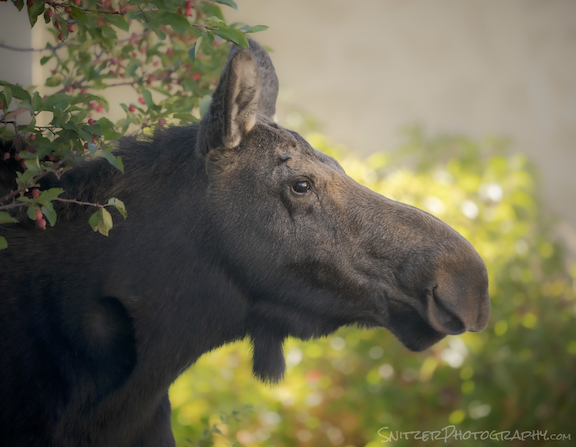
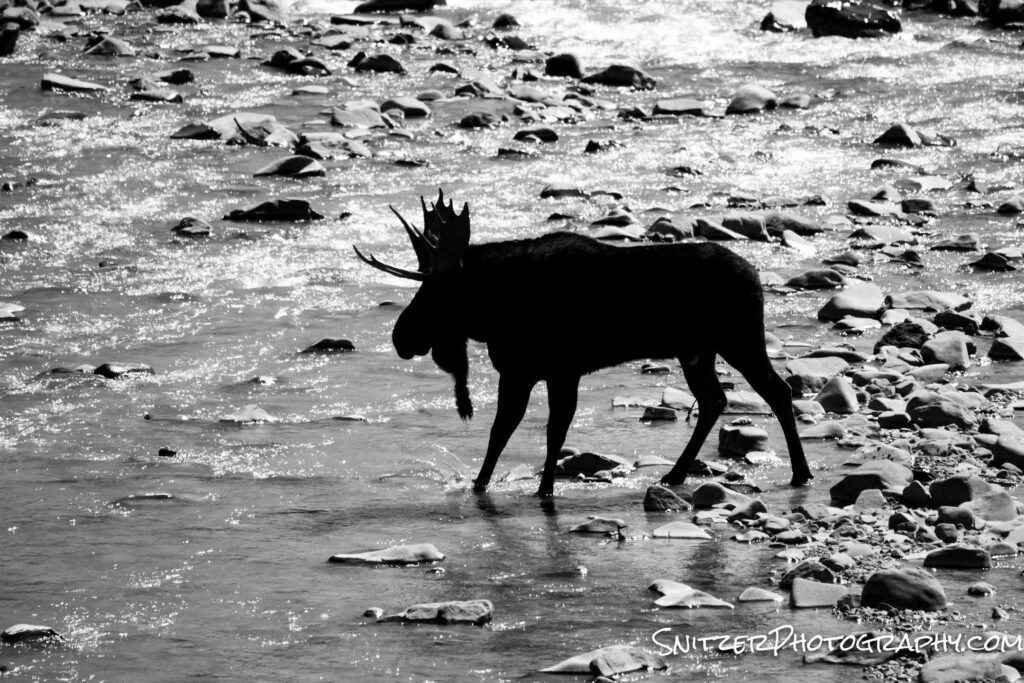
Speaking of animals, Bullwinkle here was not photographed in the wild. The photo was taken in the backyard of our Steamboat townhome!
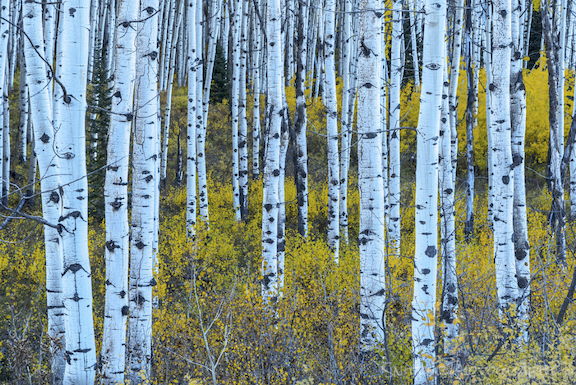
Numerous hikes in the area feature Aspens against the background of changing underbrush.
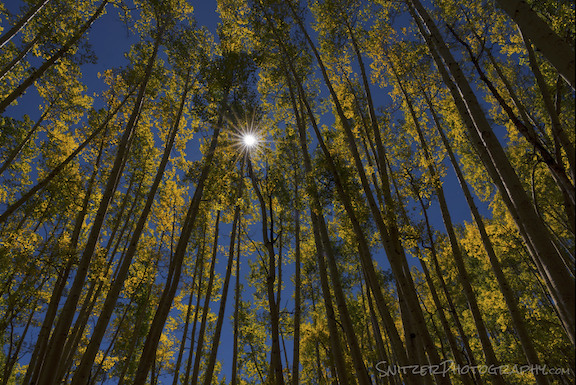
BTW, a clear sky provides a great op to produce star stars. For our photos buffs, the trick is to reduce your aperture to F22 and position the sun so it’s just peaking around a stationary object (like these trees).
My hands-down fav place to photograph in Steamboat during fall is the top of Rabbit Ears Pass. The photo below was taken with the help of a Mavic II Pro drone. I’m finding that drone photography is a game-changer. Aeriel photography allows the capture of views that were impossible before (unless you rented a chopper or fixed-wing aircraft).
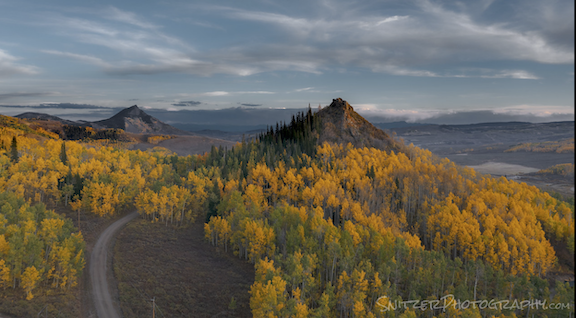
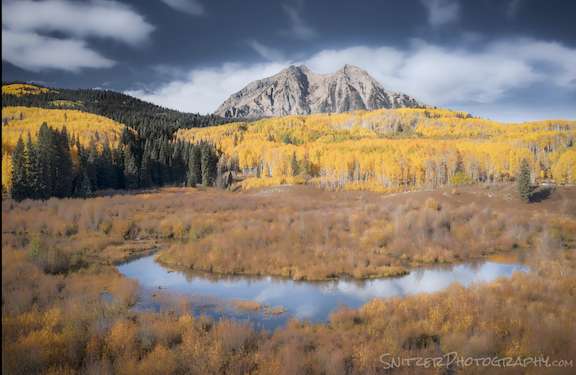
This year, for the first time, I decided to explore fall color in Crested Butte. The area is home to some of the largest Aspen groves in the US. Ground zero for viewing is the dirt road that rises over Kelber Pass. The best shots were also taken with a drone (often flown one or even two miles away!), which allowed me to position the camera exactly where I wanted it!
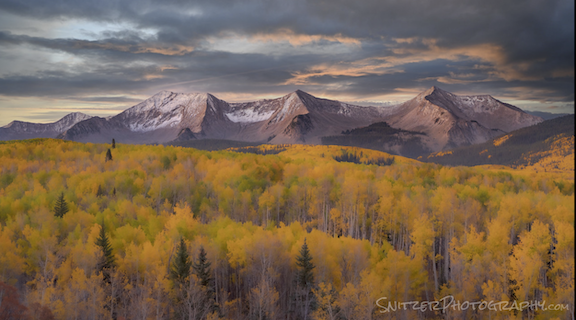
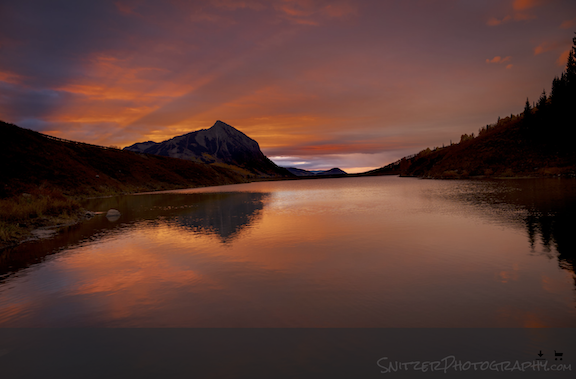
Sometimes, rising before or at sunrise is required to view exceptional color. Both these shots were also taken at Crested Butte.

DON’T STOP NOW. CLICK THE LINK TO SEE MORE PHOTOS!! Link to more PHOTOS!
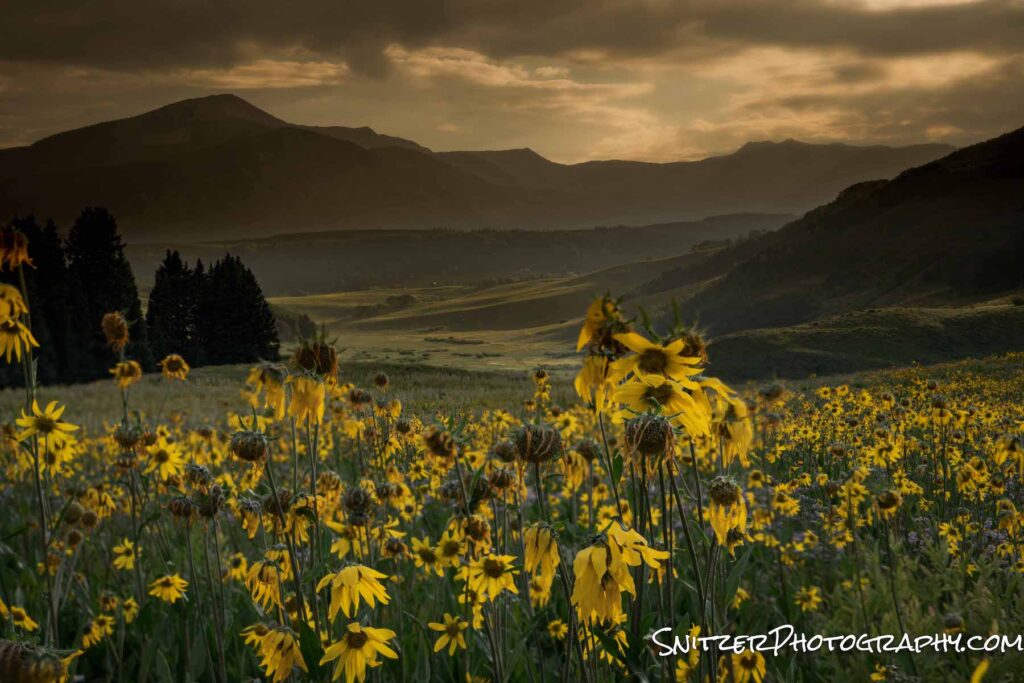
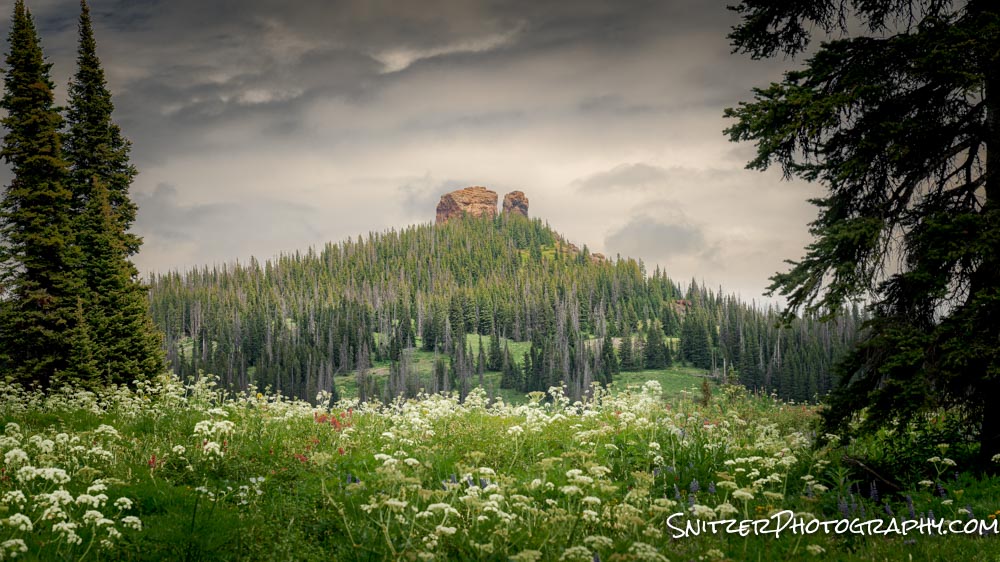
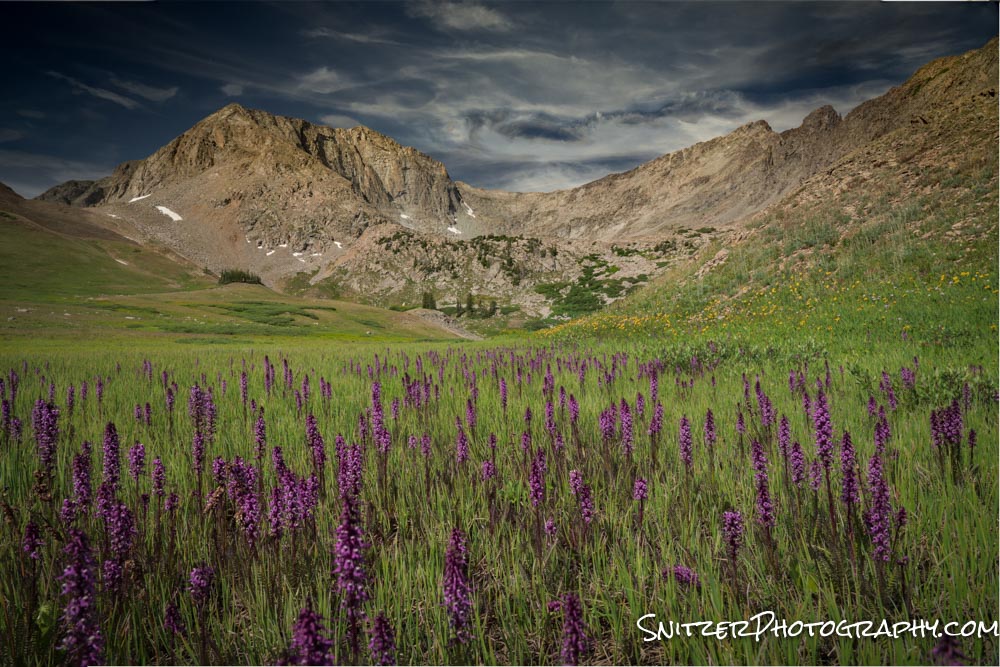
Wildflower Explosion in Colo’s Rockies
Each summer, the upper elevations of Colorado’s Rocky Mountains come alive with spectacular wildflowers. The exact timing is dependant on the previous winter’s snowmelt and Spring rains. Generally speaking mid to late July provides a 2-3 week window of bomber viewing.
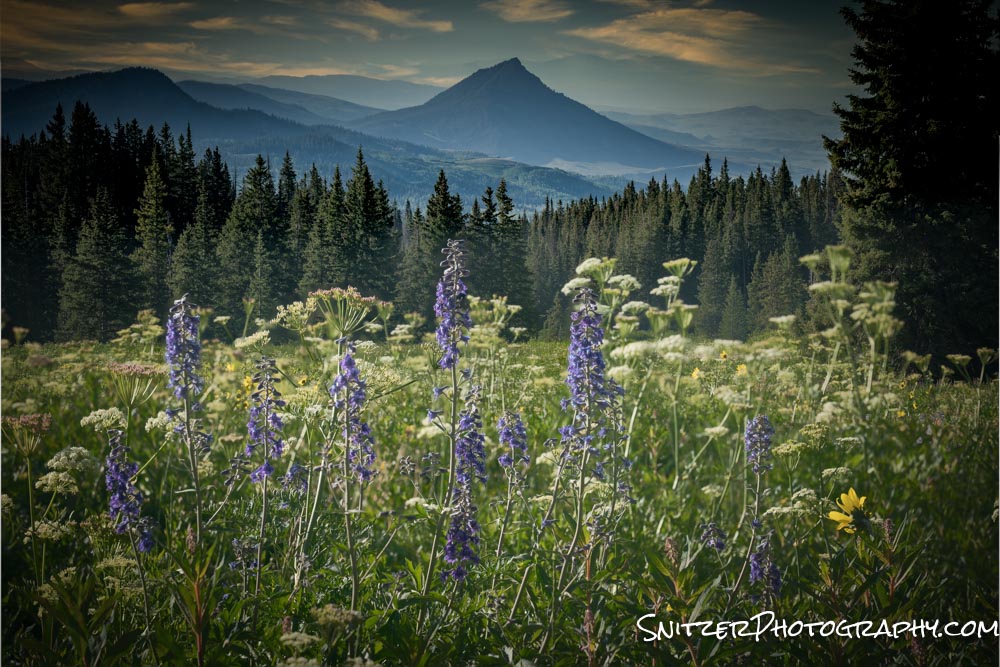
The images below come from our home base in Steamboat Springs, Colo. My favorite viewing spot is the trail up to Rabbit Ears. And my favorite time? Err…20 minutes before dawn (aka 5 am). If you want to catch the best light, be prepared to drill it early.
On route up the trail.
The first wildflower meadow about 20 minutes into the hike.
Rabbit Ears in full glory!
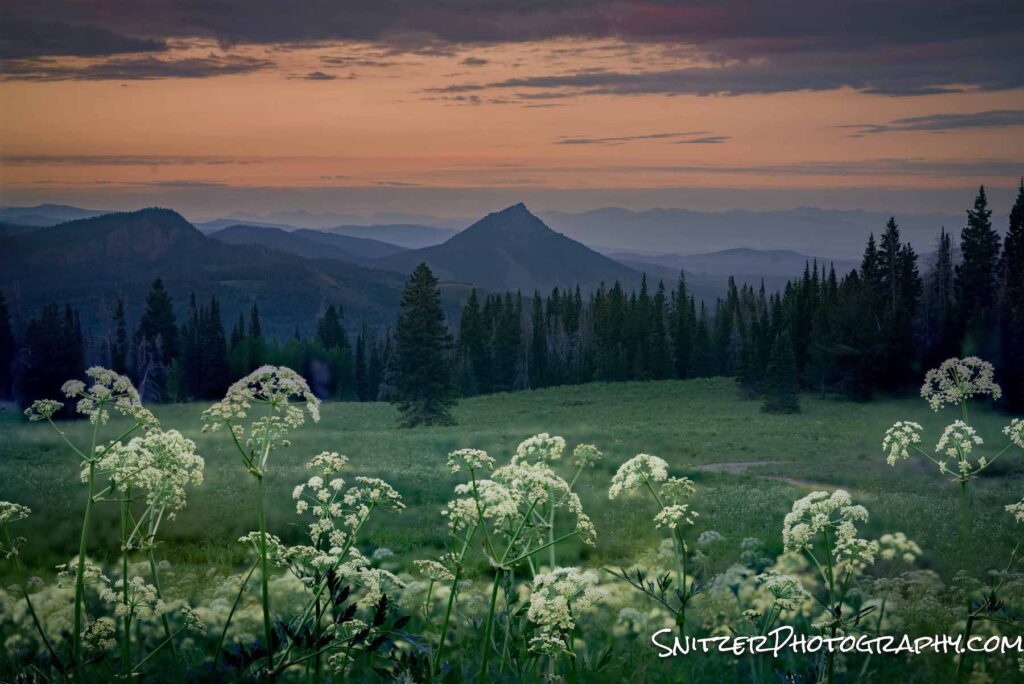
Let’s not forget the Flattops Wilderness area, a 50 minute drive Southwest of town.
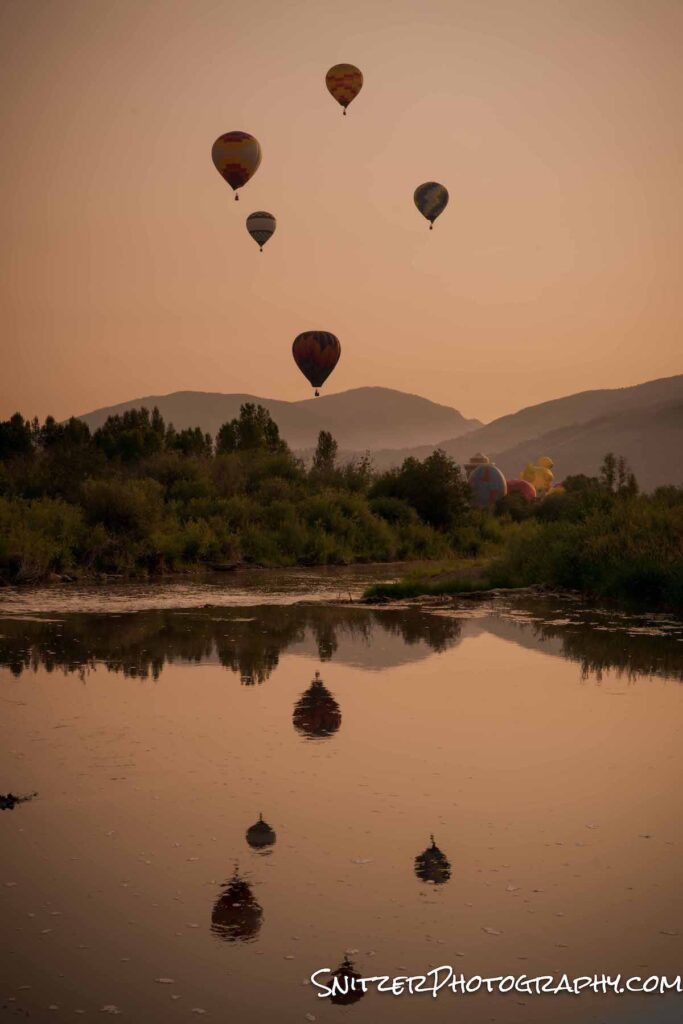
July is also the time to catch Steamboat’s annual Balloon Rodeo .
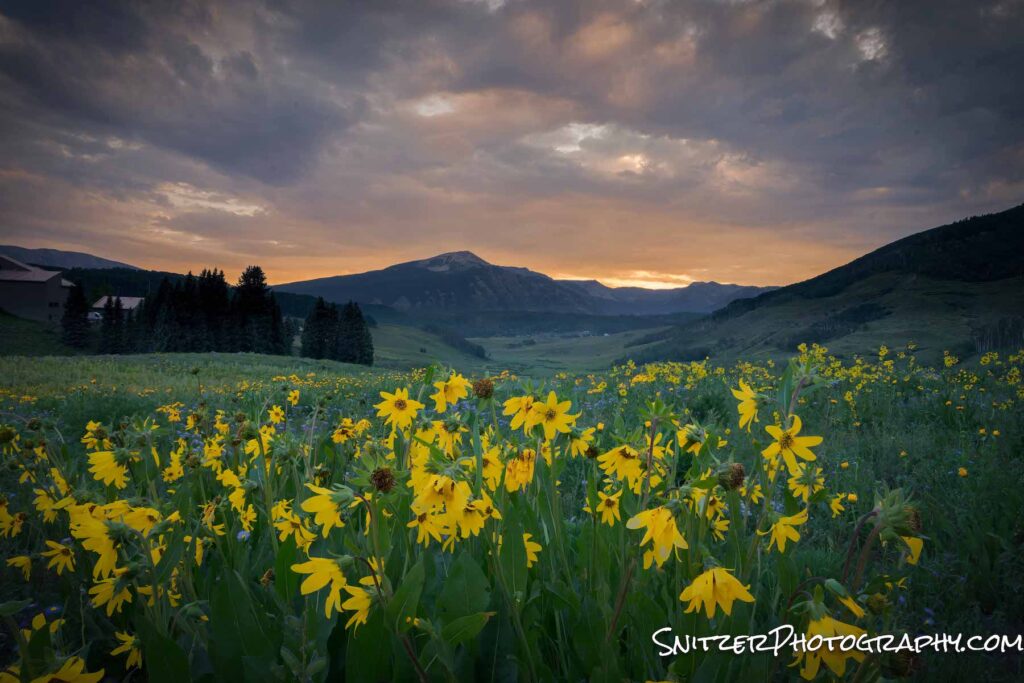
Our next stop is considered by many to be the epicenter of Colo wildflowers; Crested Butte. There are too many awesome spots to mention, but high on my list is the meadow just outside the riding stables.
Telluride doesn’t have the plethoria of wildflowers but still has among the best mountain peaks in the state!
Next July, you owe yourself the op to take advantage of Colo during the bloom! Don’t miss it. More photos! See the link below!
Spring in Yosemite!
Exploring Yosemite in late April provides blooming wildflowers and waterfalls running at full power! It also means smaller crowds, especially if you go mid-week (highly recommended).
Combining those flowers with a breaking storm and the iconic “Tunnel View” is bomber! BTW, for our photo buffs: I captured these images using a technique called “photo stacking”. I take multiple photos (one focusing close up on the flowers, then a second focusing on the mountains in the background) and combine them digitally into one perfect sharp image (Photoshop).

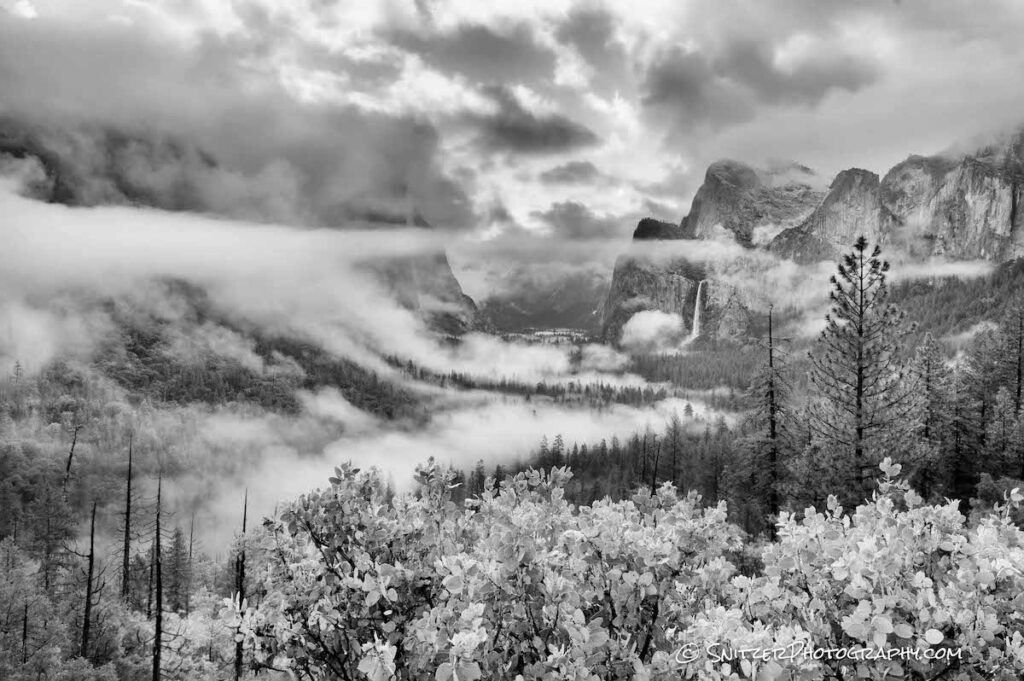
“Valley View” is another fav vantage point in the park.
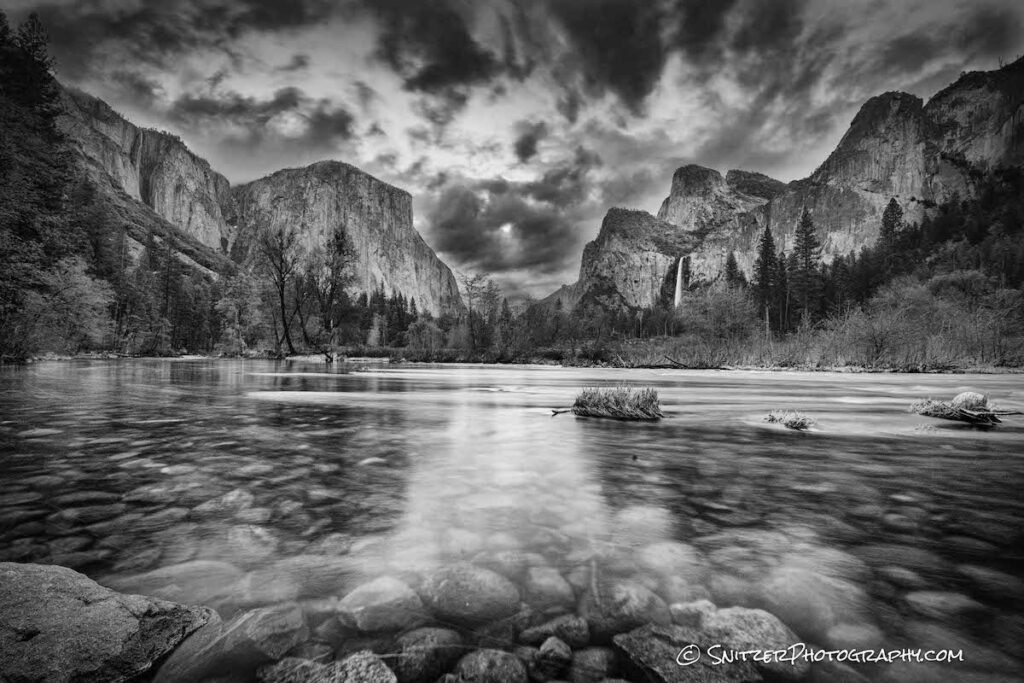
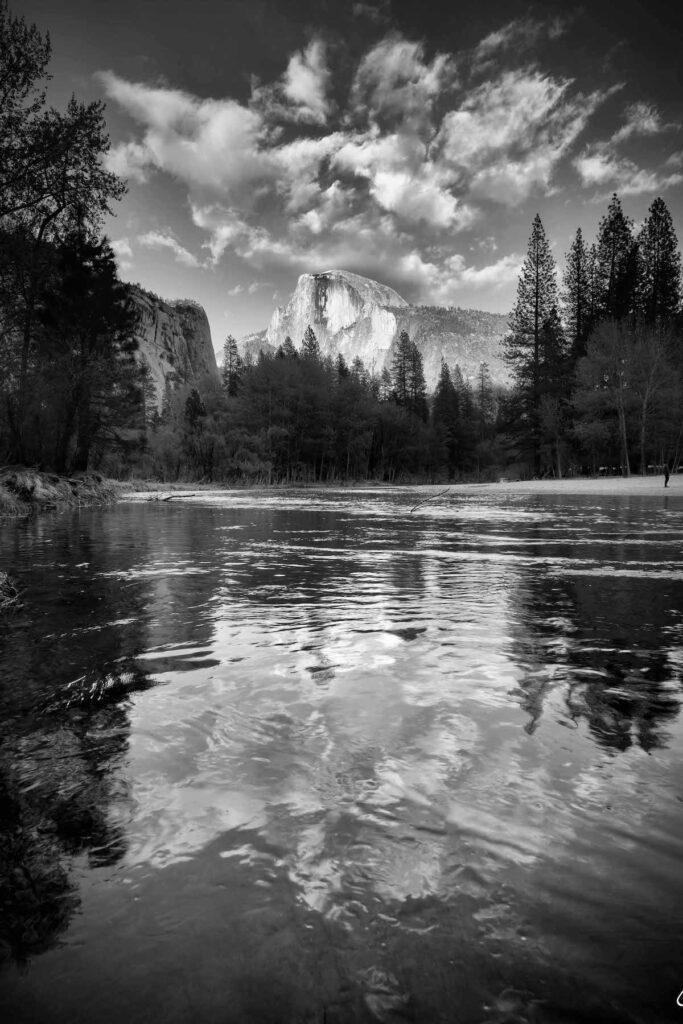
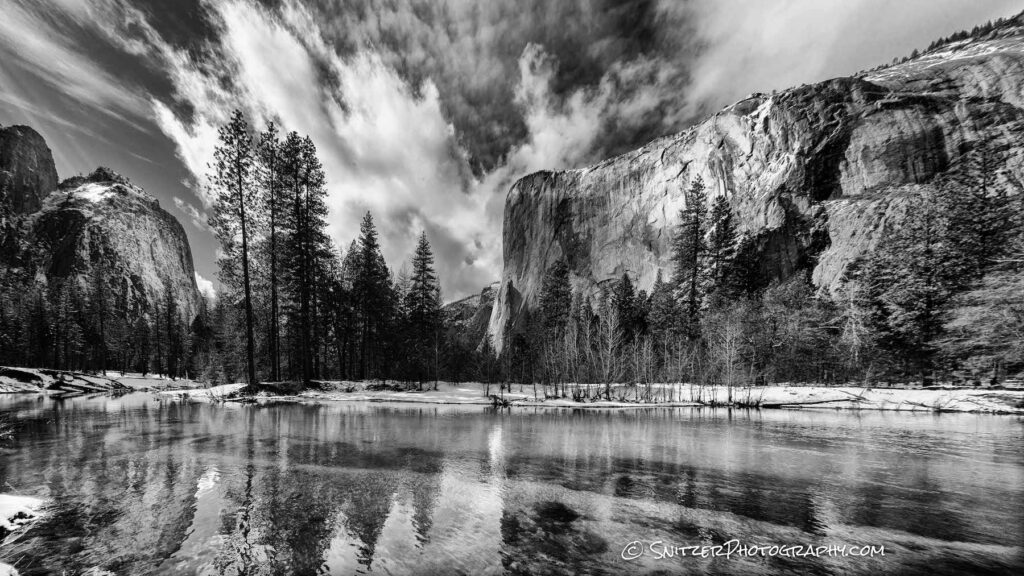
Half Dome (below) along with El Capitan (2nd below, taken on an earlier trip) are the two most well-known landmarks in the park.
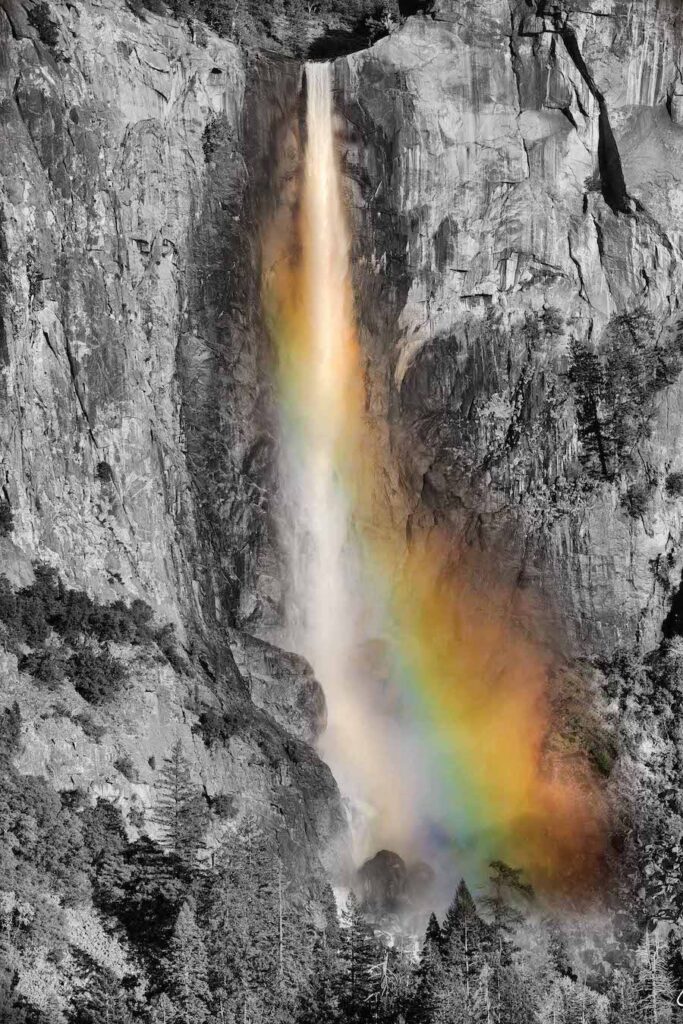
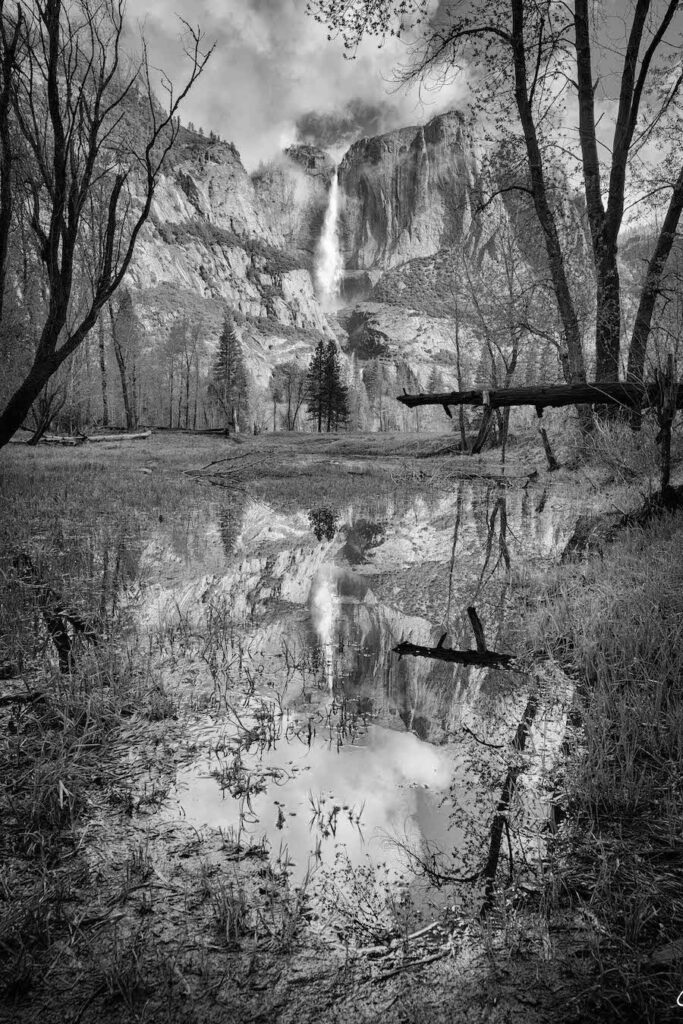
The park’s two most photographed waterfalls are Bridalveil (shown framed by a rainbow below) and Yosemite which drops over 2,400 ft. Click photo or link at the bottom for high res versions of these images (& to see the entire gallery).
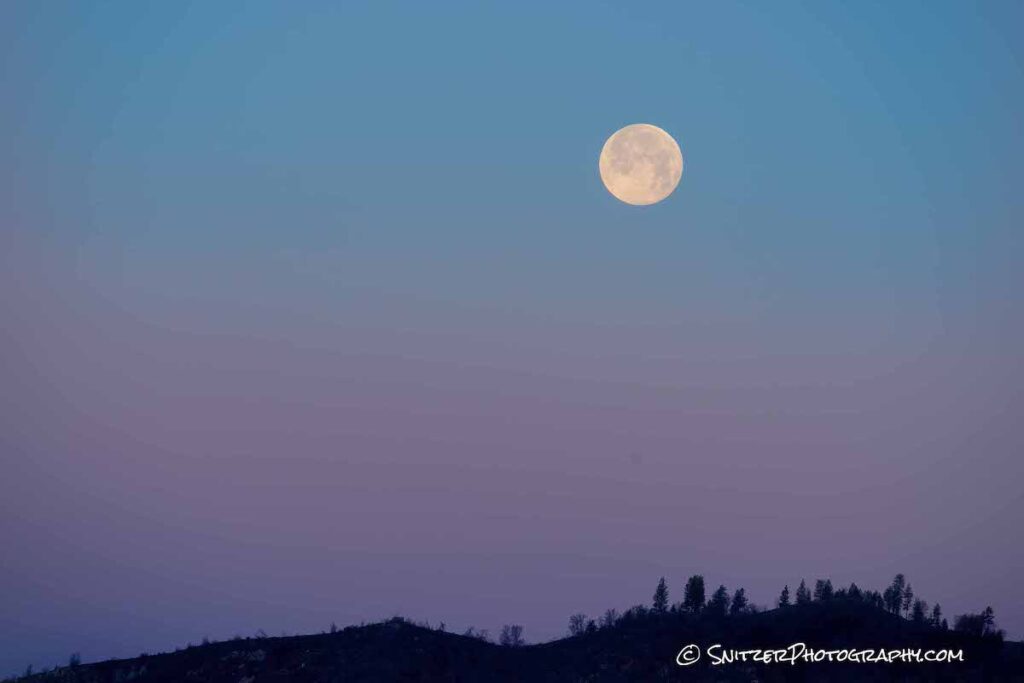
The full moon shown below was captured about 10 minutes before sunrise. The alpenglow lighting produces some amazing colors, yes? Light at a low angle (pre-dawn or post-sunset) reflects off particles in the atmosphere to create this phenom. Click photo for high res image & full gallery.
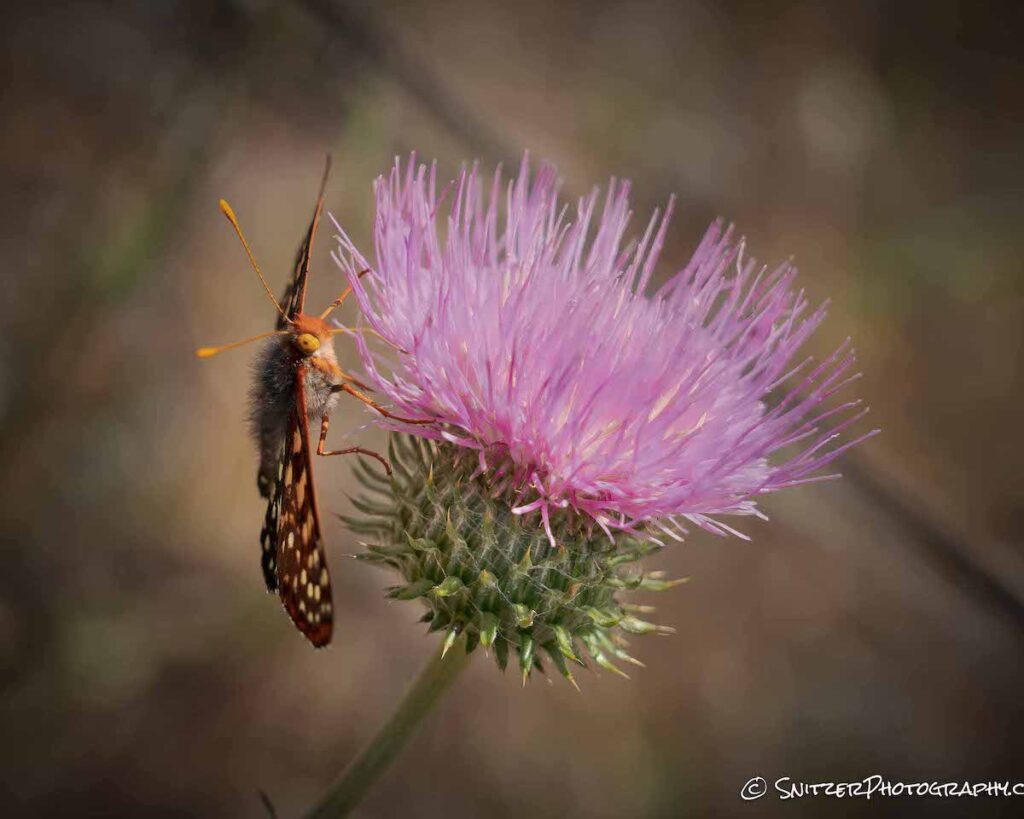
The Hites Cove Trail, approx 10 miles outside the park features a boatload of poppies and an airforce of colorful butterflies.
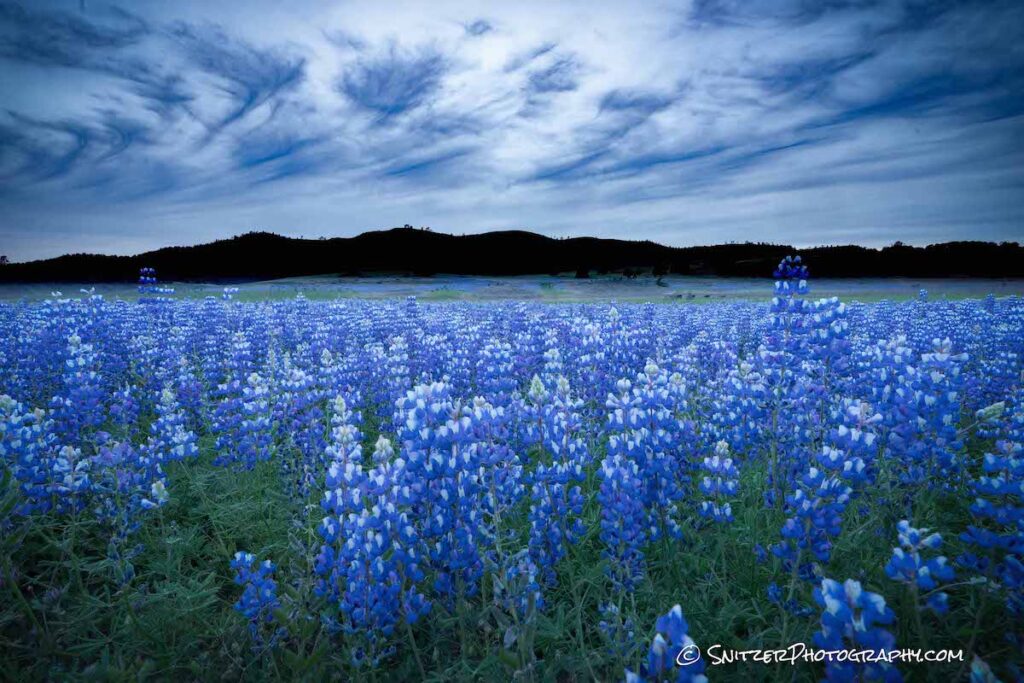
What kind of flowers below? Lupine!
Click the link below to see more photos(see them in high resolution)! https://www.snitzerphotos.com/Nature-Travel/Galleries/Yosemite-2021/n-L2MW9h/
Snitz hits Death Valley & points West!
I just returned from my first trip to Death Valley. I also had the op to visit some bomber places on my drive out there!
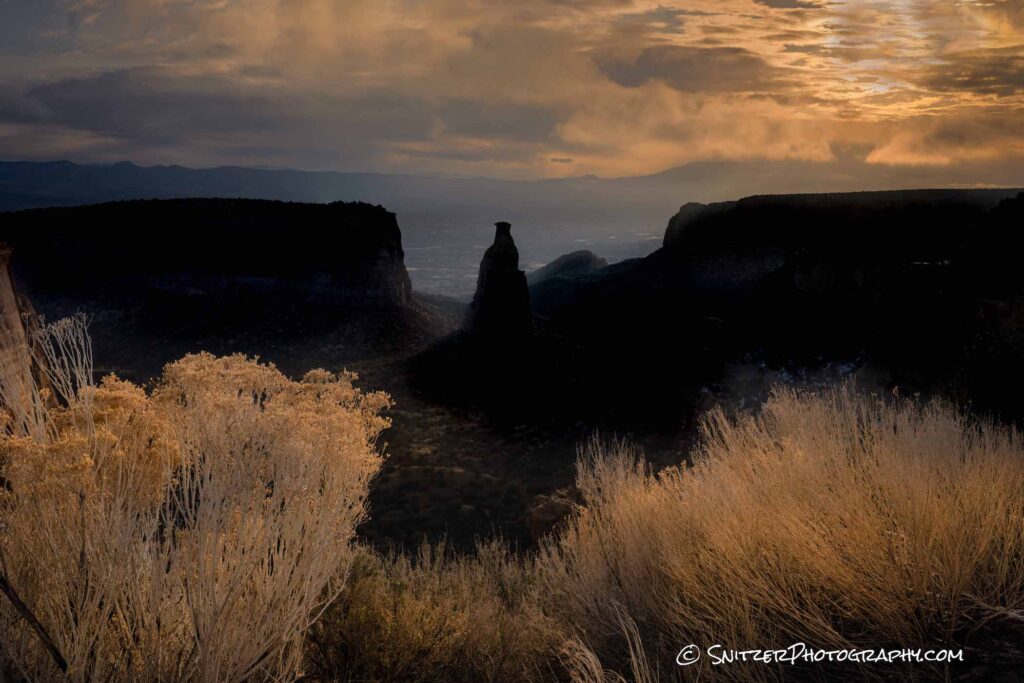
The trip began in Steamboat Springs, Colo. About three hours Southwest lies the Colorado National Monument, located in Fruita. The 23-mile scenic drive has a series of spectacular vistas. Absolutely worth checking out as you venture West on I70.
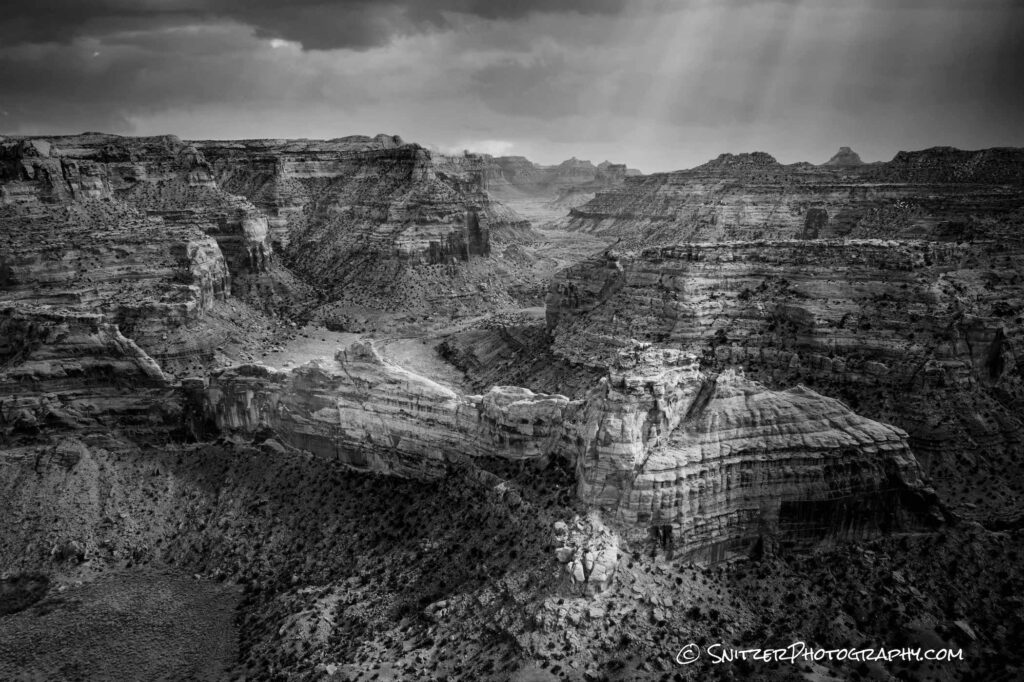
The following day, I took some remote jeep roads into the mountains to explore the San Rafael Swell. Accessed off I70 this area is known for an amazing overlook referred to as “The Wedge”. The image below was taken immediately after a breaking snowstorm with a drone. The best part of the canyon can only be shot effectively remotely. I flew about 1 mile into the canyon to get this perspective.
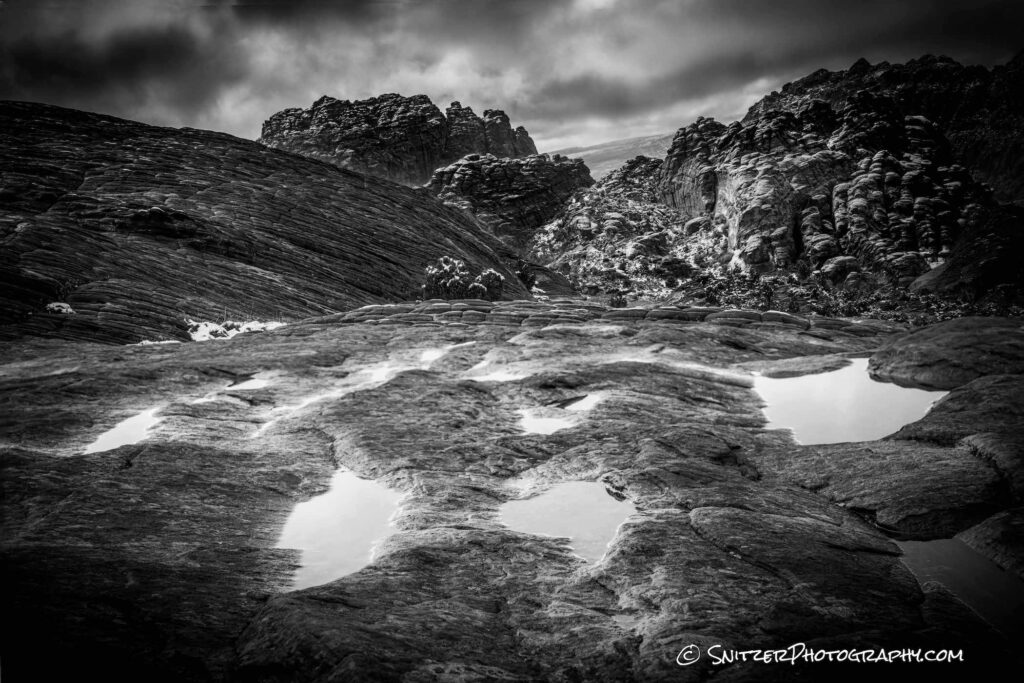
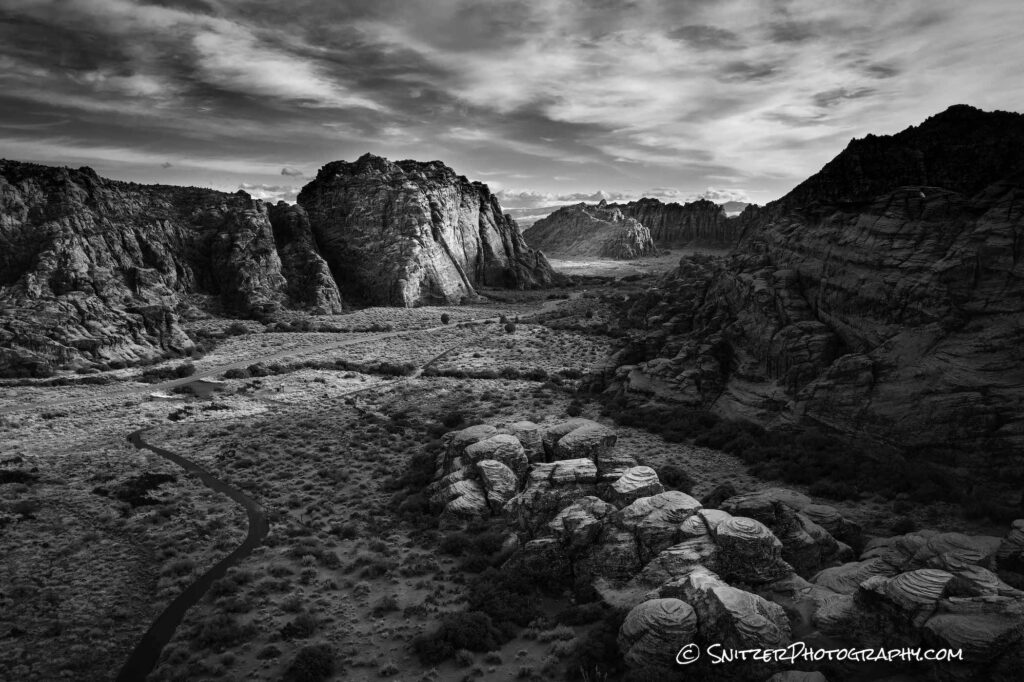
Day three (& another 3 hours West) lies the town of St George, Utah, and Snow Canyon (often referred to as the little sister of Zion Nat Park). This uncrowded State Park features interesting pools of water that form immediately after a good rain or snowstorm.
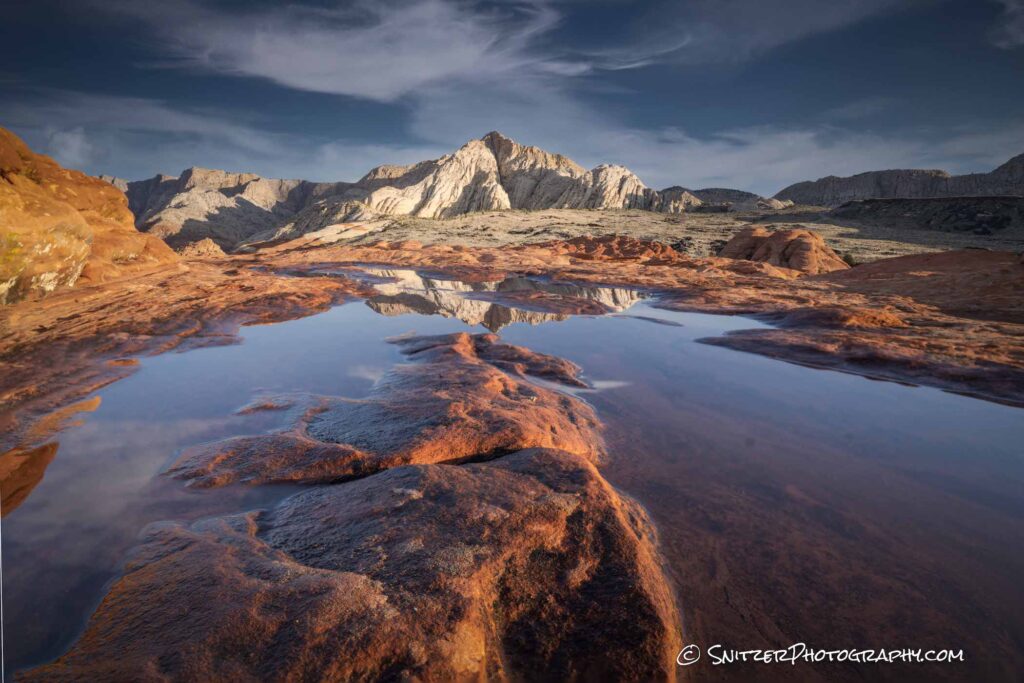
The image below was taken with a drone, looking North.
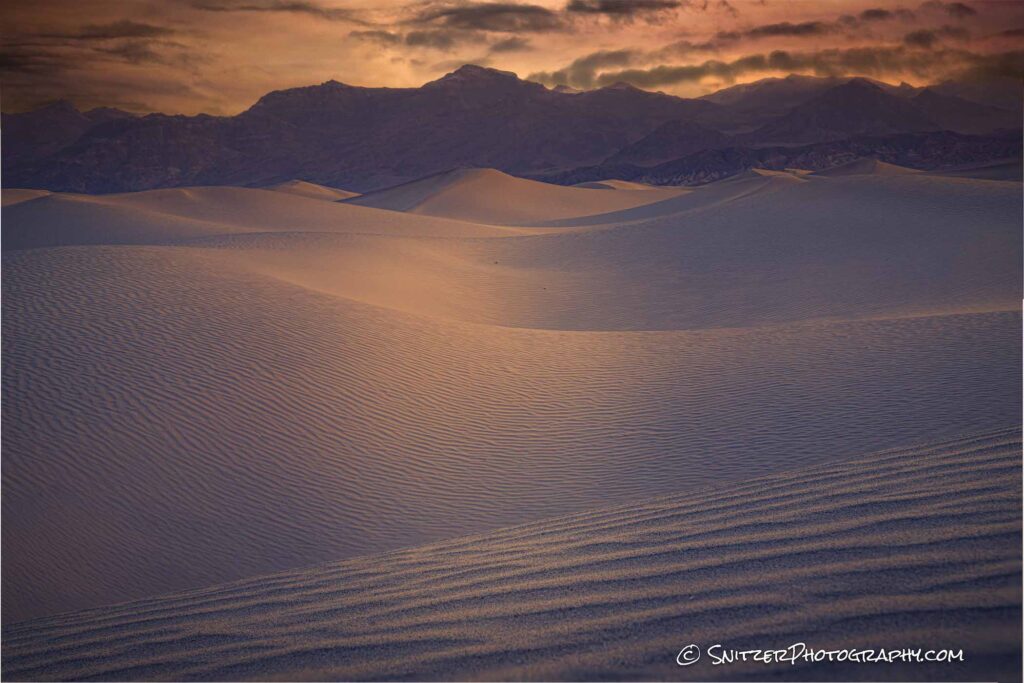
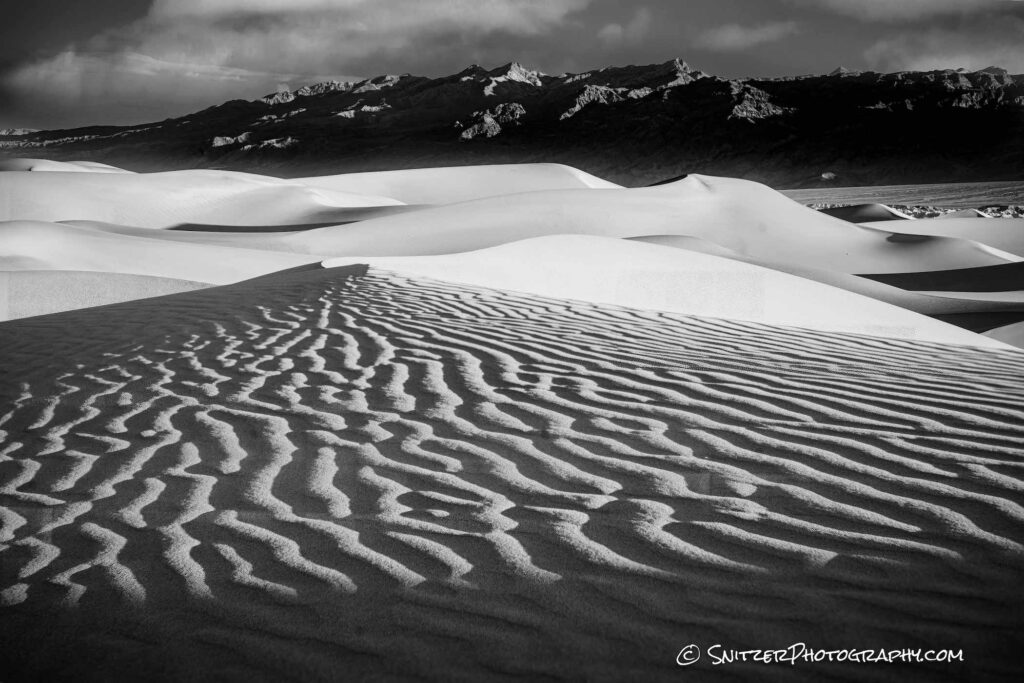
And finally, the main event: Death Valley. There are certainly some amazing sand dunes:
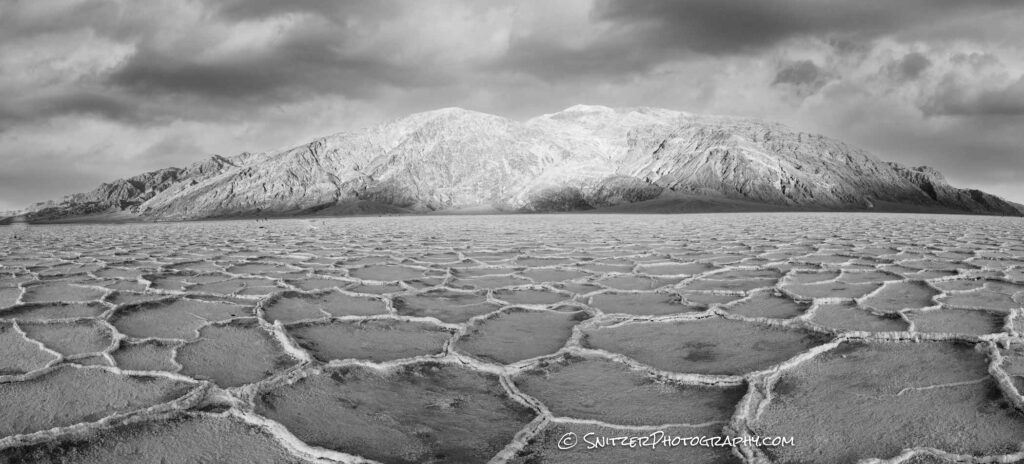
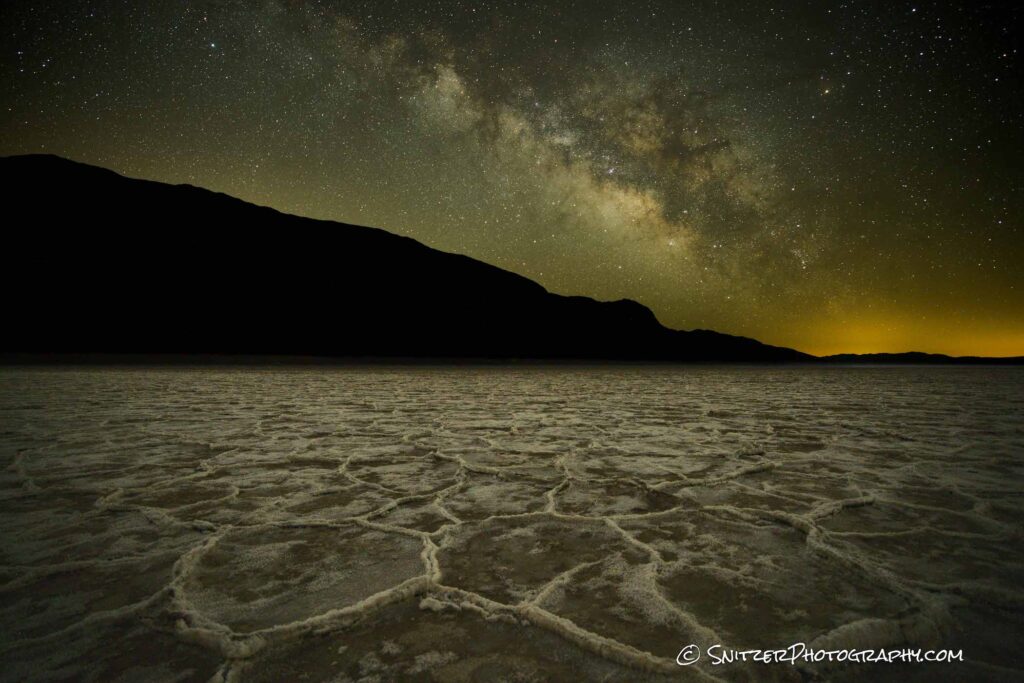
But also some otherworldly landscapes, like Badwater Basin (shown at dusk and under the Milky Way below).
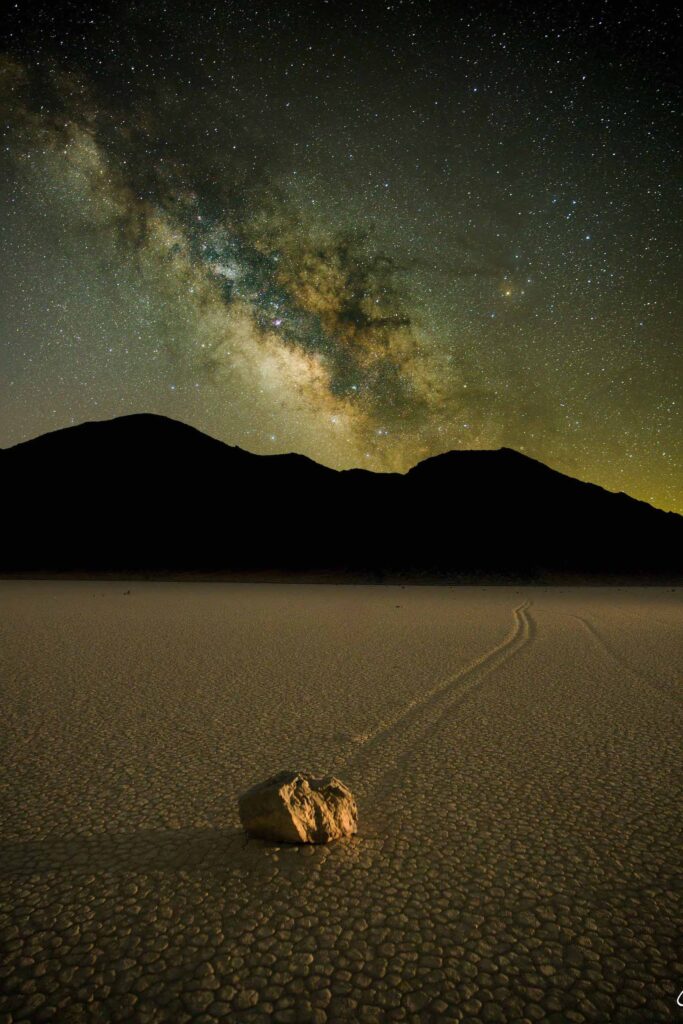
Talk about unusual, “Race Track” (NW corner of the park) is known for unique rocks that appear to be walking along the clay desert floor. In reality, ice forming under these bad boys, along with fierce winter winds actually cause the movement. To grab this shot under the Milky Way, a buddy and myself ventured out on the 2-hour drive to the destination at 1 am! Then we walked about 2/3rds of a mile to find a suitable rock. BAM.
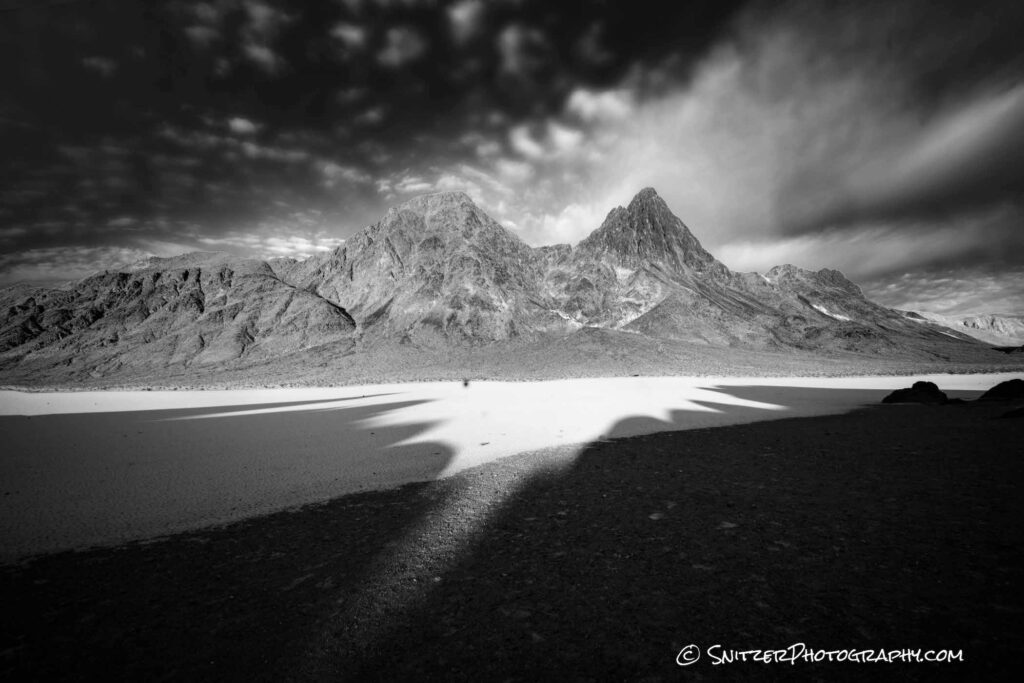
At sunrise, a few minutes down the exit road, we were greeted to this crazy image. The jagged foothills to our east formed the unusual shadows below.
Want to see more! Click the link for more images (full Death Valley Gallery): https://www.snitzerphotos.com/Nature-Travel/Galleries/Death-Valley-2021/n-Z2KGRD/
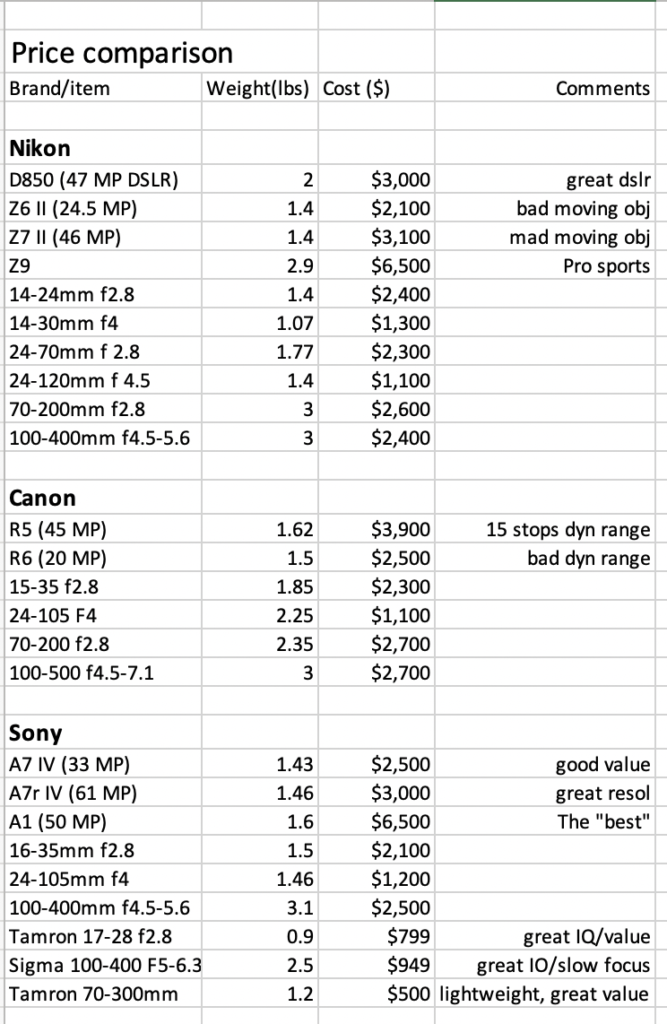
Best full frame camera?
Ok folks, I’m going to keep this short and sweet! Let’s cut to the important facts.
Preamble: I’ve shot extensively with Canon, Nikon and Sony gear (not sponsored by any of the three). Ergo, I know these manufacturers & have no particular horse in the game.
DSLR History
For several decades Canon and Nikon have been duking it out, with Nikon firmly gaining the upper hand. While each has similar deep collections of quality glass, Nikon cameras in general offer approx. 15 stops of dynamic range with Canon only 12-13. For most nature photographers, dynamic range is critically important.
Additionally, Nikon’s consumer flagship DSLR the D850 has been a great sports/birding camera with the ability to expertly focus/track moving objects. Couple that with a fast 7/sec frame rate and this camera can do it all. Canon’s equivalent the 5D Mk IV could not focus lock/track sufficiently well and has a painfully slow frame rate (with a buffer that almost immediately bogs down).
Why are people moving to mirrorless?
- They are smaller & lighter. The average full-frame mirrorless is ½ the size of the D850 and approx. 2/3 the weight.
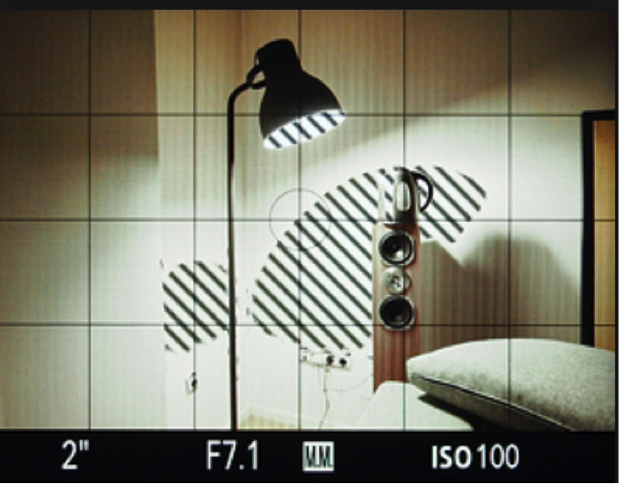
- They offer digital viewfinders that allow on-screen histograms & exposure warning indicators(ex. zebra lines below show overexposure). For advanced manual shooters, getting the exposure dialed in becomes faster/easier.
- They offer focus peaking, a feature that allows you to quickly determine which portion of the photo is in focus as you modify the aperture setting. Ex. rider on right is shown highlighted in red (in focus). Note: It’s close, not perfect…you still need to double-check.

- No need to bother with mirror lock-up with long exposures (no mirror!).
- Ditch your reading glasses. The digital viewfinder can be adjusted to your prescription.
- They offer better lenses that are lighter, shorter, and most importantly are generally sharper than legacy DSLR glass. BTW: You can purchase ($350-500) an adapter to use your old lenses on mirrorless cameras. Not a great option…focus performance for moving objects is compromised, longer heavier. Ergo, if you’re spending the money to go mirrorless eventually you’re going to want the better mirrorless glass. Be prepared to spend more money or stay away.
Nikon’s mirrorless Z6 II, Z7 II & new Z9 options
- At 25MP for the Z6 and 46 MP for the Z7 & Z9 these cameras offer good resolution and the same dynamic range as the older D850.
- They offer great, in viewfinder, histograms, exposure warning and focus peaking.
- The Z6 & Z7 having just received their 3rd software update still can’t lock on/track moving objects well. The new flagship Z9, on the other hand, has world-class focus performance & is a fantastic choice for sports shooters. Note: The Z9 is a large heavy camera. Twice the size and weight of the other mirrorless choices mentioned here (not cheap at $5,500).
- The Z6 & Z7 II can shoot a respectable 12 pics/sec when in tracking mode whereas the Z9 blazes along at 20 FPS (in RAW mode) and 30 FPS (RAW compressed).
- Improving lens selection. As I mentioned, your old Nikon DSLR glass is not nearly as sharp as new mirrorless lenses and won’t fit the Z series camera without using an adapter that adds 1 inch to the lens length. So much for a smaller camera. The selection of Nikon mirrorless glass is somewhat limited at the moment but rapidly expanding. Some of these lenses are great, some are lacking in IQ. Ergo, lens selection requires careful study (buyer beware). Nikon currently refuses to work with third-party lens manufacturers on mirrorless options. It’s a Nikon lens or nothing.
- Only one card slot for the Z6 & Z7. You can’t back up your work on a duplicate card!
Canon’s mirrorless R series option
- The new R5 (45 MP) and R6 (20MP) offer the same histogram, exposure warning, and focus peaking as Nikon.
- Unlike the Nikon however, these cameras offer outstanding focus lock/tracking and a good frame rate.
- Limited but rapidly growing lens selection. The lenses are expensive (most $2,000+) but tack sharp. You have the option of using one of two adapters for older Canon lenses.
- The R5 is the first Canon camera with excellent dynamic range at 15 stops (matching the Sony and Nikon mirrorless choice). The R6 sadly has only 13.5 stops. The R5 is also very ISO invariant (like it’s Sony and Nikon competition) able to recover almost 5 stops of under-exposed content. Not so for the R6 which can recover approx half that.
- The R5 is a do it all camera that has no weaknesses. The only rub is that it’s expensive ($3,900) and requires expensive Canon mirrorless lenses.
- Note. Canon just launched the R3 a sport-centric pro sports camera. It’s the Canon equivalent of the Nikon Z9 (similarly large/heavy) at $6,000.
Sony A7 & A1 series
- The company has a 7-year head start on mirrorless technology over Nikon/Canon.
- The A7r IV (orig $3,500, now avail $3,000) offers a whopping 61 MP, 15 stops of dynamic range and weather sealing equivalent to the D850. The earlier generation A7r III ($2,800 @ 43MP) , A7 III ($2,000 @ 25 MP) & new A7 IV ($2,500 @33 MP) offer strong lower-priced options. Of those the A7IV offers the best combination of good resolution, fast focus, and great image tracking (see discussion below for further detail).
- For sports/wildlife/birding pros: Sony has launched new Sony Alpha 1. 50mp, 30 frames/sec. The world’s best focus tracking system. @$6,500 it has few peers (only the Canon R3 and Nikon Z9).
- Great lens selection and quality. Unlike Nikon & Canon Sony lens also offer a programmable lens button that allows side button focusing, a game-changer for sports or bird shooters. Ergo, use your left hand to focus on moving objects, use your right to depress the shutter. Improved my hit ratio 100%.
- Very strong third-party lens options. Although the Sony 16-35 F2.8 is unsurpassed in IQ, the Tamron 17-28mm F2.8 is excellent as well and slightly sharper and lighter (14 oz vs 1.5 lbs) than the more expensive Sony 16-35mm F4. Sigma’s 100-400 F5-6.3 provides similar IQ as the 2.5X more expensive Sony F4.5-5.6 100-400. It also has a programable side button & is slightly lighter (2.5 vs 3.1 lbs). .Pros and serious amateurs may opt for the Sony which has better focus lock/tracking for sports/moving bird photography.The Tamron 70-300 f4.5-6.3 offers a fantastic ultra-light walk-around lens (only $500). Great option for times when you need reach but are on a long hike and need to shed weight
- Battery life: The Sony battery gets 670 shots with the LCD & 530 shots looking thru the EVF. The Canon and Nikon only 320 and 330 thru the EVF. The Canon R3 and Z9 have twice the battery life (equiv to Sony).
- Manual focus option that allows 3/1 magnification of center spot to quickly achieve critical focus. Great tool for focus stacking.
- Word of caution, the on-screen menus aren’t optimal. They could use a little better organization/simplification.
Tale of the tape:
Sony details
- The new A1, A7r IV & A7 IV chief advantages over earlier models include better weather sealing and improved ergonomic grip.
- Which camera to use for sports/in flight birds? The A1 is the clear winner, but at $6,500 it comes with a hefty price tag. While the A7r IV has a fast frame rate, the massive 62 MP file size can quickly fill up the buffer shooting sports. The only realistic option is to switch the camera to APC mode (crop sensor size) and shoot 26MP images. This allows great reach with your glass (1.6 crop factor plus the buffer won’t fill). The other strong choice to use for sports is the A7 IV. With a smaller full-frame sensor (33MP) the camera’s buffer won’t fill up,
- How to set up your A7r III or A7r IV. Don Smith offers some great instructional videos.
- Increasing the viewfinder gain for low light: A great option for focusing in very low light (great for celestial photography). This makes the image so bright you can actually see the Milky Way live on screen! Makes focus peaking a snap.
- Here’s how to use. Activate the manual focus on your lens and focus peaking. Go to the custom key setting in your camera’s menu and under custom button 2, scroll through the menu and select “bright monitoring”…select.
- Then when you have a situation where you need to brighten up your monitor in manual focus mode, just push the C2 button atop your camera to activate Bright Monitoring. Depress the button again to turn off.

Aug 2022 update: Sony has recently released a NEW F4 16-35mm lens. It’s my go to wide angle zoom choice. At less than 1 lbs it’s remarkable lightweight, small and produces fantastic image quality. Link to Sony Lens (B&H photo)
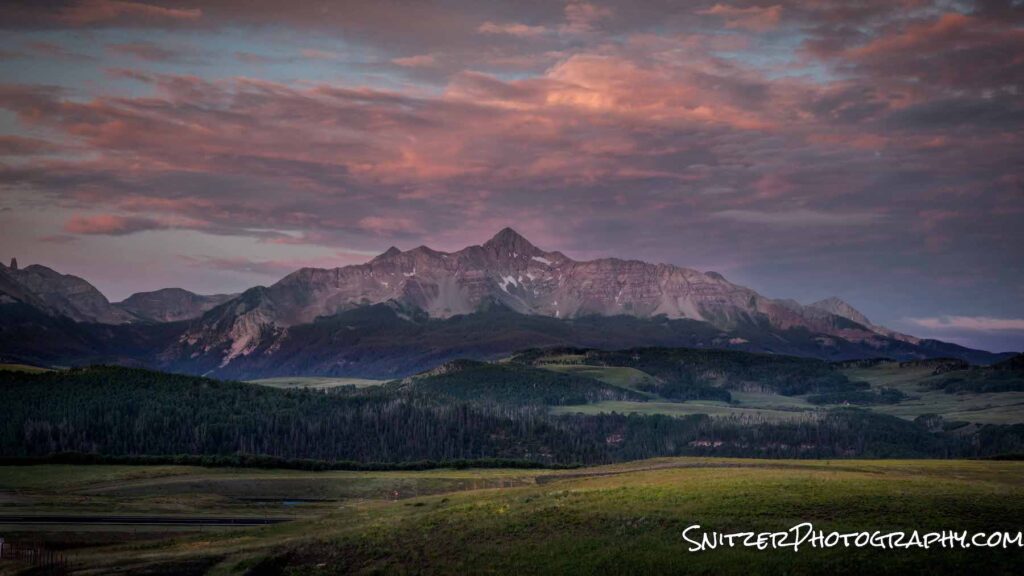
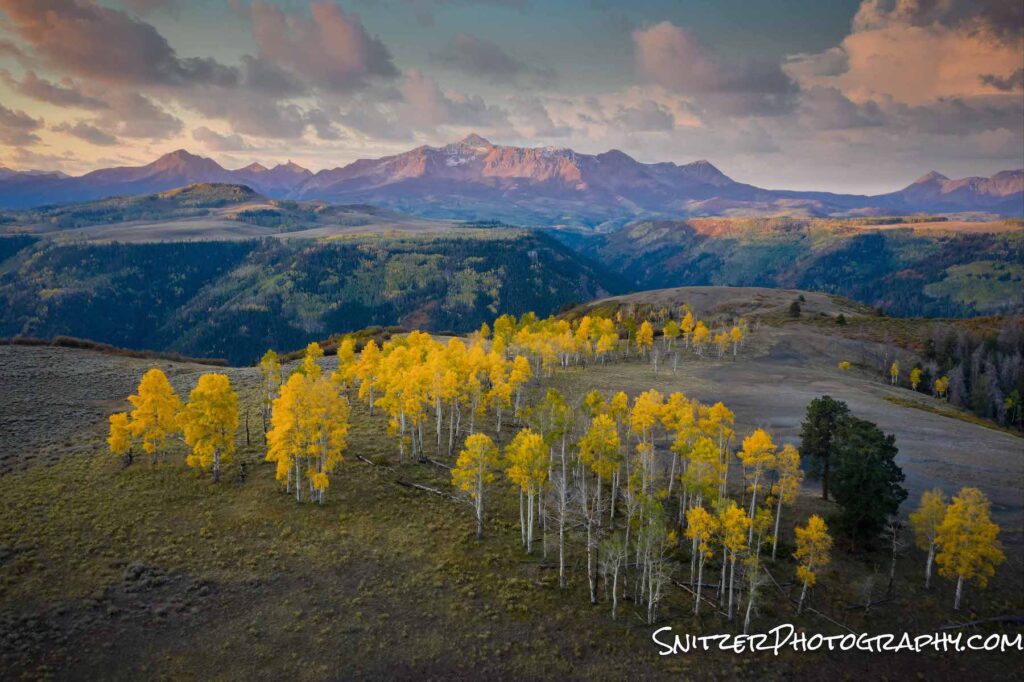
Fall color in the Rockies
The Rockies are usually awash with color in late September, especially in my favorite viewing spot, the San Juans! The towns of Telluride, Ouray, and Ridgeway are great launching pads to view the spectacular scenery.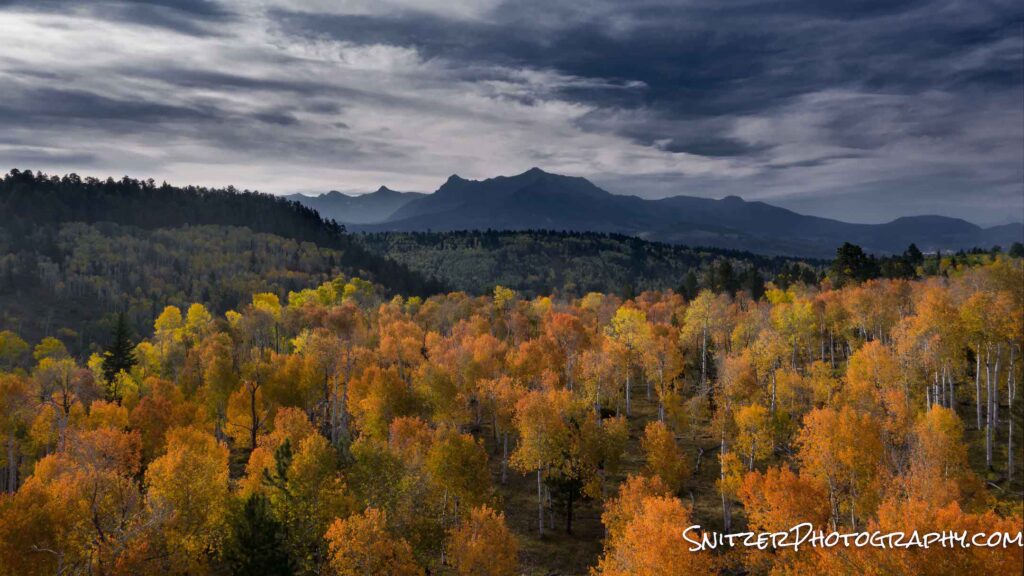
Telluride features the most impressive mountains which can be viewed from what’s often referred to as the San Juan Scenic Byway. There are also some amazing jeep roads, which while hair-raising to drive on, provide unique views. My favorite of the latter is called the Last Dollar Road which connects the town of Telluride to Ridgeway.
A new tool I’m using this year is an aerial drone. This game-changing device allows me to get in shooting positions only a helicopter could previously reach. A bomber vehicle for capturing remote fall colors. The drone can easily grab photos in locations over 2 miles away!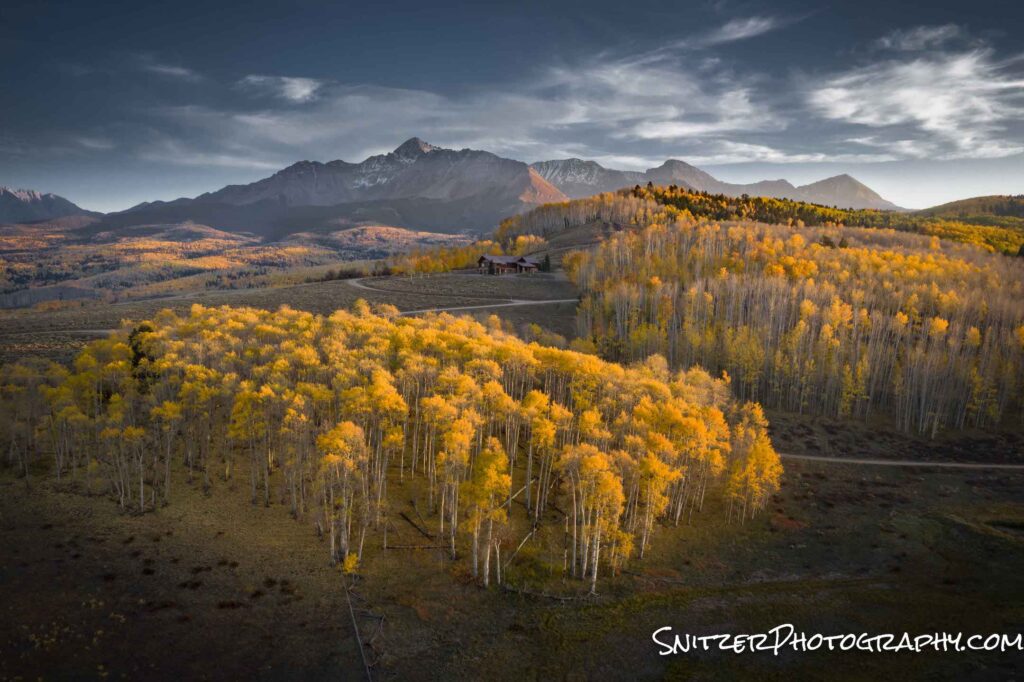
Did I mention the wildlife viewing isn’t half bad either!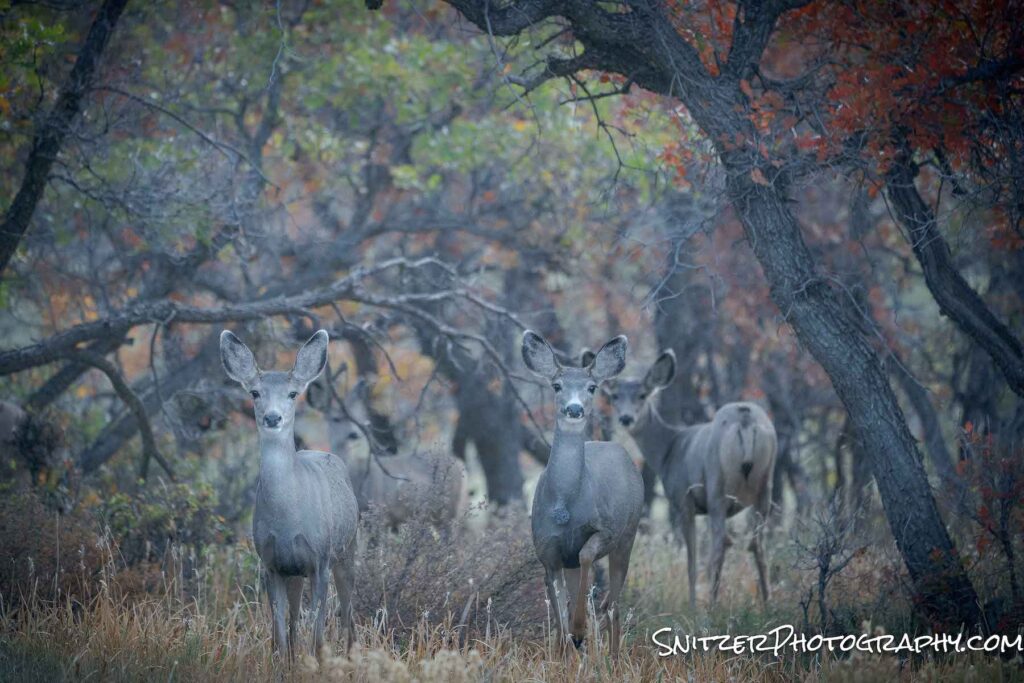
Speaking of animal viewing, I had the op to shoot at a ranch in Westcliffe, Colo! Early morning provided some spectacular lighting!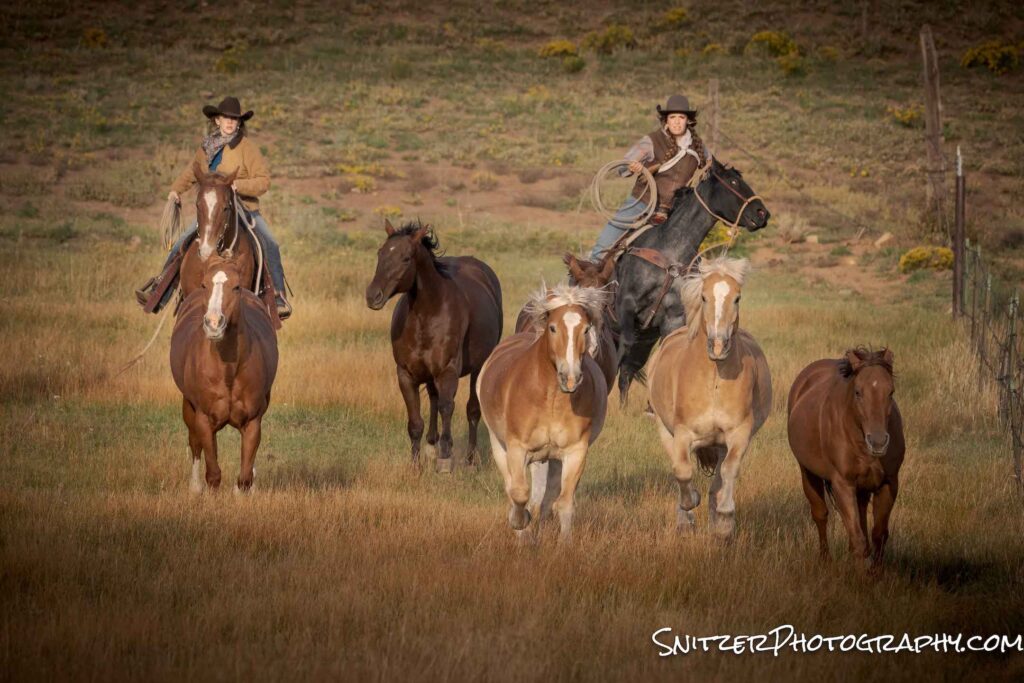
Click the link right for my full gallery of photos! Link for photos
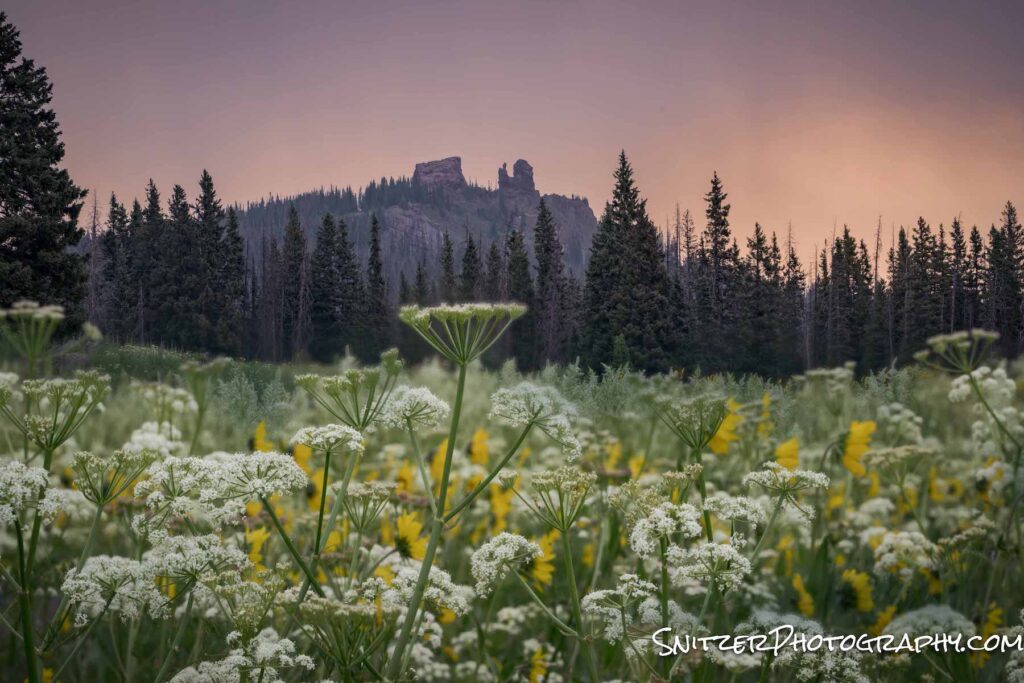
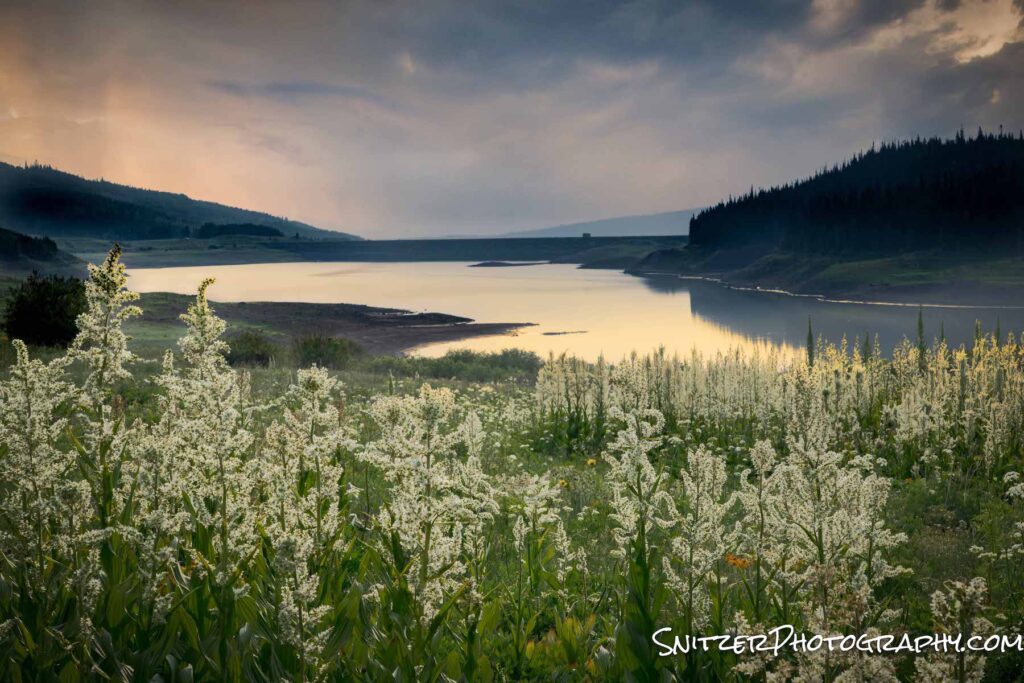
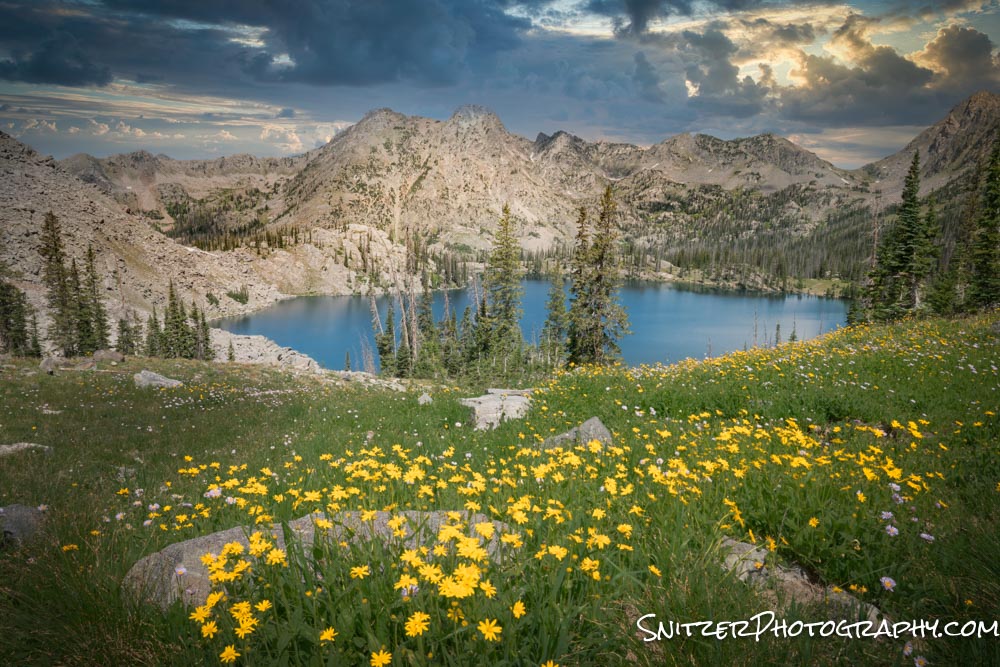
Steamboat Wildflower Invasion
For about two weeks every year, wildflowers explode along the upper elevations of the Rocky Mountains. This year’s crop was especially bomber as a plentiful snow pack finally melted. Lots of moisture means lots of flowers. Some recent rain storms didn’t hurt either!
Steamboat Springs, Colo is our home away from home. The hiking, biking and photog was spectacular.
Rabbit Ears Pass from two different vantage points.

Along the Continental Divide Trail
Evening hike up the West face of Steamboat’s Howelsen Hill.
Gilpin Lake, my favorite destination in the Zerkel National Forest (45 minutes NW of Steamboat).
I also had an opportunity to explore State Forest State Park (about 90 minutes SW of Steamboat). Lot’s of mouse this year (saw 7 on one hike).
Lots more photos to see! CLICK THIS LINK!
Snitz’s winter adventure
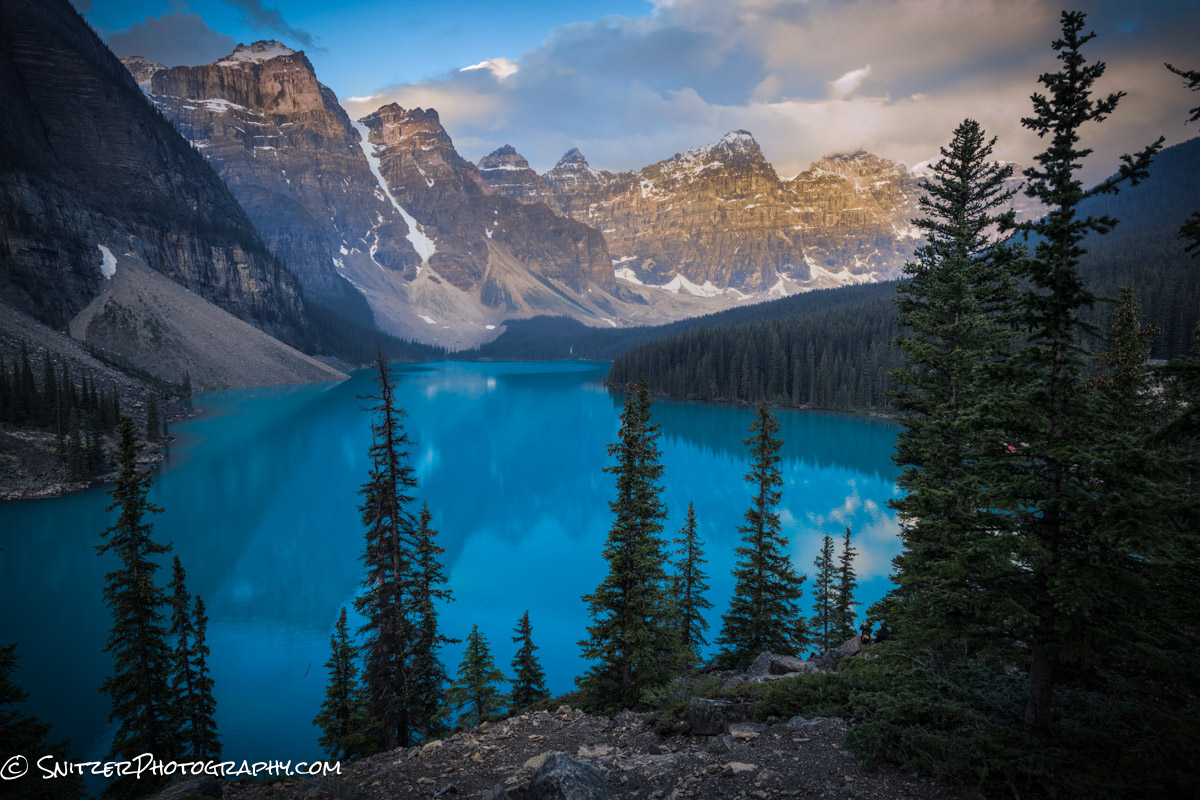
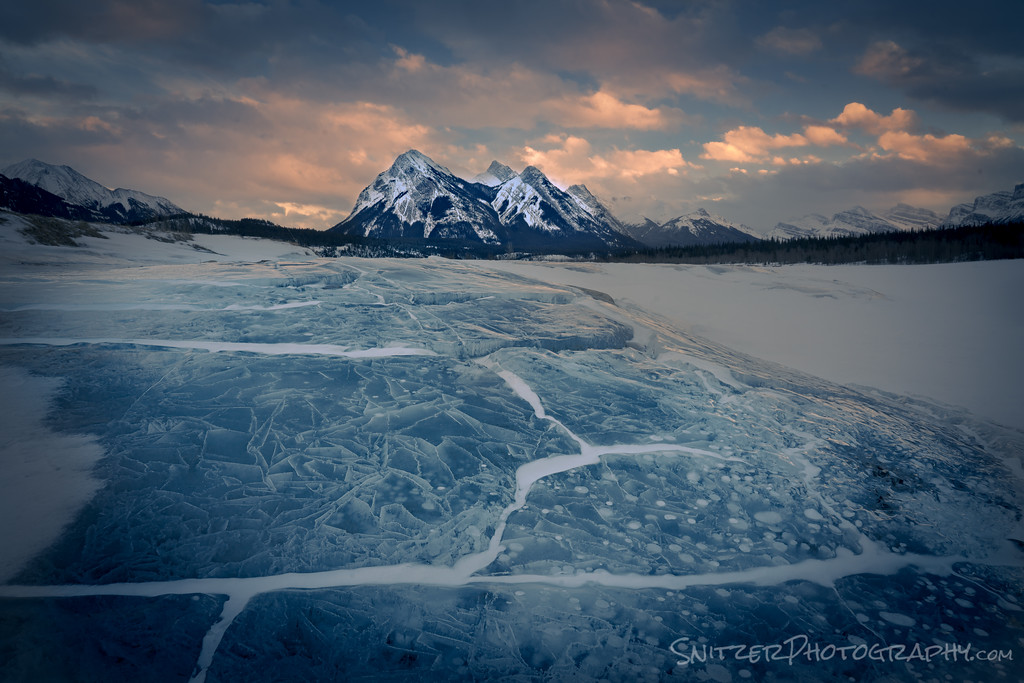
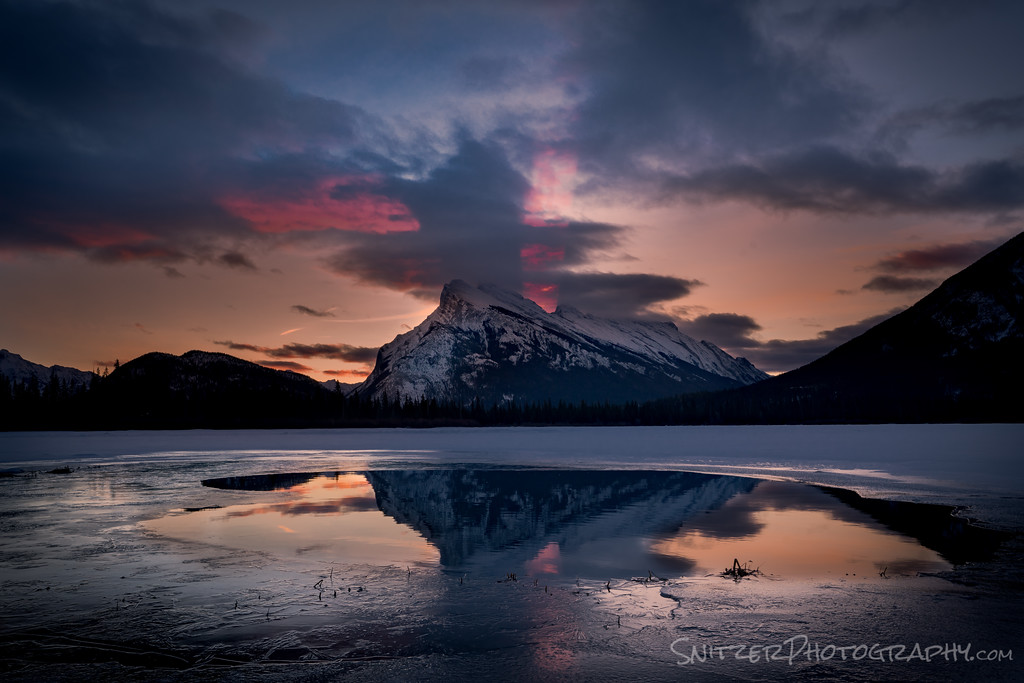
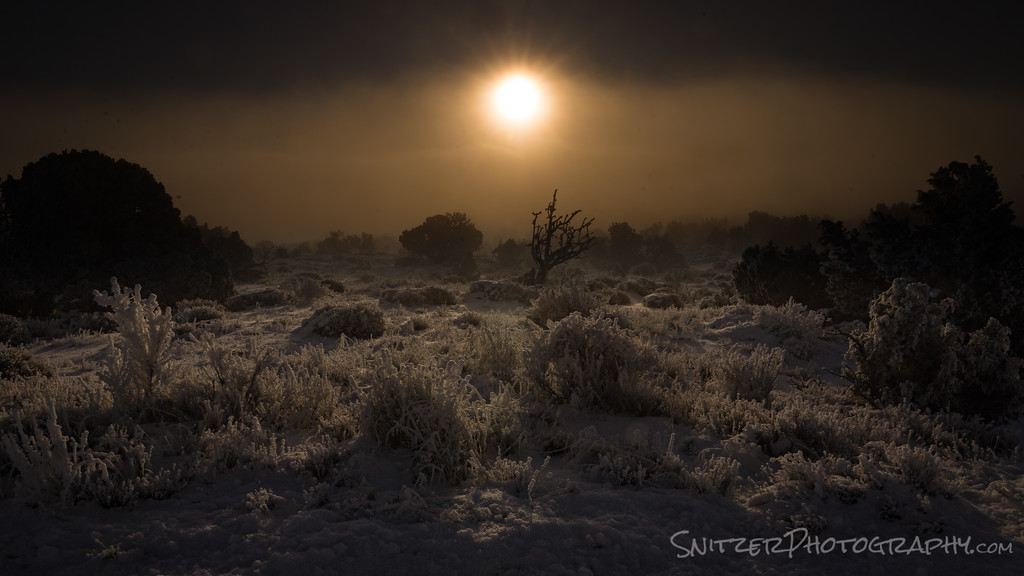
THE CANADIAN ROCKIES/SOUTHEAST UTAH
First off, if you love the American Rockies, see what they’re sporting up North! More vert, bigger, Alp-like! Did I mention crazy foregrounds leading up to bomber peaks?
How about methane bubbles that form beneath the ice and rise to the surface?
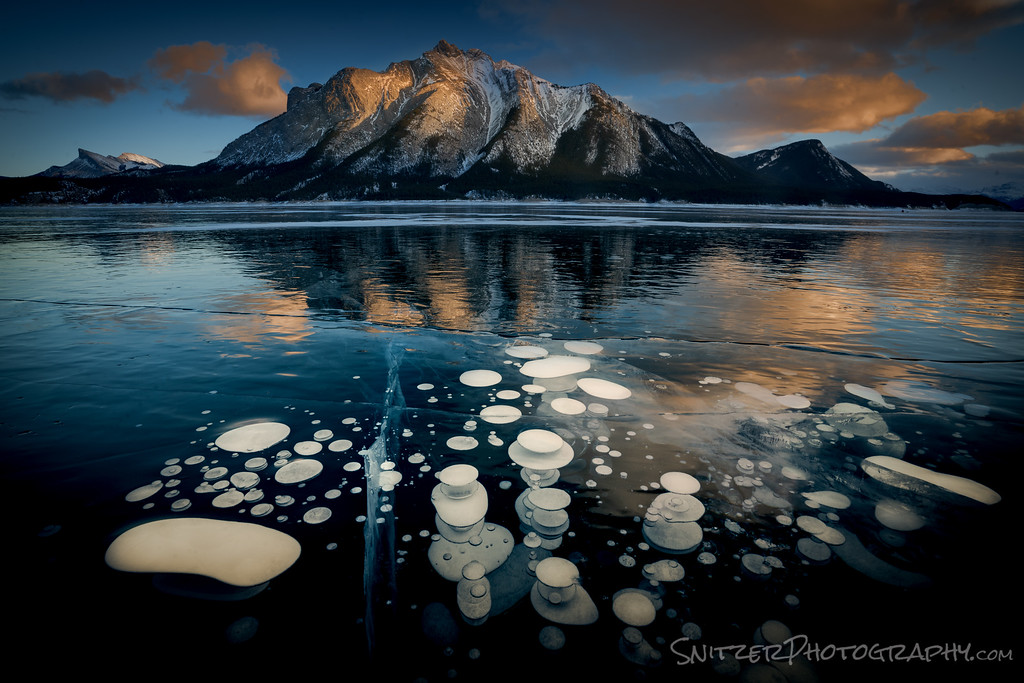
Or sunrises to die for?
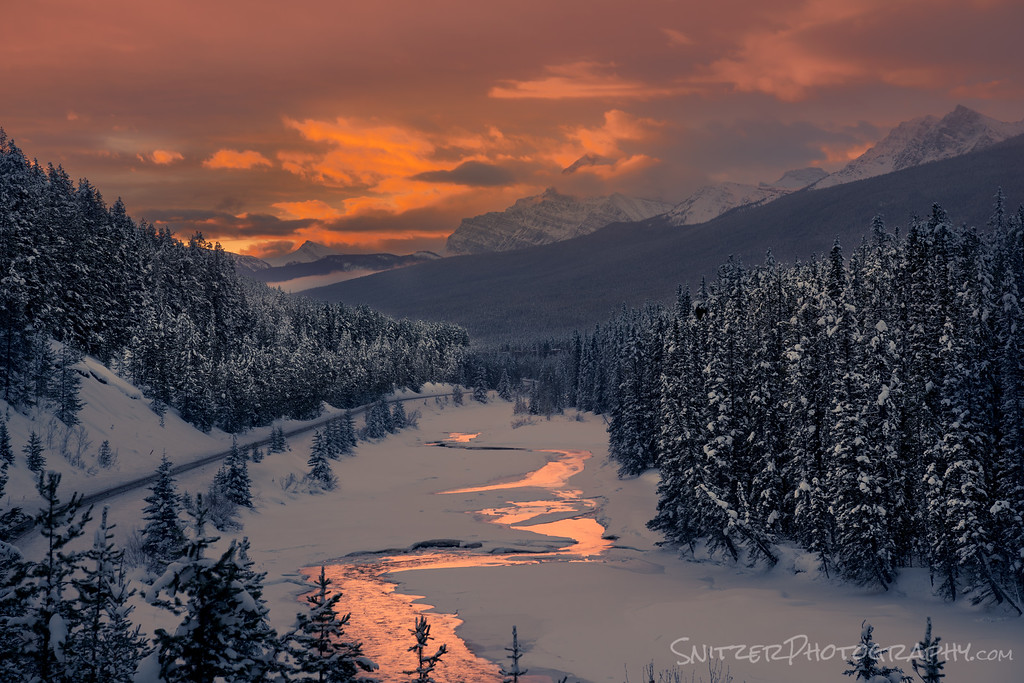
Perhaps beams of red light projected into the heavens!
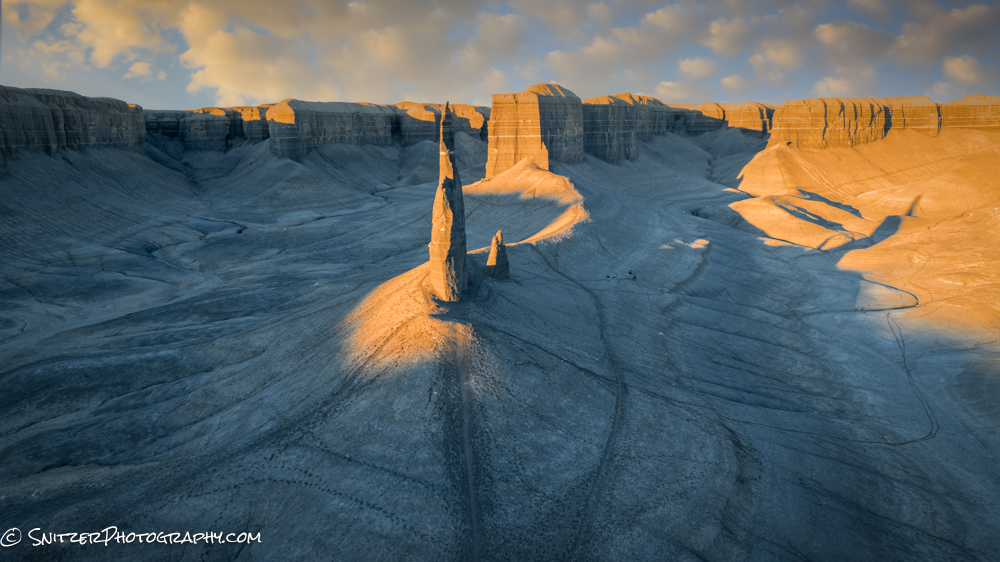
On the other hand, back in the states, the Moab area is competing for top billing! How about some 90 foot high fins at sunset?
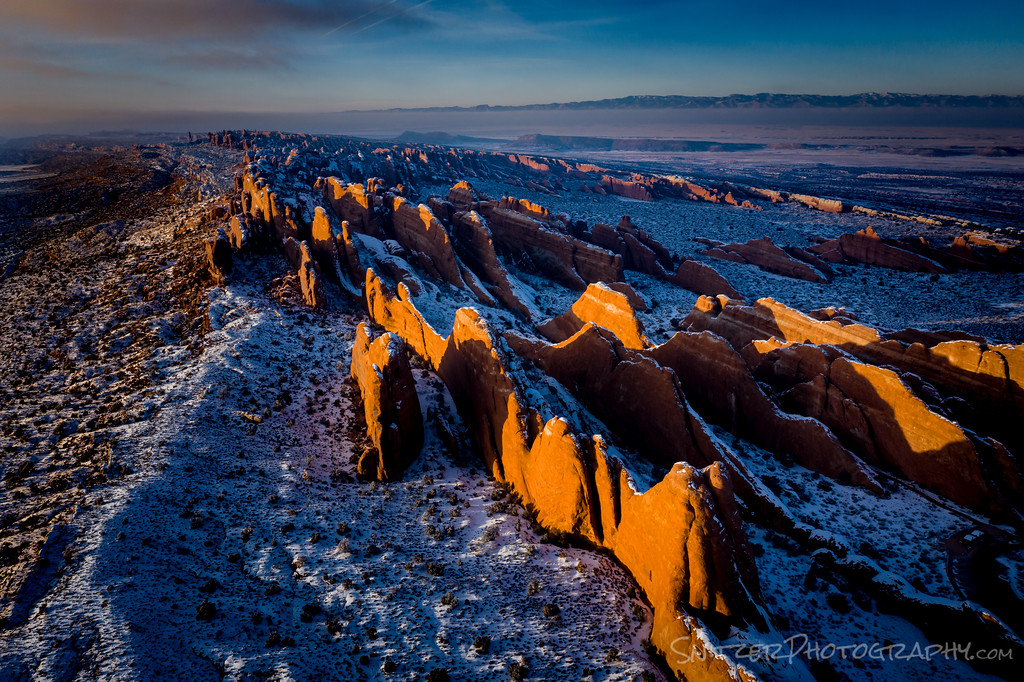
I’m a sucker for canyon views!

They even have lunatics paddling around in pack ice. This guy belongs in Belleview!

Canyonland’s version of dawn patrol.
Ok, I hear you. YOU WANT TO SEE MORE PICTURES! CLICK HERE!